登録日: 2022-03-30 更新日: 2022-04-13
UEFI 立ち上げのPCに、安定版の「Xubuntu 20.04.4 LTS」をインストール 、設定 して使っています。
-
それをホストOS にして「VirtualBox」に、公開が近づいた「Lubuntu 22.04 LTS」の開発版(日々更新される Daily 版)をインストール しました。現在、Beta 版に移行しています。
-
使用例として、仮想環境で隔離された「Python 開発環境」を作ってみました。
その備忘録です。
-
-
ホストOS : Xubuntu 20.04.4 LTS
ゲストOS : Lubuntu 22.04 LTS ←(今回の作業)
-
-
使用したPC は「ASUS Chromebox CN60 」で、 プロセッサは第4世代の「Intel Celeron 2955U 」です。UEFI 立ち上げです。
-
(注)リンクを戻るときはブラウザの左上の「←」をクリック
-
-
目次
-
以前の作業:
ホストOS に「VirtualBox をインストール」
「Lubuntu 22.04 LTS」をVirtualBox にインストール〈H146〉
-
今回の作業:
-
5. 「python3.9」のvenv 環境で、PIP で「mu-editor」をインストール: (失敗)
6. 「pypi.org 」にて、Python パッケージを検索:
7. 「python3.9」のvenv 環境で、ダウンロードした「.whl」で「mu-editor」をインストール: (失敗)
-
8. 「Python 3.8.13」をビルドしてインストール:
10. 「python3.8」のvenv 環境で、PIP で「mu-editor」をインストール:
-
11. 「mu-editor」の操作:
-
-
-
--- - --- - --- - --- - --- - --- - --- - --- - --- - --- - --- - --- - --- - --- - -
「Lubuntu 22.04 LTS」の画面:
-
Lubuntu 22.04 のテーマは「クラゲ」:

-
カスタマイズ:
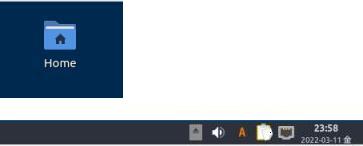
→パネルに好みのアプリのランチャーを追加。 「Home」アイコンと「時計」の形式を変え、入力メソッドの「あ」をオレンジ色にしました。 また、仮想デスクトップの数は 2つに減らしました。
-
-
今回インストールした「mu-editor」アプリ:
→デフォルトはPC 向けの「Python 3」ですが、 マイコンや組込機器などの、色々なデバイス向けの Python にも対応しており、いつでも「モード」ボタンで切り替えできます。
-
このアプリだけで、プログラミング(Python コードの作成、実行、チェック)ができます。
チェックしたときの「応答メッセージ」がユーモラスで、飽きずに学習できます。
-
現在のバージョンを表示:
-
ホストOS : Xubuntu 20.04.4 LTS
2022-04-08 現在
カーネル:
$ uname -r
5.13.0-39-generic
リリース:
$ cat /etc/lsb-release
DISTRIB_ID=Ubuntu
DISTRIB_RELEASE=20.04
DISTRIB_CODENAME=focal
DISTRIB_DESCRIPTION="Ubuntu 20.04.4 LTS"
-
ゲストOS : Lubuntu 22.04 LTS
2022-04-08 現在
カーネル:
$ uname -r
5.15.0-25-generic
リリース:
$ cat /etc/lsb-release
DISTRIB_ID=Ubuntu
DISTRIB_RELEASE=22.04
DISTRIB_CODENAME=jammy
DISTRIB_DESCRIPTION="Ubuntu Jammy Jellyfish (development branch)"
→「Jellyfish」とはクラゲのことです。
-
-
--- - --- - --- - --- - --- - --- - --- - --- - --- - --- - --- - --- - --- - --- - --
1. 作業前に、VirtualBox のスナップショットを作成:
-
VirtualBox の場合、作業をする前にスナップショットを作成しておくと、やり直しが楽になるので安心です。
-
1). システム更新を行っておきます:
$ sudo apt update
$ sudo apt upgrade
-
2). スナップショットの作成:
手順は、「コチラ 」が参考になります。
タイトルバーにその名前は表示されるので、短い名前にするのがコツです。
-
今回は事前の作業の投稿番号の「H146」の名前にしました。
-
-
--- - --- - --- - --- - --- - --- - --- - --- - --- - --- - --- - --- - --- - --- - ---
2. 参考: Python のエディタ:
-
Python の開発でよく使われているエディタ:
-
1). Visual Studio Code(Microsoft)
インストール履歴:
・Ubuntu 22.04 LTS:
・CentOS 8.2:
・Fedora 34:
→現在は、GPU オフでの起動は要りません。
-
2). Sublime Text(Jon Skinner)
インストールの参考: (Sublime Text 4)
Sublime Text 4 の日本語化とおすすめパッケージ
-
インストール履歴: (Sublime Text 3)
・CentOS 8.2:
・Manjaro Linux 20.1:
-
3). Atom(GitHub)
インストール履歴:
・Fedora 32:
-
4). PyCharm(JetBrains)
インストール履歴:
・Lubuntu 22.04 LTS: ←(試行中)
-
5). mu-editor(Code with Mu)
インストール履歴:
・Lubuntu 22.04 LTS: ←(今回の作業)
・CentOS 8.2:
-
-
参考: 使用するシステムや言語によって、テキストエディタのインデントの設定を行う必要があります:
「Python」で推奨のインデントは「半角スペース 4個」で、「Tab」キーでのインデントではありません。
-
今回は、初心者プログラマー向けの「mu-editor」を対象に色々と試して、
Python パッケージのインストールについて学んでみました。
-
-
--- - --- - --- - --- - --- - --- - --- - --- - --- - --- - --- - --- - --- - --- - ----
3. 参考: APT で「mu-editor」をインストールする場合:
-
1). apt コマンドでインストールできるか確認:
Lubuntu 22.04 LTS の場合:
$ apt search mu-editor
:
mu-editor/jammy,jammy 1.0.3+dfsg-3 all
  simple editor for beginner Python programmers

mu-editor-doc/jammy,jammy 1.0.3+dfsg-3 all
  simple editor for beginner Python programmers (documentation)
→バージョンは「1.0.3+dfsg-3」です。最新ではありません。
-
2). apt コマンドでインストール:
$ sudo apt install mu-editor
-
3). 実行:
$ mu-editor
-
「mu-editor」はAPT で簡単にインストールできます。最新が欲しいとき以外、これ以降の作業は要りません。
-
今回は、pip でのインストールを学ぶために、以降の作業を行ってみました。
-
-
--- - --- - --- - --- - --- - --- - --- - --- - --- - --- - --- - --- - --- - --- - -----
4. インストールされているpython の確認:
-
1). python の確認:
$ apt list python3.* | grep amd64
:
python3.10-dbg/jammy 3.10.3-1 amd64
python3.10-dev/jammy 3.10.3-1 amd64
python3.10-full/jammy 3.10.3-1 amd64
python3.10-minimal/jammy,now 3.10.3-1 amd64 [インストール済み、自動]
python3.10-venv/jammy 3.10.3-1 amd64
python3.10/jammy,now 3.10.3-1 amd64 [インストール済み、自動]
python3.9-dbg/jammy 3.9.10-2 amd64
python3.9-dev/jammy 3.9.10-2 amd64
python3.9-full/jammy 3.9.10-2 amd64
python3.9-minimal/jammy,now 3.9.10-2 amd64 [インストール済み]
python3.9-venv/jammy 3.9.10-2 amd64
python3.9/jammy,now 3.9.10-2 amd64 [インストール済み]
→「python3.8」はリポジトリにありません。
-
追記: 2022-04-13 確認:
「python3.9」もリポジトリから消えました:
$ apt list python3.* | grep amd64
:
python3.10-dbg/jammy 3.10.4-3 amd64
python3.10-dev/jammy 3.10.4-3 amd64
python3.10-full/jammy 3.10.4-3 amd64
python3.10-minimal/jammy,now 3.10.4-3 amd64 [インストール済み、自動]
python3.10-nopie/jammy 3.10.4-3 amd64
python3.10-venv/jammy 3.10.4-3 amd64
python3.10/jammy,now 3.10.4-3 amd64 [インストール済み、自動]
-
$ apt list python3.* | grep インストール済み
:
python3.10-minimal/jammy,now 3.10.3-1 amd64 [インストール済み、自動]
python3.10/jammy,now 3.10.3-1 amd64 [インストール済み、自動]
python3.9-minimal/jammy,now 3.9.10-2 amd64 [インストール済み]
python3.9/jammy,now 3.9.10-2 amd64 [インストール済み]
→「python3.9」と「python3.10」がインストールされています。
追記: 「python3.9」は消えました。
$ python3

Python 3.10.3 (main, Mar 16 2022, 17:19:40) [GCC 11.2.0] on linux
Type "help", "copyright", "credits" or "license" for more information.
>>>
→Ctrl+D で終了
-
$ python3 --version
Python 3.10.3

$ python3.10 --version
Python 3.10.3
→「python3」として「python3.10」がインストールされています。
-
2). pip の確認:
$ pip3 --version
コマンド 'pip3' が見つかりません。次の方法でインストールできます:
sudo apt install python3-pip
→「pip」はインストールされていません。
-
-
--- - --- - --- - --- - --- - --- - --- - --- - --- - --- - --- - --- - --- - --- - ----- -
5. 「python3.10」のvenv 環境を作りました:
-
参考:
-
Python3.10 で「venv」を使って仮想環境を作成、 その仮想環境をactivate すると、python コマンドが環境を作成したPython3.9 になります。
毎回 python3.10 とバージョン指定する必要がなくなります。deactivate で元のコマンドに戻ります。
-
-「venv」を使用してPython の依存関係を隔離します。
「python3.10」だとアプリが対応しておらず、ビルドで問題が出る可能性があります。
「python3.9」を使って仮想環境を作ることにしました:
-
追記: 2022-04-13 確認:
「python3.9」がリポジトリから消えました。なので、こちらの手順は、「python3.10」に修正しました。
-
1). 「venv」のインストール:
$ sudo apt update

$ sudo apt install python3.10 python3.10-dev python3.10-venv
:
以下のパッケージが新たにインストールされます:
  libc-dev-bin libc-devtools libc6-dev libcrypt-dev libexpat1-dev libnsl-dev libpython3.10-dev
  libtirpc-dev linux-libc-dev manpages-dev python3-distutils python3-lib2to3 python3-pip-whl
  python3-setuptools-whl python3.10-dev python3.10-venv rpcsvc-proto zlib1g-dev
-
確認:
$ which python
$ which python3
/usr/bin/python3

$ which python3.10
/usr/bin/python3.10

$ which python3.9
$

$ which pip
$ which pip3
$
-
2). Python が利用可能であることを確認:
$ python3.10 --version
Python 3.10.4

$ python3 --version
Python 3.10.4
-
3). pip をインストールして最新バージョンを入手:
-
(1). 「wget」のインストール:
$ sudo apt install wget
:
wget はすでに最新バージョン (1.21.2-2ubuntu1) です。
-
(2). 「get-pip.py」のダウンロード:
$ wget https://bootstrap.pypa.io/get-pip.py
:
2022-04-13 01:34:58 (8.94 MB/s) - ‘get-pip.py’ へ保存完了 [2658865/2658865]
-
(3). 「pip」のインストール:
$ sudo python3.10 get-pip.py
:
Collecting pip
  Downloading pip-22.0.4-py3-none-any.whl (2.1 MB)
     ━━━━━━━━━━━━━━━━━━━━━━━━━━━━━━━━━━━━━━━━ 2.1/2.1 MB 5.1 MB/s eta 0:00:00
Collecting setuptools
  Downloading setuptools-62.1.0-py3-none-any.whl (1.1 MB)
     ━━━━━━━━━━━━━━━━━━━━━━━━━━━━━━━━━━━━━━━━ 1.1/1.1 MB 7.3 MB/s eta 0:00:00
Collecting wheel
  Downloading wheel-0.37.1-py2.py3-none-any.whl (35 kB)
Installing collected packages: wheel, setuptools, pip
Successfully installed pip-22.0.4 setuptools-62.1.0 wheel-0.37.1
WARNING: Running pip as the 'root' user can result in broken permissions and conflicting behaviour with the system package manager. It is recommended to use a virtual environment instead: https://pip.pypa.io/warnings/venv
和訳:
警告:「root」ユーザーとしてpipを実行すると、権限が破損し、システムパッケージマネージャーとの動作が競合する可能性があります。代わりに仮想環境を使用することをお勧めします:
https://pip.pypa.io/warnings/venv
-
(4). pip が使えるか確認:
$ pip3.10 --version
pip 22.0.4 from /usr/local/lib/python3.10/dist-packages/pip (python 3.10)

$ pip3 --version
pip 22.0.4 from /usr/local/lib/python3.10/dist-packages/pip (python 3.10)
→出力に、/usr/local/lib/python3.x/dist-packages のバージョンが表示されます。
-
(5). 確認:
$ which python3
/usr/bin/python3

$ which python3.10
/usr/bin/python3.10
-
$ which pip
/usr/local/bin/pip

$ which pip3
/usr/local/bin/pip3

$ which pip3.10
/usr/local/bin/pip3.10
→「pip」は「/usr/local/bin」にインストールされています。
-
4). venv を使用して依存関係を隔離します:
隔離された Python 環境を作成するツールです。
これらの隔離環境では、異なるバージョンの Python パッケージを使用して、あるプロジェクトの依存関係を他のプロジェクトの依存関係から分離できます。
Python を使用してローカルに開発する場合は、常に「プロジェクトごとに仮想環境を使用する」ことをおすすめします。
-
(1). 「venv」コマンドを使用して、「env39」という任意の名前のフォルダに、Python インストール全体の仮想コピーを作成
$ mkdir -p ~/MyPy310
$ cd ~/MyPy310/
$ python3.10 -m venv env310
$
→「MyPy310」は任意のpython の「プロジェクト名」です。
ほとんどの場合、プロジェクトの名前はそのルートフォルダーの名前と同じです。
-
(2). 確認:
$ pwd
/home/ubn/MyPy310
$ ls
env310

$ ls env310/
bin  include  lib  lib64  pyvenv.cfg
$  ls -1 env310/bin/
Activate.ps1
activate
activate.csh
activate.fish
pip
pip3
pip3.10
python
python3
python3.10
-
(3). 仮想環境を有効化 →Python の venv パスを使用するようシェルを設定
$ cd ~/MyPy310/
$ source ~/MyPy310/env310/bin/activate
(env310) ubn@ubn-box:~/MyPy310$
→プロンプトの頭に「(env310) 」が付いています。
これにより、他のプロジェクトやグローバルの Python インストールに影響を与えずにパッケージをインストールできます。
-
これ以降は、プロンプトを省略表示しています:
↓
(env310) $
-
(4). インストールされているパッケージの一覧を表示:
(env310) $ pip list
:
Package    Version
---------- -------
pip        22.0.2
setuptools 59.6.0
-
(5). 実行ファイルの場所:
(env310) $ which python3
/home/ubn/MyPy310/env310/bin/python3

(env310) $ which python3.10
/home/ubn/MyPy310/env310/bin/python3.10
→「python3」と「python3.10」は「~/MyPy310/env310/bin/」です。(sudo は不要)
(env310) $ which pip
/home/ubn/MyPy310/env310/bin/pip

(env310)$ which pip3
/home/ubn/MyPy310/env310/bin/pip3

(env310)$ which pip3.10
/home/ubn/MyPy310/env310/bin/pip3.10
→「pip」はすべて「~/MyPy310/env310/bin/」です(sudo は不要)
-
(6). バージョン表示:
(env310) $ python --version
Python 3.10.4
→(env310) の中なら、「python」は「python3.10」と同じです。
(env310) $ pip --version
pip 22.0.2 from /home/ubn/MyPy310/env310/lib/python3.10/site-packages/pip (python 3.10)
→(env310) の中なら、「pip」は「pip3.10」と同じです。
-
(7). 「pip」、「setuptools」、「wheel」を最新に更新:
(env310) $ pip install --upgrade pip setuptools wheel
→ビルド済みのバイナリアーカイブからインストールするにはpip だけで十分ですが、setuptools とwheel プロジェクトの最新のコピーは、ソースアーカイブからもインストールできるようにするために役立ちます。
-
確認:
(env310) $ pip list
:
Package    Version
---------- -------
pip        22.0.4
setuptools 62.1.0
wheel      0.37.1
-
ファイルの配置:
$ ls -1 ./env310/lib/python3.10/site-packages/

_distutils_hack
distutils-precedence.pth
pip                 ←(注目)
pip-22.0.4.dist-info
pkg_resources
setuptools                 ←(注目)
setuptools-62.1.0.dist-info
wheel                 ←(注目)
wheel-0.37.1.dist-info
-
(8). 参考: pip を最新に更新するときに、エラーが表示される場合:
(env310) $ pip install --force-reinstall --upgrade pip
-
(9). Python パッケージをインストールしたい場合:
(env310) $ pip install パッケージ名
-
(10). 参考: もし、仮想環境の使用をやめて、グローバル Python に戻る場合は、無効化します:
(env310) $ deactivate
$
-
-
--- - --- - --- - --- - --- - --- - --- - --- - --- - --- - --- - --- - --- - --- - ----- --
6. 参考: 「python3.9」のvenv 環境で、PIP で「mu-editor」をインストール:(失敗)
-
1). 最新にしたいので、「--upgrade」(-U) オプションを付けてインストール:
(env39) $ pip install --upgrade mu-editor
:
Collecting mu-editor
  Using cached mu_editor-1.0.3-py3-none-any.whl (2.0 MB)
Collecting pycodestyle==2.4.0
  Using cached pycodestyle-2.4.0-py2.py3-none-any.whl (62 kB)
Collecting gpiozero>=1.4.1
  Using cached gpiozero-1.6.2-py2.py3-none-any.whl (148 kB)
Collecting PyQtChart==5.14.0
  Using cached PyQtChart-5.14.0-5.14.2-cp35.cp36.cp37.cp38-abi3-manylinux2014_x86_64.whl (1.2 MB)
Collecting pyflakes==2.0.0
  Using cached pyflakes-2.0.0-py2.py3-none-any.whl (53 kB)
Collecting guizero>=1.1.0
  Using cached guizero-1.3.0-py3-none-any.whl (44 kB)
Collecting Pillow>=5.2.0
  Using cached Pillow-9.0.1-cp310-cp310-manylinux_2_17_x86_64.manylinux2014_x86_64.whl (4.3 MB)
Collecting pgzero==1.2
  Using cached pgzero-1.2-py3-none-any.whl (69 kB)
Collecting requests>=2.19.1
  Using cached requests-2.27.1-py2.py3-none-any.whl (63 kB)
Collecting appdirs>=1.4.3
  Using cached appdirs-1.4.4-py2.py3-none-any.whl (9.6 kB)
Collecting qtconsole==4.3.1
  Using cached qtconsole-4.3.1-py2.py3-none-any.whl (108 kB)
Collecting nudatus>=0.0.3
  Using cached nudatus-0.0.5-py3-none-any.whl (5.3 kB)
Collecting qscintilla==2.11.4
  Using cached QScintilla-2.11.4-1-cp35.cp36.cp37.cp38-abi3-manylinux2014_x86_64.whl (1.9 MB)
Collecting pyqt5==5.14.1
  Downloading PyQt5-5.14.1-5.14.1-cp35.cp36.cp37.cp38-abi3-manylinux2014_x86_64.whl (63.5 MB)
     ━━━━━━━━━━━━━━━━━━━━━━━━━━━━━━━━━━━━━━━━ 63.5/63.5 MB 6.1 MB/s eta 0:00:00
Collecting pyserial==3.4
  Using cached pyserial-3.4-py2.py3-none-any.whl (193 kB)
Collecting pigpio>=1.40.post1
  Using cached pigpio-1.78-py2.py3-none-any.whl (39 kB)
Collecting semver>=2.8.0
  Using cached semver-2.13.0-py2.py3-none-any.whl (12 kB)
Collecting matplotlib==2.2.2
  Using cached matplotlib-2.2.2.tar.gz (37.3 MB)
  Preparing metadata (setup.py) ... error
  error: subprocess-exited-with-error

  × python setup.py egg_info did not run successfully.
  │ exit code: 1
  ╰─> [63 lines of output]
      ============================================================================
      Edit setup.cfg to change the build options

      BUILDING MATPLOTLIB
                  matplotlib: yes [2.2.2]
                      python: yes [3.10.3 (main, Mar 16 2022, 17:19:40) [GCC
                              11.2.0]]
                    platform: yes [linux]

      REQUIRED DEPENDENCIES AND EXTENSIONS
                       numpy: yes [not found. pip may install it below.]
            install_requires: yes [handled by setuptools]
                      libagg: yes [pkg-config information for 'libagg' could not
                              be found. Using local copy.]
                    freetype: no  [The C/C++ header for freetype2 (ft2build.h)
                              could not be found.  You may need to install the
                              development package.]
                         png: no  [pkg-config information for 'libpng' could not
                              be found.]
                       qhull: yes [pkg-config information for 'libqhull' could not
                              be found. Using local copy.]

: 省略

note: This is an issue with the package mentioned above, not pip.
hint: See above for details.
和訳:
注:これは上記のパッケージの問題であり、pip の問題ではありません。
ヒント:詳細については、上記を参照してください。
→実線がないのが、すでにダウンロードされている場合か、キャッシュ(cached) にある場合です。
-
2). 試しに、「--force-reinstall」と「--upgrade」(-U) オプションを付けてインストール:
(env39) $ pip install --force-reinstall --upgrade mu-editor
:
Collecting mu-editor
  Using cached mu_editor-1.0.3-py3-none-any.whl (2.0 MB)
Collecting matplotlib==2.2.2              ←(matplotlib 2.2.2 が必要なので、収集)
  Using cached matplotlib-2.2.2.tar.gz (37.3 MB)
  Preparing metadata (setup.py) ... error
  error: subprocess-exited-with-error

  × python setup.py egg_info did not run successfully.
  │ exit code: 1
  ╰─> [63 lines of output]
      ============================================================================
      Edit setup.cfg to change the build options

      BUILDING MATPLOTLIB              ←(MATPLOTLIB のビルド)
                  matplotlib: yes [2.2.2]              ←(MATPLOTLIB のビルド後のバージョン)
                      python: yes [3.10.3 (main, Mar 16 2022, 17:19:40) [GCC
                              11.2.0]]
                    platform: yes [linux]

      REQUIRED DEPENDENCIES AND EXTENSIONS             ←(必要な依存関係と拡張機能)
                       numpy: yes [not found. pip may install it below.]              ←(依存見つからず)
            install_requires: yes [handled by setuptools]
                      libagg: yes [pkg-config information for 'libagg' could not   ←(依存見つからず)
                              be found. Using local copy.]
                    freetype: no  [The C/C++ header for freetype2 (ft2build.h)  ←(依存見つからず)
                              could not be found.  You may need to install the
                              development package.]
                         png: no  [pkg-config information for 'libpng' could not     ←(依存見つからず)
                              be found.]
                       qhull: yes [pkg-config information for 'libqhull' could not   ←(依存見つからず)
                              be found. Using local copy.]

: 省略
→前回でダウンロードが済んだため、エラーの表示がわかりやすくなりました。
-
抜粋:
→依存パッケージが見つからないみたい:
libagg: yes [pkg-config information for 'libagg' could not be found.
freetype: no  [The C/C++ header for freetype2 (ft2build.h) could not be found.
png: no  [pkg-config information for 'libpng' could not be found.
qhull: yes [pkg-config information for 'libqhull' could not be found.
-
3). 検索すると、「matplotlib のインストールで失敗」したようです
-
→検索でヒット:
→エラー表示が「matplotlib のインストールで失敗」したときのメッセージと同じです。
つまり、依存の「matplotlib のインストールで失敗」しています。
-
4). 依存の「matplotlib」をインストール:
(env39) $ pip install matplotlib
:
Collecting matplotlib
  Downloading matplotlib-3.5.1-cp310-cp310-manylinux_2_17_x86_64.manylinux2014_x86_64.whl (11.9 MB)
     ━━━━━━━━━━━━━━━━━━━━━━━━━━━━━━━━━━━━━━━━ 11.9/11.9 MB 5.2 MB/s eta 0:00:00
Collecting numpy>=1.17
  Downloading numpy-1.22.3-cp310-cp310-manylinux_2_17_x86_64.manylinux2014_x86_64.whl (16.8 MB)
     ━━━━━━━━━━━━━━━━━━━━━━━━━━━━━━━━━━━━━━━━ 16.8/16.8 MB 5.5 MB/s eta 0:00:00
Collecting cycler>=0.10
  Downloading cycler-0.11.0-py3-none-any.whl (6.4 kB)
Collecting pillow>=6.2.0
  Using cached Pillow-9.0.1-cp310-cp310-manylinux_2_17_x86_64.manylinux2014_x86_64.whl (4.3 MB)
Collecting python-dateutil>=2.7
  Downloading python_dateutil-2.8.2-py2.py3-none-any.whl (247 kB)
     ━━━━━━━━━━━━━━━━━━━━━━━━━━━━━━━━━━━━━━━━ 247.7/247.7 KB 5.8 MB/s eta 0:00:00
Collecting kiwisolver>=1.0.1
  Downloading kiwisolver-1.4.0-cp310-cp310-manylinux_2_12_x86_64.manylinux2010_x86_64.whl (1.6 MB)
     ━━━━━━━━━━━━━━━━━━━━━━━━━━━━━━━━━━━━━━━━ 1.6/1.6 MB 5.4 MB/s eta 0:00:00
Collecting packaging>=20.0
  Downloading packaging-21.3-py3-none-any.whl (40 kB)
     ━━━━━━━━━━━━━━━━━━━━━━━━━━━━━━━━━━━━━━━━ 40.8/40.8 KB 2.1 MB/s eta 0:00:00
Collecting fonttools>=4.22.0
  Downloading fonttools-4.31.2-py3-none-any.whl (899 kB)
     ━━━━━━━━━━━━━━━━━━━━━━━━━━━━━━━━━━━━━━━━ 899.5/899.5 KB 6.0 MB/s eta 0:00:00
Collecting pyparsing>=2.2.1
  Downloading pyparsing-3.0.7-py3-none-any.whl (98 kB)
     ━━━━━━━━━━━━━━━━━━━━━━━━━━━━━━━━━━━━━━━━ 98.0/98.0 KB 3.3 MB/s eta 0:00:00
Collecting six>=1.5
  Downloading six-1.16.0-py2.py3-none-any.whl (11 kB)
Installing collected packages: six, pyparsing, pillow, numpy, kiwisolver, fonttools, cycler, python-dateutil, packaging, matplotlib
Successfully installed cycler-0.11.0 fonttools-4.31.2 kiwisolver-1.4.0 matplotlib-3.5.1 numpy-1.22.3 packaging-21.3 pillow-9.0.1 pyparsing-3.0.7 python-dateutil-2.8.2 six-1.16.0
→こちらは、正常に終了しました。
-
5). 念の為、最新に更新:
(env39) $ pip install --upgrade matplotlib
:
Requirement already satisfied: matplotlib in ./env/lib/python3.10/site-packages (3.5.1)
Requirement already satisfied: numpy>=1.17 in ./env/lib/python3.10/site-packages (from matplotlib) (1.22.3)
Requirement already satisfied: cycler>=0.10 in ./env/lib/python3.10/site-packages (from matplotlib) (0.11.0)
Requirement already satisfied: fonttools>=4.22.0 in ./env/lib/python3.10/site-packages (from matplotlib) (4.31.2)
Requirement already satisfied: packaging>=20.0 in ./env/lib/python3.10/site-packages (from matplotlib) (21.3)
Requirement already satisfied: pillow>=6.2.0 in ./env/lib/python3.10/site-packages (from matplotlib) (9.0.1)
Requirement already satisfied: python-dateutil>=2.7 in ./env/lib/python3.10/site-packages (from matplotlib) (2.8.2)
Requirement already satisfied: pyparsing>=2.2.1 in ./env/lib/python3.10/site-packages (from matplotlib) (3.0.7)
Requirement already satisfied: kiwisolver>=1.0.1 in ./env/lib/python3.10/site-packages (from matplotlib) (1.4.0)
Requirement already satisfied: six>=1.5 in ./env/lib/python3.10/site-packages (from python-dateutil>=2.7->matplotlib) (1.16.0)
→すでに最新
-
6). インストールされたPython パッケージの確認:
(env39) $ pip list
:
Package         Version
--------------- -------
cycler          0.11.0
fonttools       4.31.2
kiwisolver      1.4.0
matplotlib      3.5.1
numpy           1.22.3
packaging       21.3
Pillow          9.0.1
pip             22.0.4
pyparsing       3.0.7
python-dateutil 2.8.2
setuptools      59.6.0
six             1.16.0
-
7). 再び、「mu-editor」をインストール:
(env39) $ pip install mu-editor
:
Collecting matplotlib==2.2.2
  Using cached matplotlib-2.2.2.tar.gz (37.3 MB)
  Preparing metadata (setup.py) ... error
  error: subprocess-exited-with-error

  × python setup.py egg_info did not run successfully.
  │ exit code: 1
  ╰─> [63 lines of output]
      ============================================================================
      Edit setup.cfg to change the build options

      BUILDING MATPLOTLIB
                  matplotlib: yes [2.2.2]
                      python: yes [3.10.3 (main, Mar 16 2022, 17:19:40) [GCC
                              11.2.0]]
                    platform: yes [linux]

      REQUIRED DEPENDENCIES AND EXTENSIONS
                       numpy: yes [version 1.22.3]
            install_requires: yes [handled by setuptools]
                      libagg: yes [pkg-config information for 'libagg' could not
                              be found. Using local copy.]
                    freetype: no  [The C/C++ header for freetype2 (ft2build.h)  ←(依存見つからず)
                              could not be found.  You may need to install the
                              development package.]
                         png: no  [pkg-config information for 'libpng' could not  ←(依存見つからず)
                              be found.]
                       qhull: yes [pkg-config information for 'libqhull' could not
                              be found. Using local copy.]

: 省略
-
依存のインストール:
(env39) $ sudo apt install libfreetype6-dev
:
以下のパッケージが新たにインストールされます:
  libbrotli-dev libfreetype-dev libfreetype6-dev libpng-dev libpng-tools
-
確認:
(env39) $ apt search freetype | grep インストール済み
:
fontconfig/jammy,now 2.13.1-4.2ubuntu4 amd64 [インストール済み、自動]
gir1.2-freedesktop/jammy,now 1.72.0-1 amd64 [インストール済み、自動]
gir1.2-pango-1.0/jammy,now 1.50.4+ds-1 amd64 [インストール済み、自動]
libfreetype-dev/jammy,now 2.11.1+dfsg-1 amd64 [インストール済み、自動]
libfreetype6/jammy,now 2.11.1+dfsg-1 amd64 [インストール済み、自動]
libfreetype6-dev/jammy,now 2.11.1+dfsg-1 amd64 [インストール済み]
libpango-1.0-0/jammy,now 1.50.4+ds-1 amd64 [インストール済み、自動]
libpangocairo-1.0-0/jammy,now 1.50.4+ds-1 amd64 [インストール済み、自動]
libpangoft2-1.0-0/jammy,now 1.50.4+ds-1 amd64 [インストール済み、自動]
libpangoxft-1.0-0/jammy,now 1.50.4+ds-1 amd64 [インストール済み、自動]
libxft2/jammy,now 2.3.3-0ubuntu4 amd64 [インストール済み、自動]
-
8). 再び、「mu-editor」をインストール:
(env39) $ pip install mu-editor
:
Collecting pygame<2.0,>=1.9.2
  Downloading pygame-1.9.6.tar.gz (3.2 MB)
     ━━━━━━━━━━━━━━━━━━━━━━━━━━━━━━━━━━━━━━━━ 3.2/3.2 MB 5.8 MB/s eta 0:00:00
  Preparing metadata (setup.py) ... error
  error: subprocess-exited-with-error

  × python setup.py egg_info did not run successfully.
  │ exit code: 1
  ╰─> [12 lines of output]


      WARNING, No "Setup" File Exists, Running "buildconfig/config.py"
      Using UNIX configuration...

      /bin/sh: 1: sdl-config: not found
      /bin/sh: 1: sdl-config: not found
      /bin/sh: 1: sdl-config: not found
      Unable to run "sdl-config". Please make sure a development version of SDL is installed.

      Hunting dependencies...
      WARNING: "sdl-config" failed!
      [end of output]
-
依存のインストール:
(env39) $ sudo apt install libsdl-dev
:
パッケージ libsdl-dev は、以下によって提供される仮想パッケージです:
  libsdl1.2-dev 1.2.15+dfsg2-6
  libsdl1.2-compat-dev 1.2.52-3
インストールするには、明示的にいずれかを選択する必要があります。
-
依存のインストール:
(env39) $ sudo apt install libsdl1.2-dev libsdl-image1.2-dev libsdl-mixer1.2-dev libsdl-ttf2.0-dev
:
以下のパッケージが新たにインストールされます:
  libcaca-dev libdeflate-dev libflac-dev libfluidsynth3 libinstpatch-1.0-2 libjbig-dev libjpeg-dev
  libjpeg-turbo8-dev libjpeg8-dev liblzma-dev libmad0-dev libmikmod-dev libmikmod3 libogg-dev libopenal-data
  libopenal1 libsdl-image1.2-dev libsdl-mixer1.2 libsdl-mixer1.2-dev libsdl-ttf2.0-0 libsdl-ttf2.0-dev
  libsdl1.2-dev libslang2-dev libtiff-dev libtiffxx5 libvorbis-dev libwebp-dev timgm6mb-soundfont
-
9). 再び、「mu-editor」をインストール:
(env39) $ pip install mu-editor
:
Collecting pygame<2.0,>=1.9.2
  Using cached pygame-1.9.6.tar.gz (3.2 MB)
  Preparing metadata (setup.py) ... error
  error: subprocess-exited-with-error

  × python setup.py egg_info did not run successfully.
  │ exit code: 1
  ╰─> [18 lines of output]


      WARNING, No "Setup" File Exists, Running "buildconfig/config.py"
      Using UNIX configuration...

      Missing dependencies

      Hunting dependencies...
      SDL     : found 1.2.15
      FONT    : found
      IMAGE   : found
      MIXER   : found
      PNG     : found
      JPEG    : found
      SCRAP   : found
      PORTMIDI: not found
      PORTTIME: not found
      FREETYPE: found 24.1.18
      [end of output]
-
依存の確認:
(env39) $ apt search PORTMIDI
:
hydrogen/jammy 1.1.0~beta1-1~exp1 amd64
  advanced drum machine/step sequencer

libportmidi-dev/jammy 1:217-6 amd64
  library for real-time MIDI input/output

libportmidi0/jammy 1:217-6 amd64
  library for real-time MIDI input/output
-
(env39) $ apt search PORTTIME
:
libportmidi-dev/jammy 1:217-6 amd64
  library for real-time MIDI input/output

libportmidi0/jammy 1:217-6 amd64
  library for real-time MIDI input/output
-
依存のインストール:
(env39) $ sudo apt install libportmidi-dev
:
以下のパッケージが新たにインストールされます:
  libportmidi-dev libportmidi0
-
10). 再び、「mu-editor」をインストール:
(env39) $ pip install mu-editor
:
  Running setup.py install for pygame ... error
  error: subprocess-exited-with-error

  × Running setup.py install for pygame did not run successfully.
  │ exit code: 1
  ╰─> [517 lines of output]
      running install
-
依存のインストール:
(env39) $ pip install pygame
:
Collecting pygame
  Downloading pygame-2.1.2-cp310-cp310-manylinux_2_17_x86_64.manylinux2014_x86_64.whl (21.9 MB)
     ━━━━━━━━━━━━━━━━━━━━━━━━━━━━━━━━━━━━━━━━ 21.9/21.9 MB 100.3 kB/s eta 0:00:00
Installing collected packages: pygame
Successfully installed pygame-2.1.2
-
確認:
(env39) $ pip list
:
Package         Version
--------------- -------
cycler          0.11.0
fonttools       4.31.2
kiwisolver      1.4.0
matplotlib      3.5.1
numpy           1.22.3
packaging       21.3
Pillow          9.0.1
pip             22.0.4
pygame          2.1.2
pyparsing       3.0.7
pyserial        3.4
python-dateutil 2.8.2
pytz            2022.1
setuptools      59.6.0
six             1.16.0
wcwidth         0.2.5
-
11). 再び、「mu-editor」をインストール:
(env39) $ pip install mu-editor
:
Collecting pygame<2.0,>=1.9.2
  Using cached pygame-1.9.6.tar.gz (3.2 MB)
:
  Attempting uninstall: pygame
    Found existing installation: pygame 2.1.2
    Uninstalling pygame-2.1.2:
      Successfully uninstalled pygame-2.1.2
  Running setup.py install for pygame ... error
  error: subprocess-exited-with-error
→インストールした「pygame」のバージョンが高すぎたみたい。
-
アンインストール:
(env39) $ pip uninstall pygame
:
Proceed (Y/n)? Y
  Successfully uninstalled pygame-2.1.2
-
インストール可能なライブラリのバージョンを調べました:
(env39) $ pip install pygame==
:
ERROR: Could not find a version that satisfies the requirement pygame== (from versions: 1.9.2rc1, 1.9.2, 1.9.3, 1.9.4.dev0, 1.9.4rc1, 1.9.4, 1.9.5rc1, 1.9.5rc2, 1.9.5, 1.9.6rc1, 1.9.6rc2, 1.9.6, 2.0.0.dev6, 2.0.0.dev12, 2.0.0.dev14, 2.0.0.dev16, 2.0.0.dev18, 2.0.0.dev20, 2.0.0.dev22, 2.0.0.dev24, 2.0.0, 2.0.1.dev1, 2.0.1, 2.0.2.dev4, 2.0.2, 2.0.3.dev2, 2.0.3.dev4, 2.0.3.dev6, 2.0.3, 2.1.0.dev2, 2.1.0, 2.1.1.dev2, 2.1.1.dev4, 2.1.1, 2.1.2, 2.1.3.dev2, 2.1.3.dev4)
ERROR: No matching distribution found for pygame==
-
バージョン指定で依存をインストール:
(env39) $ pip install pygame==1.9.6
:
Collecting pygame==1.9.6
:
      error: command '/usr/bin/x86_64-linux-gnu-gcc' failed with exit code 1
      [end of output]
-
別のバージョンで依存をインストール:
(env39) $ pip install pygame==2.0.0
:
Collecting pygame==2.0.0
:
      /bin/sh: 1: sdl2-config: not found
      /bin/sh: 1: sdl2-config: not found
      /bin/sh: 1: sdl2-config: not found
→エラー
-
libsdl2 でインストールする場合:
まずは削除:
(env39) $ sudo apt remove libsdl1.2-dev libsdl-image1.2-dev libsdl-mixer1.2-dev libsdl-ttf2.0-dev
(env39) $ sudo apt autoremove
-
代わりをインストール:
(env39) $ sudo apt install libsdl2-dev libsdl2-image-dev libsdl2-mixer-dev libsdl2-ttf-dev
:
以下のパッケージが新たにインストールされます:
  libasound2-dev libblkid-dev libdbus-1-dev libdecor-0-0 libdecor-0-plugin-1-cairo libegl1-mesa-dev libffi-dev
  libfluidsynth3 libgles-dev libgles1 libglib2.0-dev libglib2.0-dev-bin libglvnd-core-dev libglvnd-dev
  libibus-1.0-dev libice-dev libinstpatch-1.0-2 libmodplug1 libmount-dev libopengl-dev libopusfile0 libpcre16-3
  libpcre2-32-0 libpcre2-dev libpcre2-posix3 libpcre3-dev libpcre32-3 libpcrecpp0v5 libpulse-dev libsdl2-2.0-0
  libsdl2-dev libsdl2-image-2.0-0 libsdl2-image-dev libsdl2-mixer-2.0-0 libsdl2-mixer-dev libsdl2-ttf-2.0-0
  libsdl2-ttf-dev libselinux1-dev libsepol-dev libsm-dev libsndio-dev libudev-dev libwayland-bin libwayland-dev
  libxcursor-dev libxfixes-dev libxi-dev libxinerama-dev libxkbcommon-dev libxrandr-dev libxrender-dev libxss-dev
  libxt-dev libxv-dev libxxf86vm-dev timgm6mb-soundfont uuid-dev
-
バージョン指定で依存をインストール:
(env39) $ pip install pygame==2.0.0
:
Collecting pygame==2.0.0
:
       Hunting dependencies...
      SDL     : found 2.0.20
      FONT    : found
      IMAGE   : found
      MIXER   : found
      PNG     : found
      JPEG    : not found   ←(依存見つからず)
      JPEG jpeglib.h libjpeg ['/usr/include', '/usr/include/SDL2', '/usr/local/include', '/usr/local/include/SDL2', '/usr/X11R6/include', '/usr/include/SDL2'] ['/usr/lib', '/usr/lib64', '/usr/X11R6/lib', '/usr/lib/i386-linux-gnu', '/usr/lib/x86_64-linux-gnu', '/usr/lib/arm-linux-gnueabihf/', '/usr/lib/aarch64-linux-gnu/', '/usr/local/lib', '/usr/local/lib64', '/usr/local/X11R6/lib', '/usr/local/lib/i386-linux-gnu', '/usr/local/lib/x86_64-linux-gnu', '/usr/local/lib/arm-linux-gnueabihf/', '/usr/local/lib/aarch64-linux-gnu/']
      SCRAP   : found
      PORTMIDI: found
      PORTTIME: found
      FREETYPE: found 24.1.18
-
依存をインストール:
(env39) $ sudo apt install libsdl-image1.2-dev
:
以下のパッケージが新たにインストールされます:
  libcaca-dev libdeflate-dev libjbig-dev libjpeg-dev libjpeg-turbo8-dev libjpeg8-dev liblzma-dev
  libsdl-image1.2-dev libsdl1.2-dev libslang2-dev libtiff-dev libtiffxx5 libwebp-dev
-
バージョン指定で依存をインストール:
(env39) $ pip install pygame==2.0.0
:
Collecting pygame==2.0.0
  Using cached pygame-2.0.0.tar.gz (5.5 MB)
  Preparing metadata (setup.py) ... done
Using legacy 'setup.py install' for pygame, since package 'wheel' is not installed.
Installing collected packages: pygame
  Running setup.py install for pygame ... error
  error: subprocess-exited-with-error

  × Running setup.py install for pygame did not run successfully.
  │ exit code: 1
  ╰─> [511 lines of output]
-
「setuptools」を最新に更新:
(env39) $ pip install -U setuptools
:
Requirement already satisfied: setuptools in ./env/lib/python3.10/site-packages (59.6.0)
Collecting setuptools
  Downloading setuptools-61.1.1-py3-none-any.whl (1.1 MB)
     ━━━━━━━━━━━━━━━━━━━━━━━━━━━━━━━━━━━━━━━━ 1.1/1.1 MB 4.9 MB/s eta 0:00:00
Installing collected packages: setuptools
  Attempting uninstall: setuptools
    Found existing installation: setuptools 59.6.0
    Uninstalling setuptools-59.6.0:
      Successfully uninstalled setuptools-59.6.0
Successfully installed setuptools-61.1.1
-
「pip」を最新に更新:
(env39) $ pip install -U pip
:
Requirement already satisfied: pip in ./env/lib/python3.10/site-packages (22.0.4)
-
確認:
(env39) $ pip list

Package         Version
--------------- -------
cycler          0.11.0
fonttools       4.31.2
kiwisolver      1.4.0
matplotlib      3.5.1
numpy           1.22.3
packaging       21.3
Pillow          9.0.1
pip             22.0.4
pyparsing       3.0.7
pyserial        3.4
python-dateutil 2.8.2
pytz            2022.1
setuptools      61.1.1
six             1.16.0
wcwidth         0.2.5
-
バージョン指定で依存をインストール:
(env39) $ pip install pygame==2.0.0
:
      error: command '/usr/bin/x86_64-linux-gnu-gcc' failed with exit code 1
      [end of output]
-
依存の最新をインストール:
(env39) $ pip install -U pygame
:
Collecting pygame
  Using cached pygame-2.1.2-cp310-cp310-manylinux_2_17_x86_64.manylinux2014_x86_64.whl (21.9 MB)
Installing collected packages: pygame
Successfully installed pygame-2.1.2
→エラーなく、インストールできました。
-
12). 再び、最新の「mu-editor」をインストール:
(env39) $ pip install -U mu-editor
:
      Missing dependencies

      Hunting dependencies...
      SDL     : found 1.2.15
      FONT    : not found
      IMAGE   : found
      MIXER   : not found
      PNG     : found
      JPEG    : found
      SCRAP   : found
      PORTMIDI: found
      PORTTIME: found
      FREETYPE: found 24.1.18
-
外していた、依存をインストール:
(env39) $ sudo apt install libsdl1.2-dev libsdl-image1.2-dev libsdl-mixer1.2-dev libsdl-ttf2.0-dev
:
以下のパッケージが新たにインストールされます:
  libflac-dev libmad0-dev libmikmod-dev libmikmod3 libogg-dev libopenal-data libopenal1 libsdl-mixer1.2
  libsdl-mixer1.2-dev libsdl-ttf2.0-0 libsdl-ttf2.0-dev libvorbis-dev
-
13). 再び、「mu-editor」をインストール:
(env39) $ pip install mu-editor
:
      error: command '/usr/bin/x86_64-linux-gnu-gcc' failed with exit code 1
      [end of output]
setup.py を確認すると、Python 3.5 〜 3.9 の対応
-
→「python3.8」もしくは、「python3.7」でビルドしないとインストールできないかも。
-
14). ちなみに、「mu-editor」をビルドするためにAPT でインストールした依存パッケージ:
$ apt list libfreetype6-dev libportmidi-dev libsdl-image1.2-dev libsdl-mixer1.2-dev libsdl-ttf2.0-dev libsdl1.2-dev libsdl2-dev libsdl2-image-dev libsdl2-mixer-dev libsdl2-ttf-dev | grep amd64
:
libfreetype6-dev/jammy,now 2.11.1+dfsg-1 amd64 [インストール済み、自動]
libportmidi-dev/jammy 1:217-6 amd64
libsdl-image1.2-dev/jammy 1.2.12-13build1 amd64
libsdl-mixer1.2-dev/jammy 1.2.12-17build1 amd64
libsdl-ttf2.0-dev/jammy 2.0.11-6 amd64
libsdl1.2-dev/jammy 1.2.15+dfsg2-6 amd64
libsdl2-dev/jammy 2.0.20+dfsg-2build1 amd64
libsdl2-image-dev/jammy 2.0.5+dfsg1-3build1 amd64
libsdl2-mixer-dev/jammy 2.0.4+dfsg1-4build1 amd64
libsdl2-ttf-dev/jammy 2.0.18+dfsg-2 amd64
→バージョンによって、sdl を使うか、sdl2 を使うかが決まります。 両方入れておくと混乱しません。
-
-
--- - --- - --- - --- - --- - --- - --- - --- - --- - --- - --- - --- - --- - --- - ----- ---
7. 参考: 「pypi.org 」にて、欲しいバージョンのPython パッケージを検索:
-
pip で使えるリポジトリ「pypi.org 」で検索:
pypi: Python Package Index の略。
自由に使える、python パッケージが置かれており、公開されています。
-
1).「mu-editor」で検索
mu-editor 1.1.1
Feb 23, 2022
A simple Python editor for beginner programmers.
-
「mu-editor 1.1.1 」をクリック
-
2). Download files
和訳: プラットフォーム用のファイルをダウンロードします。どちらを選択すればよいかわからない場合は、 パッケージのインストール についてで詳しく学んでください。
-
(1). Source Distribution(ソースで配布)
mu-editor-1.1.1.tar.gz
Uploaded Feb 23, 2022 source
SHA256 c404102a198586e450df3671e097ddf7eb9832481c0599ba92ea216780cb7fe1
-
(2). Built Distribution(ビルドして配布)
mu_editor-1.1.1-py3-none-any.whl
Uploaded Feb 23, 2022 py3
SHA256 946253684a8d92b905c5a38c012e92fcf1f16299d48eb15bf646fba86c7a62bf
-
-
--- - --- - --- - --- - --- - --- - --- - --- - --- - --- - --- - --- - --- - --- - ----- ----
8. 参考: 「python3.9」のvenv 環境で、ダウンロードした「.whl」で「mu-editor」をインストール:(失敗)
-
参考:
-
1). pip でインストールできないか確認:
(env39) $ pip install mu-editor==
:
ERROR: Could not find a version that satisfies the requirement mu-editor==
 (from versions: 1.0.0b12, 1.0.0b13, 1.0.0b14, 1.0.0b15, 1.0.0b16,
1.0.0b17, 1.0.0rc1, 1.0.0, 1.0.1, 1.0.2, 1.0.3)
ERROR: No matching distribution found for mu-editor==
→最新の「1.1.1」は表示されません。
-
2). pypi で「mu-editor」を検索
「Download files」ボタンをクリック
→「whl」ファイル名を選んでクリック:
mu_editor-1.1.1-py3-none-any.whl
→ダウンロード
「~/ダウンロード/mu_editor/」に移動
-
3). チェックサムを確認:
(env39) $ cd ~/ダウンロード/mu_editor/

(env39) $ sha256sum mu_editor-1.1.1-py3-none-any.whl
946253684a8d92b905c5a38c012e92fcf1f16299d48eb15bf646fba86c7a62bf  mu_editor-1.1.1-py3-none-any.whl
-
ダウンロードされるファイルの拡張子は「.whl」(ホイール)です:
Python で利用されているZIP のアーカイブファイルで、 ダウンロードしておけば、オフライン環境でもパッケージのインストールができます。
-
4). オフラインでのインストール:
(env39) $ cd ~/ダウンロード/mu_editor/

(env39) $  pip install --no-deps mu_editor-1.1.1-py3-none-any.whl mu_editor
:
ERROR: Package 'mu-editor' requires a different Python: 3.9.10 not in '<3.9,>=3.5'
→和訳:
エラー:パッケージ「mu-editor」には別のPython が必要です:「3.9.10」は「<3.9、>=3.5」にありません
-
→「3.9」未満 なので、「python3.9.10」では「.whl」での「mu_editor」のインストールはできません。
- python3.8 のインストールが必要と思われますが、Lubuntu 22.04 のAPT のリポジトリに存在しません。
-
-
--- - --- - --- - --- - --- - --- - --- - --- - --- - --- - --- - --- - --- - --- - ----- -----
9. 参考: 「Python 3.8.13」をビルドしてインストール(試行):
-
こちらはいろいろと試してみたことなので、閲覧するだけで作業は要りません。
-
-
python のダウンロード:
-
-
python3.8 の最終バージョンを選びました:
-
1). Python 3.8.13 ダウンロード:
-
2). チェックサム確認:
$ cd ~/ダウンロード/python/

$ md5sum Python-3.8.13.tar.xz
c4b7100dcaace9d33ab1fda9a3a038d6  Python-3.8.13.tar.xz
-
3). 「Python-3.8.13.tar.xz」ファイルの展開:
$  ls
Python-3.8.13  Python-3.8.13.tar.xz

$ cd Python-3.8.13
$ ls
CODE_OF_CONDUCT.md  LICENSE          Misc     PCbuild   README.rst    config.sub    pyconfig.h.in
Doc                 Lib              Modules  Parser    Tools         configure     setup.py
Grammar             Mac              Objects  Programs  aclocal.m4    configure.ac
Include             Makefile.pre.in  PC       Python    config.guess  install-sh
-
4). 「./configure」を実行:
$ cd ~/ダウンロード/python/Python-3.8.13/
$ ./configure
:
creating Modules/Setup.local
creating Makefile

If you want a release build with all stable optimizations active (PGO, etc),
please run ./configure --enable-optimizations
-
5). 「make」を実行:
$ make
:
/home/ubn/ダウンロード/python/Python-3.8.13/Modules/_ctypes/_ctypes.c:107:10: fatal error: ffi.h: そのようなファイルやディレクトリはありません
  107 | #include <ffi.h>     ←(注目)
      |          ^~~~~~~
compilation terminated.

Python build finished successfully!
The necessary bits to build these optional modules were not found:
_bz2                  _curses               _curses_panel
_dbm                  _gdbm                 _hashlib
_lzma                 _sqlite3              _ssl
_tkinter              _uuid                 readline
To find the necessary bits, look in setup.py in detect_modules() for the module's name.

The following modules found by detect_modules() in setup.py, have been
built by the Makefile instead, as configured by the Setup files:
_abc                  atexit                pwd
time

Failed to build these modules:     ←(モジュールのビルドに失敗)
_ctypes

Could not build the ssl module!     ←(注目)
Python requires an OpenSSL 1.0.2 or 1.1 compatible libssl with X509_VERIFY_PARAM_set1_host().
LibreSSL 2.6.4 and earlier do not provide the necessary APIs, https://github.com/libressl-portable/portable/issues/381

:
→エラー表示があるけど、終了しました。
-
6). このままで良いのか、検索:
-
→ヒット:
【Python3】_ctypes と libffi のインストールに苦しんだ記録
ソースからPython をビルドする際、「libffi」が見つからない場合は「
_ctypes」のビルドはスキップされます。「
_ctypes」がビルドされていない Python から「_ctypes」を利用しようとすると、エラー(ModuleNotFoundError: No module named '_ctypes')が発生します。まずいですね。
-
「libffi-dev」の確認:
$ apt list libffi*
:
libffi-checklib-perl/jammy,jammy 0.28-1 all
libffi-dev/jammy 3.4.2-4 amd64
libffi-dev/jammy 3.4.2-4 i386
libffi-platypus-perl/jammy 1.56-1build1 amd64
libffi7/jammy 3.3-5ubuntu1 amd64
libffi7/jammy 3.3-5ubuntu1 i386
libffi8/jammy,now 3.4.2-4 amd64 [インストール済み、自動]
libffi8/jammy 3.4.2-4 i386
libffindex0-dev/jammy 0.9.9.9-5 amd64
libffindex0/jammy 0.9.9.9-5 amd64
-
「libffi-dev」のインストール:
$ sudo apt install libffi-dev
:
以下のパッケージが新たにインストールされます:
  libffi-dev
-
Ubuntu の「開発パッケージ」を入れていなかったので、インストール:
$ sudo apt install build-essential
:
build-essential はすでに最新バージョン (12.9ubuntu2) です。
→入っていました。
-
「./configure」もオプションを付けて実行する必要があるみたい:
$ ./configure --prefix=$HOME/local/python/ --with-system-ffi LDFLAGS="-L $HOME/local/lib/" CPPFLAGS="-I $HOME/local/include/"
--prefix Python3 をインストールする場所
--with-system-ffi libffi のシステムバージョンへの接続を有効にするスイッチ
CPPFLAGS Cプリプロセッサのオプション。include パスを入れる?
LDFLAGS リンク用のディレクトリを指定する。lib フォルダを入れる?
注意: prefix を指定せずにmake install を実行すると、Linux が標準で持っているpython、python3 コマンドが上書きされてしまいます。
「make install」の代わりに、「make altinstall」を利用すると良いです。
コレは、単純に 既存の python、python3 を置き換えるシンボリックリンクを作成しない、と言うものになります。 そのため、既存の環境を壊すことなく安心してメジャーバージョンの異なる複数のPython をインストールすることができます。
-
ssl モジュールのビルドのエラーの件:
Could not build the ssl module!
Python requires an OpenSSL 1.0.2 or 1.1 compatible libssl with X509_VERIFY_PARAM_set1_host().
LibreSSL 2.6.4 and earlier do not provide the necessary APIs,
https://github.com/libressl-portable/portable/issues/381
和訳:
Python には、`X509_VERIFY_PARAM_set1_host()` を備えた OpenSSL1.0.2
または 1.1 互換のlibssl が必要です。
LibreSSL 2.6.4 以前では、必要なAPI が提供されていません。
-
「libssl-dev」のインストール:
$ sudo apt install libssl-dev
:
以下のパッケージが新たにインストールされます:
  libssl-dev
-
参考:
-
その他の依存パッケージもあるみたい:
-
-
--- - --- - --- - --- - --- - --- - --- - --- - --- - --- - --- - --- - --- - --- - ----- ----- -
10.「Python 3.8.13」をビルドしてインストール(本番):
-
1). 必要なライブラリをインストール:
$ sudo apt install build-essential libbz2-dev libdb-dev libffi-dev \
libgdbm-dev liblzma-dev libncursesw5-dev libreadline-dev \
libsqlite3-dev libssl-dev tk-dev uuid-dev zlib1g-dev
確認:
$ apt list build-essential libbz2-dev libdb-dev libffi-dev \
libgdbm-dev liblzma-dev libncursesw5-dev libreadline-dev \
libsqlite3-dev libssl-dev tk-dev uuid-dev zlib1g-dev | grep amd64
:
build-essential/jammy,now 12.9ubuntu2 amd64 [インストール済み]
libbz2-dev/jammy,now 1.0.8-5 amd64 [インストール済み]
libdb-dev/jammy,now 1:5.3.21~exp1ubuntu3 amd64 [インストール済み]
libffi-dev/jammy,now 3.4.2-4 amd64 [インストール済み]
libgdbm-dev/jammy,now 1.23-1 amd64 [インストール済み]
liblzma-dev/jammy,now 5.2.5-2build1 amd64 [インストール済み]
libncursesw5-dev/jammy,now 6.3-2 amd64 [インストール済み]
libreadline-dev/jammy,now 8.1.2-1 amd64 [インストール済み]
libsqlite3-dev/jammy,now 3.37.2-2 amd64 [インストール済み]
libssl-dev/jammy,now 3.0.1-0ubuntu1 amd64 [インストール済み]
tk-dev/jammy,now 8.6.11+1build1 amd64 [インストール済み]
uuid-dev/jammy,now 2.37.2-4ubuntu3 amd64 [インストール済み]
zlib1g-dev/jammy,now 1:1.2.11.dfsg-2ubuntu7 amd64 [インストール済み]
-
2). python のソースをダウンロード:
$ cd ~/ダウンロード/

$ mkdir -p python
$ cd ~/ダウンロード/python/
$ wget https://www.python.org/ftp/python/3.8.13/Python-3.8.13.tar.xz
$ tar Jxfv ./Python-3.8.13.tar.xz
$ ls
Python-3.8.13  Python-3.8.13.tar.xz
-
3). 「./configure」を実行:
$ cd ~/ダウンロード/python/Python-3.8.13/

$ ./configure --enable-optimizations --enable-shared
:
onfig.status: creating pyconfig.h
creating Modules/Setup.local
creating Makefile
→Python のビルドでは「./configure --enable-optimizations --enable-shared」は推奨されています。
-
4). 「make」を実行:
$ cd ~/ダウンロード/python/Python-3.8.13/
$ make
:
make[1]: ディレクトリ '/home/ubn/ダウンロード/python/Python-3.8.13' から出ます
-
5). 「sudo make altinstall」を実行:
$ cd ~/ダウンロード/python/Python-3.8.13/
$ sudo make altinstall
:
Looking in links: /tmp/tmpvox50qtc
Processing /tmp/tmpvox50qtc/setuptools-56.0.0-py3-none-any.whl
Processing /tmp/tmpvox50qtc/pip-22.0.4-py3-none-any.whl
Installing collected packages: setuptools, pip
Successfully installed pip-22.0.4 setuptools-56.0.0

WARNING: Running pip as the 'root' user can result in broken permissions
 and conflicting behaviour with the system package manager.
It is recommended to use a virtual environment instead: https://pip.pypa.io/warnings/venv
和訳:
警告:「root」ユーザーとして pip を実行すると、権限が破損し、システムパッケージマネージャーとの動作が競合する可能性があります。代わりに仮想環境を使用することをお勧めします:
https://pip.pypa.io/warnings/venv
-
「sudo make install」だと、既存のPython3 を別のバージョンで上書きしますが、
「sudo make altinstall」を使うと、上書きせずに、既存のPython に影響せずにPython をインストールできます。
→Python のビルドでは推奨されています。
-
6). 動作確認:
$ which python3.8
/usr/local/bin/python3.8

$ which python
$

$ which python3
/usr/bin/python3

$ which python3.9
/usr/bin/python3.9

$ which python3.10
/usr/bin/python3.10
→「python3.8」は「python3.8」でのみ起動されます。
-
$ python3
Python 3.10.3 (main, Mar 16 2022, 17:19:40) [GCC 11.2.0] on linux
Type "help", "copyright", "credits" or "license" for more information.
>>> exit
→「python3」で「python3.10」が起動されます。
$ python --version
コマンド 'python' が見つかりません。

$ python3 --version
Python 3.10.3

$ python3.9 --version
Python 3.9.10

$ python3.10 --version
Python 3.10.3
-
$ python3.8 --version
python3.8: error while loading shared libraries: libpython3.8.so.1.0:
 cannot open shared object file: No such file or directory
→「python3.8」は「python3.8」でのみ起動されます。
→共有ライブラリが参照できていないようです
-
$ which pip
/usr/local/bin/pip

$ which pip3
/usr/local/bin/pip3

$ which pip3.8
/usr/local/bin/pip3.8

$ which pip3.9
/usr/local/bin/pip3.9

$ which pip3.10
$
→「pip3.10」はインストールされていません。
-
$ pip --version
pip 22.0.4 from /usr/local/lib/python3.9/dist-packages/pip (python 3.9)

$ pip3 --version
pip 22.0.4 from /usr/local/lib/python3.9/dist-packages/pip (python 3.9)

$ pip3.9 --version
pip 22.0.4 from /usr/local/lib/python3.9/dist-packages/pip (python 3.9)
→「pip3」で「pip3.9」が起動されます。
-
$ pip3.10 --version
コマンド 'pip3.10' が見つかりません。次の方法でインストールできます:
sudo apt install python3-pip
→インストールなし
-
$ pip3.8 --version
/usr/local/bin/python3.8: error while loading shared libraries: libpython3.8.so.1.0:
 cannot open shared object file: No such file or directory
→「pip3.8」は「pip3.8」でのみ起動されます。
→共有ライブラリが参照できていないようです
-
7). 共有ライブラリの確認:
$ sudo find / -name libpython3.8.so.1.0
:
/snap/gnome-3-38-2004/99/usr/lib/x86_64-linux-gnu/libpython3.8.so.1.0

/home/ubn/ダウンロード/python/Python-3.8.13/libpython3.8.so.1.0
/usr/local/lib/libpython3.8.so.1.0
$ ls -l /lib64
lrwxrwxrwx 1 root root 9  3月 22 01:42 /lib64 -> usr/lib64

$ ls -l /usr/lib64
:
lrwxrwxrwx 1 root root 42  3月  4 11:54 ld-linux-x86-64.so.2 -> /lib/x86_64-linux-gnu/ld-linux-x86-64.so.2
→「/lib64」フォルダはリンクされています。
-
8). 対処するためコピー:
$ sudo cp /usr/local/lib/libpython3.8.so.1.0 /usr/lib64
→リンクでも良いです。
-
確認:
$ ls -l /usr/lib64
:
lrwxrwxrwx 1 root root       42  3月  4 11:54 ld-linux-x86-64.so.2 -> /lib/x86_64-linux-gnu/ld-linux-x86-64.so.2
-rwxr-xr-x 1 root root 13474872  3月 29 10:55 libpython3.8.so.1.0
-
再起動
-
9). 正常に動作するか確認:
$ python3.8 --version
Python 3.8.13

$ pip3.8 --version
pip 22.0.4 from /usr/local/lib/python3.8/site-packages/pip (python 3.8)
-
-
--- - --- - --- - --- - --- - --- - --- - --- - --- - --- - --- - --- - --- - --- - ----- ----- --
11. 「python3.8」のvenv 環境を作りました:
-
-「venv」を使用してPython の依存関係を隔離します。
「python3.10」や「python3.9.10」では、ビルドに失敗するパッケージがありました。
「Python 3.8.13」で、仮想環境を作りました:
-
1). 「venv」のインストールの確認:
$ apt list python* | grep venv
:
python3-venv/jammy 3.10.1-0ubuntu2 amd64
python3-venv/jammy 3.10.1-0ubuntu2 i386
python3.10-venv/jammy 3.10.3-1 amd64
python3.10-venv/jammy 3.10.3-1 i386
python3.9-venv/jammy,now 3.9.10-2 amd64 [インストール済み]
python3.9-venv/jammy 3.9.10-2 i386
→「python3.9-venv」がインストールされているからOK かな。
-
2). venv を使用して依存関係を隔離
-
(1). 「venv」コマンドを使用して、「env38」という任意の名前のフォルダに、Python インストール全体の仮想コピーを作成
$ mkdir -p ~/MyPy38
$ cd ~/MyPy38/
$ python3.8 -m venv env38
$
-
(2). 確認:
$ pwd
/home/ubn/MyPy38
$ ls
env38

$ ls env38/
bin  include  lib  lib64  pyvenv.cfg
$  ls -1 env38/bin/
Activate.ps1
activate
activate.csh
activate.fish
pip
pip3
pip3.8
python
python3
python3.8
-
(3). 仮想環境を有効化 →Python の venv パスを使用するようシェルを設定
$ cd ~/MyPy38/
$ source ~/MyPy38/env38/bin/activate

(env38) ubn@ubn-box:~/MyPy38$
→プロンプトの頭に「(env38) 」が付いています。
-
これ以降は、プロンプトを省略表示しています:
↓
(env38) $
-
(4). インストールされているパッケージの一覧を表示:
(env38) $ pip list
:
Package    Version
---------- -------
pip        22.0.4
setuptools 56.0.0
-
(5). 実行ファイルの場所:
(env38) $ which python3
/home/ubn/MyPy38/env38/bin/python3   ←(注目)

(env38) $ which python3.8
/home/ubn/MyPy38/env38/bin/python3.8   ←(注目)

(env38) $ which python3.9
/usr/bin/python3.9

(env38) $ which python3.10
/usr/bin/python3.10
-
(6). 「pip」、「setuptools」、「wheel」を最新に更新:
(env38) $ pip install --upgrade pip setuptools wheel
:
Requirement already satisfied: pip in ./env38/lib/python3.8/site-packages (22.0.4)
Requirement already satisfied: setuptools in ./env38/lib/python3.8/site-packages (56.0.0)
Collecting setuptools
  Using cached setuptools-61.2.0-py3-none-any.whl (1.1 MB)
Collecting wheel
  Using cached wheel-0.37.1-py2.py3-none-any.whl (35 kB)
Installing collected packages: wheel, setuptools
  Attempting uninstall: setuptools
    Found existing installation: setuptools 56.0.0
    Uninstalling setuptools-56.0.0:
      Successfully uninstalled setuptools-56.0.0
Successfully installed setuptools-61.2.0 wheel-0.37.1
-
(7). インストールされているパッケージの一覧を表示:
(env38) $ pip list
:
Package    Version
---------- -------
pip        22.0.4
setuptools 61.2.0
wheel      0.37.1
-
-
--- - --- - --- - --- - --- - --- - --- - --- - --- - --- - --- - --- - --- - --- - ----- ----- ---
12. 「python3.8」のvenv 環境で、PIP で「mu-editor」をインストール:
-
1). インストールできるバージョンを確認:
(env38) $ pip install mu-editor==
:
ERROR: Could not find a version that satisfies the requirement mu-editor==
 (from versions: 1.0.0b12, 1.0.0b13, 1.0.0b14, 1.0.0b15, 1.0.0b16,
 1.0.0b17, 1.0.0rc1, 1.0.0, 1.0.1, 1.0.2, 1.0.3, 1.1.0b2, 1.1.0b3,
 1.1.0b4, 1.1.0b5, 1.1.0b6, 1.1.0b7, 1.1.1)
ERROR: No matching distribution found for mu-editor==
→オプション指定をしなくても、最新の「1.1.1」がインストールできそう。
-
2). 通常のやり方でインストール:
(env38) $ pip install mu-editor
:
Collecting mu-editor
  Downloading mu_editor-1.1.1-py3-none-any.whl (4.6 MB)
     ━━━━━━━━━━━━━━━━━━━━━━━━━━━━━━━━━━━━━━━━ 4.6/4.6 MB 7.2 MB/s eta 0:00:00
Collecting QScintilla==2.11.3
  Downloading QScintilla-2.11.3-cp35.cp36.cp37.cp38-abi3-manylinux1_x86_64.whl (2.7 MB)
     ━━━━━━━━━━━━━━━━━━━━━━━━━━━━━━━━━━━━━━━━ 2.7/2.7 MB 7.5 MB/s eta 0:00:00
Collecting PyQtChart==5.13.1
  Downloading PyQtChart-5.13.1-5.13.2-cp35.cp36.cp37.cp38-abi3-manylinux1_x86_64.whl (1.1 MB)
     ━━━━━━━━━━━━━━━━━━━━━━━━━━━━━━━━━━━━━━━━ 1.1/1.1 MB 841.3 kB/s eta 0:00:00
Collecting ipykernel<6,>=4.1
  Downloading ipykernel-5.5.6-py3-none-any.whl (121 kB)
     ━━━━━━━━━━━━━━━━━━━━━━━━━━━━━━━━━━━━━━━━ 121.0/121.0 KB 4.6 MB/s eta 0:00:00
Collecting semver>=2.8.0
  Downloading semver-2.13.0-py2.py3-none-any.whl (12 kB)
Requirement already satisfied: wheel in ./env38/lib/python3.8/site-packages (from mu-editor) (0.37.1)
Collecting virtualenv>=16.7.6
  Downloading virtualenv-20.14.0-py2.py3-none-any.whl (8.8 MB)
     ━━━━━━━━━━━━━━━━━━━━━━━━━━━━━━━━━━━━━━━━ 8.8/8.8 MB 7.5 MB/s eta 0:00:00
Collecting black<22.1.0,>=19.10b0
  Downloading black-21.12b0-py3-none-any.whl (156 kB)
     ━━━━━━━━━━━━━━━━━━━━━━━━━━━━━━━━━━━━━━━━ 156.7/156.7 KB 6.3 MB/s eta 0:00:00
Collecting pyserial~=3.5
  Downloading pyserial-3.5-py2.py3-none-any.whl (90 kB)
     ━━━━━━━━━━━━━━━━━━━━━━━━━━━━━━━━━━━━━━━━ 90.6/90.6 KB 5.4 MB/s eta 0:00:00
Collecting jupyter-client<6.2,>=4.1
  Downloading jupyter_client-6.1.12-py3-none-any.whl (112 kB)
     ━━━━━━━━━━━━━━━━━━━━━━━━━━━━━━━━━━━━━━━━ 112.7/112.7 KB 4.8 MB/s eta 0:00:00
Collecting ipython-genutils>=0.2.0
  Downloading ipython_genutils-0.2.0-py2.py3-none-any.whl (26 kB)
Collecting PyQt5==5.13.2
  Downloading PyQt5-5.13.2-5.13.2-cp35.cp36.cp37.cp38-abi3-manylinux1_x86_64.whl (62.2 MB)
     ━━━━━━━━━━━━━━━━━━━━━━━━━━━━━━━━━━━━━━━━ 62.2/62.2 MB 4.8 MB/s eta 0:00:00
Collecting nudatus>=0.0.3
  Downloading nudatus-0.0.5-py3-none-any.whl (5.3 kB)
Collecting adafruit-board-toolkit~=1.1
  Downloading adafruit-board-toolkit-1.1.0.tar.gz (34 kB)  ←(注目)
  Installing build dependencies ... done
  Getting requirements to build wheel ... done
  Installing backend dependencies ... done
  Preparing metadata (pyproject.toml) ... done
Collecting qtconsole==4.7.7
  Downloading qtconsole-4.7.7-py2.py3-none-any.whl (118 kB)
     ━━━━━━━━━━━━━━━━━━━━━━━━━━━━━━━━━━━━━━━━ 118.5/118.5 KB 8.0 MB/s eta 0:00:00
Collecting appdirs>=1.4.3
  Downloading appdirs-1.4.4-py2.py3-none-any.whl (9.6 kB)
Collecting flake8>=3.8.3
  Downloading flake8-4.0.1-py2.py3-none-any.whl (64 kB)
     ━━━━━━━━━━━━━━━━━━━━━━━━━━━━━━━━━━━━━━━━ 64.1/64.1 KB 4.2 MB/s eta 0:00:00
Collecting PyQt5_sip<13,>=4.19.19
  Downloading PyQt5_sip-12.9.1-cp38-cp38-manylinux1_x86_64.whl (353 kB)
     ━━━━━━━━━━━━━━━━━━━━━━━━━━━━━━━━━━━━━━━━ 353.6/353.6 KB 4.2 MB/s eta 0:00:00
Collecting qtpy
  Downloading QtPy-2.0.1-py3-none-any.whl (65 kB)
     ━━━━━━━━━━━━━━━━━━━━━━━━━━━━━━━━━━━━━━━━ 65.7/65.7 KB 3.1 MB/s eta 0:00:00
Collecting traitlets
  Downloading traitlets-5.1.1-py3-none-any.whl (102 kB)
     ━━━━━━━━━━━━━━━━━━━━━━━━━━━━━━━━━━━━━━━━ 102.0/102.0 KB 6.3 MB/s eta 0:00:00
Collecting jupyter-core
  Downloading jupyter_core-4.9.2-py3-none-any.whl (86 kB)
     ━━━━━━━━━━━━━━━━━━━━━━━━━━━━━━━━━━━━━━━━ 86.9/86.9 KB 3.6 MB/s eta 0:00:00
Collecting pyzmq>=17.1
  Downloading pyzmq-22.3.0-cp38-cp38-manylinux_2_12_x86_64.manylinux2010_x86_64.whl (1.1 MB)
     ━━━━━━━━━━━━━━━━━━━━━━━━━━━━━━━━━━━━━━━━ 1.1/1.1 MB 4.6 MB/s eta 0:00:00
Collecting pygments
  Downloading Pygments-2.11.2-py3-none-any.whl (1.1 MB)
     ━━━━━━━━━━━━━━━━━━━━━━━━━━━━━━━━━━━━━━━━ 1.1/1.1 MB 4.4 MB/s eta 0:00:00
Collecting click>=7.1.2
  Downloading click-8.1.0-py3-none-any.whl (96 kB)
     ━━━━━━━━━━━━━━━━━━━━━━━━━━━━━━━━━━━━━━━━ 96.4/96.4 KB 4.8 MB/s eta 0:00:00
Collecting pathspec<1,>=0.9.0
  Downloading pathspec-0.9.0-py2.py3-none-any.whl (31 kB)
Collecting tomli<2.0.0,>=0.2.6
  Downloading tomli-1.2.3-py3-none-any.whl (12 kB)
Collecting mypy-extensions>=0.4.3
  Downloading mypy_extensions-0.4.3-py2.py3-none-any.whl (4.5 kB)
Collecting typing-extensions>=3.10.0.0
  Downloading typing_extensions-4.1.1-py3-none-any.whl (26 kB)
Collecting platformdirs>=2
  Downloading platformdirs-2.5.1-py3-none-any.whl (14 kB)
Collecting pyflakes<2.5.0,>=2.4.0
  Downloading pyflakes-2.4.0-py2.py3-none-any.whl (69 kB)
     ━━━━━━━━━━━━━━━━━━━━━━━━━━━━━━━━━━━━━━━━ 69.7/69.7 KB 2.7 MB/s eta 0:00:00
Collecting pycodestyle<2.9.0,>=2.8.0
  Downloading pycodestyle-2.8.0-py2.py3-none-any.whl (42 kB)
     ━━━━━━━━━━━━━━━━━━━━━━━━━━━━━━━━━━━━━━━━ 42.1/42.1 KB 1.6 MB/s eta 0:00:00
Collecting mccabe<0.7.0,>=0.6.0
  Downloading mccabe-0.6.1-py2.py3-none-any.whl (8.6 kB)
Collecting ipython>=5.0.0
  Downloading ipython-8.2.0-py3-none-any.whl (750 kB)
     ━━━━━━━━━━━━━━━━━━━━━━━━━━━━━━━━━━━━━━━━ 750.7/750.7 KB 4.8 MB/s eta 0:00:00
Collecting tornado>=4.2
  Downloading tornado-6.1-cp38-cp38-manylinux2010_x86_64.whl (427 kB)
     ━━━━━━━━━━━━━━━━━━━━━━━━━━━━━━━━━━━━━━━━ 427.5/427.5 KB 4.8 MB/s eta 0:00:00
Collecting python-dateutil>=2.1
  Downloading python_dateutil-2.8.2-py2.py3-none-any.whl (247 kB)
     ━━━━━━━━━━━━━━━━━━━━━━━━━━━━━━━━━━━━━━━━ 247.7/247.7 KB 3.6 MB/s eta 0:00:00
Collecting six<2,>=1.9.0
  Downloading six-1.16.0-py2.py3-none-any.whl (11 kB)
Collecting filelock<4,>=3.2
  Downloading filelock-3.6.0-py3-none-any.whl (10.0 kB)
Collecting distlib<1,>=0.3.1
  Downloading distlib-0.3.4-py2.py3-none-any.whl (461 kB)
     ━━━━━━━━━━━━━━━━━━━━━━━━━━━━━━━━━━━━━━━━ 461.2/461.2 KB 4.7 MB/s eta 0:00:00
Collecting stack-data
  Downloading stack_data-0.2.0-py3-none-any.whl (21 kB)
Requirement already satisfied: setuptools>=18.5 in ./env38/lib/python3.8/site-packages (from ipython>=5.0.0->ipykernel<6,>=4.1->mu-editor) (61.2.0)
Collecting backcall
  Downloading backcall-0.2.0-py2.py3-none-any.whl (11 kB)
Collecting prompt-toolkit!=3.0.0,!=3.0.1,<3.1.0,>=2.0.0
  Downloading prompt_toolkit-3.0.28-py3-none-any.whl (380 kB)
     ━━━━━━━━━━━━━━━━━━━━━━━━━━━━━━━━━━━━━━━━ 380.2/380.2 KB 5.4 MB/s eta 0:00:00
Collecting pickleshare
  Downloading pickleshare-0.7.5-py2.py3-none-any.whl (6.9 kB)
Collecting matplotlib-inline
  Downloading matplotlib_inline-0.1.3-py3-none-any.whl (8.2 kB)
Collecting jedi>=0.16
  Downloading jedi-0.18.1-py2.py3-none-any.whl (1.6 MB)
     ━━━━━━━━━━━━━━━━━━━━━━━━━━━━━━━━━━━━━━━━ 1.6/1.6 MB 5.3 MB/s eta 0:00:00
Collecting decorator
  Downloading decorator-5.1.1-py3-none-any.whl (9.1 kB)
Collecting pexpect>4.3
  Downloading pexpect-4.8.0-py2.py3-none-any.whl (59 kB)
     ━━━━━━━━━━━━━━━━━━━━━━━━━━━━━━━━━━━━━━━━ 59.0/59.0 KB 2.6 MB/s eta 0:00:00
Collecting packaging
  Using cached packaging-21.3-py3-none-any.whl (40 kB)
Collecting parso<0.9.0,>=0.8.0
  Downloading parso-0.8.3-py2.py3-none-any.whl (100 kB)
     ━━━━━━━━━━━━━━━━━━━━━━━━━━━━━━━━━━━━━━━━ 100.8/100.8 KB 4.5 MB/s eta 0:00:00
Collecting ptyprocess>=0.5
  Downloading ptyprocess-0.7.0-py2.py3-none-any.whl (13 kB)
Collecting wcwidth
  Downloading wcwidth-0.2.5-py2.py3-none-any.whl (30 kB)
Collecting pyparsing!=3.0.5,>=2.0.2
  Using cached pyparsing-3.0.7-py3-none-any.whl (98 kB)
Collecting pure-eval
  Downloading pure_eval-0.2.2-py3-none-any.whl (11 kB)
Collecting asttokens
  Downloading asttokens-2.0.5-py2.py3-none-any.whl (20 kB)
Collecting executing
  Downloading executing-0.8.3-py2.py3-none-any.whl (16 kB)

Building wheels for collected packages: adafruit-board-toolkit  ←(注目)
  Building wheel for adafruit-board-toolkit (pyproject.toml) ... done
  Created wheel for adafruit-board-toolkit: filename=adafruit_board_toolkit-1.1.0-py3-none-any.whl size=12820 sha256=e07fb516a608ef88870df87367800a41033a87ffc185762b091920119d46e7d8
  Stored in directory: /home/ubn/.cache/pip/wheels/cd/ed/92/93e219259d0a7ef9ad277db193000929e93999deb2ab3400b0
Successfully built adafruit-board-toolkit

Installing collected packages: wcwidth, pyserial, pure-eval, ptyprocess, pickleshare, mypy-extensions, mccabe, ipython-genutils, executing, distlib, backcall, appdirs, typing-extensions, traitlets, tornado, tomli, six, semver, pyzmq, PyQt5_sip, pyparsing, pygments, pyflakes, pycodestyle, prompt-toolkit, platformdirs, pexpect, pathspec, parso, nudatus, filelock, decorator, click, adafruit-board-toolkit, virtualenv, python-dateutil, PyQt5, packaging, matplotlib-inline, jupyter-core, jedi, flake8, black, asttokens, stack-data, qtpy, QScintilla, PyQtChart, jupyter-client, ipython, ipykernel, qtconsole, mu-editor
Successfully installed PyQt5-5.13.2 PyQt5_sip-12.9.1 PyQtChart-5.13.1 QScintilla-2.11.3 adafruit-board-toolkit-1.1.0 appdirs-1.4.4 asttokens-2.0.5 backcall-0.2.0 black-21.12b0 click-8.1.0 decorator-5.1.1 distlib-0.3.4 executing-0.8.3 filelock-3.6.0 flake8-4.0.1 ipykernel-5.5.6 ipython-8.2.0 ipython-genutils-0.2.0 jedi-0.18.1 jupyter-client-6.1.12 jupyter-core-4.9.2 matplotlib-inline-0.1.3 mccabe-0.6.1 mu-editor-1.1.1 mypy-extensions-0.4.3 nudatus-0.0.5 packaging-21.3 parso-0.8.3 pathspec-0.9.0 pexpect-4.8.0 pickleshare-0.7.5 platformdirs-2.5.1 prompt-toolkit-3.0.28 ptyprocess-0.7.0 pure-eval-0.2.2 pycodestyle-2.8.0 pyflakes-2.4.0 pygments-2.11.2 pyparsing-3.0.7 pyserial-3.5 python-dateutil-2.8.2 pyzmq-22.3.0 qtconsole-4.7.7 qtpy-2.0.1 semver-2.13.0 six-1.16.0 stack-data-0.2.0 tomli-1.2.3 tornado-6.1 traitlets-5.1.1 typing-extensions-4.1.1 virtualenv-20.14.0 wcwidth-0.2.5
→「.whl」(ホイール)がないか、バージョンが未対応とかの理由で使えない場合は、「.tar.gz」を使ってビルドされ、それは次回に備えキャッシュ (~/.cache/pip/wheels/) にも格納されます。
-
ビルドする機会が増えることで、依存がなくて失敗する可能性が高くなります。
今回は 1個のパッケージ「adafruit-board-toolkit」がビルドされて成功。
-
3). 確認:
(env38) $ pip list
:
Package                Version
---------------------- -------
adafruit-board-toolkit 1.1.0  ←(ビルド)
appdirs                1.4.4
asttokens              2.0.5
backcall               0.2.0
black                  21.12b0
click                  8.1.0
decorator              5.1.1
distlib                0.3.4
executing              0.8.3
filelock               3.6.0
flake8                 4.0.1
ipykernel              5.5.6
ipython                8.2.0
ipython-genutils       0.2.0
jedi                   0.18.1
jupyter-client         6.1.12
jupyter-core           4.9.2
matplotlib-inline      0.1.3
mccabe                 0.6.1
mu-editor              1.1.1  ←(注目)
mypy-extensions        0.4.3
nudatus                0.0.5
packaging              21.3
parso                  0.8.3
pathspec               0.9.0
pexpect                4.8.0
pickleshare            0.7.5
pip                    22.0.4
platformdirs           2.5.1
prompt-toolkit         3.0.28
ptyprocess             0.7.0
pure-eval              0.2.2
pycodestyle            2.8.0
pyflakes               2.4.0
Pygments               2.11.2
pyparsing              3.0.7
PyQt5                  5.13.2
PyQt5-sip              12.9.1
PyQtChart              5.13.1
pyserial               3.5
python-dateutil        2.8.2
pyzmq                  22.3.0
QScintilla             2.11.3
qtconsole              4.7.7
QtPy                   2.0.1
semver                 2.13.0
setuptools             61.2.0
six                    1.16.0
stack-data             0.2.0
tomli                  1.2.3
tornado                6.1
traitlets              5.1.1
typing_extensions      4.1.1
virtualenv             20.14.0
wcwidth                0.2.5
wheel                  0.37.1
→前回、依存で苦労した「pygame」が依存としてはなくなっています。
-
-
--- - --- - --- - --- - --- - --- - --- - --- - --- - --- - --- - --- - --- - --- - ----- ----- ----
13. 「mu-editor」の操作:
-
1). 初めての「mu-editor」の起動
-
(1). 端末より起動:
$ cd ~/MyPy38/
$ source ~/MyPy38/env38/bin/activate

(env38) ubn@ubn-box:~/MyPy38$ mu-editor
-
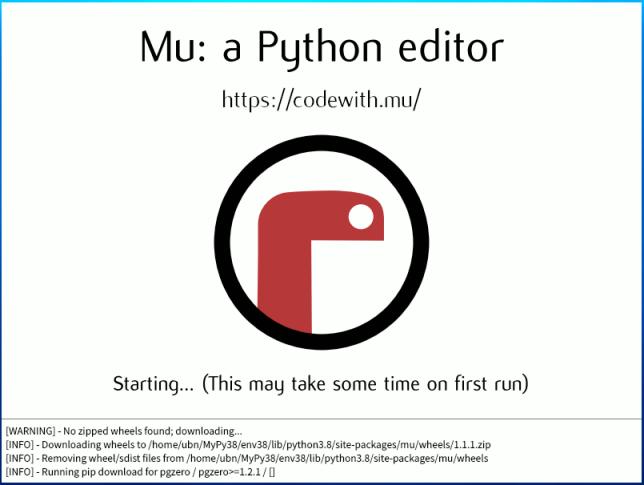
(2). 最初のみ、起動するまでに時間がかかります。
→その間、パイソン(へび)のアニメーションがあります:
-
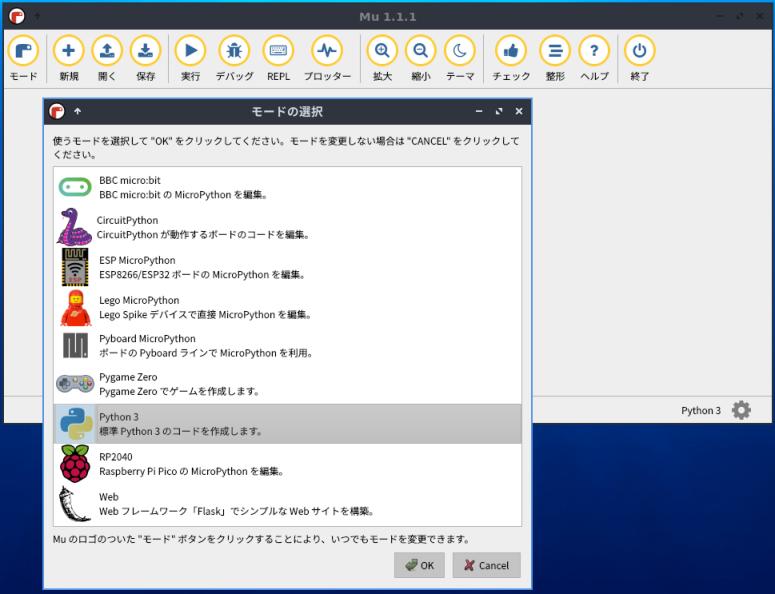
(3). 最初のみ、「モードの選択」ダイアログが表示:
-
(4). デフォルトの「Python 3」を選んで、「OK」
→標準 Python 3 のコードを作成します。
後で、左上の「モード」ボタンで切り替えできます。
-
(5). 編集画面が広がりました。

-
2). 次回からの「mu-editor」の起動
-
(1). 端末より起動:
$ cd ~/MyPy38/
$ source ~/MyPy38/env38/bin/activate

(env38) ubn@ubn-box:~/MyPy38$ mu-editor
もしくは、
$ ~/MyPy38/env38/bin/mu-editor
-
(2). 少しだけ、パイソン(へび)のアニメーションがあります。
-
(3). すぐに、編集画面が表示。
→メニューのボタンと表示文字が大きいのが利点。シンプルですが使いやすいです。
-
3). メニューボタンの説明:
左上の「モード」ボタンで、いつでも編集モードを切り替えできます:
- モード: Mu の現在のモードを変更
- 新規: 新しい空のファイルを作成
- 開く: ファイルの選択画面を開いて、Mu にロードするファイルを選択
- 保存: ファイルをコンピュータのハードドライブに保存
- 実行: 現在のスクリプトを実行
- デバッグ: Mu のビジュアルデバッガを起動
- REPL: テキストエディタとフッターの間に新しいパネルを開きます
- プロッター: テキストエディタと Mu のフッターの間にプロッタペインを開きます
- 拡大: テキストを拡大 ←(文字サイズを自由に変更できます)
- 縮小: テキストを縮小
- テーマ: テーマの切り替え
- チェック: コードを分析し、それを改善する方法を提案
- Tidy: Python の構文に合ったコードに変更
- ヘルプ: Mu のヘルプページをデフォルトのブラウザで開きます
- 終了: エディターを終了
-
4). Python のソースファイルを開いて確認:
端末にて:
$ echo 'print("Hello world!")' > ~/ドキュメント/hello.py
-
$ ~/MyPy38/env38/bin/mu-editor
→「mu-editor」が起動されました。
-
「開く」ボタン →「Open file」画面 →ユーザフォルダ「ubn」→「ドキュメント」→「hello.py」
「hello.py」タブの、編集画面が開きました。
-
「チェック」ボタン →一番下のステータス欄に「よくやりました!問題ありません。」表示
「チェック」ボタン →一番下のステータス欄に「良いですね!問題の検出はゼロです。」表示
ボタンを押すたびに、表示が変わります。
-
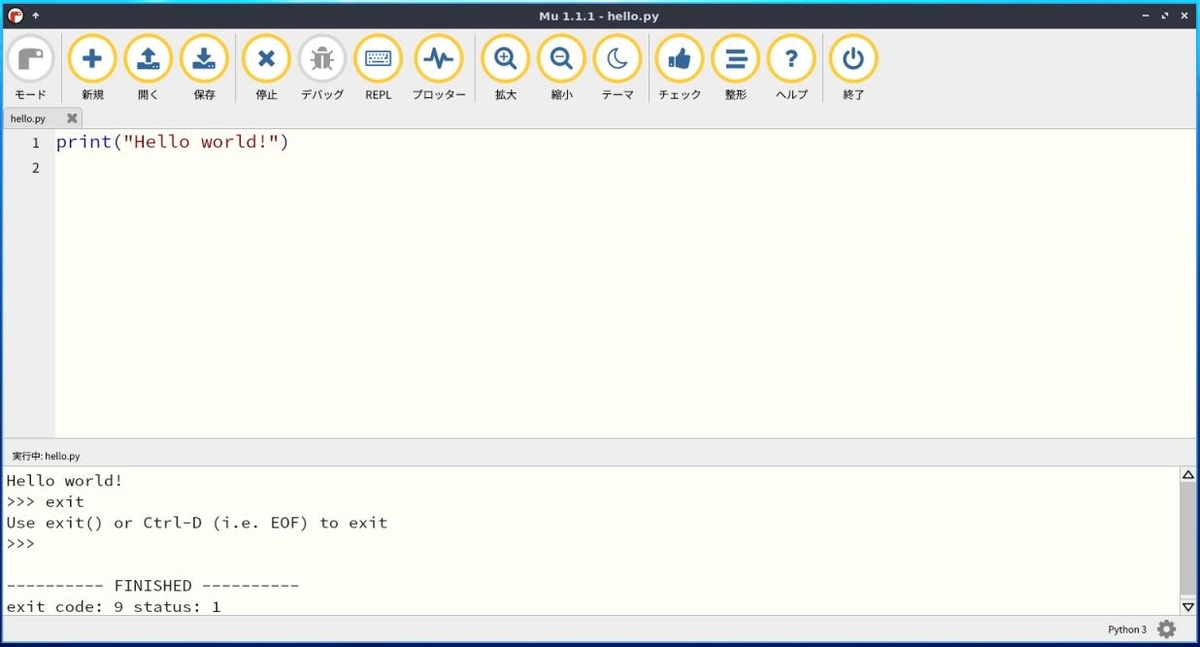
「実行」ボタン →ウィンドウ下側に「python の実行」画面が開きました:
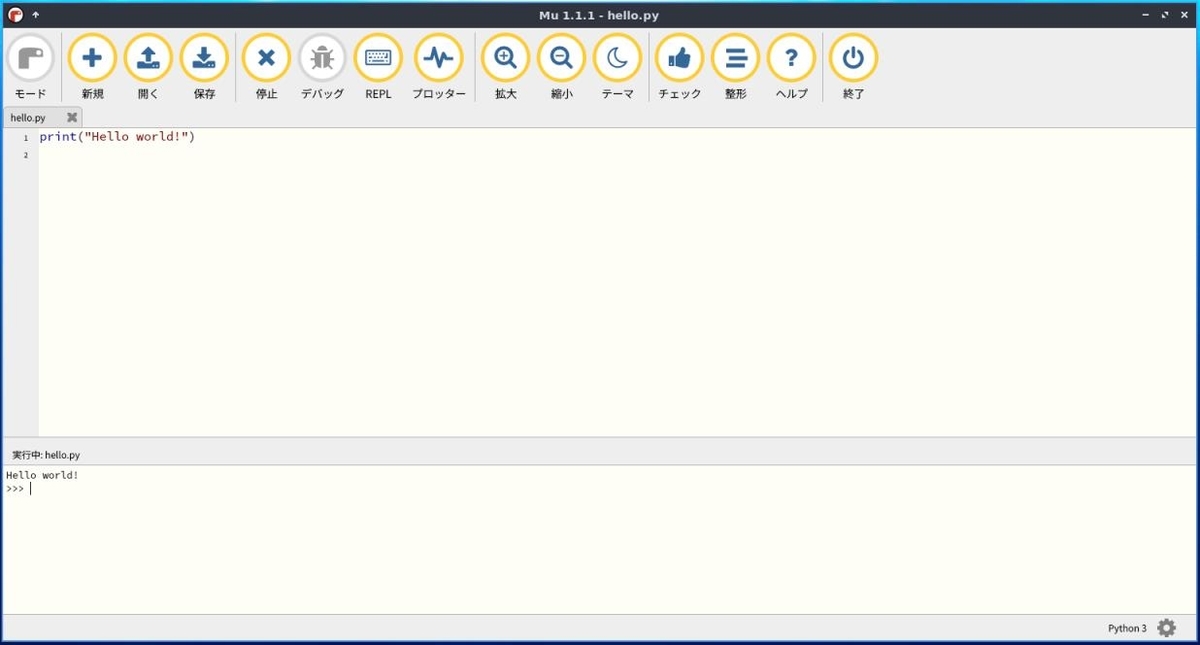
Hello world!
>>>
-
「exit」入力:
>>> exit
Use exit() or Ctrl-D (i.e. EOF) to exit
→コマンドを間違いました。「exit」でなく「exit()」で終了でした。
-
実行の終了は「exit()」入力:
もしくは、
Ctrl+D
---------- FINISHED ----------
exit code: 9 status: 1
→終了しますが、「python の実行」画面はそのままで、閉じません。
-
ここで、「拡大」ボタン:
→簡単に編集画面の文字サイズを大きくできます。メニューのボタンのサイズ等は変わりません。 見やすいのが一番です。作業効率が変ってきます。
-
「実行」ボタン が「停止」ボタンの表示に変わっています。
「停止」ボタン →ウィンドウ下側の「python の実行」画面が閉じました。
-
5). 「Mu-Editor」をメニューから起動できるように、デスクトップファイルを作成:
-
(1). デスクトップファイルを作成:
$ sudo featherpad /usr/share/applications/mu-editor.desktop
↓ 下記を貼り付け:
[Desktop Entry]
Name=Mu-Editor
Comment=Code Editing
GenericName=Text Editor
Exec=/home/ubn/MyPy38/env38/bin/mu-editor
Icon=/home/ubn/mu_code/static/img/logo.png
Type=Application
Categories=Utility;TextEditor;Development;IDE;
MimeType=text/plain;inode/directory;application/x-code-workspace;
→「/home/ubn/」は自分のホームフォルダ名に修正してください。
-
(2). 「Mu-Editor」の起動:
メニュー →「プログラミング」→「Mu-Editor」
-
-
--- - --- - --- - --- - --- - --- - --- - --- - --- - --- - --- - --- - --- - --- - ----- ----- -----
14. 参考: 「mu-editor」について:
-
初心者プログラマー向けのシンプルなPython エディタ:
→初心者のプログラマーが「Python」のプログラムを学習しながら、
プログラミング(Python コードを作成、実行、チェック)できる環境を提供します。
-
PC 向けの標準の「Python 3」だけでなく、「他のデバイス向け」のPython の編集が可能です:
他のデバイス(マイコン、組込機器)向けのPython の編集モード:
「BBC micro:bitm」 →BBC micro:bit
「CircuitPython 」 →microcontroller boards
「ESP MicroPython 」 →ESP8266、ESP32
「Lego MicroPython」 →教育版レゴ マインドストーム ev3 ロボット
「Pyboard MicroPython」 →マイコンボード pyboard
「Pygame Zero」 →ゲームの作成(Scratch と似ています)
「RP2040」 →RP2040(Raspberry Pi Pico) マイコンボード
「Web」 →Python「Flask」モジュールによるWeb アプリ開発
-
参考:
Flask の使い方: Webアプリケーション Flask入門
-
-
公式サイト:
-
ソースコードはGitHub にあります。
古いリリースはここ です。
-
-
-
setup.py を確認すると、Python 3.5 〜
3.9(修正: 3.9未満)の対応でした(追記: Python 3.8 が確実)推奨されている 新しい安定版リリース: 1.1.1 2022年2月22日
-
Linux で使うときの注意:
MicroPython ベースのデバイスで使うときは、
正しいアクセス許可グループ(通常は dialout または uucp グループ)に自分自身を追加する必要があります。 また、フラッシュデバイスがマウントできることを確認します。
-
-
--- - --- - --- - --- - --- - --- - --- - --- - --- - --- - --- - --- - --- - --- - ----- ----- ----- -
15. 参考: 「mu-editor」のリンク:
-
-
-
まとめ
VirtulBox のLubuntu 22.04 に、venv を使ってPython の学習環境を構築してみました。 仮想環境なので、気兼ねなく自由に学習できます。
-
Python のビルドをしてわかったことは、通常のアプリと同じく、依存パッケージの解決で苦労するということと、 Python 自体のバージョンが大きく関係するということです。
最新よりも少し古いPython のバージョンの方が問題が少く、楽にビルドできました。
-
今回の反省は、依存で「Python: '<3.9,>=3.5'」を 3.5 〜 3.9 と勘違いして、余計な作業をしてしまったこと。 依存のパッケージのビルドは成功しても、肝心のパッケージのビルドで、先ほどビルドした依存が削除され、ビルドし直されて失敗するので、おかしいなと気付きました。
3.5 〜 3.9 未満なので、 3.5 〜 3.8 の依存でした。ビルドではわかりやすいエラーメッセージは表示されません。勉強になりました。
-
それと、2世代古いPython のバージョンはリポジトリから削除されています。それらのバージョンを使いたいときは、古めのLinux ディストリビューションを使うか、目的とするPython のビルドをすることになります。
-
追記: Python 3.9 が「Lubuntu 22.04 LTS」のリポジトリから消えました。 こちらの投稿も、一部が無効になりましたが、違うバージョンに応用できると思います。
-
-
-
-
目次
-
-
- 目次
- --- - --- - --- - --- - --- - --- - --- - --- - --- - --- - --- - --- - --- - --- - -
- 「Lubuntu 22.04 LTS」の画面:
- --- - --- - --- - --- - --- - --- - --- - --- - --- - --- - --- - --- - --- - --- - --
- 1. 作業前に、VirtualBox のスナップショットを作成:
- --- - --- - --- - --- - --- - --- - --- - --- - --- - --- - --- - --- - --- - --- - ---
- 2. 参考: Python のエディタ:
- --- - --- - --- - --- - --- - --- - --- - --- - --- - --- - --- - --- - --- - --- - ----
- 3. 参考: APT で「mu-editor」をインストールする場合:
- --- - --- - --- - --- - --- - --- - --- - --- - --- - --- - --- - --- - --- - --- - -----
- 4. インストールされているpython の確認:
- --- - --- - --- - --- - --- - --- - --- - --- - --- - --- - --- - --- - --- - --- - ----- -
- 5. 「python3.10」のvenv 環境を作りました:
- 1). 「venv」のインストール:
- 2). Python が利用可能であることを確認:
- 3). pip をインストールして最新バージョンを入手:
- 4). venv を使用して依存関係を隔離します:
- (1). 「venv」コマンドを使用して、「env39」という任意の名前のフォルダに、Python インストール全体の仮想コピーを作成
- (2). 確認:
- (3). 仮想環境を有効化 →Python の venv パスを使用するようシェルを設定
- (4). インストールされているパッケージの一覧を表示:
- (5). 実行ファイルの場所:
- (6). バージョン表示:
- (7). 「pip」、「setuptools」、「wheel」を最新に更新:
- (8). 参考: pip を最新に更新するときに、エラーが表示される場合:
- (9). Python パッケージをインストールしたい場合:
- (10). 参考: もし、仮想環境の使用をやめて、グローバル Python に戻る場合は、無効化します:
- --- - --- - --- - --- - --- - --- - --- - --- - --- - --- - --- - --- - --- - --- - ----- --
- 6. 参考: 「python3.9」のvenv 環境で、PIP で「mu-editor」をインストール:(失敗)
- 1). 最新にしたいので、「--upgrade」(-U) オプションを付けてインストール:
- 2). 試しに、「--force-reinstall」と「--upgrade」(-U) オプションを付けてインストール:
- 3). 検索すると、「matplotlib のインストールで失敗」したようです
- 4). 依存の「matplotlib」をインストール:
- 5). 念の為、最新に更新:
- 6). インストールされたPython パッケージの確認:
- 7). 再び、「mu-editor」をインストール:
- 8). 再び、「mu-editor」をインストール:
- 9). 再び、「mu-editor」をインストール:
- 10). 再び、「mu-editor」をインストール:
- 11). 再び、「mu-editor」をインストール:
- 12). 再び、最新の「mu-editor」をインストール:
- 13). 再び、「mu-editor」をインストール:
- 14). ちなみに、「mu-editor」をビルドするためにAPT でインストールした依存パッケージ:
- --- - --- - --- - --- - --- - --- - --- - --- - --- - --- - --- - --- - --- - --- - ----- ---
- 7. 参考: 「pypi.org 」にて、欲しいバージョンのPython パッケージを検索:
- --- - --- - --- - --- - --- - --- - --- - --- - --- - --- - --- - --- - --- - --- - ----- ----
- 8. 参考: 「python3.9」のvenv 環境で、ダウンロードした「.whl」で「mu-editor」をインストール:(失敗)
- --- - --- - --- - --- - --- - --- - --- - --- - --- - --- - --- - --- - --- - --- - ----- -----
- 9. 参考: 「Python 3.8.13」をビルドしてインストール(試行):
- --- - --- - --- - --- - --- - --- - --- - --- - --- - --- - --- - --- - --- - --- - ----- ----- -
- 10.「Python 3.8.13」をビルドしてインストール(本番):
- --- - --- - --- - --- - --- - --- - --- - --- - --- - --- - --- - --- - --- - --- - ----- ----- --
- 11. 「python3.8」のvenv 環境を作りました:
- --- - --- - --- - --- - --- - --- - --- - --- - --- - --- - --- - --- - --- - --- - ----- ----- ---
- 12. 「python3.8」のvenv 環境で、PIP で「mu-editor」をインストール:
- --- - --- - --- - --- - --- - --- - --- - --- - --- - --- - --- - --- - --- - --- - ----- ----- ----
- 13. 「mu-editor」の操作:
- --- - --- - --- - --- - --- - --- - --- - --- - --- - --- - --- - --- - --- - --- - ----- ----- -----
- 14. 参考: 「mu-editor」について:
- 初心者プログラマー向けのシンプルなPython エディタ:
- PC 向けの標準の「Python 3」だけでなく、「他のデバイス向け」のPython の編集が可能です:
- 「BBC micro:bitm」 →BBC micro:bit
- 「CircuitPython 」 →microcontroller boards
- 「ESP MicroPython 」 →ESP8266、ESP32
- 「Lego MicroPython」 →教育版レゴ マインドストーム ev3 ロボット
- 「Pyboard MicroPython」 →マイコンボード pyboard
- 「Pygame Zero」 →ゲームの作成(Scratch と似ています)
- 「RP2040」 →RP2040(Raspberry Pi Pico) マイコンボード
- 「Web」 →Python「Flask」モジュールによるWeb アプリ開発
- 公式サイト:
- Linux で使うときの注意:
- --- - --- - --- - --- - --- - --- - --- - --- - --- - --- - --- - --- - --- - --- - ----- ----- ----- -
- 15. 参考: 「mu-editor」のリンク:
- まとめ
- -
-
-
-