登録日: 2025-10-22 更新日: 2025-10-24
前回の〈H175-8〉にて、「Xubuntu 24.04 LTS」に「VirtualBox 7.2.2」と「Vagrant 2.4.9」をインストールしました:
-
今回は「その続き」の動作確認です。
その「Vagrant 2.4.9」で「VirtualBox 7.2.2」の仮想マシンがちゃんと作成できるか、
公式サイトの「Box」を使い、「Void Linux」の仮想マシンを作成して、確認しました:
-
その備忘録です。
-
-
使用したPC は、以前に購入した ミニPC「MINISFORUM NAB5」で、Linux マシンとして運用中です。
プロセッサは「Core i5-12450H」で、メモリ 16GB、SSD 512GB です。
-
(注)リンクを戻るときはブラウザの左上の「←」をクリック
Android スマホであれば「ホーム」ボタン隣の「<」をタップ
-
-
目次
-
今回の作業:
2. 「Vagrant にて「仮想マシン」を作成して動作を確認:
5. 「 仮想マシン」で「GUI」を表示するように「Vagrantfile」を修正:
6. 「GUI」を使えるように、「仮想マシン」の設定を見直し:
10. 「タイムゾーン」を日本に変更:
12. 日本語入力:
13. デスクトップとパネルの設定:
14. フォントのインストール:
15. アプリ のインストール:
16. ゲームのインストール:
17. 気づいたこと:
-
参考になりそうな作業:
1. システムの起動と、「Firefox」ブラウザの立ち上げが遅くなる、原因が判明:
4. 「TLP」を使った、「少電力」の設定: ←runit サービスの操作例:
5. 「TLP」の停止と削除: ←runit サービスの操作例:
8. 「runit」のしくみ:
-
-
-
- --- - --- - --- - --- - --- - --- - --- - --- - -
Xubuntu 24.04 LTS の立ち上げ:
-
「VirtualBox 7.2.2」の VirtualBox マネージャを起動:
左側に「アイコン」(ボタン)が縦に並びます:
-
「ホーム」ボタン:(デフォルト)
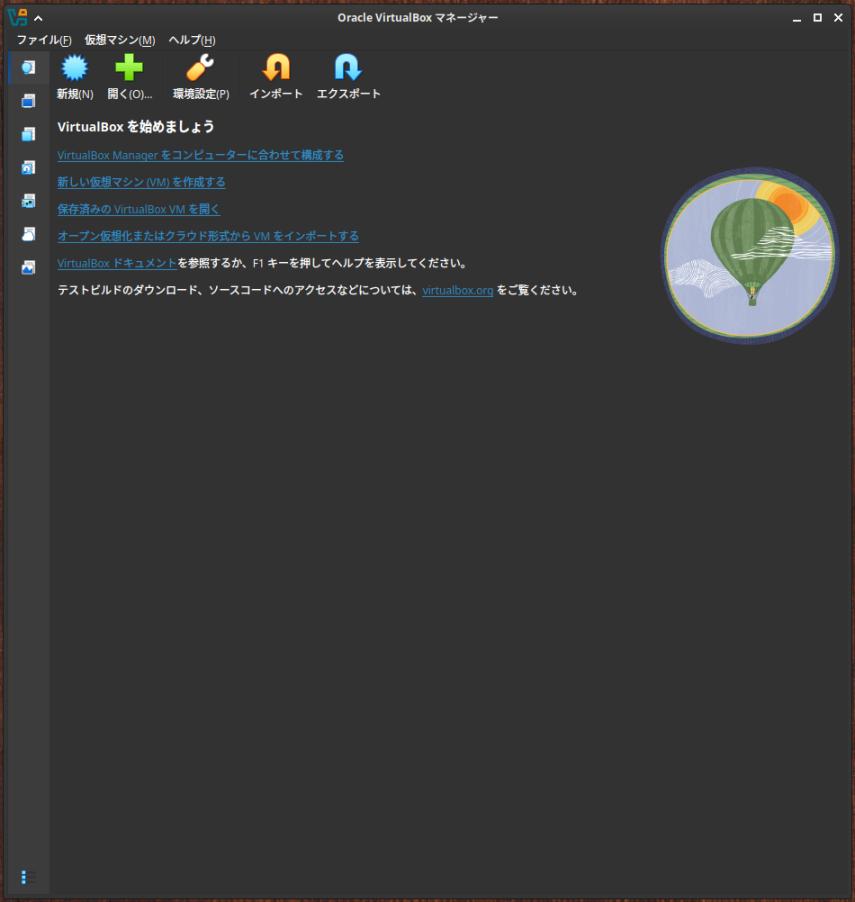
→新しいデザインに変わり、機能を探す手間が減りました:
-
「仮想マシン」ボタン:(通常使用)
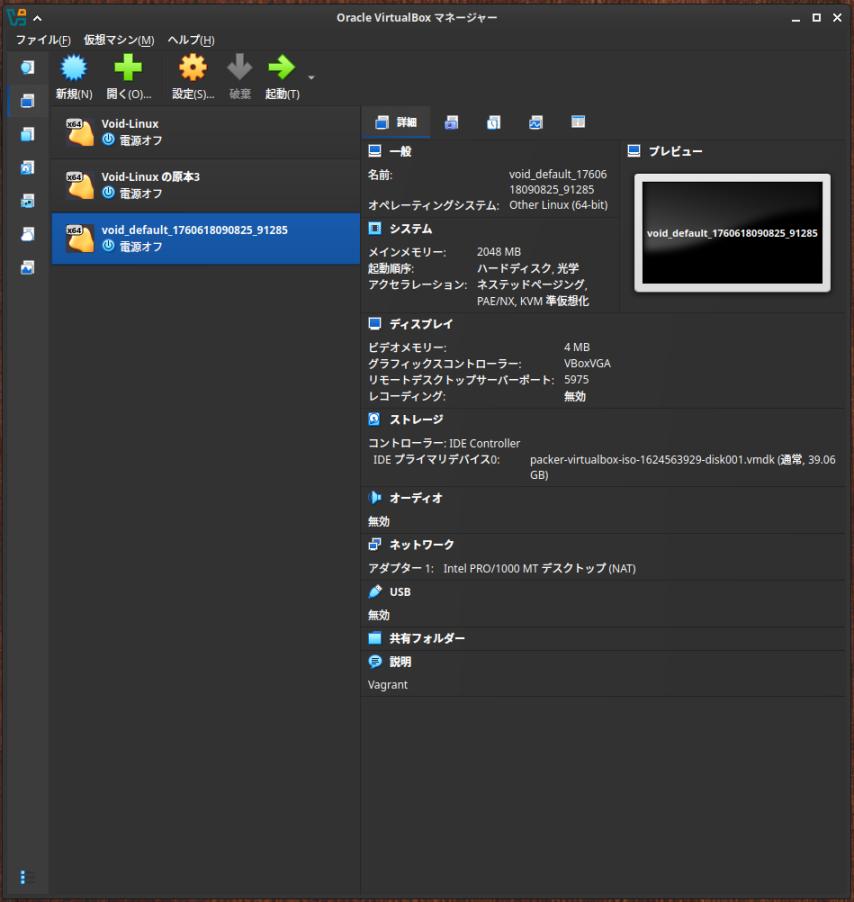
→こちらは、今までと同じ画面です:
なので、使い勝手は変わりません:
-
一番下の「仮想マシン」が、「Vagrant 2.4.9」で自動作成された「Void Linux」です:
→Vagrant だけでなく、VirtualBox マネージャからも起動や停止ができます:
-
-
- --- - --- - --- - --- - --- - --- - --- - --- - --
「Xubuntu」について:
-
Ubuntu の公式フレーバー(性格の違う兄弟?)です
Ubuntu ベースの、軽量な「Xfce」デスクトップ環境です。
個人的には使い慣れた環境です。
安定していることと、カスタマイズしやすく、自分にとって使い勝手の良い環境を再現しやすいのが利点です。
-
-
- --- - --- - --- - --- - --- - --- - --- - --- - ---
「VirtualBox」について:
-
「VirtualBox 」は、Oracle が開発している「仮想マシン」を構築するためのソフトウェアです。
-
「VirtalBox」は「仮想的なパソコン」(仮想デバイス)を実現するソフトウェアです。別のパソコンに「Linux」をインストールするのと変わりません。
仮想マシンを使うことで、ハードウェアで問題になりそうなPC でも、最新のLinux ディストリビューションをインストールできる可能性が高くなります。
-
-
- --- - --- - --- - --- - --- - --- - --- - --- - ----
「Vagrant」について:
-
公式サイト:
-
「Vagrant」 (ベイグラント) は、「仮想マシン」の管理をしやすくするための「フロントエンド」のソフトウェアです:
「仮想マシン」の管理を「vagrant コマンド」で行います:
複数の「仮想マシン」の環境(ベンダーと言います)に対応しており、
ベンダー指定を省略した時のデフォルトは「VirtualBox」です。
-
例えば、「VirtualBox」の場合は、
「vagrant コマンド」の実行で、「VirtualBox」が内蔵する「VBoxManage」コマンドを発行して、「仮想マシン」の制御を行っています。
つまり、「VirtualBox」がインストールされていないと使えません。
また、「Vagrant」は、仮想環境を統一するのに便利なので、共同作業の多い「ソフト開発」でよく使われています。
-
個人的にはいろいろなOS にトライしており、ssh 接続よりも、GUI をよく使っていて、 GUI で使うときに便利になる、Guest Additions のインストールを手動で行うのですが、 その都度環境が違うので、よく失敗します。
-
なので、Guest Additions を(ほぼ 100% の成功率で)仮想マシンに自動インストールしてくれる、「vagrant plugin」機能を使うために、「Vagrant」を使っています。
-
-
- --- - --- - --- - --- - --- - --- - --- - --- - -----
現在のOS のバージョンを表示:
-
2025-10-19 現在
-
-- -- -- -- -- -- -- -- -- -- -- -- -- -- -- -- -- -- -- -- -- -- -- --
ホストOS : 「Xubuntu 24.04.2 LTS」
カーネル:
$ uname -r
6.8.0-85-generic
→安定志向なので、更新は少なめです:
-
リリース:
$ cat /etc/lsb-release
DISTRIB_ID=Ubuntu
DISTRIB_RELEASE=24.04
DISTRIB_CODENAME=noble
DISTRIB_DESCRIPTION="Ubuntu 24.04.3 LTS"
→LTS 版の更新(ポイントリリース)は、ほぼ 6ヶ月ごとです:
-
「x11」と「Wayland」のどちらで動作しているか確認:
$ echo $XDG_SESSION_TYPE
x11
→「Wayland」ではなく、「x11」で動作しています。
→「Wayland」ではなく、「x11」で動作しています。
-
-- -- -- -- -- -- -- -- -- -- -- -- -- -- -- -- -- -- -- -- -- -- -- --
ゲストOS : 「Void Linux」
2025-10-19 現在
-
カーネル:
$ uname -r
6.12.52_1
→Ubuntu よりも進んでいます:
-
リリース:
$ cat /etc/os-release
:
NAME="Void"
ID="void"
PRETTY_NAME="Void Linux"
HOME_URL="https://voidlinux.org/"
DOCUMENTATION_URL="https://docs.voidlinux.org/"
LOGO="void-logo"
ANSI_COLOR="0;38;2;71;128;97"

DISTRIB_ID="void"
→ローリングリリースです:
-
「x11」と「Wayland」のどちらで動作してるか確認:
$ echo $XDG_SESSION_TYPE
x11
→「Wayland」ではなく、「x11」で動作しています。
-
-
- --- - --- - --- - --- - --- - --- - --- - --- - ----- -
(前回の続き:)
-
前回の〈H175-8〉にて、「Xubuntu 24.04 LTS」に「VirtualBox 7.2.2」と「Vagrant 2.4.9」をインストールしました:
-
その「Vagrant 2.4.9」がうまく動作するかは、イチから「仮想マシン」を作ってみないとわかりません:
-
-
- --- - --- - --- - --- - --- - --- - --- - --- - ----- --
1. 「Vagrant」の状態を確認:
-
1). vagrant のプラグインを確認:
$ vagrant plugin list
:
vagrant-vbguest (0.32.0, global)
-
2). 登録されている「Box」を確認:
$ vagrant box list
:
There are no installed boxes! Use `vagrant box add` to add some.
→なし
-
3). 作成された「仮想マシン」を確認:
$ vagrant global-status
:
id       name    provider   state    directory
-------------------------------------------------------------------------
-
-
- --- - --- - --- - --- - --- - --- - --- - --- - ----- ---
2. 「Vagrant 2.4.9」の確認に、Vagrant にて、「仮想マシン」を作成して動作を確認:
-
1). インストールすべき「Box」を検索:
-
公式サイト:
-
「void」で検索:
→「ylabidi/voidlinux」のBox を使うことにしました:
-
2). 「作業フォルダ」を作成:
$ mkdir -p ~/ダウンロード/vm/void/
-
3). 「Box」をダウンロード、および「Vagrantfile」を作成:
$ cd ~/ダウンロード/vm/void/
$ vagrant init ylabidi/voidlinux --box-version 0.2.0
:
A `Vagrantfile` has been placed in this directory. You are now
ready to `vagrant up` your first virtual environment! Please read
the comments in the Vagrantfile as well as documentation on
`vagrantup.com` for more information on using Vagrant.
→ファルひとつの作成だけなので、すぐに応答が返ってきます:
-
4). 確認:
$ ls -lA ~/ダウンロード/vm/void/
:
-rw-rw-r-- 1 ubn ubn 3425 10月 16 21:20 Vagrantfile
→自動で「Vagrantfile」が作られました
-
-
- --- - --- - --- - --- - --- - --- - --- - --- - ----- ----
3. 仮想マシンの(初回の作成と)立ち上げで、エラー:
-
1). 仮想マシンの立ち上げ:
$ cd ~/ダウンロード/vm/void/
$ vagrant up
Bringing machine 'default' up with 'virtualbox' provider...
==> default: Box 'ylabidi/voidlinux' could not be found. Attempting to find and install...
    default: Box Provider: virtualbox
    default: Box Version: 0.2.0
==> default: Loading metadata for box 'ylabidi/voidlinux'
    default: URL: https://vagrantcloud.com/api/v2/vagrant/ylabidi/voidlinux
==> default: Adding box 'ylabidi/voidlinux' (v0.2.0) for provider: virtualbox
    default: Downloading: https://vagrantcloud.com/ylabidi/boxes/voidlinux/versions/0.2.0/providers/virtualbox/unknown/vagrant.box
    default: Calculating and comparing box checksum...
==> default: Successfully added box 'ylabidi/voidlinux' (v0.2.0) for 'virtualbox'!
==> default: Importing base box 'ylabidi/voidlinux'...
==> default: Matching MAC address for NAT networking...
==> default: Checking if box 'ylabidi/voidlinux' version '0.2.0' is up to date...
==> default: Setting the name of the VM: void_default_1760618090825_91285
==> default: Clearing any previously set network interfaces...
==> default: Preparing network interfaces based on configuration...
    default: Adapter 1: nat
==> default: Forwarding ports...
    default: 22 (guest) => 2222 (host) (adapter 1)
==> default: Booting VM...
==> default: Waiting for machine to boot. This may take a few minutes...
    default: SSH address: 127.0.0.1:2222
    default: SSH username: vagrant
    default: SSH auth method: private key
    default:
    default: Vagrant insecure key detected. Vagrant will automatically replace
    default: this with a newly generated keypair for better security.
    default:
    default: Inserting generated public key within guest...
    default: Removing insecure key from the guest if it's present...
    default: Key inserted! Disconnecting and reconnecting using new SSH key...
==> default: Machine booted and ready!
[default] A Virtualbox Guest Additions installation was found but no tools to rebuild or start them.
The guest's platform ("linux") is currently not supported, will try generic Linux method...
Copy iso file /usr/share/virtualbox/VBoxGuestAdditions.iso into the box /tmp/VBoxGuestAdditions.iso
Mounting Virtualbox Guest Additions ISO to: /mnt
mount: /mnt: WARNING: source write-protected, mounted read-only.
Installing Virtualbox Guest Additions 7.2.2 - guest version is 6.1.20
Verifying archive integrity...  100%   MD5 checksums are OK. All good.
Uncompressing VirtualBox 7.2.2 Guest Additions for Linux  100%
VirtualBox Guest Additions installer
This system appears to have a version of the VirtualBox Guest Additions
already installed.  If it is part of the operating system and kept up-to-date,
there is most likely no need to replace it.  If it is not up-to-date, you
should get a notification when you start the system.  If you wish to replace
it with this version, please do not continue with this installation now, but
instead remove the current version first, following the instructions for the
operating system.

If your system simply has the remains of a version of the Additions you could
not remove you should probably continue now, and these will be removed during
installation.

Do you wish to continue? [yes or no]
touch: cannot touch '/var/lib/VBoxGuestAdditions/skip-5.12.13_1': No such file or directory
VirtualBox Guest Additions: Starting.
VirtualBox Guest Additions: Setting up modules
VirtualBox Guest Additions: Building the VirtualBox Guest Additions kernel
modules.  This may take a while.
VirtualBox Guest Additions: To build modules for other installed kernels, run
VirtualBox Guest Additions:   /sbin/rcvboxadd quicksetup <version>
VirtualBox Guest Additions: or
VirtualBox Guest Additions:   /sbin/rcvboxadd quicksetup all
VirtualBox Guest Additions: Building the modules for kernel 5.12.13_1.
VirtualBox Guest Additions: Running kernel modules will not be replaced until
the system is restarted or 'rcvboxadd reload' triggered
VirtualBox Guest Additions: reloading kernel modules and services
VirtualBox Guest Additions: cannot reload kernel modules: one or more module(s)
is still in use
VirtualBox Guest Additions: kernel modules and services were not reloaded
The log file /var/log/vboxadd-setup.log may contain further information.
An error occurred during installation of VirtualBox Guest Additions 7.2.2. Some functionality may not work as intended.
In most cases it is OK that the "Window System drivers" installation failed.
VirtualBox Guest Additions: Starting.
VirtualBox Guest Additions: reloading kernel modules and services
VirtualBox Guest Additions: cannot reload kernel modules: one or more module(s)
is still in use
VirtualBox Guest Additions: kernel modules and services were not reloaded
The log file /var/log/vboxadd-setup.log may contain further information.
vboxadd-service.sh: Starting VirtualBox Guest Addition service.
VBoxService: error: VbglR3Init failed with rc=VERR_FILE_NOT_FOUND
Unmounting Virtualbox Guest Additions ISO from: /mnt
Got different reports about installed GuestAdditions version:
Virtualbox on your host claims:   6.1.20
VBoxService inside the vm claims: 7.2.2
Going on, assuming VBoxService is correct...
Got different reports about installed GuestAdditions version:
Virtualbox on your host claims:   6.1.20
VBoxService inside the vm claims: 7.2.2
Going on, assuming VBoxService is correct...
Got different reports about installed GuestAdditions version:
Virtualbox on your host claims:   6.1.20
VBoxService inside the vm claims: 7.2.2
Going on, assuming VBoxService is correct...
Restarting VM to apply changes...
==> default: Attempting graceful shutdown of VM...
==> default: Booting VM...
==> default: Waiting for machine to boot. This may take a few minutes...
==> default: Machine booted and ready!
==> default: Checking for guest additions in VM...
==> default: Mounting shared folders...
    default: /home/ubn/ダウンロード/vm/void => /vagrant
赤色の警告が表示:
Vagrant was unable to mount VirtualBox shared folders. This is usually
because the filesystem "vboxsf" is not available. This filesystem is
made available via the VirtualBox Guest Additions and kernel module.
Please verify that these guest additions are properly installed in the
guest. This is not a bug in Vagrant and is usually caused by a faulty
Vagrant box. For context, the command attempted was:

mount -t vboxsf -o uid=1000,gid=1000,_netdev vagrant /vagrant

The error output from the command was:

/sbin/mount.vboxsf: mounting failed with the error: No such device
ubn@ubnbox:~/ダウンロード/vm/void$
-
和訳:
Vagrant は VirtualBox 共有フォルダをマウントできませんでした。
これは通常、ファイルシステム「vboxsf」が使用できないことが原因です。
:
→共有フォルダのマウントで失敗しました:
-
2). 現在の状態を確認:
$ cd ~/ダウンロード/vm/void
$ vagrant plugin list
:
vagrant-vbguest (0.32.0, global)
-
$ vagrant status
:
Current machine states:

default                   running (virtualbox)
-
$ vagrant global-status
:
id       name    provider   state   directory
------------------------------------------------------------------------
88be79a  default virtualbox running /home/ubn/ダウンロード/vm/void
→「仮想マシン」は作成されており、実行(running)中です:
-
3). ssh 接続:
$ vagrant ssh
:
[vagrant@voidlinux ~]$
→ssh 接続できました:
-
[vagrant@voidlinux ~]$ ls
[vagrant@voidlinux ~]$ pwd
/home/vagrant
→ユーザ名は「vagrant」で、ホスト名は「voidlinux」です:
-
[vagrant@voidlinux ~]$ uname -r
5.12.13_1
-
[vagrant@voidlinux ~]$ cat /etc/os-release
:
NAME="Void"
ID="void"
PRETTY_NAME="Void Linux"
HOME_URL="https://voidlinux.org/"
DOCUMENTATION_URL="https://docs.voidlinux.org/"
LOGO="void-logo"
ANSI_COLOR="0;38;2;71;128;97"

DISTRIB_ID="void"
→ちゃんと動作しています:
-
4). ssh 接続を抜けました:
[vagrant@voidlinux ~]$ exit
logout
ubn@ubnbox:~/ダウンロード/vm/void$
-
5). 「仮想マシン」を電源オフ:
$ vagrant halt
:
==> default: Attempting graceful shutdown of VM...
ubn@ubnbox:~/ダウンロード/vm/void
-
$ vagrant status
:
Current machine states:
default                   poweroff (virtualbox)
→電源オフされています:
-
6. ホストOS を再起動:
「端末」以外のウィンドウを閉じてから、
$ reboot
-
-
- --- - --- - --- - --- - --- - --- - --- - --- - ----- -----
4. 「仮想マシン」の立ち上げ時のエラーに対応:
-
1). 「仮想マシン」を立ち上げ:
$ cd ~/ダウンロード/vm/void/
$ vagrant up
-
2). ssh 接続:
$ vagrant ssh
:
[vagrant@voidlinux ~]$
-
[vagrant@voidlinux ~]$ pwd
/home/vagrant
-
[vagrant@voidlinux ~]$ uname -r
5.12.13_1
-
3). ssh 接続できたので、「システム更新」してみました:
$ sudo xbps-install -Su
:
[*] Updating repository `https://alpha.de.repo.voidlinux.org/current/x86_64-repodata' ...
SSL certificate subject doesn't match host alpha.de.repo.voidlinux.org
ERROR: [reposync] failed to fetch file `https://alpha.de.repo.voidlinux.org/current/x86_64-repodata': Operation not permitted
エラーしました:
[リポジトリの同期] ファイル「https://alpha.de.repo.voidlinux.org/current/x86_64-repodata」の取得に失敗しました:
-
ミラーを登録している、「リポジトリの設定ファイル」を確認:
$ ls /etc/xbps.d/
$
→「リポジトリの設定ファイル」に、ミラーは登録されていません:
ということは、
「デフォルト」で設定されている、リポジトリのURL が使われています:
-
4). デフォルトの「リポジトリの設定ファイル」の場所を検索:
エラーメッセージで、検索:
$ sudo grep -ril "alpha.de.repo.voidlinux" /usr/share/
:
/usr/share/xbps.d/00-repository-main.conf
-
5). デフォルトの「リポジトリの設定ファイル」を表示:
$ cat /usr/share/xbps.d/00-repository-main.conf
repository=https://alpha.de.repo.voidlinux.org/current
→エラーメッセージと同じ URL です:
「de」ということは「ドイツ」のミラーです:
-
前回は「日本」のミラーがダメで、今回は「ドイツ」のミラーです。
「Void Linux」のミラーは、調子が良くないミラーが多いみたい:
-
6). 調子が良い(ことが判明している)「ミラー」に設定:
GUI が操作できず、nano もインストールできない状態なので、
今のところ、エディタは「vim」しか使えません:
-
「vim」の操作を思い出しながら設定:
$ sudo vim /etc/xbps.d/00-repository-main.conf
「Esc」を数回押して、「a」で挿入モード:
↓ 下記を貼り付け:
repository=https://repo-fi.voidlinux.org/current
「Esc」を数回押して、「:wq」で保存して終了
-
7). リポジトリの同期:
$ sudo xbps-install -S
:
[*] Updating repository `https://repo-fi.voidlinux.org/current/x86_64-repodata' ...
x86_64-repodata: 2025KB [avg rate: 1859KB/s]
→エラーせず、同期できました:
-
8). 登録されている、リポジトリを確認:
$ xbps-query -L
:
14293 https://repo-fi.voidlinux.org/current (Staged) (RSA signed)
-
9). パッケージの更新:
$ sudo xbps-install -Su
:
[*] Updating repository `https://repo-fi.voidlinux.org/current/x86_64-repodata' ...
The 'xbps' package must be updated, please run `xbps-install -u xbps`
→先に「xbps」の更新が必要のようです:
-
10). 「xbps」の更新:
$ sudo xbps-install -u xbps
:
Name             Action    Version           New version            Download size
libxcrypt-compat install   -                 4.4.38_1               87KB
glibc            update    2.32_2            2.41_1                 8956KB
libcrypto3       install   -                 3.5.4_1                2097KB
libssl3          install   -                 3.5.4_1                428KB
libxbps          update    0.59.1_5          0.60.5_1               142KB
xbps             update    0.59.1_5          0.60.5_1               118KB
base-system      update    0.114_1           0.114_2                848B
→「glibc」も更新されました:
-
11). パッケージの更新:
$ sudo xbps-install -Su
→多くのパッケージの更新があり、時間がかかりました:
-
12). ssh 接続を抜けました:
$ exit
-
13). 「仮想マシン」の電源オフ:
$ vagrant halt
:
==> default: Attempting graceful shutdown of VM...
ubn@ubnbox:~/ダウンロード/vm/void
-
14). 「仮想マシン」の電源オン:
$ vagrant up
:
Bringing machine 'default' up with 'virtualbox' provider...
==> default: Checking if box 'ylabidi/voidlinux' version '0.2.0' is up to date...
==> default: Clearing any previously set forwarded ports...
==> default: Clearing any previously set network interfaces...
==> default: Preparing network interfaces based on configuration...
    default: Adapter 1: nat
==> default: Forwarding ports...
    default: 22 (guest) => 2222 (host) (adapter 1)
==> default: Booting VM...
==> default: Waiting for machine to boot. This may take a few minutes...
    default: SSH address: 127.0.0.1:2222
    default: SSH username: vagrant
    default: SSH auth method: private key
==> default: Machine booted and ready!
[default] GuestAdditions 7.2.2 running --- OK.     ←(バージョンに注目)
==> default: Checking for guest additions in VM...
==> default: Mounting shared folders...
    default: /home/ubn/ダウンロード/vm/void => /vagrant  ←(共有フォルダ)
ubn@ubnbox:~/ダウンロード/vm/void$
→「仮想マシン」が、すんなり立ち上がりました:
-
メッセージを見ると「共有フォルダ」も自動でマウントされました:
-
リポジトリの登録された「ミラー」の調子が良くないため、
「仮想マシン」の更新ができない(アプリのインストールができない)状態につき、
「 GuestAdditions」の整合の処理で、エラーしたようです:
ミラー変更で OK
-
15). 「仮想マシン」は立ち上がっていますが、
「Box」から作成した「仮想マシン」の多くは「デスクトップ環境」なし、なので、
GUI 画面は表示されません:
-
Vagrant を使う場合、「ssh 接続」して、操作する人(開発者?)が多いので、
表示すると邪魔になる、「GUI」を表示する(使用する)設定に、ほとんどの「Box」がなっていません:
-
-
- --- - --- - --- - --- - --- - --- - --- - --- - ----- ----- -
5. 仮想マシンで「GUI」を表示する設定に変更:
-
1). 「仮想マシン」の電源オフ:
$ vagrant halt
:
==> default: Attempting graceful shutdown of VM...
ubn@ubnbox:~/ダウンロード/vm/void
-
$ vagrant status
:
Current machine states:
default                   poweroff (virtualbox)
-
$ vagrant global-status
:
id       name    provider   state    directory
-------------------------------------------------------------------------
88be79a  default virtualbox poweroff /home/ubn/ダウンロード/vm/void
-
今回の「仮想マシン」の作業フォルダは、「~/ダウンロード/vm/void」です:
-
2). 「Vagrantfile」ファイルの確認:
$ cd ~/ダウンロード/vm/void
$ ls -1Ap
:
.vagrant/
Vagrantfile
-
3). 「GUI 表示」を行うように設定を変更:
$ featherpad Vagrantfile
-
60行目:
  # config.vm.provider "virtualbox" do |vb|
  #   # Display the VirtualBox GUI when booting the machine
  #   vb.gui = true
  #
  #   # Customize the amount of memory on the VM:
  #   vb.memory = "1024"
  # end
↓ 3つ(実質は 2つ)のコメント行を解除):
   config.vm.provider "virtualbox" do |vb|
     # Display the VirtualBox GUI when booting the machine
     vb.gui = true
  #
  #   # Customize the amount of memory on the VM:
  #   vb.memory = "1024"
   end
→Ctrl+S で保存:
-
4). 「仮想マシン」をリロード:
$ cd ~/ダウンロード/vm/void
$ vagrant reload
==> default: Checking if box 'ylabidi/voidlinux' version '0.2.0' is up to date...
==> default: Clearing any previously set forwarded ports...
==> default: Clearing any previously set network interfaces...
==> default: Preparing network interfaces based on configuration...
    default: Adapter 1: nat
==> default: Forwarding ports...
    default: 22 (guest) => 2222 (host) (adapter 1)
==> default: Booting VM...
==> default: Waiting for machine to boot. This may take a few minutes...
    default: SSH address: 127.0.0.1:2222
    default: SSH username: vagrant
    default: SSH auth method: private key
==> default: Machine booted and ready!
[default] GuestAdditions 7.2.2 running --- OK.
==> default: Checking for guest additions in VM...
==> default: Mounting shared folders...
    default: /home/ubn/ダウンロード/vm/void => /vagrant
==> default: Machine already provisioned. Run `vagrant provision` or use the `--provision`
==> default: flag to force provisioning. Provisioners marked to run always will still run.
ubn@ubnbox:~/ダウンロード/vm/void$
→「仮想マシン」が立ち上がりました:
-
5). 「コンソール」画面が表示:
ログイン待ち:
Void 6.12.52_1 (voidlinux) (tty1)

voidlinux login:
-
6). 「仮想マシン」の電源オフ:
-
ログインします:
ユーザ名: vagrant
パスワード: vagant
-
電源オフ:
$ shutdown -h now
-
もしくは、ログインせずに、
「仮想マシン」を起動した「端末」画面にて、
$ vagrant halt
:
==> default: Attempting graceful shutdown of VM...
ubn@ubnbox:~/ダウンロード/vm/void$
-
-
- --- - --- - --- - --- - --- - --- - --- - --- - ----- ----- --
6. 「GUI」を使えるように、「仮想マシン」の設定を見直し:
-
「ssh 接続」しか使うことがないなら、こちらの設定は要りません:
「GUI」(デスクトップ画面)を使う場合の設定です:
-
例えば、「ssh 接続」で、「Xbps-src」を使ってのアプリの移植は行えますが、
「GUI」アプリを移植した場合、最終的なアプリの動作確認には「GUI 環境」が必要です:
-
ホストOS の「Xubuntu 24.04 LTS」で操作:
-
1). 「VirtualBox マネージャ」を起動:
メニュー→「システム」→「Orcre VirtualBox」
-
2). 「仮想マシン」の設定を見直し:
-
(1). Vagrant で自動で作られた「仮想マシン」をクリックして、選択:
「仮想マシン」名は任意で、 今回は「void_default_1760618090825_91285」です:
「vagrant」で作られた「仮想マシン」には、「default」が含まれています:
-
(2). システム:
「マザーボード」タブ:
メインメモリー: →「8177 MB」
ポインティングデバイス: 「PS/2 マウス」→「USB タブレット」に変更:
-
「プロセッサー」タブ:
CPU数: 「1」→「8」に変更:
→パソコンで使われているプロセッサで異なります:
-
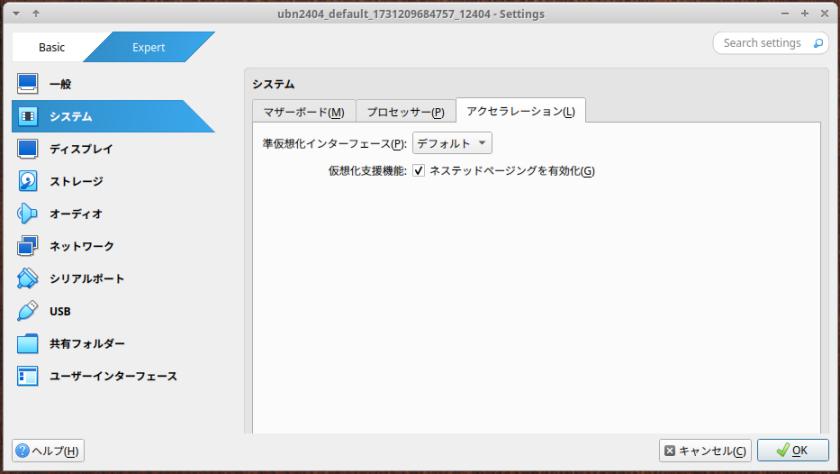
「アクセラレーション」タブ:
準仮想化インターフェース: 「デフォルト」
「ネステッドページンク」にチェック:
-
-
→右下の「OK」
-
(3). ディスプレイ:
「スクリーン」タブ:
「グラフィックコントローラー」: 「VMSVGA」に変更:
「3Dアクセラレーション」にチェック:
ビデオメモリー: →「256 MB」に変更:
-
「リモートディスプレイ」タブ:
「サーバーを有効化」のチェックを外しました:(セキュリティ面でリスクがあります)
-
→右下の「OK」
-
ちなみに、OS タイプを「Other」にした場合、「3Dアクセラレーション」にチェックさせてもらえません:
また、「3Dアクセラレーション」にチェックしないと、ビデオメモリー: を「256 MB」に変更できません:
-

-
追記:
「sudo demsg」で確認すると、立ち上げ時に「vmwgfx」のエラーが登録されているので、
「仮想マシン」を作成し、「Xfce」デスクトップ環境をインストールして、立ち上げを確認した後に、
エラーを回避するため、「3Dアクセラレーション」のチェックを外して、「グラフィックコントローラー」を 「VBoxSVGA」に変更しました:
-
(4). 説明:
Vagrant で作成:
→任意です。わかりやすい説明にしました:
-
→右下の「OK」
-
3). 「VirtualBox」マネージャの「起動」ボタンをクリック:
「Void Linux」のウィンドウが表示されました:
-
4). 「コンソール」画面が表示:
ログイン待ち:
Void 6.12.52_1 (voidlinux) (tty1)

voidlinux login:
-
「仮想マシン」の画面の下が表示しきれていない場合は、
表示→「ウィンドウのサイズを調整」
-
5). 「仮想マシン」の電源オフ:
voidlinux login:
ログイン:
ユーザ名: 「vagrant」
パスワード: 「vagrant」
-
[vagrant@voidlinux ~]$
→プロンプトが変わりました:
-
6). 参考として、現在、使われているサービスを確認しておきました:
収集:
$ ls -l /etc/sv/ >memo01.txt
$ ls -l /etc/sv/dbus >>memo01.txt
-
確認:
$ cat /etc/sv/ >memo01.txt
-
7). 電源オフ:
$ sudo shutdown -h now
-
-
参考: GUI 表示して使う場合の候補:
軽量な「デスクトップ」環境:
- 「OpenBox」デスクトップ環境:
- 「OpenBox + Xfce パネル」デスクトップ環境:
- 「Xfce」デスクトップ環境:
→インストールは「Xfce」デスクトップ環境が楽です:
-
-
- --- - --- - --- - --- - --- - --- - --- - --- - ----- ----- ---
7. 「Xfce」デスクトップ環境をインストール:
-
参考:
-
1). 「仮想マシン」の電源オン:
確認:
$ vagrant global-status
id       name    provider   state    directory
-------------------------------------------------------------------------
88be79a  default virtualbox poweroff /home/ubn/ダウンロード/vm/void
-
立ち上げ:
$ cd ~/ダウンロード/vm/void
$ vagrant up
Bringing machine 'default' up with 'virtualbox' provider...
==> default: Checking if box 'ylabidi/voidlinux' version '0.2.0' is up to date...
==> default: Clearing any previously set forwarded ports...
==> default: Clearing any previously set network interfaces...
==> default: Preparing network interfaces based on configuration...
    default: Adapter 1: nat
==> default: Forwarding ports...
    default: 22 (guest) => 2222 (host) (adapter 1)
==> default: Booting VM...
==> default: Waiting for machine to boot. This may take a few minutes...
    default: SSH address: 127.0.0.1:2222
    default: SSH username: vagrant
    default: SSH auth method: private key
==> default: Machine booted and ready!
[default] GuestAdditions 7.2.2 running --- OK.
==> default: Checking for guest additions in VM...
==> default: Mounting shared folders...
    default: /home/ubn/ダウンロード/vm/void => /vagrant
==> default: Machine already provisioned. Run `vagrant provision` or use the `--provision`
==> default: flag to force provisioning. Provisioners marked to run always will still run.
ubn@ubnbox:~/ダウンロード/vm/void$
→正常に立ち上がりました:
-
2). ssh 接続:
$ vagrant ssh
:
Last login: Sun Oct 19 02:19:34 2025 from 10.0.2.2
[vagrant@voidlinux ~]$
-
$ uname -r
6.12.52_1
-
3). システム更新:
$ sudo xbps-install -Su
[*] Updating repository `https://repo-fi.voidlinux.org/current/x86_64-repodata' ...
x86_64-repodata: 2027KB [avg rate: 794KB/s]

Name              Action    Version           New version            Download size
gdbm              update    1.23_1            1.26_1                 189KB
libarchive        update    3.8.1_1           3.8.2_1                367KB
linux6.12         update    6.12.52_1         6.12.53_1              156MB
linux6.12-headers update    6.12.52_1         6.12.53_1              12MB
lzo               update    2.10_2            2.10_3                 49KB

Size to download:              169MB
Size required on disk:         220MB
Space available on disk:        35GB

Do you want to continue? [Y/n]
→Enter
-
4). 参考:「dbus」のインストール:
すでにインストールされているので、作業は要りません:
-
確認:
$ xbps-query -l | grep dbus
:
ii dbus-1.16.2_2                           Message bus system
ii dbus-libs-1.16.2_2                      Message bus system - shared libraries
→すでにインストール済です:
-
もし、インストールされていない場合:
$ sudo xbps-install dbus
-
5). 「dbus」の有効化:
確認:
$ ls -l /etc/sv/dbus
:
-rwxr-xr-x 1 root root   92 Jul 19  2020 check
drwxr-xr-x 2 root root 4096 Oct 16 09:35 log
-rwxr-xr-x 1 root root  128 May 11 13:35 run
lrwxrwxrwx 1 root root   25 May 11 13:35 supervise -> /run/runit/supervise.dbus
-
もし、リンクされていない場合:
$ sudo ln -s /etc/sv/dbus /var/service/
-
6). 「Xorg」のインストール:
$ sudo xbps-install xorg
:
140 packages will be installed:
  font-alias-1.0.5_1 libpng-1.6.50_1 brotli-1.1.0_1 freetype-2.13.3_1
  fontconfig-2.16.0_3 libfontenc-1.1.8_1 mkfontscale-1.2.2_1
  font-util-1.4.1_1 encodings-1.1.0_1 font-adobe-100dpi-1.0.4_1
  font-adobe-75dpi-1.0.4_1 font-adobe-utopia-100dpi-1.0.5_1
  font-adobe-utopia-75dpi-1.0.5_1 font-adobe-utopia-type1-1.0.5_1
  font-bh-100dpi-1.0.4_1 font-bh-75dpi-1.0.4_1
  font-bh-lucidatypewriter-100dpi-1.0.4_1
  font-bh-lucidatypewriter-75dpi-1.0.4_1 font-bh-ttf-1.0.4_1
  font-bh-type1-1.0.4_1 font-bitstream-100dpi-1.0.4_1
  font-bitstream-75dpi-1.0.4_1 font-bitstream-type1-1.0.4_1
  font-cursor-misc-1.0.4_1 font-daewoo-misc-1.0.4_1
  font-dec-misc-1.0.4_1 font-ibm-type1-1.0.4_1 font-isas-misc-1.0.4_1
  font-jis-misc-1.0.4_1 font-misc-misc-1.1.3_1 font-mutt-misc-1.0.4_1
  dejavu-fonts-ttf-2.37_2 xorg-fonts-7.6_5 libxkbfile-1.1.3_1
  xkbcomp-1.4.7_1 xkeyboard-config-2.45_1 xorg-server-common-21.1.18_1
  pixman-0.46.4_1 libglvnd-1.7.0_1 libXfont2-2.0.7_2
  libpciaccess-0.18.1_1 libdrm-2.4.124_1 libgbm-25.1.9_1
  libepoxy-1.5.10_1 nettle-3.9.1_1 libxshmfence-1.3.3_2
  libtirpc-1.3.7_2 libxcvt-0.1.3_1 xorg-server-21.1.18_1
  iceauth-1.0.9_1 oclock-1.0.6_1 sessreg-1.1.4_1 libXrender-0.9.12_1
  libXrandr-1.5.4_1 setxkbmap-1.3.4_1 smproxy-1.0.8_1
  transset-1.0.4_1 libXft-2.3.9_2 x11perf-1.6.1_1 xauth-1.1.4_1
  xcb-util-0.4.1_1 xbacklight-1.2.4_1 libXpm-3.5.17_1 libXaw-1.0.16_1
  xcalc-1.1.2_1 xclipboard-1.1.5_1 xclock-1.1.1_1 xcmsdb-1.0.7_1
  xconsole-1.1.0_1 libXfixes-6.0.1_1 libXcursor-1.2.3_2
  xcursorgen-1.0.9_1 libXcomposite-0.4.6_1 libXi-1.8.2_2
  libXinerama-1.1.5_1 libXtst-1.2.5_2 xdpyinfo-1.3.4_2 xev-1.2.6_1
  xeyes-1.3.1_1 xfontsel-1.1.1_1 libXxf86vm-1.1.6_2 xgamma-1.0.8_1
  xhost-1.0.10_1 xinit-1.4.4_1 xinput-1.6.4_1 xkbevd-1.1.6_1
  xkbutils-1.0.6_1 xkill-1.0.6_1 xload-1.2.0_1 xlogo-1.0.7_1
  xlsatoms-1.1.4_1 xlsclients-1.1.5_1 xmessage-1.0.7_1
  xmodmap-1.0.11_1 xpr-1.2.0_1 xprop-1.2.8_1 xrandr-1.5.3_1
  libmcpp-2.7.2_8 mcpp-2.7.2_8 xrdb-1.2.2_1 xrefresh-1.1.0_1
  xset-1.2.5_2 xsetroot-1.1.3_1 libXv-1.0.13_2 xvinfo-1.1.5_1
  xwd-1.0.9_1 xwininfo-1.1.6_1 xwud-1.0.7_1 xorg-apps-7.6_9
  mtdev-1.1.7_1 libevdev-1.13.2_1 xf86-input-evdev-2.11.0_1
  xf86-input-synaptics-1.10.0_1 glib-2.86.0_1 libgudev-238_1
  libwacom-2.16.1_1 libinput-1.28.1_1 xf86-input-libinput-1.5.0_1
  xf86-input-wacom-1.2.3_1 xf86-input-vmmouse-13.2.0_1
  xorg-input-drivers-7.6_4 xf86-video-fbdev-0.5.1_1
  xf86-video-dummy-0.4.1_1 xf86-video-vesa-2.6.0_1 libz3-4.15.3_1
  libicu77-77.1_1 libxml2-2.13.8_2 libllvm19-19.1.4_7
  libxatracker-25.1.9_1 wayland-1.24.0_1 libsensors-3.6.0_2
  mesa-libgallium-25.1.9_1 mesa-25.1.9_1 mesa-dri-25.1.9_1
  xf86-video-vmware-13.4.0_1 xf86-video-ati-22.0.0_1
  xf86-video-amdgpu-23.0.0_1 xf86-video-nouveau-1.0.18_1
  xorg-video-drivers-7.6_23 xorg-7.6_6
-
確認:
$ xbps-query -l | grep xorg-fonts
:
ii xorg-fonts-7.6_5                        Modular Xorg Fonts
→すでにインストール済です:
-
$ xbps-query -l | grep mesa-dri
:
ii mesa-dri-25.1.9_1                       Mesa DRI drivers
→すでにインストール済です:
-
7). 「Xfce4」、「Xfce4 プラグイン」のインストール:
「Xfce4」のインストール:
$ sudo xbps-install xfce4
:
243 packages will be installed:
  desktop-file-utils-0.28_1 hicolor-icon-theme-0.18_1
  shared-mime-info-2.4_2 libjpeg-turbo-3.1.1_1 jbigkit-libs-2.2_2
  tiff-4.7.0_1 gdk-pixbuf-2.42.12_2 gtk-update-icon-cache-3.24.50_1
  cairo-1.18.4_2 libdav1d-1.5.1_1 fribidi-1.0.16_1 libdatrie-0.2.13_1
  libthai-0.1.29_1 graphite-1.3.14_1 libharfbuzz-11.3.3_2
  pango-1.56.3_2 librsvg-2.59.2_2 adwaita-icon-theme-49.0_1
  dbus-x11-1.16.2_2 libxkbcommon-1.12.0_1 libXdamage-1.1.6_1
  atk-2.56.5_1 at-spi2-core-2.56.5_1 at-spi2-atk-2.56.5_1
  avahi-libs-0.8_2 libtasn1-4.20.0_1 p11-kit-0.25.5_2
  libsodium-1.0.20_1 libevent-2.1.12_3 libunbound-1.24.0_1
  gnutls-3.8.10_1 libcups-2.4.13_1 lcms2-2.17_1 json-glib-1.10.8_1
  libgusb-0.4.9_1 libcolord-1.4.7_1 gtk+3-3.24.50_1
  libxfce4util-4.20.1_1 xfconf-4.20.0_1 startup-notification-0.12_11
  libgtop-2.41.3_1 libxfce4ui-4.20.2_1 garcon-4.20.0_1
  xfce4-appfinder-4.20.0_1 gtk-layer-shell-0.9.2_1
  libxfce4panel-4.20.5_1 libdisplay-info-0.2.0_1 libXres-1.2.2_1
  libwnck-43.2_1 libxfce4windowing-4.20.4_1 exo-4.20.0_1
  libdbusmenu-glib-16.04.0_6 libdbusmenu-gtk3-16.04.0_6
  xfce4-panel-4.20.5_1 libelogind-252.9_2 duktape-2.7.0_2
  polkit-126_2 xfce4-session-4.20.3_1 gnome-icon-theme-3.12.0_3
  iso-codes-4.18.0_1 libxklavier-5.4_3 libnotify-0.8.6_1
  libupower-glib3-1.90.9_2 xfce4-settings-4.20.2_1 libyaml-0.2.5_1
  libexif-0.6.25_1 Thunar-4.20.5_1 xfdesktop-4.20.1_1
  libXpresent-1.0.1_1 xfwm4-4.20.0_1 xfwm4-themes-4.10.0_4
  libplist-2.2.0_6 libusbmuxd-2.0.2_1 libimobiledevice-1.3.0_7
  upower-1.90.9_2 xfce4-power-manager-4.20.0_1
  gsettings-desktop-schemas-48.0_1 vte3-profile-0.80.3_1 libicu73-73.2_5
  icu-libs-73.2_5 vte3-0.80.3_1 xfce4-terminal-1.1.5_1
  xfce4-taskmanager-1.6.0_1 thunar-volman-4.20.0_1 orc-0.4.41_2
  gstreamer1-1.26.5_1 alsa-lib-1.2.14_1 libcdparanoia-10.2_15
  graphene-1.10.8_1 libogg-1.3.6_1 opus-1.5.2_1 libtheora-1.1.1_8
  libvorbis-1.3.7_1 gst-plugins-base1-1.26.5_1 libva-2.22.0_1
  libvdpau-1.5_1 libvpl-2.15.0_1 ocl-icd-2.3.2_2 libavutil6-6.1.3_3
  libswscale6-6.1.3_3 libpostproc6-6.1.3_3 libgomp-14.2.1+20250405_2
  libsoxr-0.1.3_2 libswresample6-6.1.3_3 libvpx-1.13.1_1
  libsharpyuv-1.6.0_2 libwebp-1.6.0_2 celt-0.11.3_3 libaom-3.8.1_2
  lame-3.100_2 libspeex-1.2.1_1 libsvt-av1-2.3.0_1
  x264-20191217.2245_1 x265-4.1_1 xvidcore-1.3.7_1
  libavcodec6-6.1.3_3 libmpg123-1.33.0_1 libopenmpt-0.8.1_1
  libbluray-1.3.4_1 mbedtls-3.6.3_1 librist-0.2.11_1
  librtmp-2.4.20161210_10 libsrt-1.5.4_2 libavformat6-6.1.3_3
  libflac-1.5.0_1 libsndfile-1.2.2_2 libbs2b-3.1.0_3 vmaf-3.0.0_1
  libass-0.17.4_1 libvidstab-1.1.0_2 libavfilter6-6.1.3_3
  gst-libav-1.26.5_1 v4l-utils-1.28.1_2 aalib-1.4rc5_3 giflib-5.2.2_1
  libde265-1.0.16_2 libheif-1.20.1_3 libopenjpeg2-2.5.3_1
  highway-1.2.0_1 libjxl-0.11.1_3 libjbig2dec-0.20_1
  libpaper-1.1.29_1 libgs-10.05.1_1 libspectre-0.2.12_1
  libid3tag-0.15.1b_8 imlib2-1.12.5_2 libcaca-0.99.beta20_1
  libasyncns-0.8_9 libfftw-3.3.10_3 libsamplerate-0.2.2_1
  libjack-1.9.22_1 libltdl-2.4.7_8 libtdb-1.4.10_2 sbc-2.0_1
  speexdsp-1.2.1_1 webrtc-audio-processing-1.3_1 libpulseaudio-16.1_2
  taglib-2.1.1_1 twolame-0.4.0_2 libwavpack-5.7.0_1
  gst-plugins-good1-1.26.5_1 vulkan-loader-1.4.313.0_1
  libxkbcommon-x11-1.12.0_1 libnice-0.1.22_1 chromaprint-1.5.1_2
  faac-1.30_1 fdk-aac-2.0.3_1 flite-2.2_1 portaudio-190600.20161030_6
  libcanberra-0.30_15 libpipewire-1.4.8_2 libinstpatch-1.1.6_1
  libXScrnSaver-1.2.4_1 libdecor-0.2.2_1 SDL3-3.2.24_1
  libfluidsynth-2.4.8_1 libgme-0.6.3_1 libgsm-1.0.22_2
  libxslt-1.1.43_2 libraptor-2.0.16_1 liblrdf-0.6.1_2
  libserd-0.32.2_1 zix-0.6.2_1 libsord-0.16.16_1 sratom-0.6.18_2
  liblilv-0.24.26_2 libmodplug-0.8.9.0_1 libsndio-1.10.0_1
  libopenal-1.23.1_2 openh264-2.6.0_2 soundtouch-2.3.2_1
  spandsp-0.0.6_4 libsrtp-2.7.0_2 libzbar-0.23.1_8
  gst-plugins-bad1-1.26.5_2 liba52-0.8.0_1 libcddb-1.3.2_9
  libcdio-2.2.0_2 libdvdcss-1.4.3_1 libdvdread-6.1.3_1
  libmpeg2-0.5.1_12 gst-plugins-ugly1-1.26.5_1 dbus-glib-0.112_1
  parole-4.20.0_1 ristretto-0.13.4_1 gtksourceview4-4.8.4_1
  enchant2-2.8.2_2 gspell-1.14.0_1 mousepad-0.6.5_1
  libcanberra-gtk3-0.30_15 xfce4-notifyd-0.9.7_1
  xfce4-screensaver-4.20.1_1 libcdio-paranoia-10.2+2.0.1_1 SDL2-2.32.8_1
  libavdevice6-6.1.3_3 ffplay6-6.1.3_3 ffmpeg6-6.1.3_3 ffmpeg-4.4.6_2
  ffmpegthumbnailer-2.2.3_1 libgsf-1.14.52_1 poppler-data-0.4.12_1
  libgpg-error-1.55_1 libassuan-2.5.7_1 pinentry-1.3.2_1
  libksba-1.6.6_1 libgcrypt-1.11.1_1 npth-1.8_1 mbedtls2-2.28.10_1
  tpm2-tss-3.2.0_6 gnupg-2.4.5_2 libgpgme-2.0.0_1 gpgmepp-2.0.0_1
  nspr-4.37_1 nss-3.117_1 libpoppler-25.06.0_2 poppler-glib-25.06.0_2
  libopenraw-0.1.3_3 tumbler-4.20.1_1 xdg-user-dirs-0.18_1
  xdg-user-dirs-gtk-0.14_1 elogind-252.9_2 xfce-polkit-0.3_2
  xfce4-4.20_2
-
確認:
$ xbps-query -l | grep elogind
:
ii elogind-252.9_2                         Standalone logind fork
ii libelogind-252.9_2                      Standalone logind fork - elogind library
→「elogind」がインストールされました:
-
確認:
$ sudo sv status elogind
:
fail: elogind: unable to change to service directory: file does not exist
リンク:
$ sudo ln -s /etc/sv/elogind /var/service/
→行末の「/」を忘れずに
-
確認:
$ sudo sv status elogind
down: elogind: 1s, normally up, want up; run: log: (pid 1985) 9s
-
「端末」のインストールの確認:
$ xbps-query -l | grep xfce4-term
:
ii xfce4-terminal-1.1.5_1          Modern terminal emulator primarly for the Xfce desktop environment
→端末の「xfce4-terminal」がインストールされました:
-
$ xbps-query -l | grep thunar
:
ii thunar-volman-4.20.0_1          Thunar Volume Manager
→ファイルマネージャの「thunar」がインストールされました:
-
$ xbps-query -l | grep firefox
$
→ブラウザは、インストールされていません:
-
「Xfce4 プラグイン」のインストール:
$ sudo xbps-install xfce4-plugins
:
38 packages will be installed:
  xfce4-battery-plugin-1.2.0_1 libqrencode-4.1.1_1
  xfce4-clipman-plugin-1.7.0_1 xfce4-cpufreq-plugin-1.3.0_1
  xfce4-cpugraph-plugin-1.3.0_1 xfce4-diskperf-plugin-2.8.0_1
  xfce4-fsguard-plugin-1.2.0_1 xfce4-genmon-plugin-4.2.1_1
  xfce4-mailwatch-plugin-1.4.0_1 xfce4-mpc-plugin-0.6.0_1
  xfce4-netload-plugin-1.5.0_1 xfce4-places-plugin-1.9.0_1
  libsigc++3-3.4.0_1 glibmm2.68-2.78.0_1 libcloudproviders-0.3.6_1
  libtinysparql-3.9.2_1 gtk4-4.18.6_1 cairomm1.16-1.16.1_1
  pangomm2.48-2.50.0_1 gtkmm4-4.18.0_1 pavucontrol-6.1_1
  libkeybinder3-0.3.2_2 xfce4-pulseaudio-plugin-0.5.1_1
  xfce4-sensors-plugin-1.5.0_1 xfce4-systemload-plugin-1.4.0_1
  xfce4-time-out-plugin-1.2.0_1 xfce4-timer-plugin-1.8.0_1
  xfce4-verve-plugin-2.1.0_1 xfce4-wavelan-plugin-0.7.0_1
  libproxy-0.5.11_1 glib-networking-2.80.1_1 libsoup3-3.4.2_1
  xfce4-weather-plugin-0.11.3_1 accountsservice-23.13.9_2
  xfce4-whiskermenu-plugin-2.10.0_1 xfce4-xkb-plugin-0.9.0_1
  xfce4-smartbookmark-plugin-0.6.0_1 xfce4-plugins-1.4_1
-
8). 「LightDM」のインストール:
$ sudo xbps-install lightdm lightdm-greeter
:
5 packages will be installed:
  lightdm-1.32.0_7 liblightdm-gobject-1.32.0_7 ayatana-ido-0.9.3_1
  libayatana-indicator-0.9.4_1 lightdm-gtk-greeter-2.0.9_1
→ディスプレイマネージャです:
-
見栄えの良い「ログイン画面」にしたいときは、「lightdm-slick-greeter」がオススメ:
$ xbps-query -Rs lightdm-slick-greeter
:
[-] lightdm-slick-greeter-2.0.9_1 Light Display Manager GTK+ Greeter from Lin...
-
9). 「LightDM」の有効化:
-
確認:
$ ls -l /etc/sv/lightdm
:
drwxr-xr-x 2 root root 4096 Oct 19 03:55 log
-rwxr-xr-x 1 root root  145 May 12 02:51 run
lrwxrwxrwx 1 root root   28 May 12 02:51 supervise -> /run/runit/supervise.lightdm
一番下が赤色で点滅表示:
→インストールしただけでは、うまくリンクされていません:
-
リンク:
$ sudo ln -s /etc/sv/lightdm /var/service/
→行末の「/」を忘れずに(フォルダの中にリンクを貼ります)
-
確認:
$ ls -l /etc/sv/lightdm
:
drwxr-xr-x 2 root root 4096 Oct 19 03:55 log
-rwxr-xr-x 1 root root  145 May 12 02:51 run
lrwxrwxrwx 1 root root   28 May 12 02:51 supervise -> /run/runit/supervise.lightdm
→一番下が「水色」で点滅がなくなりました:
(正常な状態)
-
「リンク:」のところに書いたコマンドで、リンクを貼ると、こちらの「水色」のリンクが自動で作られます:
-
確認:
$ sudo sv status lightdm
:
run: lightdm: (pid 1705) 2167s; run: log: (pid 1704) 2167s
→サービスが動いています:
-
10). 「ネットワークマネージャ」のインストール:
$ sudo xbps-install NetworkManager
:
10 packages will be installed:
  openresolv-3.17.0_1 mobile-broadband-provider-info-20250613_1
  libmm-glib-1.24.0_1 libnm-1.50.0_1 oniguruma-6.9.10_1 slang-2.3.2_2
  popt-1.19_1 newt-0.52.24_2 libndp-1.9_1 NetworkManager-1.50.0_1
-
11). 「ネットワークマネージャ」の有効化:
-
確認:
$ ls -l /etc/sv/NetworkManager
:
drwxr-xr-x 2 root root 4096 Oct 19 04:10 log
-rwxr-xr-x 1 root root   95 Nov 16  2024 run
lrwxrwxrwx 1 root root   35 Nov 16  2024 supervise -> /run/runit/supervise.NetworkManager
一番下が赤色で点滅表示:
→インストールしただけでは、うまくリンクされていません:
-
確認:
$ sudo sv status NetworkManager
:
fail: NetworkManager: unable to change to service directory: file does not exist
→リンクされていません:
-
リンク:
$ sudo ln -s /etc/sv/NetworkManager /var/service/
-
確認:
$ sudo sv status NetworkManager
:
run: NetworkManager: (pid 3371) 27s; run: log: (pid 3370) 27s
-
12). 「ネットワーク アプレット」のインストール:
$ sudo xbps-install network-manager-applet
:
5 packages will be installed:
  libayatana-appindicator-0.5.94_1 gcr-3.41.2_1 libnma-1.10.6_1
  libsecret-0.21.7_1 network-manager-applet-1.36.0_1
→「ネットワークマネージャ」のサポートを行います:
-
13). 「pulseaudio」のインストール:
$ sudo xbps-install pulseaudio pavucontrol
:
ERROR: Package `pavucontrol' already installed.

Name             Action    Version     New version      Download size
pulseaudio-utils install   -           16.1_2           70KB
rtkit            install   -           0.13_3           31KB
pulseaudio       install   -           16.1_2           498KB
→「pavucontrol」はインストール済でした:
-
14). 「firefox-esr」ブラウザのインストール:
$ sudo xbps-install firefox-esr
:
Name        Action    Version     New version      Download size
firefox-esr install   -           140.2.0_1        74MB
-
15). 再起動:
$ sudo reboot
-
-
- --- - --- - --- - --- - --- - --- - --- - --- - ----- ----- ----
8. 「その他の「ツール」のインストール:
-
1). 「その他の「ツール」のインストール:
$ sudo xbps-install nano htop git unzip p7zip archiver
:
ERROR: Package `unzip' already installed.
17 packages will be installed:
  nano-8.6_1 htop-3.4.1_1 perl-Digest-HMAC-1.04_1
  perl-Authen-SASL-2.1800_1 perl-Convert-BinHex-1.125_3
  perl-IO-stringy-2.113_2 perl-TimeDate-2.33_2 perl-MailTools-2.21_3
  perl-MIME-tools-5.515_1 perl-Net-SSLeay-1.94_2 perl-URI-5.21_1
  perl-IO-Socket-SSL-2.095_1 perl-Net-SMTP-SSL-1.04_3 git-2.51.0_1
  7zip-25.01_1 p7zip-25.01_1 archiver-3.5.1_4
→「unzip」はインストール済でした:
-
スクリーンショット関連:
$ sudo xbps-install xfce4-screenshooter shotwell
:
12 packages will be installed:
  xfce4-screenshooter-1.11.2_1 libgee-0.20.8_2 exiv2-0.28.5_1
  libgexiv2-0.14.5_1 libgphoto2-udev-rules-2.5.32_1 gd-2.3.3_2
  libgphoto2-2.5.32_1 libjasper-2.0.25_1 libraw-0.21.4_1
  libportal-0.9.1_2 libportal-gtk3-0.9.1_2 shotwell-0.32.13_1
-
$ sudo xbps-install libsensors
:
ERROR: Package `libsensors' already installed.
→「libsensors」はインストール済でした:
-
$ xbps-query -Rs psensor
:
[-] psensor-1.2.1_2 Graphical hardware temperature monitor for Linux
-
$ sudo xbps-install psensor
:
Name          Action    Version     New version      Download size
libatasmart   install   -           0.19_5           22KB
libmicrohttpd install   -           1.0.2_1          112KB
lm_sensors    install   -           3.6.0_2          88KB
mpfr          install   -           4.2.2_1          343KB
libbytesize   install   -           2.10_2           17KB
libcryptsetup install   -           2.8.0_1          270KB
libkeyutils   install   -           1.6.3_2          7526B
volume_key    install   -           0.3.12_9         144KB
libdaxctl     install   -           70.1_1           15KB
libndctl      install   -           70.1_1           58KB
libnvme       install   -           1.15_1           91KB
libparted     install   -           3.6_1            179KB
libblockdev   install   -           3.3.1_1          268KB
udisks2       install   -           2.10.1_1         892KB
psensor       install   -           1.2.1_2          349KB
→「lm-sensors」は、「lm_sensors」でした:
どちらにしても、依存で入りました:
-
パッケージのアップデート通知:
$ sudo xbps-install octoxbps
:
18 packages will be installed:
  double-conversion-3.3.1_1 libb2-0.98.1_1 qt6-core-6.8.2_5
  qt6-dbus-6.8.2_5 libmd4c-0.5.2_1 xcb-util-image-0.4.1_1
  xcb-util-renderutil-0.3.10_1 xcb-util-cursor-0.1.4_1
  xcb-util-wm-0.4.2_1 xcb-util-keysyms-0.4.1_1 tslib-1.23_1
  qt6-network-6.8.2_5 qt6-gui-6.8.2_5 qt6-widgets-6.8.2_5
  qt-sudo-2.2.0_1 qtermwidget-qt6-2.2.0_1 qt6-xml-6.8.2_5
  octoxbps-0.4.1_1
-
Thunar ファイルマネージャの「ゴミ箱」の表示:
$ sudo xbps-install -S gvfs
:
Name            Action    Version     New version      Download size
gcr4            install   -           4.4.0.1_2        539KB
fuse3           install   -           3.16.2_1         100KB
avahi-glib-libs install   -           0.8_8            24KB
libnfs          install   -           5.0.3_1          133KB
gvfs            install   -           1.56.1_1         1130KB
-
2). 再起動:
-
ssh 接続を抜けました:
[vagrant@voidlinux ~]$ exit
logout
ubn@ubnbox:~/ダウンロード/vm/void$
-
「仮想マシン」の電源オフ:
$ vagrant halt
:
==> default: Attempting graceful shutdown of VM...
ubn@ubnbox:~/ダウンロード/vm/void$
-
「仮想マシン」の電源オン:
$ vagrant up
-
3). ログイン画面が表示:
ユーザ名: vagrant
パスワード: vagrant
-
4). デスクトップ画面が表示:
Xfce デスクトップ画面です:
→日本語化されていません:
-
GUI 画面にて、Ctrl+Alt+T で「端末」を起動:
$ @@
↓
$ [[
→日本語キーボードですが、英語の配列です:
-
-
- --- - --- - --- - --- - --- - --- - --- - --- - ----- ----- -----
9. 「Void Linux」の日本語化:
-
1). ssh 接続:
$ vagrant ssh
:
Last login: Sun Oct 19 04:58:57 2025 from 10.0.2.2
[vagrant@voidlinux ~]$
-
2). 「日本語フォント」の「noto-fonts-cjk-sans」をインストール:
$  sudo xbps-install -S noto-fonts-cjk-sans
:
1 package will be installed:
  noto-fonts-cjk-sans-2.004_1
-
3). 日本語のロケールか確認:
$ locale
:
LANG=en_US.UTF-8
LC_CTYPE="en_US.UTF-8"
LC_NUMERIC="en_US.UTF-8"
LC_TIME="en_US.UTF-8"
LC_COLLATE="en_US.UTF-8"
LC_MONETARY="en_US.UTF-8"
LC_MESSAGES="en_US.UTF-8"
LC_PAPER="en_US.UTF-8"
LC_NAME="en_US.UTF-8"
LC_ADDRESS="en_US.UTF-8"
LC_TELEPHONE="en_US.UTF-8"
LC_MEASUREMENT="en_US.UTF-8"
LC_IDENTIFICATION="en_US.UTF-8"
LC_ALL=
-
4). 「date」で確認:
$ date
:
Sun Oct 19 07:42:26 AM CDT 2025
→「日時」が日本語で表示されません:
-
5). ロケールの確認:
$ locale -a
:
C
C.utf8
en_US.utf8
POSIX
→日本語を指定する「ja_JP.UTF-8」が見当たりません:
-
6). locale 定義に「ja_JP.UTF-8」を追加:
$ sudo localedef -f UTF-8 -i ja_JP ja_JP.UTF-8
-
確認:
$ locale -a
:
C
C.utf8
POSIX
en_US.utf8
ja_JP.utf8   ←(追加されました)
-
7). ロケールを「日本語」に設定:
$ sudo nano /etc/locale.conf
-
LANG=en_US.UTF-8
↓ 修正:
LANG=ja_JP.UTF-8
-
$ cat /etc/locale.conf
:
LANG=ja_JP.UTF-8
-
8). 反映させるため、再起動:
[vagrant@voidlinux ~]$ exit
logout
ubn@ubnbox:~/ダウンロード/vm/void$
-
電源オフ:
$ vagrant halt
:
==> default: Attempting graceful shutdown of VM...
ubn@ubnbox:~/ダウンロード/vm/void$
-
電源オン:
$ vagrant up
-
9). ログイン画面が表示:
ユーザ名: vagrant
パスワード: vagrant
-
10). デスクトップ画面が表示:
Xfce デスクトップ画面です:
→日本語化されました:
-
11). ssh 接続:
$ vagrant ssh
:
Last login: Sun Oct 19 07:58:49 2025 from 10.0.2.2
[vagrant@voidlinux ~]$
-
12). ロケールの確認:
[vagrant@voidlinux ~]$ locale
:
LANG=ja_JP.UTF-8
LC_CTYPE="ja_JP.UTF-8"
LC_NUMERIC="ja_JP.UTF-8"
LC_TIME="ja_JP.UTF-8"
LC_COLLATE="ja_JP.UTF-8"
LC_MONETARY="ja_JP.UTF-8"
LC_MESSAGES="ja_JP.UTF-8"
LC_PAPER="ja_JP.UTF-8"
LC_NAME="ja_JP.UTF-8"
LC_ADDRESS="ja_JP.UTF-8"
LC_TELEPHONE="ja_JP.UTF-8"
LC_MEASUREMENT="ja_JP.UTF-8"
LC_IDENTIFICATION="ja_JP.UTF-8"
LC_ALL=
→日本になりました:
-
13). 「date」で確認:
[vagrant@voidlinux ~]$ date
2025年 10月 19日 日曜日 08:19:31 CDT
→「日時」は日本語表示ですが、「タイムゾーン」が「JST」ではありません:
-
14). 次の項番で、「タイムゾーン」を変更
-
-
- --- - --- - --- - --- - --- - --- - --- - --- - ----- ----- ----- -
10. 「タイムゾーン」を日本に変更:
-
1). 日本の「タイムゾーン」ファイルがあるか確認:
$ ls -1p /usr/share/zoneinfo/Asia/Tokyo
:
/usr/share/zoneinfo/Asia/Tokyo
→ありました:
-
2). 再起動で「タイムゾーン」が元に戻らないように設定を変更:
-
修正:
$ sudo nano /etc/rc.conf
-
HOSTNAME="voidlinux"
HARDWARECLOCK="UTC"
TIMEZONE="America/Chicago"
KEYMAP="us"
↓ 「TIMEZONE」の部分だけを修正:
HOSTNAME="voidlinux"
HARDWARECLOCK="UTC"
TIMEZONE="Asia/Tokyo"
KEYMAP="us"
-
3). リンク:
-
作業前:
$ ls -l /etc/localtime
lrwxrwxrwx 1 root root 35 10月 19 14:04 /etc/localtime -> /usr/share/zoneinfo/America/Chicago
-
リンク:
$ sudo ln -sf /usr/share/zoneinfo/Asia/Tokyo /etc/localtime
「-s」はシンボリックリンクの指定、「-f」はファイルがあった場合に削除の指定:
-
作業後:
$ ls -l /etc/localtime
lrwxrwxrwx 1 root root 30 10月 20 04:08 /etc/localtime -> /usr/share/zoneinfo/Asia/Tokyo
-
4). 再起動:
$ sudo reboot
-
5). 再起動しても、元に戻らないことを確認:
$ date
2025年 10月 19日 日曜日 22:48:13 JST
→正常な表示になりました:
-
-
- --- - --- - --- - --- - --- - --- - --- - --- - ----- ----- ----- --
11. 残りの設定:
-
ここまで来れば、以前の投稿〈H179〉と手順は同じです:
:
-
1). キーボードレイアウトを「日本語キーボード」に修正:
-
2). 日本語入力:
-
3). デスクトップとパネルの設定:
-
4). フォントのインストール:
-
5). アプリ のインストール:
-
6). ゲームのインストール:
-
-
- --- - --- - --- - --- - --- - --- - --- - --- - ----- ----- ----- ---
12. 任意: Void Linux に、「少電力」の設定を追加:
-
runit での「サービス」の使い方の勉強になりました:
-
本来は、ノートパソコンでバッテリを長持ちさせる、少電力に使うツール類ですが、
今回は、CPU バーが振れっ放し?なので、CPU への負荷を減らそうと、インストールしました:
負荷が高くなる原因がわからないので、取りあえず行なった対処です:
-
追記: 変化なしだったので、「ノートパソコン」でないかぎり、設定は要りません:
使うなら、「TLP」の設定は細かすぎて面倒?なので、「powertop」を使うのが簡単そう:
-
-
- --- - --- - --- - --- - --- - --- - --- - --- - ----- ----- ----- ----
12-1. 「TLP」を使った、「少電力」の設定:
-
「TLP」は、少電力のための「コマンドライン」ユーティリティです:
-
1). 「TLP」をインストール:
$ sudo xbps-install -S tlp
:
Name   Action    Version           New version            Download size
hdparm install   -                 9.65_1                 77KB
tlp    install   -                 1.8.0_1                92KB
-
2). runit サービスとして、「TLP」を有効化:
$ sudo ln -sfv /etc/sv/tlp /var/service/
:
'/var/service/tlp' -> '/etc/sv/tlp'
-
3). 確認:
$ sudo sv status tlp
:
run: tlp: (pid 1481) 256s; run: log: (pid 1480) 256s
→実行中です:
-
4). 設定ファイルの確認:
細かすぎて、使いこなすのは大変そう:
-
$ sudo nano /etc/tlp.conf
# ------------------------------------------------------------------------------
# /etc/tlp.conf - TLP user configuration (version 1.8.0)
# See full explanation: https://linrunner.de/tlp/settings
#
# Copyright (c) 2025 Thomas Koch <linrunner at gmx.net> and others.
# SPDX-License-Identifier: GPL-2.0-or-later
#
# Settings are read in the following order:
#
# 1. Intrinsic defaults
# 2. /etc/tlp.d/*.conf - Drop-in customization snippets
# 3. /etc/tlp.conf     - User configuration (this file)
#
# Please note:
# - If parameters are specified more than once, the last occurrence takes
#   precedence. This also means that any parameters defined here will take
#   precedence over any drop-ins.
# - You can however, append values to a parameter already defined as intrinsic
#   default or in a previously read file: use PARAMETER+="add values".
# - Important: all parameters are disabled here. Remove the leading '#' if you
#   want to enable a feature without a default or if you want to set a value
#   other than the default.
# - Parameters must always be specified in pairs, i.e. for AC and BAT.
#   If you omit one of them, the value you set will apply to both power
#   sources, since a change will only occur if different values are defined.
# - To completely disable a parameter, use PARAMETER="".
# Legend for defaults:
# - Default *: intrinsic default that is effective when the parameter is
#   missing or the line has a leading #'.
# - Default <none>: do nothing or use kernel/hardware defaults.
#
# ------------------------------------------------------------------------------
# tlp - Parameters for power saving

# Set to 0 to disable, 1 to enable TLP.
# Default: 1

#TLP_ENABLE=1

# Control how warnings about invalid settings are issued:
#   0=disabled,
#   1=background tasks (boot, resume, change of power source) report to syslog,
#   2=shell commands report to the terminal (stderr),
#   3=combination of 1 and 2
# Default: 3

#TLP_WARN_LEVEL=3

# Colorize error, warning, notice and success messages. Colors are specified
# with ANSI codes:
#   1=bold black, 90=grey, 91=red, 92=green, 93=yellow, 94=blue, 95=magenta,
#   96=cyan, 97=white.
# Other colors are possible, refer to:
#   https://en.wikipedia.org/wiki/ANSI_escape_code#3-bit_and_4-bit
# Colors must be specified in the order "<error> <warning> <notice> <success>".
# By default, errors are shown in red, warnings in yellow, notices in bold
# and success in green.
# Default: "91 93 1 92"

#TLP_MSG_COLORS="91 93 1 92"

# Operation mode when no power supply can be detected: AC, BAT.
# Concerns some desktop and embedded hardware only.
# Default: <none>

#TLP_DEFAULT_MODE=AC

# Operation mode select: 0=depend on power source, 1=always use TLP_DEFAULT_MODE
# Note: use in conjunction with TLP_DEFAULT_MODE=BAT for BAT settings on AC.
# Default: 0

#TLP_PERSISTENT_DEFAULT=0

# Power supply classes to ignore when determining operation mode: AC, USB, BAT.
# Separate multiple classes with spaces.
# Note: try on laptops where operation mode AC/BAT is incorrectly detected.
# Default: <none>

#TLP_PS_IGNORE="BAT"

# Seconds laptop mode has to wait after the disk goes idle before doing a sync.
# Non-zero value enables, zero disables laptop mode.
# Default: 0 (AC), 2 (BAT)

#DISK_IDLE_SECS_ON_AC=0
#DISK_IDLE_SECS_ON_BAT=2

# Dirty page values (timeouts in secs).
# Default: 15 (AC), 60 (BAT)

#MAX_LOST_WORK_SECS_ON_AC=15
#MAX_LOST_WORK_SECS_ON_BAT=60

# Select a CPU scaling driver operation mode.
# Intel CPU with intel_pstate driver:
#   active, passive.
# AMD Zen 2 or newer CPU with amd-pstate driver as of kernel 6.3/6.4(*):
#   active, passive, guided(*).
# Default: <none>
#CPU_DRIVER_OPMODE_ON_AC=active
#CPU_DRIVER_OPMODE_ON_BAT=active

# Select a CPU frequency scaling governor.
# Intel CPU with intel_pstate driver or
# AMD CPU with amd-pstate driver in active mode ('amd-pstate-epp'):
#   performance, powersave(*).
# Intel CPU with intel_pstate driver in passive mode ('intel_cpufreq') or
# AMD CPU with amd-pstate driver in passive or guided mode ('amd-pstate') or
# Intel, AMD and other CPU brands with acpi-cpufreq driver:
#   conservative, ondemand(*), userspace, powersave, performance, schedutil(*).
# Use tlp-stat -p to show the active driver and available governors.
# Important:
#   Governors marked (*) above are power efficient for *almost all* workloads
#   and therefore kernel and most distributions have chosen them as defaults.
#   You should have done your research about advantages/disadvantages *before*
#   changing the governor.
# Default: <none>

#CPU_SCALING_GOVERNOR_ON_AC=powersave
#CPU_SCALING_GOVERNOR_ON_BAT=powersave

# Set the min/max frequency available for the scaling governor.
# Possible values depend on your CPU. For available frequencies see
# the output of tlp-stat -p.
# Notes:
# - Min/max frequencies must always be specified for both AC *and* BAT
# - Not recommended for use with the intel_pstate driver, use
#   CPU_MIN/MAX_PERF_ON_AC/BAT below instead
# Default: <none>

#CPU_SCALING_MIN_FREQ_ON_AC=0
#CPU_SCALING_MAX_FREQ_ON_AC=0
#CPU_SCALING_MIN_FREQ_ON_BAT=0
#CPU_SCALING_MAX_FREQ_ON_BAT=0

# Set CPU energy/performance policies EPP and EPB:
#   performance, balance_performance, default, balance_power, power.
# Values are given in order of increasing power saving.
# Requires:
# * Intel CPU
#   EPP: Intel Core i 6th gen. or newer CPU with intel_pstate driver
#   EPB: Intel Core i 2nd gen. or newer CPU with intel_pstate driver
#   EPP and EPB are mutually exclusive: when EPP is available, Intel CPUs
#   will not honor EPB. Only the matching feature will be applied by TLP.
# * AMD Zen 2 or newer CPU
#   EPP: amd-pstate driver in active mode ('amd-pstate-epp') as of kernel 6.3
# Default: balance_performance (AC), balance_power (BAT)

#CPU_ENERGY_PERF_POLICY_ON_AC=balance_performance
#CPU_ENERGY_PERF_POLICY_ON_BAT=balance_power

# Set Intel CPU P-state performance: 0..100 (%).
# Limit the max/min P-state to control the power dissipation of the CPU.
# Values are stated as a percentage of the available performance.
# Requires Intel Core i 2nd gen. or newer CPU with intel_pstate driver.
# Default: <none>

#CPU_MIN_PERF_ON_AC=0
#CPU_MAX_PERF_ON_AC=100
#CPU_MIN_PERF_ON_BAT=0
#CPU_MAX_PERF_ON_BAT=30

# Set the CPU "turbo boost" (Intel) or "core performance boost" (AMD) feature:
#   0=disable, 1=allow.
# Allows to raise the maximum frequency/P-state of some cores if the
# CPU chip is not fully utilized and below it's intended thermal budget.
# Note: a value of 1 does *not* activate boosting, it just allows it.
# Default: <none>

#CPU_BOOST_ON_AC=1
#CPU_BOOST_ON_BAT=0

# Set CPU dynamic boost feature:
#   0=disable, 1=enable.
# Improve performance by increasing minimum P-state limit dynamically
# whenever a task previously waiting on I/O is selected to run.
# Requires Intel Core i  6th gen. or newer CPU: intel_pstate driver in active mode.
# Note: AMD CPUs currently have no tunable for this.
# Default: <none>

#CPU_HWP_DYN_BOOST_ON_AC=1
#CPU_HWP_DYN_BOOST_ON_BAT=0

# Kernel NMI Watchdog:
#   0=disable (default, saves power), 1=enable (for kernel debugging only).
# Default: 0

#NMI_WATCHDOG=0

# Select platform profile:
#   performance, balanced, low-power.
# Controls system operating characteristics around power/performance levels,
# thermal and fan speed. Values are given in order of increasing power saving.
# Note: check the output of tlp-stat -p to determine availability on your
# hardware and additional profiles such as: balanced-performance, quiet, cool.
# Default: <none>

#PLATFORM_PROFILE_ON_AC=performance
#PLATFORM_PROFILE_ON_BAT=low-power

# System suspend mode:
#   s2idle: Idle standby - a pure software, light-weight, system sleep state,
#   deep: Suspend to RAM - the whole system is put into a low-power state,
#     except for memory, usually resulting in higher savings than s2idle.
# CAUTION: changing suspend mode may lead to system instability and even
# data loss. As for the availability of different modes on your system,
# check the output of tlp-stat -s. If unsure, stick with the system default
# by not enabling this.
# Default: <none>

#MEM_SLEEP_ON_AC=s2idle
#MEM_SLEEP_ON_BAT=deep

# Define disk devices on which the following DISK/AHCI_RUNTIME parameters act.
# Separate multiple devices with spaces.
# Devices can be specified by disk ID also (lookup with: tlp diskid).
# Default: "nvme0n1 sda"

#DISK_DEVICES="nvme0n1 sda"

# Disk advanced power management level: 1..254, 255 (max saving, min, off).
# Levels 1..127 may spin down the disk; 255 allowable on most drives.
# Separate values for multiple disks with spaces. Use the special value 'keep'
# to keep the hardware default for the particular disk.
# Default: 254 (AC), 128 (BAT)

#DISK_APM_LEVEL_ON_AC="254 254"
#DISK_APM_LEVEL_ON_BAT="128 128"

# Exclude disk classes from advanced power management (APM):
#   sata, ata, usb, ieee1394.
# Separate multiple classes with spaces.
# CAUTION: USB and IEEE1394 disks may fail to mount or data may get corrupted
# with APM enabled. Be careful and make sure you have backups of all affected
# media before removing 'usb' or 'ieee1394' from the denylist!
# Default: "usb ieee1394"

#DISK_APM_CLASS_DENYLIST="usb ieee1394"

# Hard disk spin down timeout:
#   0:        spin down disabled
#   1..240:   timeouts from 5s to 20min (in units of 5s)
#   241..251: timeouts from 30min to 5.5 hours (in units of 30min)
# See 'man hdparm' for details.
# Separate values for multiple disks with spaces. Use the special value 'keep'
# to keep the hardware default for the particular disk.
# Default: <none>

#DISK_SPINDOWN_TIMEOUT_ON_AC="0 0"
#DISK_SPINDOWN_TIMEOUT_ON_BAT="0 0"

# Select I/O scheduler for the disk devices.
# Multi queue (blk-mq) schedulers:
#   mq-deadline(*), none, kyber, bfq
# Single queue schedulers:
#   deadline(*), cfq, bfq, noop
# (*) recommended.
# Separate values for multiple disks with spaces. Use the special value 'keep'
# to keep the kernel default scheduler for the particular disk.
# Notes:
# - Multi queue (blk-mq) may need kernel boot option 'scsi_mod.use_blk_mq=1'
#   and 'modprobe mq-deadline-iosched|kyber|bfq' on kernels < 5.0
# - Single queue schedulers are legacy now and were removed together with
#   the old block layer in kernel 5.0
# Default: keep

#DISK_IOSCHED="mq-deadline mq-deadline"

# AHCI link power management (ALPM) for SATA disks:
#   min_power, med_power_with_dipm(*), medium_power, max_performance.
# (*) recommended.
# Multiple values separated with spaces are tried sequentially until success.
# Default: med_power_with_dipm (AC & BAT)

#SATA_LINKPWR_ON_AC="med_power_with_dipm"
#SATA_LINKPWR_ON_BAT="med_power_with_dipm"

# Exclude SATA links from AHCI link power management (ALPM).
# SATA links are specified by their host. Refer to the output of
# tlp-stat -d to determine the host; the format is "hostX".
# Separate multiple hosts with spaces.
# Default: <none>

#SATA_LINKPWR_DENYLIST="host1"

# Runtime Power Management for NVMe, SATA, ATA and USB disks
# as well as SATA ports:
#   on=disable, auto=enable.
# Note: SATA controllers are PCIe bus devices and handled by RUNTIME_PM further
# down.

# Default: on (AC), auto (BAT)

#AHCI_RUNTIME_PM_ON_AC=on
#AHCI_RUNTIME_PM_ON_BAT=auto

# Seconds of inactivity before disk is suspended.
# Note: effective only when AHCI_RUNTIME_PM_ON_AC/BAT is activated.
# Default: 15

#AHCI_RUNTIME_PM_TIMEOUT=15

# Power off optical drive in UltraBay/MediaBay: 0=disable, 1=enable.
# Drive can be powered on again by releasing (and reinserting) the eject lever
# or by pressing the disc eject button on newer models.
# Note: an UltraBay/MediaBay hard disk is never powered off.
# Default: 0

#BAY_POWEROFF_ON_AC=0
#BAY_POWEROFF_ON_BAT=0

# Optical drive device to power off
# Default: sr0

#BAY_DEVICE="sr0"

# Set the min/max/turbo frequency for the Intel GPU.
# Possible values depend on your hardware. For available frequencies see
# the output of tlp-stat -g.
# Default: <none>

#INTEL_GPU_MIN_FREQ_ON_AC=0
#INTEL_GPU_MIN_FREQ_ON_BAT=0
#INTEL_GPU_MAX_FREQ_ON_AC=0
#INTEL_GPU_MAX_FREQ_ON_BAT=0
#INTEL_GPU_BOOST_FREQ_ON_AC=0
#INTEL_GPU_BOOST_FREQ_ON_BAT=0

# AMD GPU power management.
# Performance level (DPM): auto, low, high; auto is recommended.
# Note: requires amdgpu or radeon driver.
# Default: auto

#RADEON_DPM_PERF_LEVEL_ON_AC=auto
#RADEON_DPM_PERF_LEVEL_ON_BAT=auto

# Dynamic power management method (DPM): balanced, battery, performance.
# Note: radeon driver only.
# Default: <none>

#RADEON_DPM_STATE_ON_AC=performance
#RADEON_DPM_STATE_ON_BAT=battery

# Display panel adaptive backlight modulation (ABM) level: 0(off), 1..4.
# Values 1..4 control the maximum brightness reduction allowed by the ABM
# algorithm, where 1 represents the least and 4 the most power saving.
# Notes:
# - Requires AMD Vega or newer GPU with amdgpu driver as of kernel 6.9
# - Savings are made at the expense of color balance
# Default: 0 (AC), 1 (BAT)

#AMDGPU_ABM_LEVEL_ON_AC=0
#AMDGPU_ABM_LEVEL_ON_BAT=3

# Wi-Fi power saving mode: on=enable, off=disable.
# Default: off (AC), on (BAT)

#WIFI_PWR_ON_AC=off
#WIFI_PWR_ON_BAT=on

# Disable Wake-on-LAN: Y/N.
# Default: Y

#WOL_DISABLE=Y

# Enable audio power saving for Intel HDA, AC97 devices (timeout in secs).
# A value of 0 disables, >= 1 enables power saving.
# Note: 1 is recommended for Linux desktop environments with PulseAudio,
# systems without PulseAudio may require 10.
# Default: 1

#SOUND_POWER_SAVE_ON_AC=1
#SOUND_POWER_SAVE_ON_BAT=1

# Disable controller too (HDA only): Y/N.
# Note: effective only when SOUND_POWER_SAVE_ON_AC/BAT is activated.
# Default: Y

#SOUND_POWER_SAVE_CONTROLLER=Y

# PCIe Active State Power Management (ASPM):
#   default(*), performance, powersave, powersupersave.
# (*) keeps BIOS ASPM defaults (recommended)
# Default: <none>

#PCIE_ASPM_ON_AC=default
#PCIE_ASPM_ON_BAT=default

# Runtime Power Management for PCIe bus devices: on=disable, auto=enable.
# Default: on (AC), auto (BAT)

#RUNTIME_PM_ON_AC=on
#RUNTIME_PM_ON_BAT=auto

# Exclude listed PCIe device adresses from Runtime PM.
# Note: this preserves the kernel driver default, to force a certain state
# use RUNTIME_PM_ENABLE/DISABLE instead.
# Separate multiple addresses with spaces.
# Use lspci to get the adresses (1st column).
# Default: <none>

#RUNTIME_PM_DENYLIST="11:22.3 44:55.6"

# Exclude PCIe devices assigned to the listed drivers from Runtime PM.
# Note: this preserves the kernel driver default, to force a certain state
# use RUNTIME_PM_ENABLE/DISABLE instead.
# Separate multiple drivers with spaces.
# Default: "mei_me nouveau radeon xhci_hcd", use "" to disable completely.

#RUNTIME_PM_DRIVER_DENYLIST="mei_me nouveau radeon xhci_hcd"

# Permanently enable/disable Runtime PM for listed PCIe device addresses
# (independent of the power source). This has priority over all preceding
# Runtime PM settings. Separate multiple addresses with spaces.
# Use lspci to get the adresses (1st column).
# Default: <none>

#RUNTIME_PM_ENABLE="11:22.3"
#RUNTIME_PM_DISABLE="44:55.6"

# Set to 0 to disable, 1 to enable USB autosuspend feature.
# Default: 1

#USB_AUTOSUSPEND=1

# Exclude listed devices from USB autosuspend (separate with spaces).
# Use lsusb to get the ids.
# Note: input devices (usbhid) and libsane-supported scanners are excluded
# automatically.
# Default: <none>

#USB_DENYLIST="1111:2222 3333:4444"

# Exclude audio devices from USB autosuspend:
#   0=do not exclude, 1=exclude.
# Default: 1

#USB_EXCLUDE_AUDIO=1

# Exclude bluetooth devices from USB autosuspend:
#   0=do not exclude, 1=exclude.
# Default: 0

#USB_EXCLUDE_BTUSB=0

# Exclude phone devices from USB autosuspend:
#   0=do not exclude, 1=exclude (enable charging).
# Default: 0

#USB_EXCLUDE_PHONE=0

# Exclude printers from USB autosuspend:
#   0=do not exclude, 1=exclude.
# Default: 1

#USB_EXCLUDE_PRINTER=1

# Exclude WWAN devices from USB autosuspend:
#   0=do not exclude, 1=exclude.
# Default: 0

#USB_EXCLUDE_WWAN=0

# Allow USB autosuspend for listed devices even if already denylisted or
# excluded above (separate with spaces). Use lsusb to get the ids.
# Default: 0

#USB_ALLOWLIST="1111:2222 3333:4444"

# Restore radio device state (Bluetooth, WiFi, WWAN) from previous shutdown
# on system startup: 0=disable, 1=enable.
# Note: the parameters DEVICES_TO_DISABLE/ENABLE_ON_STARTUP/SHUTDOWN below
# are ignored when this is enabled.
# Default: 0

#RESTORE_DEVICE_STATE_ON_STARTUP=0

# Radio devices to disable on startup: bluetooth, nfc, wifi, wwan.
# Separate multiple devices with spaces.
# Default: <none>

#DEVICES_TO_DISABLE_ON_STARTUP="bluetooth nfc wifi wwan"

# Radio devices to enable on startup: bluetooth, nfc, wifi, wwan.
# Separate multiple devices with spaces.
# Default: <none>

#DEVICES_TO_ENABLE_ON_STARTUP="wifi"

# Radio devices to enable on AC: bluetooth, nfc, wifi, wwan.
# Default: <none>

#DEVICES_TO_ENABLE_ON_AC="bluetooth nfc wifi wwan"

# Radio devices to disable on battery: bluetooth, nfc, wifi, wwan.
# Default: <none>

#DEVICES_TO_DISABLE_ON_BAT="bluetooth nfc wifi wwan"

# Radio devices to disable on battery when not in use (not connected):
#   bluetooth, nfc, wifi, wwan.
# Default: <none>

#DEVICES_TO_DISABLE_ON_BAT_NOT_IN_USE="bluetooth nfc wifi wwan"

# Battery Care -- Charge thresholds
# Charging starts when the charger is connected and the charge level
# is below the start threshold. Charging stops when the charge level
# is above the stop threshold.
# Required hardware: Lenovo ThinkPads and other laptop brands are driven
#   via specific plugins:
# - Use the tlp-stat -b command to see if a plugin for your hardware is
#   active and to look up vendor-specific threshold values. Some
#   laptops support only 1 (on)/0 (off) instead of a percentage level.
# - If your hardware supports a start *and* a stop threshold, you must
#   specify both, otherwise TLP will refuse to apply the single threshold.
# - If your hardware supports only a stop threshold, set the start
#   value to 0.
# - The names of the batteries shown by tlp-stat -b don't have to match
#   the _BAT0 or _BAT1 parameter qualifiers. Please refer to [2]
#   to see which qualifier applies to which battery.
# For further explanation and all vendor specific details refer to
# [1] https://linrunner.de/tlp/settings/battery.html
# [2] https://linrunner.de/tlp/settings/bc-vendors.html

# BAT0: Main battery
# Default: <none>

# Battery charge level below which charging will begin.
#START_CHARGE_THRESH_BAT0=75
# Battery charge level above which charging will stop.
#STOP_CHARGE_THRESH_BAT0=80

# BAT1: Secondary battery (primary on some laptops)
# Default: <none>

# Battery charge level below which charging will begin.
#START_CHARGE_THRESH_BAT1=75
# Battery charge level above which charging will stop.
#STOP_CHARGE_THRESH_BAT1=80

# Restore charge thresholds when AC is unplugged: 0=disable, 1=enable.
# Default: 0

#RESTORE_THRESHOLDS_ON_BAT=1

# ------------------------------------------------------------------------------
# tlp-rdw - Parameters for the radio device wizard

# Possible devices: bluetooth, wifi, wwan.
# Separate multiple radio devices with spaces.
# Default: <none> (for all parameters below)

# Radio devices to disable on connect.

#DEVICES_TO_DISABLE_ON_LAN_CONNECT="wifi wwan"
#DEVICES_TO_DISABLE_ON_WIFI_CONNECT="wwan"
#DEVICES_TO_DISABLE_ON_WWAN_CONNECT="wifi"

# Radio devices to enable on disconnect.

#DEVICES_TO_ENABLE_ON_LAN_DISCONNECT="wifi wwan"
#DEVICES_TO_ENABLE_ON_WIFI_DISCONNECT=""
#DEVICES_TO_ENABLE_ON_WWAN_DISCONNECT=""

# Radio devices to enable/disable when docked.

#DEVICES_TO_ENABLE_ON_DOCK=""
#DEVICES_TO_DISABLE_ON_DOCK=""

# Radio devices to enable/disable when undocked.

#DEVICES_TO_ENABLE_ON_UNDOCK="wifi"
#DEVICES_TO_DISABLE_ON_UNDOCK=""
[vagrant@voidlinux ~]$
バッテリ使用時と、AC電源接続時で、異なるプロファイルをカスタマイズできます:
→予想していましたが、バーグラフに変化はありません:
-
余計に負荷が増えたかな。
-
-
- --- - --- - --- - --- - --- - --- - --- - --- - ----- ----- ----- -----
12-2. 「TLP」の停止と削除:
-
runit での「サービス」の使い方の勉強になりました:
-
1). サービスの確認:
$ sudo sv status tlp
:
run: tlp: (pid 667) 72s; run: log: (pid 666) 72s
→実行中です:
-
2). 一時的にサービスを停止
$ sudo sv down tlp
サービスを監視している runsv プロセスに、サービスを停止するよう指示します
-
サービスの確認:
$ sudo sv status tlp
:
down: tlp: 14s, normally up; run: log: (pid 666) 124s
-
3). 停止したサービスの再開:
$ sudo sv up tlp
-
サービスの確認:
$ sudo sv status tlp
:
run: tlp: (pid 2844) 21s; run: log: (pid 666) 177s
-
4). 再起動後も自動的に起動しないようにしたい場合
-
4a). サービスのディレクトリに、down という名前の空ファイルを作成する場合:
-
ファイルの確認:
$ sudo ls -1p /etc/sv/tlp/
:
finish
log/
run
supervise
-
確認:
$ sudo sv status tlp
:
run: tlp: (pid 2844) 1485s; run: log: (pid 666) 1641s
-
起動の禁止:
空の「down」ファイルを作成:
$ sudo touch /etc/sv/tlp/down
-
確認:
$ sudo sv status tlp
:
run: tlp: (pid 2844) 1535s, normally down; run: log: (pid 666) 1691s
→「tlp」はサービス名です:
-
再起動:
[vagrant@voidlinux ~]$ sudo reboot
[vagrant@voidlinux ~]$ Connection to 127.0.0.1 closed by remote host.
ubn@ubnbox:~/ダウンロード/vm/void$
-
$ vagrant status
:
Current machine states:
default                   running (virtualbox)
-
$ vagrant ssh
:
Last login: Wed Oct 22 00:44:29 2025 from 10.0.2.2
[vagrant@voidlinux ~]$
-
$  sudo sv status tlp
:
down: tlp: 49s; run: log: (pid 653) 49s
→停止しています:
-
4b). サービスへのシンボリックリンクを削除する場合:
確認:
$ ls /var/service/
:
NetworkManager  agetty-tty3  agetty-tty6  elogind  tlp
agetty-tty1     agetty-tty4  dbus         lightdm  udevd
agetty-tty2     agetty-tty5  dhcpcd       sshd     vboxservice
-
$ ls -l /var/service/ | grep tlp
:
lrwxrwxrwx 1 root root 11 10月 21 22:57 tlp -> /etc/sv/tlp
-
$ ls /etc/sv/tlp
:
down  finish  log  run  supervise
-
リンクを削除:
$ sudo rm /var/service/tlp
→「tlp」はサービス名です:
-
確認:
$ ls /etc/sv/tlp
down  finish  log  run  supervise
→実体あり:
-
$ ls -l /var/service/ | grep tlp
$
→リンクなし:
-
5). 「TLP」の削除:
$ sudo xbps-remove tlp
:
Name Action    Version           New version            Download size
tlp  remove    1.8.0_1           -                      -
-
確認:
$ ls /etc/sv/tlp
down
→追加した「down」ファイルがあったので、「tlp」フォルダが削除されず残りました:
-
フォルダの削除:
$ sudo rm -r /etc/sv/tlp
-
確認:
$ ls /etc/sv/tlp
:
ls: '/etc/sv/tlp' にアクセスできません: そのようなファイルやディレクトリはありません
-
-
- --- - --- - --- - --- - --- - --- - --- - --- - ----- ----- ----- ----- -
12-3. 「Powertop」を使った設定:
-
「Powertop」は、電力消費を測定し、最小化するためのユーティリティです:
「TLP」と併用とか、「TLP」の代替として使用できます:
-
1). 「powertop」をインストール:
$ sudo xbps-install -S powertop
:
Name     Action    Version           New version            Download size
powertop install   -                 2.15_2                 235KB
-
2). システム起動時に「自動チューニングを適用する」設定にします:
$ sudo nano /etc/rc.local
↓ 下記の行を追記:
powertop --auto-tune
-
3). 確認:
$ cat /etc/rc.local
#!/bin/sh
# Default rc.local for void; add your custom commands here.
#
# This is run by runit in stage 2 before the services are executed
# (see /etc/runit/2).
powertop --auto-tune
-
4). 再起動:
[vagrant@voidlinux ~]$ exit
ログアウト
ubn@ubnbox:~/ダウンロード/vm/void$
-
$ vagrant halt
==> default: Attempting graceful shutdown of VM...
ubn@ubnbox:~/ダウンロード/vm/void$
-
$ vagrant up
→予想していましたが、バーグラフに変化はありません:
-
余計に負荷が増えたかな。
-
-
- --- - --- - --- - --- - --- - --- - --- - --- - ----- ----- ----- ----- --
12-4. 「Powertop」の停止と削除:
-
サービスではないので、単に削除するだけです:
-
1). 「powertop」の停止:
-
(1). 設定フィルから、「powertop」の行を削除するか、コメント化:
$ sudo nano /etc/rc.local
↓ 下記の行を削除、もしくは、行頭に「#」を付けてコメントにします:
powertop --auto-tune
-
(2). 確認:
$ cat /etc/rc.local
#!/bin/sh
# Default rc.local for void; add your custom commands here.
#
# This is run by runit in stage 2 before the services are executed
# (see /etc/runit/2).
和訳:
void のデフォルトの「rc.local」には、カスタム コマンドを追加します。
これは、サービスが実行される前の「ステージ 2」で、runit によって実行されます。
(/etc/runit/2 を参照)
-
(3). 参考: 「runit」のしくみ:
確認:
$ ls -1p /etc/runit/
:
1
2
3
core-services/
crypt.awk
ctrlaltdel
functions
reboot
runsvdir/
shutdown.d/
stopit
-
$ cat /etc/runit/1
#!/bin/sh
# vim: set ts=4 sw=4 et:

PATH=/usr/bin:/usr/sbin

. /etc/runit/functions

msg "Welcome to Void!"

[ -r /etc/rc.conf ] && . /etc/rc.conf

# Start core services: one-time system tasks.
detect_container
for f in /etc/runit/core-services/*.sh; do
    [ -r $f ] && . $f
done

msg "Initialization complete, running stage 2..."
-
$ cat /etc/runit/2
#!/bin/sh
# vim: set ts=4 sw=4 et:

PATH=/usr/bin:/usr/sbin

runlevel=default
for arg in $(cat /proc/cmdline); do
    if [ -d /etc/runit/runsvdir/"$arg" ]; then
        echo "Runlevel detected: '$arg' (via kernel cmdline)"
        runlevel="$arg"
    fi
done

[ -x /etc/rc.local ] && /etc/rc.local

runsvchdir "${runlevel}"
mkdir -p /run/runit/runsvdir
ln -s /etc/runit/runsvdir/current /run/runit/runsvdir/current

exec env - PATH=$PATH \
    runsvdir -P /run/runit/runsvdir/current 'log: ...........................................................................................................................................................................................................................................................................................................................................................................................................'
-
$ cat /etc/runit/3
#!/bin/sh
# vim: set ts=4 sw=4 et:

PATH=/usr/bin:/usr/sbin

. /etc/runit/functions
detect_container
[ -r /etc/rc.conf ] && . /etc/rc.conf
echo
for f in /etc/runit/shutdown.d/*.sh; do
    [ -r $f ] && . $f
done
-
(4). 再起動:
[vagrant@voidlinux ~]$ exit
ログアウト
ubn@ubnbox:~/ダウンロード/vm/void$
-
$ vagrant halt
==> default: Attempting graceful shutdown of VM...
ubn@ubnbox:~/ダウンロード/vm/void$
-
$ vagrant up
-
2). 「powertop」の削除:
$ sudo xbps-remove powertop
:
Name     Action    Version           New version            Download size
powertop remove    2.15_2            -                      -
-
再起動:
[vagrant@voidlinux ~]$ exit
ログアウト
ubn@ubnbox:~/ダウンロード/vm/void$
-
$ vagrant halt
==> default: Attempting graceful shutdown of VM...
ubn@ubnbox:~/ダウンロード/vm/void$
-
$ vagrant up
-
-
- --- - --- - --- - --- - --- - --- - --- - --- - ----- ----- ----- ----- ---
13. 気づいたこと:
-
1). 以前に、「Xfce」のイメージからインストールした「Void Linux」は:
→なぜか、システムの起動も、Firefox ブラウザの起動も遅かったです:
→「Guest Additions」をインストールしたら、「解像度の自動調整」も、「クリップボードの共有」機能も使えませんでした:
-
2). 今回、Vagrant で作成した「Void Linux」は:
- (ホストOS の端末で)ssh 接続するので、「クリップボードの共有」機能は(そもそも)要りません:

- (成功率の高い)プラグインの機能で「Guest Additions」が自動インストールされたからか、
 「解像度の自動調整」も、「クリップボードの共有」機能も、「共有フォルダ」の機能も使えます:

- そして、「システムの起動」も、「Firefox ブラウザの起動」も「3~4 秒」で立ち上がります。速くなりました:
-
3). それらの違いは、
- UEFI 立ち上げだったのが、BIOS 立ち上げです:
- コンソール画面までのインストールで、ssh 接続で、「Xfce」を手動で(パッケージ少なめで)インストールしました:
- 成功率の高い「プラグイン」機能で、「Guest Additions」が自動インストールされました:
- もしかしたら、「VirtualBox 7.2.2」にアップしたことも影響(不具合の改善?)したかも:
→余計なものをインストールしていないことと、「Guest Additions」がうまくインストールされたことが大きいかも:
-
4). 気になるのは、「仮想マシン」画面の右下の「赤いバーが振れっ放し」なこと:
→「負荷が高い」状態みたい。対処療法ですが、「項番 10.」で、少電力の設定を追加しました:
-
5). 「項番 4).」の「CPU 高負荷」の原因を調べてみる:
-
(1). htop をインストール:
$ sudo xbps-install -S htop
:
ERROR: Package `htop' already installed.
→インストール済でした:
-
(2). 「htop」または「top」を実行:
CPU使用率が高いプロセスがリストの上位に表示されます:
-
$ top
→「q」で終了:
-
$ htop
→「q」で終了:
-
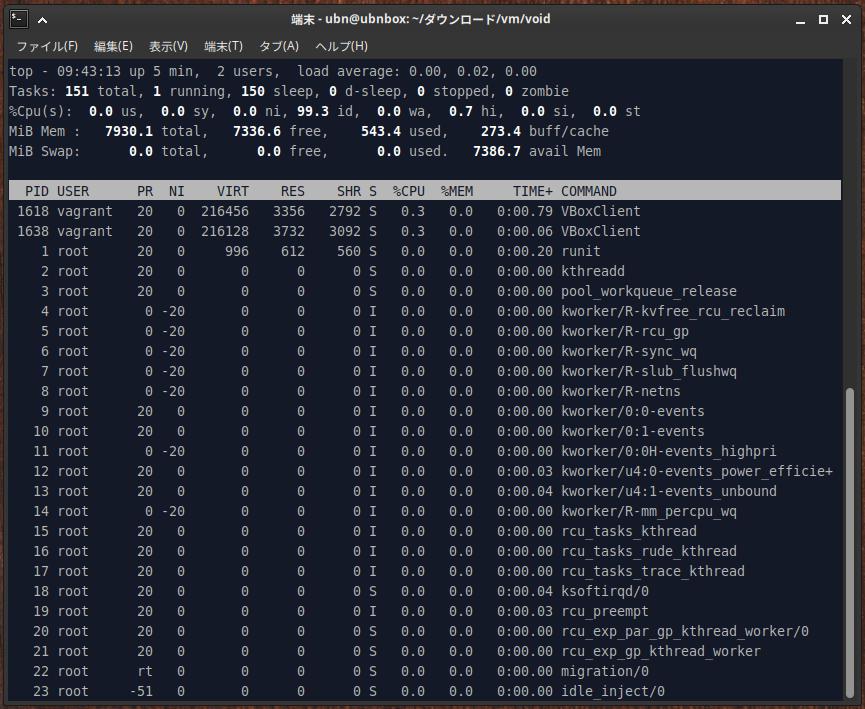
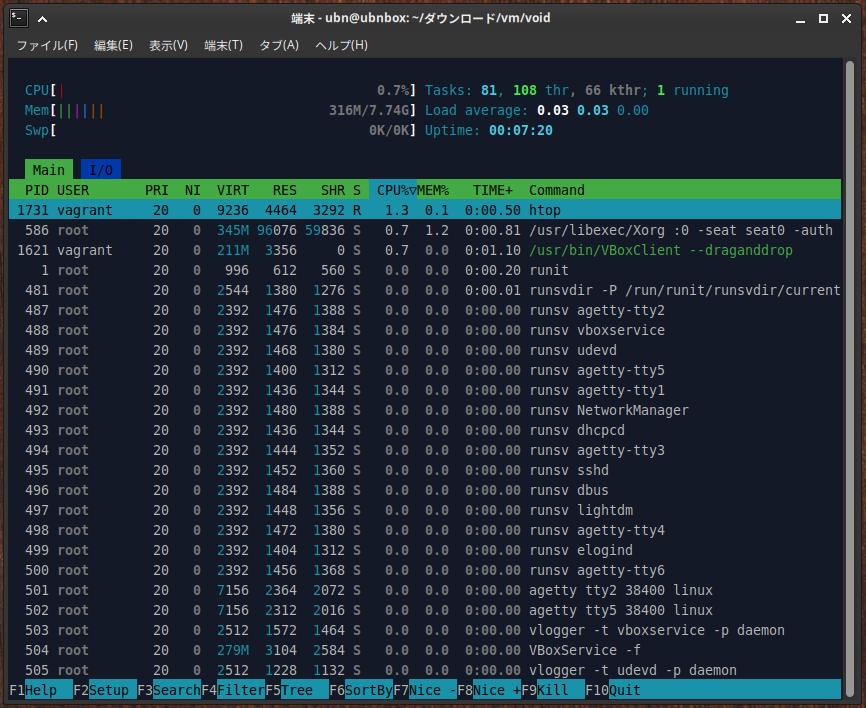
(3).どのプロセス(例:firefox、dbus-daemon)が CPU を最も消費しているかを確認:
アイドル時でも CPU 使用率が高い場合、バックグラウンドで不要なサービスが動作している可能性があります
「VBoxService」や「VBoxClient」が負荷が高いみたい:
→「%CPU」の値を見ると、大したことはありません。それほど、異常というわけではないみたい:
これが「Guest Additions」のクライアントが正常に動いている証拠かも:
-
-
- --- - --- - --- - --- - --- - --- - --- - --- - ----- ----- ----- ----- ----
14. 追記: システムの起動と、「Firefox」ブラウザの立ち上げが遅くなる、原因が判明しました:
-
「こちら」を参照:
-
今回は、「Vagrant」でインストールしたため、たまたま、
(1). 「仮想マシン」の設定が「3D アクセラレーションを有効化」のチェックが外れていて、「VMSVGA」以外の設定だったから:
-
また、「Guest Additions」が有効になったのは、その後、
(2). GUI 表示させるため、設定を変更したから:
(3). つまり、たまたま(エラーを回避する)条件が重なったわけです:
-
これらの条件をクリアして、「仮想マシン」を作成するには、工夫が必要です:
-
-
まとめ
今回は、前回の〈H175-8〉でインストールした、最新の「Vagrant 2.4.9」で、最新の「VirtualBox 7.2.2」の「仮想マシン」が作成できるか確認しました。
-
この組み合わせだと、スムーズに移行でき、正常に動作しました。
-
「仮想マシン」に使った「Void Linux」は、「コンソール」画面の「ログイン待ち」までなら、あっという間に、起動され、
その環境で、「Void Linux」に「デスクトップ環境」をインストールしたところ、
「デスクトップ」表示や、「Firefox」の起動は、あっという間で、素早く立ち上がりました:
また、プラグインで自動でインストールされた「Guest Additions」の機能も有効です:
-
「Vagrant」で仮想マシンを作成したことで(たまたま、エラー条件をすり抜け)、使いやすい環境が作成できました。
-
-
その後ですが、 前回遅かった原因が判明しました。
-
せっかく原因がわかったので、それを加味して、「デスクトップ環境」なしの iso イメージで、「Void Linux」と「デスクトップ環境」をインストールして、「Guest Additions」の機能が有効にできないか、(以降の投稿で)試してみたいと思います。
-
-
-
-
-
目次
-
-
- 目次
- - --- - --- - --- - --- - --- - --- - --- - --- - -
- Xubuntu 24.04 LTS の立ち上げ:
- - --- - --- - --- - --- - --- - --- - --- - --- - --
- 「Xubuntu」について:
- - --- - --- - --- - --- - --- - --- - --- - --- - ---
- 「VirtualBox」について:
- - --- - --- - --- - --- - --- - --- - --- - --- - ----
- 「Vagrant」について:
- - --- - --- - --- - --- - --- - --- - --- - --- - -----
- 現在のOS のバージョンを表示:
- - --- - --- - --- - --- - --- - --- - --- - --- - ----- -
- (前回の続き:)
- - --- - --- - --- - --- - --- - --- - --- - --- - ----- --
- 1. 「Vagrant」の状態を確認:
- - --- - --- - --- - --- - --- - --- - --- - --- - ----- ---
- 2. 「Vagrant 2.4.9」の確認に、Vagrant にて、「仮想マシン」を作成して動作を確認:
- - --- - --- - --- - --- - --- - --- - --- - --- - ----- ----
- 3. 仮想マシンの(初回の作成と)立ち上げで、エラー:
- - --- - --- - --- - --- - --- - --- - --- - --- - ----- -----
- 4. 「仮想マシン」の立ち上げ時のエラーに対応:
- 1). 「仮想マシン」を立ち上げ:
- 2). ssh 接続:
- 3). ssh 接続できたので、「システム更新」してみました:
- 4). デフォルトの「リポジトリの設定ファイル」の場所を検索:
- 5). デフォルトの「リポジトリの設定ファイル」を表示:
- 6). 調子が良い(ことが判明している)「ミラー」に設定:
- 7). リポジトリの同期:
- 8). 登録されている、リポジトリを確認:
- 9). パッケージの更新:
- 10). 「xbps」の更新:
- 11). パッケージの更新:
- 12). ssh 接続を抜けました:
- 13). 「仮想マシン」の電源オフ:
- 14). 「仮想マシン」の電源オン:
- 15). 「仮想マシン」は立ち上がっていますが、
- - --- - --- - --- - --- - --- - --- - --- - --- - ----- ----- -
- 5. 仮想マシンで「GUI」を表示する設定に変更:
- - --- - --- - --- - --- - --- - --- - --- - --- - ----- ----- --
- 6. 「GUI」を使えるように、「仮想マシン」の設定を見直し:
- - --- - --- - --- - --- - --- - --- - --- - --- - ----- ----- ---
- 7. 「Xfce」デスクトップ環境をインストール:
- 1). 「仮想マシン」の電源オン:
- 2). ssh 接続:
- 3). システム更新:
- 4). 参考:「dbus」のインストール:
- 5). 「dbus」の有効化:
- 6). 「Xorg」のインストール:
- 7). 「Xfce4」、「Xfce4 プラグイン」のインストール:
- 8). 「LightDM」のインストール:
- 9). 「LightDM」の有効化:
- 10). 「ネットワークマネージャ」のインストール:
- 11). 「ネットワークマネージャ」の有効化:
- 12). 「ネットワーク アプレット」のインストール:
- 13). 「pulseaudio」のインストール:
- 14). 「firefox-esr」ブラウザのインストール:
- 15). 再起動:
- - --- - --- - --- - --- - --- - --- - --- - --- - ----- ----- ----
- 8. 「その他の「ツール」のインストール:
- - --- - --- - --- - --- - --- - --- - --- - --- - ----- ----- -----
- 9. 「Void Linux」の日本語化:
- - --- - --- - --- - --- - --- - --- - --- - --- - ----- ----- ----- -
- 10. 「タイムゾーン」を日本に変更:
- - --- - --- - --- - --- - --- - --- - --- - --- - ----- ----- ----- --
- 11. 残りの設定:
- - --- - --- - --- - --- - --- - --- - --- - --- - ----- ----- ----- ---
- 12. 任意: Void Linux に、「少電力」の設定を追加:
- - --- - --- - --- - --- - --- - --- - --- - --- - ----- ----- ----- ----
- 12-1. 「TLP」を使った、「少電力」の設定:
- - --- - --- - --- - --- - --- - --- - --- - --- - ----- ----- ----- -----
- 12-2. 「TLP」の停止と削除:
- - --- - --- - --- - --- - --- - --- - --- - --- - ----- ----- ----- ----- -
- 12-3. 「Powertop」を使った設定:
- - --- - --- - --- - --- - --- - --- - --- - --- - ----- ----- ----- ----- --
- 12-4. 「Powertop」の停止と削除:
- - --- - --- - --- - --- - --- - --- - --- - --- - ----- ----- ----- ----- ---
- 13. 気づいたこと:
- - --- - --- - --- - --- - --- - --- - --- - --- - ----- ----- ----- ----- ----
- 14. 追記: システムの起動と、「Firefox」ブラウザの立ち上げが遅くなる、原因が判明しました:
- まとめ
- -
-
-
-