登録日: 2023-12-12 更新日: 2024-03-14
「Xubuntu 22.04 LTS」および「Windows11」(22H2) の「VirtualBox 7.0」の仮想マシンに、色々なLinux ディストリビューションをインストールして、自分に最適なものはないか試しています。
開発環境では、それらの仮想マシン(ボックス)の管理に「Vagrant」(ベイグラント) というツールが、よく使われています。
-
(実践編1):
今回は「Xubuntu 22.04.3 LTS」の「VirtualBox 7.0.10」にて、「Vagrant」を使えるようにした後に、
「Vagrant」で実際に Ubuntu 22.04(デスクトップ) の「仮想マシン」を作成、 および、その「Box」を共有してみました。
その備忘録です。
-
-
(注)リンクを戻るときはブラウザの左上の「←」をクリック
スマホの場合は、「ホーム」ボタンの横の「<」キーをタップ
-
-
目次
-
参考:
-
今回の作業:
-
追加の作業:
-
問題点の回避策:
-
-
-
- --- - --- - --- - --- - --- - --- - --- - --- - -
「Xubuntu 22.04 LTS」を起動:
-
「VirtualBox 7.0.10」の仮想マシン「Ubuntu 22.04」(デスクトップ有り)を「Vagrant」で起動:

→ホストの「Xubuntu 22.04 LTS」の端末で「vagrant up」と入力するだけで起動しています。
ちなみに、「VirtualBox マネージャ」は起動していません。
-
「VirtualBox マネージャ」を起動:

→「Vagrant」で管理されている「仮想マシン」の名前に注目(「default」が含まれます)。
「Vagrant」で管理されていますが、「VirtualBox マネージャ」で「仮想マシン」の状態を確認したり、いつも通りの管理が可能です。
-
上記の「仮想マシン」をカスタマイズ:
→壁紙を変えて、ドックのアイコンを小さくして、画面半分のサイズに拡大
システム更新後、アプリを追加しています。
こちらの「仮想マシン」を「項番 9. 」で「共有」してみました。
-
-
- --- - --- - --- - --- - --- - --- - --- - --- - --
「VirtualBox」について:
-
「VirtualBox」は、Oracle が開発している「仮想マシン」を構築するためのソフトウェアです。
-
- 仮想マシンを使うことで、ハードウェアで問題となりそうなPC でも、最新のLinux ディストリビューションをインストールできる可能性が高くなります。
-
-
- --- - --- - --- - --- - --- - --- - --- - --- - ---
「Vagrant」 (ベイグラント) について:
-
公式サイト:
-
「仮想マシン」の管理や操作をコマンドで使うための「フロントエンド」のソフトウェアです:
-
→詳細は、前回に投稿の「こちら 」を参照:
-
-
- --- - --- - --- - --- - --- - --- - --- - --- - ----
1. 事前に、Vagrant で使う「Box」を検索:
-
検索は、「vagrant box add」や「vagrant init」前であれば、いつでも良いです:
-
公式のVagrant の「Box」の公開サイト:
→「Vagrant cloud」に「Box」は保存されています:
-
デフォルトは「ダウンロード数」でのソートなので、ダウンロードが 1番多い「Box」が 1番上に来ます:
「ダウンロード数」が多いということは、検証されていて、怪しいときは削除される?と思うので、少し安心。
-
「検索キー」の入れ方で、微妙に、表示される「Box」が変わります:
-
1). 「ubuntu22」で検索:
-
-- -- -- -- -- -- -- -- -- -- -- -- -- -- -- -- -- -- -- -- -- -- -- --
(a).「generic/ubuntu2204」v4.3.6
クロスプラットフォーム開発で使用するためのビルド環境:
hyperv           Vagrant Cloud (1.46 GB)
libvirt          Vagrant Cloud (1.57 GB)
parallels        Vagrant Cloud (1.69 GB)
virtualbox       Vagrant Cloud (1.57 GB)
vmware_desktop   Vagrant Cloud (1.41 GB)
→ 1番ダウンロード数が多いです。登録が「Vagrant Cloud」なので安心かな。
「デスクトップ環境」なしと思うけど、開発ツールが入っているのか、サイズが大きめ?。
もしかしたら「デスクトップ環境」ありかも?。インストールしないとわかりません。
-
2). 「ubuntu22 desk」で検索:
-
-- -- -- -- -- -- -- -- -- -- -- -- -- -- -- -- -- -- -- -- -- -- -- --
(b).「fasmat/ubuntu2204-desktop」v22.0509.1
This version was created over 1 year ago. ←( 1年以上前に作成: ここが悩むところ)
Ubuntu Desktop 22.04 Jammy Jellyfish (64-bit)
VirtualBox Guest Additions v6.1.34
virtualbox       Vagrant Cloud (1.49 GB)
vmware_desktop   Vagrant Cloud (1.49 GB)
→「デスクトップ」環境あり。登録が「Vagrant Cloud」で、毎回アップの常連さんです。
サイズの表示もあり。デスクトップ環境であればこんなものかな。
-
-- -- -- -- -- -- -- -- -- -- -- -- -- -- -- -- -- -- -- -- -- -- -- --
(c). 「nercceh/ubuntu22.04-desktop」4.0.3
Puppet とさまざまな開発者ツールがプリインストールされた Ubuntu 22.04 デスクトップ
virtualbox       外部ホスト (dist.nerc-lancaster.ac.uk)  サイズ不明
vmware_desktop   外部ホスト (dist.nerc-lancaster.ac.uk)  サイズ不明
→「デスクトップ」環境は、Ubuntu 純正の「Gnome」でした。
-
登録が「外部サーバー」だとセキュリティ面では不利です:
→(Lancaster University) は、リビジョンごとに毎回アップの常連さんなので安心かな。
-
「外部サーバー」だと サイズが表示されません:
→ダウンロードしたら、2.7 GiB
(気に入るかわからない)開発者ツールがすでに入っている のがポイント。
サイズが大きくなりますが、もしかしたら、使い勝手が良くて便利かも。
-
3). 個人で使うには「デスクトップ環境」があると便利。とりあえず「nercceh/ubuntu22.04-desktop」を選びました:
→Vagrant の「Box」は開発環境での使用が多く、ほとんどが「デスクトップ環境」なし、だろうと思います:
ただし、Ubuntu はデスクトップありが普通なので、desktop や、server が「Box」名に付いていない場合は、「デスクトップ環境」ありの場合もあるかも。試して見ないとわかりません。
-
削除は簡単なので、3つとも確認してみたいところ:
「Box」と「仮想マシン」の削除のやり方は、 「項番 9-2. の11). 」を参照:
-
-
- --- - --- - --- - --- - --- - --- - --- - --- - -----
2. 「Xubuntu 22.04 LTS」にて、「VirtualBox」をインストール:
-
「.deb」ファイルをダウンロードして、最新の「VirtualBox 7.0.10」がすでにインストール済みです:
-
インストールしたときの手順は「こちら 」:
→「VirtualBox」の「アップデート」手順ですが、「新規インストール」の手順も同じです:
-
内容:
(1). 「VirtualBox」のインストール:
(2). 「VirtualBox Extension」のインストール:
-
-
- --- - --- - --- - --- - --- - --- - --- - --- - ----- -
3. ホストOS に「Vagrant」をインストール:
-
追記:
「Vagrant」をインストールするときは、「VirtualBox」とのバージョンの整合に注意:
-
- apt でインストールした「Vagrant」のバージョンだと、最新の「VirtualBox 7.0」はサポートされていませんでした。
-
- 最新の「VirtualBox」(7.0) をインストールした場合は、最新の「Vagrant」をインストールすると良いです:
→「VirtualBox 7.0」をサポートしている可能性が高いです。
-
apt でインストールされる「Vagrant 2.2.19」は、「VirtualBox 6.1」までのサポートです:
apt でインストールした場合、「VirtualBox 6.1」なので、「Vagrant」をapt でインストールして良いです。
-
参考: apt でインストールされるバージョン:
「Xubuntu 22.04.3 LTS」にて確認:
2023-12-02 現在:
-
$ apt list virtualbox -a
:
virtualbox/jammy-updates 6.1.38-dfsg-3~ubuntu1.22.04.1 amd64
virtualbox/jammy 6.1.32-dfsg-1build1 amd64
→apt でインストールされる「virtualbox」のバージョンは「6.1.38」
-
$ apt list vagrant -a
:
vagrant/jammy,jammy 2.2.19+dfsg-1ubuntu1 amd64
→apt でインストールされる「vagrant」のバージョンは「2.2.19」
-
-
- --- - --- - --- - --- - --- - --- - --- - --- - ----- --
3-a. 参考: 最新の「VirtualBox 7.0」の環境で、(楽をしようと)apt で「Vagrant」をインストール:
-
失敗例なので、確認だけにしてください:
-
「Vagrant」が「VirtualBox 7.0」をサポートしておらず、「仮想マシン」の作成で「失敗」しました
ちなみに、「VirtualBox 6.1」の環境であれば 、apt で「Vagrant」をインストールして使えます
-
-
参考:( ↓ 以下は、楽をしようとして、失敗した手順です)
-
1). 「VirtualBox」のインストールを確認:
$ apt list virtualbox -a | grep 済
$
→apt でのインストールなし。
-
$ apt list virtualbox* -a | grep 済
:
virtualbox-7.0/now 7.0.10-158379~Ubuntu~jammy amd64 [インストール済み、ローカル]
→手動(ダウンロード)でインストールされています。
(最新の)「.deb」パッケージをダウンロードしてインストールしたので、「ローカル」の表示があります。
-
パッケージ名が「virtualbox」ではなく、「virtualbox-7.0」であることに注目:
(7.0 が主流になれば、「virtualbox」になるはずです)
-
2). (楽をしようと)apt で「Vagrant」をインストールしました:
$ sudo apt update
$ sudo apt install vagrant
以下のパッケージが新たにインストールされます:
  attr augeas-lenses bsdmainutils btrfs-progs cryptsetup-bin db-util
  db5.3-util debootstrap exfatprogs extlinux f2fs-tools finalrd gawk
  guestfish guestfs-tools guestmount hfsplus icoutils keyutils kpartx
  ldmtool libafflib0v5 libarchive-tools libaugeas0 libbfio1 libconfig9
  libdate-manip-perl libevent-core-2.1-7 libewf2 libguestfs-hfsplus
  libguestfs-perl libguestfs-reiserfs libguestfs-tools libguestfs-xfs
  libguestfs0 libhfsp0 libhivex0 libinih1 libintl-perl libintl-xs-perl
  libldm-1.0-0 libnetpbm10 libnfsidmap1 librpm9 librpmio9 libsigsegv2
  libstring-shellquote-perl libsys-virt-perl libtsk19 libvhdi1 libvmdk1
  libwin-hivex-perl libxml-xpath-perl libyara8 lsscsi lzop mdadm mtools
  ncal netpbm nfs-common nfs-kernel-server osinfo-db racc reiserfsprogs
  rpcbind rpm-common ruby-bcrypt-pbkdf ruby-builder ruby-childprocess
  ruby-concurrent ruby-ed25519 ruby-erubi ruby-excon ruby-ffi
  ruby-fog-core ruby-fog-json ruby-fog-libvirt ruby-fog-xml
  ruby-formatador ruby-i18n ruby-libvirt ruby-listen ruby-log4r
  ruby-mime-types ruby-mime-types-data ruby-mini-portile2 ruby-multi-json
  ruby-net-scp ruby-net-sftp ruby-net-ssh ruby-nokogiri ruby-oj
  ruby-pkg-config ruby-rb-inotify ruby-vagrant-cloud ruby-zip scrub
  sleuthkit supermin syslinux syslinux-common vagrant vagrant-libvirt
  virt-p2v xfsprogs zerofree
アップグレード: 0 個、新規インストール: 107 個、削除: 0 個、保留: 0 個。
-
3). インストールされたか確認:
$ apt list vagrant
:
vagrant/jammy,jammy,now 2.2.19+dfsg-1ubuntu1 all [インストール済み]
-
「Vagrant」のバージョンを確認:
$ vagrant --version
Vagrant 2.2.19
-
4). ホストOS を再起動:
$ reboot
-
5). 作業用ディレクトリの作成:
作業用のディレクトリ名は、分かりやすい名前にしました:
$ mkdir -p ~/ダウンロード/vm/ubn2204/
$ cd ~/ダウンロード/vm/ubn2204/
-
6). 「Box」をダウンロード、および「Vagrantfile」を作成:
例: 公式サイトの「Box」を指定:「nercceh/ubuntu22.04-desktop」
$ vagrant init nercceh/ubuntu22.04-desktop
A `Vagrantfile` has been placed in this directory. You are now
ready to `vagrant up` your first virtual environment! Please read
the comments in the Vagrantfile as well as documentation on
`vagrantup.com` for more information on using Vagrant.
和訳:
「Vagrantfile」はこのディレクトリに配置されています。
これで、最初の仮想環境を「vagrant up」する準備が整いました。
Vagrant の使用方法の詳細は、Vagrantfile のコメントと「vagrantup.com」の
ドキュメントをお読みください。
→これは、いつもの表示です。すぐに完了しました。
-
参考: わざわざ、「vagrant box add」を使って「Box 一覧」に追加しなくても、
「Box」のイメージがダウンロードされていなければ、初回に「vagrant up」したときにダウンロードされます。
-
「作業フォルダ」の確認:
$ ls -lA ~/ダウンロード/vm/ubn2204
:
-rw-rw-r-- 1 ubn ubn 3033 11月 18 16:44 Vagrantfile
→「Vagrantfile」だけが作られました。
-
7). 仮想マシンの(初回の作成と)立ち上げ:(失敗)
$ vagrant up --provider=virtualbox
もしくは、
$ vagrant up
→「--provider=virtualbox」のパラメータは「virtualbox」がデフォルトなので、省略できます。
-
赤色のメッセージが表示:
The provider 'virtualbox' that was requested to back the machine
'default' is reporting that it isn't usable on this system. The
reason is shown below:

Vagrant has detected that you have a version of VirtualBox installed
that is not supported by this version of Vagrant. Please install one of
the supported versions listed below to use Vagrant:

4.0, 4.1, 4.2, 4.3, 5.0, 5.1, 5.2, 6.0, 6.1

A Vagrant update may also be available that adds support for the version
you specified. Please check www.vagrantup.com/downloads.html to download
the latest version.
和訳:
マシン「default」でサポートするように要求されたプロバイダ「virtualbox」は、
このシステムでは使用できません。

その理由は以下です:

Vagrant は、このバージョンの Vagrant でサポートされていないバージョンの
VirtualBox がインストールされていることを検出しました。

Vagrant を使用するには、以下の一覧のサポートされているバージョンの
VirtualBox を使用してください。

4.0、4.1、4.2、4.3、5.0、5.1、5.2、6.0、6.1

指定したバージョンのサポートを追加する Vagrant のアップデートを利用できる場合があります。
最新バージョンのダウンロードは、www.vagrantup.com/downloads.html を確認してください。
→apt でインストールした「Vagrant 2.2.19」では、最新の「VirtualBox 7.0.10」は未サポートでした。
なので、「仮想マシン」の作成で失敗しました:
-
-
8). うまく動かなかった「Vagrant」を削除:
-
(1). 「Vagrant」の確認:
$ apt list vagrant
:
vagrant/jammy,jammy,now 2.2.19+dfsg-1ubuntu1 all [インストール済み]
-
(2). 「Vagrant」の削除:
$ sudo apt remove vagrant
-
(3). 削除されたか確認:
$ apt list vagrant
:
vagrant/jammy,jammy 2.2.19+dfsg-1ubuntu1 all
-
(4). ゴミの削除:
$ sudo apt autoremove
-
-
- --- - --- - --- - --- - --- - --- - --- - --- - ----- ---
3-b. 最新の「VirtualBox 7.0」の環境で、最新の「Vagrant」をインストール:
-
最新の「VirtualBox」をダウンロードしてインストールしているので、最新の「Vagrant」をダウンロードしてインストールしました:
-
参考: 整合するバージョンの組合せ:
- 最新の「VirtualBox」 →「VirtualBox 7.0.10」
- 最新の「Vagrant」 →「Vagrant 2.4.0」
-
1). 「VirtualBox」のインストールを確認:
$ apt search virtualbox-7.0
:
virtualbox-7.0/now 7.0.10-158379~Ubuntu~jammy amd64 [インストール済み、ローカル]
  Oracle VM VirtualBox
→ダウンロードした最新の「.deb」パッケージをインストール
「ローカル」の表示があることに注目
-
2). 最新の「Vagrant」をダウンロードしてインストール:
-
(1). 最新の vagrant_2.4.0-1_amd64.deb をダウンロード:
-
(2). チェックサムが同じか確認:
$ cd ~/ダウンロード/

$ sha256sum vagrant_2.4.0-1_amd64.deb
e04916750205819c90e38acf639ab12af89fd4593dcc6ef38c33c306666f73c5  vagrant_2.4.0-1_amd64.deb
-
(3). 「.deb」ファイルのインストール:
$ sudo apt install ./vagrant_2.4.0-1_amd64.deb
以下のパッケージが新たにインストールされます:
  vagrant
-
(4). インストールされたか確認:
$ apt list vagrant -a
:
vagrant/now 2.4.0-1 amd64 [インストール済み、ローカル]
vagrant/jammy,jammy 2.2.19+dfsg-1ubuntu1 amd64
→ローカルの表示に注目
-
バージョンを確認:
$ vagrant --version
Vagrant 2.4.0
-
(5). ホストOS を再起動:
$ reboot
-
-
- --- - --- - --- - --- - --- - --- - --- - --- - ----- ----
4. 「仮想マシン」の(初回の作成と)立ち上げ:
-
1). 作業用ディレクトリの作成:
作業用のディレクトリ名は分かりやすい名前にしました:
$ mkdir -p ~/ダウンロード/vm/ubn2204/
$ cd ~/ダウンロード/vm/ubn2204/
-
前回の作業で作成されたファイルがあれば削除:
$ ls -1A
.vagrant
Vagrantfile
-
$ rm -r .vagrant
$ rm Vagrantfile
$ ls -A
$
-
2). 「Box」をダウンロード、および「Vagrantfile」を作成:
$ cd ~/ダウンロード/vm/ubn2204/
$ vagrant init nercceh/ubuntu22.04-desktop
A `Vagrantfile` has been placed in this directory. You are now
ready to `vagrant up` your first virtual environment! Please read
the comments in the Vagrantfile as well as documentation on
`vagrantup.com` for more information on using Vagrant.
和訳:
「Vagrantfile」はこのディレクトリに配置されています。
これで、最初の仮想環境を「vagrant up」する準備が整いました。
Vagrant の使用方法の詳細は、Vagrantfile のコメントと「vagrantup.com」の
ドキュメントをお読みください。
→すぐに完了しました。
-
確認:
$ cd ~/ダウンロード/vm/ubn2204
$ ls -lA
:
-rw-rw-r-- 1 ubn ubn 3401 11月 18 18:37 Vagrantfile
→「Vagrantfile」が作られただけです。
-
3). 参考: 公式のVagrant の「Box」の登録サイトにある、「Vagrantfile」タブを表示:
Vagrant.configure("2") do |config|                     ←(1行目)
  config.vm.box = "nercceh/ubuntu22.04-desktop"        ←(2行目)
end                                                    ←(3行目)
-
4). 実際の「Vagrantfile」の内容を確認:
$ cd ~/ダウンロード/vm/ubn2204/
$ cat Vagrantfile
# -*- mode: ruby -*-
# vi: set ft=ruby :

# All Vagrant configuration is done below. The "2" in Vagrant.configure
# configures the configuration version (we support older styles for
# backwards compatibility). Please don't change it unless you know what
# you're doing.
Vagrant.configure("2") do |config|                ←( 1行目)★
  # The most common configuration options are documented and commented below.
  # For a complete reference, please see the online documentation at
  # https://docs.vagrantup.com.

  # Every Vagrant development environment requires a box. You can search for
  # boxes at https://vagrantcloud.com/search.
  config.vm.box = "nercceh/ubuntu22.04-desktop"    ←( 2行目)★

  # Disable automatic box update checking. If you disable this, then
  # boxes will only be checked for updates when the user runs
  # `vagrant box outdated`. This is not recommended.
  # config.vm.box_check_update = false

  # Create a forwarded port mapping which allows access to a specific port
  # within the machine from a port on the host machine. In the example below,
  # accessing "localhost:8080" will access port 80 on the guest machine.
  # NOTE: This will enable public access to the opened port
  # config.vm.network "forwarded_port", guest: 80, host: 8080

  # Create a forwarded port mapping which allows access to a specific port
  # within the machine from a port on the host machine and only allow access
  # via 127.0.0.1 to disable public access
  # config.vm.network "forwarded_port", guest: 80, host: 8080, host_ip: "127.0.0.1"

  # Create a private network, which allows host-only access to the machine
  # using a specific IP.
  # config.vm.network "private_network", ip: "192.168.33.10"

  # Create a public network, which generally matched to bridged network.
  # Bridged networks make the machine appear as another physical device on
  # your network.
  # config.vm.network "public_network"

  # Share an additional folder to the guest VM. The first argument is
  # the path on the host to the actual folder. The second argument is
  # the path on the guest to mount the folder. And the optional third
  # argument is a set of non-required options.
  # config.vm.synced_folder "../data", "/vagrant_data"

  # Disable the default share of the current code directory. Doing this
  # provides improved isolation between the vagrant box and your host
  # by making sure your Vagrantfile isn't accessable to the vagrant box.
  # If you use this you may want to enable additional shared subfolders as
  # shown above.
  # config.vm.synced_folder ".", "/vagrant", disabled: true

  # Provider-specific configuration so you can fine-tune various
  # backing providers for Vagrant. These expose provider-specific options.
  # Example for VirtualBox:
  #
  # config.vm.provider "virtualbox" do |vb|
  #   # Display the VirtualBox GUI when booting the machine
  #   vb.gui = true
  #
  #   # Customize the amount of memory on the VM:
  #   vb.memory = "1024"
  # end
  #
  # View the documentation for the provider you are using for more
  # information on available options.

  # Enable provisioning with a shell script. Additional provisioners such as
  # Ansible, Chef, Docker, Puppet and Salt are also available. Please see the
  # documentation for more information about their specific syntax and use.
  # config.vm.provision "shell", inline: <<-SHELL
  #   apt-get update
  #   apt-get install -y apache2
  # SHELL
end                                              ←( 3行目)★
-
5). 仮想マシンの作成と立ち上げ:
→最新の「VirtualBox 7.0.10」の場合は、最新の「Vagrant 2.4.0」のインストールが必要でした:
-
$ cd ~/ダウンロード/vm/ubn2204/
$ vagrant up --provider=virtualbox
「--provider=virtualbox」のパラメータはデフォルトなので、省略できます。
Bringing machine 'default' up with 'virtualbox' provider...
==> default: Box 'nercceh/ubuntu22.04-desktop' could not be found. Attempting to find and install...
    default: Box Provider: virtualbox
    default: Box Version: >= 0
==> default: Loading metadata for box 'nercceh/ubuntu22.04-desktop'
    default: URL: https://vagrantcloud.com/api/v2/vagrant/nercceh/ubuntu22.04-desktop
==> default: Adding box 'nercceh/ubuntu22.04-desktop' (v4.0.3) for provider: virtualbox
    default: Downloading: https://vagrantcloud.com/nercceh/boxes/ubuntu22.04-desktop/versions/4.0.3/providers/virtualbox/unknown/vagrant.box
Download redirected to host: dist.nerc-lancaster.ac.uk
Progress: 32% (Rate: 5885k/s, Estimated time remaining: 0:07:06)
: ダウンロードがあるので、時間がかかります(最後の行がカウントUP):
==> default: Successfully added box 'nercceh/ubuntu22.04-desktop' (v4.0.3) for 'virtualbox'!
==> default: Importing base box 'nercceh/ubuntu22.04-desktop'...
Progress: 80%
: 時間がかかります(最後の行がカウントUP):
==> default: Matching MAC address for NAT networking...
==> default: Checking if box 'nercceh/ubuntu22.04-desktop' version '4.0.3' is up to date...
==> default: Setting the name of the VM: ubn2204_default_1700301456943_75635
Vagrant is currently configured to create VirtualBox synced folders with
the `SharedFoldersEnableSymlinksCreate` option enabled. If the Vagrant
guest is not trusted, you may want to disable this option. For more
information on this option, please refer to the VirtualBox manual:

  https://www.virtualbox.org/manual/ch04.html#sharedfolders

This option can be disabled globally with an environment variable:

  VAGRANT_DISABLE_VBOXSYMLINKCREATE=1

or on a per folder basis within the Vagrantfile:

  config.vm.synced_folder '/host/path', '/guest/path', SharedFoldersEnableSymlinksCreate: false
==> default: Clearing any previously set network interfaces...
==> default: Preparing network interfaces based on configuration...
    default: Adapter 1: nat
==> default: Forwarding ports...
    default: 22 (guest) => 2222 (host) (adapter 1)
==> default: Running 'pre-boot' VM customizations...
==> default: Booting VM...
==> default: Waiting for machine to boot. This may take a few minutes...
    default: SSH address: 127.0.0.1:2222          ←(SSH 接続する場合の情報)
    default: SSH username: vagrant
    default: SSH auth method: private key
    default: Warning: Remote connection disconnect. Retrying...
    default: Warning: Connection reset. Retrying...
    default:
    default: Vagrant insecure key detected. Vagrant will automatically replace
    default: this with a newly generated keypair for better security.
    default:
    default: Inserting generated public key within guest...
    default: Removing insecure key from the guest if it's present...
    default: Key inserted! Disconnecting and reconnecting using new SSH key...
==> default: Machine booted and ready!
==> default: Checking for guest additions in VM...      ←(チェックで問題あり)
    default: The guest additions on this VM do not match the installed version of
    default: VirtualBox! In most cases this is fine, but in rare cases it can
    default: prevent things such as shared folders from working properly. If you see
    default: shared folder errors, please make sure the guest additions within the
    default: virtual machine match the version of VirtualBox you have installed on
    default: your host and reload your VM.
    default:
    default: Guest Additions Version: 6.1.38
    default: VirtualBox Version: 7.0
==> default: Mounting shared folders...
    default: /vagrant => /home/ubn/ダウンロード/vm/ubn2204
→「VirtualBox」の仮想マシン「ubn2204_default_1700301456943_75635」が、マネージャ画面なしで自動起動されましたが、「画面真っ暗」です。
-
6). 「Vagrant」側のファイル階層を確認:
「Box」側の確認です:
-
「作業フォルダ」の位置:
$ pwd
/home/ubn/ダウンロード/vm/ubn2204
-
「作業フォルダ」のファイル階層を表示:
簡易的なツリー表示:
$ ls -1ARp ~/ダウンロード/vm/ubn2204/
/home/ubn/ダウンロード/vm/ubn2204/:
.vagrant/
Vagrantfile           ←(「Vagrantfile」)

/home/ubn/ダウンロード/vm/ubn2204/.vagrant:  ←(「.vagrant/ フォルダの中身」)
machines/
rgloader/

/home/ubn/ダウンロード/vm/ubn2204/.vagrant/machines:
default/

/home/ubn/ダウンロード/vm/ubn2204/.vagrant/machines/default:
virtualbox/

/home/ubn/ダウンロード/vm/ubn2204/.vagrant/machines/default/virtualbox:
action_provision
action_set_name
box_meta
creator_uid
id
index_uuid
private_key
synced_folders
vagrant_cwd

/home/ubn/ダウンロード/vm/ubn2204/.vagrant/rgloader:
loader.rb
-
7). 「VirtualBox」側のファイル階層を確認:
「仮想マシン」側の確認です:
-
「仮想マシン」側のファイル階層を表示:
$ ls -ARp1 ~/'VirtualBox VMs'/
'/home/ubn/VirtualBox VMs/':
EndeavourOS_OpenBox/                          ←(「VirtualBox」で作成した「仮想マシン」)
ubn2204_default_1700301456943_75635/    ←(「Vagrant」で作成された「仮想マシン」)

'/home/ubn/VirtualBox VMs/EndeavourOS_OpenBox':
EndeavourOS_OpenBox.nvram
EndeavourOS_OpenBox.vbox
EndeavourOS_OpenBox.vbox-prev
EndeavourOS_OpenBox.vdi
Logs/

'/home/ubn/VirtualBox VMs/EndeavourOS_OpenBox/Logs':
VBox.log
VBox.log.1
VBox.log.2
VBox.log.3

'/home/ubn/VirtualBox VMs/ubn2204_default_1700301456943_75635':
Logs/
packer-virtualbox-iso-1670500096-disk001.vmdk
ubn2204_default_1700301456943_75635.vbox
ubn2204_default_1700301456943_75635.vbox-prev

'/home/ubn/VirtualBox VMs/ubn2204_default_1700301456943_75635/Logs':
VBox.log
VBox.log.1
VBox.log.2
VBox.log.3
-
「VirtualBox」の「仮想マシン」のディスクイメージを確認:
$ ls -lA '/home/ubn/VirtualBox VMs/EndeavourOS_OpenBox'
:
-rw------- 1 ubn ubn      540672 11月 16 03:07 EndeavourOS_OpenBox.nvram  ←(仮想マシンのBIOS設定)
-rw------- 1 ubn ubn        4219 11月 16 03:07 EndeavourOS_OpenBox.vbox
-rw------- 1 ubn ubn        5067 11月 16 03:07 EndeavourOS_OpenBox.vbox-prev
-rw------- 1 ubn ubn 19115540480 11月 16 03:07 EndeavourOS_OpenBox.vdi  ←(VirtualBoxの仮想ハードディスク形式)
drwx------ 2 ubn ubn        4096 11月 16 03:02 Logs
-
「Vagrant」の「仮想マシン」のディスクイメージを確認:
$ ls -lA '/home/ubn/VirtualBox VMs/ubn2204_default_1700301456943_75635'
:
drwx------ 2 ubn ubn        4096 11月 19 09:58 Logs
-rw------- 1 ubn ubn 16523853824 11月 19 10:43 packer-virtualbox-iso-1670500096-disk001.vmdk  ←(VMwareの仮想ハードディスク形式)
-rw------- 1 ubn ubn        5384 11月 19 10:43 ubn2204_default_1700301456943_75635.vbox
-rw------- 1 ubn ubn        6249 11月 19 10:01 ubn2204_default_1700301456943_75635.vbox-prev
-
8). ホストOS を再起動:
$ reboot
-
9). 仮想マシンの再立ち上げ:
$ cd ~/ダウンロード/vm/ubn2204/
$ vagrant up
「--provider=virtualbox」のパラメータはデフォルトなので、省略しました。
Bringing machine 'default' up with 'virtualbox' provider...
==> default: Checking if box 'nercceh/ubuntu22.04-desktop' version '4.0.3' is up to date...
==> default: Clearing any previously set forwarded ports...
==> default: Clearing any previously set network interfaces...
==> default: Preparing network interfaces based on configuration...
    default: Adapter 1: nat
==> default: Forwarding ports...
    default: 22 (guest) => 2222 (host) (adapter 1)
==> default: Running 'pre-boot' VM customizations...
==> default: Booting VM...
==> default: Waiting for machine to boot. This may take a few minutes...
    default: SSH address: 127.0.0.1:2222
    default: SSH username: vagrant
    default: SSH auth method: private key
==> default: Machine booted and ready!
==> default: Checking for guest additions in VM...   ←(チェックで下記を指摘。後で対応)
    default: The guest additions on this VM do not match the installed version of
    default: VirtualBox! In most cases this is fine, but in rare cases it can
    default: prevent things such as shared folders from working properly. If you see
    default: shared folder errors, please make sure the guest additions within the
    default: virtual machine match the version of VirtualBox you have installed on
    default: your host and reload your VM.
    default:
    default: Guest Additions Version: 6.1.38
    default: VirtualBox Version: 7.0
==> default: Mounting shared folders...
    default: /vagrant => /home/ubn/ダウンロード/vm/ubn2204
==> default: Machine already provisioned. Run `vagrant provision` or use the `--provision`
==> default: flag to force provisioning. Provisioners marked to run always will still run.
$
Ubuntu のデスクトップ画面が表示されました:
→デスクトップが表示されてもゲスト側の「黒いマウス」が動かないので、デスクトップの操作が出来ません。
-
10). 仮想マシンの停止(シャットダウン、電源オフ):
$ vagrant halt
==> default: Attempting graceful shutdown of VM...
$
-
-
- --- - --- - --- - --- - --- - --- - --- - --- - ----- -----
5. 参考: Vagrantfile を修正して、仮想マシンのメモリを「4096 MB」に増やしました:
-
デスクトップの問題とは関係ないけど、
デスクトップ環境を使うのに、メモリが 2048 MB では少ないので修正:
(PC のメモリに余裕がある場合の修正です)
-
1). 「Vagrantfile」ファイルを修正:
テキストエディタは何でも良いです:
$ cd ~/ダウンロード/vm/ubn2204/
$ featherpad Vagrantfile
-
メモリを「4096 MB」に増やしました:
57 行目以降を修正:
  # Example for VirtualBox:
  #
    config.vm.provider "virtualbox" do |vb|            ←(コメント解除)
  #   # Display the VirtualBox GUI when booting the machine
  #   vb.gui = true
  #
  #   # Customize the amount of memory on the VM:
  #   vb.memory = "1024"
      vb.memory = "4096"              ←(追記)
    end                    ←(コメント解除)
  #
  # View the documentation for the provider you are using for more
  # information on available options.

  # Enable provisioning with a shell script. Additional provisioners such as
  # Ansible, Chef, Docker, Puppet and Salt are also available. Please see the
  # documentation for more information about their specific syntax and use.
  # config.vm.provision "shell", inline: <<-SHELL
  #   apt-get update
  #   apt-get install -y apache2
  # SHELL
end
Ctrl+S で保存:
-
2). 「Vagrantfile」を反映させて、仮想マシンを立ち上げ:
$ cd ~/ダウンロード/vm/ubn2204/
$ vagrant reload
-
-
- --- - --- - --- - --- - --- - --- - --- - --- - ----- ----- -
6. Vagrant の「仮想マシン」に SSH で接続して、ログイン:
-
まずは、確認できる項目を確認しました:
デスクトップが表示されなかったり、表示されても操作できなかったりしても、
「仮想マシン」に接続できれば、コマンドで操作ができます。
-
SSH の情報(「vagrant up」時のメッセージ中に表示されます):
→「Box」をWeb サイトで公開する場合に、システムイメージに追加しておく推奨の設定みたい。
-
1). 「仮想マシン」に SSH で接続:
ホストが、Linux の場合:
ホストの「端末」画面にて、
$ ssh -p 2222 vagrant@localhost
-
-
最初のログイン時にのみ表示:
The authenticity of host '[localhost]:2222 ([127.0.0.1]:2222)' can't be established.
ED25519 key fingerprint is SHA256:seET.......yek.
This key is not known by any other names
Are you sure you want to continue connecting (yes/no/[fingerprint])?
和訳:
ホスト '[localhost]:2222 ([127.0.0.1]:2222)' の信頼性を確立できません。
ED25519 キーのフィンガープリントは SHA256:seET......yek です。
このキーは他の名前では知られていません
接続を続けてもよろしいですか (yes/no/[fingerprint])?
→「yes」Enter
-
最初、および 2度目以降のログイン時の表示:
vagrant@localhost's password:
→パスワードは「vagrant」を入力
-
ホストの「端末」画面に表示:
Welcome to Ubuntu 22.04.1 LTS (GNU/Linux 5.15.0-56-generic x86_64)

 * Documentation:  https://help.ubuntu.com
 * Management:     https://landscape.canonical.com
 * Support:        https://ubuntu.com/advantage

  System information as of Sat 18 Nov 12:25:13 UTC 2023

  System load:  0.4072265625       Processes:             206
  Usage of /:   22.9% of 38.15GB   Users logged in:       1
  Memory usage: 20%                IPv4 address for eth0: xx.xx.xx.xx
  Swap usage:   0%

 * Strictly confined Kubernetes makes edge and IoT secure. Learn how MicroK8s
   just raised the bar for easy, resilient and secure K8s cluster deployment.

   https://ubuntu.com/engage/secure-kubernetes-at-the-edge

466 updates can be applied immediately.
288 of these updates are standard security updates.
To see these additional updates run: apt list --upgradable

        ,u@@E@@E@@>,
    .;EBBBBBBBBBBBBBBE@
   p@BB@5EBBBBBBBBBBBBBB@     Packer.io built VM maintained by the Application
 ,EBBBBBB@@BBBBBBBBBBBBBBBL   Development Team, Centre for Ecology & Hydrology
 @B██████BB██████BB██BB██BB,
EBB██BBBBBB██@BBBBB██BB██BBE
EBB██BBBBBB████BBBB██████BBB
(BB██BBBBBB██BB@BBB██BB██BBE  Version:    Ubuntu 22.04.1 LTS
 EB██████BB██████@B██BB██BB   Built:      2022-12-08
  EBBBBBBBBBBBBBB@@BBBBBBE"   Management: puppet
   "EBBBBBBBBBBBBBB@@B@@P     Repository: https://github.com/NERC-CEH/ubuntu
     "tEBBBBBBBBBBBBBb"
         "*CehP*"^"
Last login: Sat Nov 18 10:12:44 2023 from xx.xx.xx.xx
vagrant@vagrant:~$
→ログインすると、プロンプトの表示が変わります:
ユーザ名@マシン名
接続した「仮想マシン」にて、 OS 名、および、「システム更新がある」ことが表示されています。
-
2). システムの情報を確認:
$ uname -a
Linux vagrant 5.15.0-56-generic #62-Ubuntu SMP Tue Nov 22 19:54:14 UTC 2022 x86_64 x86_64 x86_64 GNU/Linux

$ uname -r
5.15.0-56-generic

$ uname -n
vagrant

$ cat /etc/lsb-release
DISTRIB_ID=Ubuntu
DISTRIB_RELEASE=22.04
DISTRIB_CODENAME=jammy
DISTRIB_DESCRIPTION="Ubuntu 22.04.1 LTS"
→システムは初期の頃の「Ubuntu 22.04.1 LTS」です。
こちらの「Box」は、その頃に公開されたということです。
-
3). システム更新:
$ sudo apt update
:
Hit:1 http://apt.puppetlabs.com jammy InRelease
Hit:2 http://gb.archive.ubuntu.com/ubuntu jammy InRelease
Get:3 http://gb.archive.ubuntu.com/ubuntu jammy-updates InRelease [119 kB]
Hit:4 http://gb.archive.ubuntu.com/ubuntu jammy-backports InRelease
Get:5 http://gb.archive.ubuntu.com/ubuntu jammy-security InRelease [110 kB]
Fetched 229 kB in 4s (57.2 kB/s)
Reading package lists... Done
Building dependency tree... Done
Reading state information... Done
460 packages can be upgraded. Run 'apt list --upgradable' to see them.
→更新がたくさんあります。
-
更新内容の確認:
$ apt list --upgradable
→たくさん表示
-
更新を実行:
$ sudo apt upgrade
↓
(毎回、なぜか、)ピンク色の画面が表示:

-
Package configuration

 ┌──────────┤ Pending kernel upgrade ├───────────────┐
 │
 │ Newer kernel available
 │
 │ The currently running kernel version is 5.15.0-56-generic which is
 │ not the expected kernel version 5.15.0-88-generic.
 │
 │ Restarting the system to load the new kernel will not be handled
 │ automatically, so you should consider rebooting.
 │
 │                                <Ok>
和訳:
パッケージ構成

 ┌──────────┤ カーネルのアップグレードが保留中です ├───────────┐
 │
 │ 新しいカーネルが利用可能
 │
 │ 現在実行中のカーネル バージョンは 5.15.0-56-generic ですが、
 │ これは予期されたカーネル バージョン 5.15.0-88-generic ではありません。
 │
 │ 新しいカーネルをロードするためのシステムの再起動は自動的に処理
 │ されないため、再起動を検討する必要があります。
 │
 │                                <Ok>
→ <Ok> が選択されているので、Enter
-
次の画面が表示:
Package configuration

┌─────────┤ Daemons using outdated libraries ├──────────┐
│
│ Which services should be restarted?
│
│    [*] acpid.service
│    [*] colord.service
│    [*] cron.service
│    [ ] dbus.service
│    [ ] gdm.service
│    [ ] gdm3                          ↓(スクロールバー)
│
│          <Ok>              <Cancel>
和訳:
パッケージ構成

┌─────────┤ 古いライブラリを使用するデーモン ├───────────┐
│
│ どのサービスを再起動する必要がありますか?
│
│    [*] acpid.service
│    [*] colord.service
│    [*] cron.service
│    [ ] dbus.service
│    [ ] gdm.service
│    [ ] gdm3                          ↓(スクロールバー)
│
│          <Ok>              <Cancel>
→Tab キーで、<Ok> を選択して、Enter
-
更新が終了しました:
vagrant@vagrant:~$
-
4). 作業が完了したので、SSH 接続を終了(切断):
$ exit
もしくは、
$ logout
もしくは、
Ctrl+D
logout
Connection to localhost closed.

ubn@ubn-box:~/ダウンロード/vm/ubn2204$
→ホストのプロンプトに戻りました
-
5). 「仮想マシン」の状態を確認:
$ vagrant status
Current machine states:

default                   running (virtualbox)

The VM is running. To stop this VM, you can run `vagrant halt` to
shut it down forcefully, or you can run `vagrant suspend` to simply
suspend the virtual machine. In either case, to restart it again,
simply run `vagrant up`.
和訳:
「仮想マシン」が実行中です。この「仮想マシン」を停止するには、
「vagrant halt」を実行して強制的にシャットダウンするか、または、
「vagrant suspend」を実行して単に仮想マシンを一時停止することができます。
どちらの場合も、再起動は、「vagrant up」を実行するだけです。
-
ちなみに、「default」は「仮想マシン名」です。
-
6). 「仮想マシン」の停止(シャットダウン):
$ vagrant halt
==> default: Attempting graceful shutdown of VM...
和訳:
default: VM の正常なシャットダウンを試みています...
-
→「VirtualBox」の仮想マシン「default」のウィンドウが閉じました。
-
「Vagrant」の操作では、「VirtualBox」マネージャ画面は起動されません。(必要とされていません)
「Vagrant」によって、現在の「作業フォルダ」に置かれた「Vagrantfile」で作成された「仮想マシン」の画面だけが起動されます。
-
7). 「仮想マシン」の立ち上げ:
$ vagrant up
:
    default: your host and reload your VM.
    default:
    default: Guest Additions Version: 6.1.38
    default: VirtualBox Version: 7.0
==> default: Mounting shared folders...
    default: /vagrant => /home/ubn/ダウンロード/vm/ubn2204
==> default: Machine already provisioned. Run `vagrant provision` or use the `--provision`
==> default: flag to force provisioning. Provisioners marked to run always will still run.
ubn@ubn-box:~/ダウンロード/vm/ubn2204$
-
後半部分の和訳:
==> default: 共有フォルダのマウント...
    default: /vagrant => /home/ubn/ダウンロード/vm/ubn2204
==> default: マシンはすでにプロビジョニングされています。
     「vagrant provision」を実行するか、「--provision」を使用します。
==> default: プロビジョニングを強制するフラグ。
       常に実行するようにマークされたプロビジョニングは引き続き実行されます。
→起動された「仮想マシン」の画面は真っ暗です。(「項番 8-2.」で対応: )
-
デスクトップ画面がうまく表示される場合と、されない場合があるみたい。
また、デスクトップ画面が表示されたとしても、
Ubuntu の左側にあるドックが表示されなかったり、マウス操作ができなかったりです。
-
-
- --- - --- - --- - --- - --- - --- - --- - --- - ----- ----- --
7. 問題点1: 「仮想マシン」の立ち上げ時に「Guest Additions」のバージョンが合わないとの警告が表示:
-
「Guest Additions」のバージョンは、「Box」(ゲストOS: つまり仮想マシン )のイメージを作成した環境によると思われます:
-
「仮想マシン」を立ち上げ:
$ cd ~/ダウンロード/vm/ubn2204/
$ vagrant up
Bringing machine 'default' up with 'virtualbox' provider...   ←(プロバイダは VirtualBox)
==> default: Checking if box 'nercceh/ubuntu22.04-desktop' version '4.0.3' is up to date...
==> default: Clearing any previously set forwarded ports...
==> default: Clearing any previously set network interfaces...
==> default: Preparing network interfaces based on configuration...
    default: Adapter 1: nat
==> default: Forwarding ports...
    default: 22 (guest) => 2222 (host) (adapter 1)
==> default: Running 'pre-boot' VM customizations...
==> default: Booting VM...
==> default: Waiting for machine to boot. This may take a few minutes...
    default: SSH address: 127.0.0.1:2222
    default: SSH username: vagrant
    default: SSH auth method: private key
    default: Warning: Connection reset. Retrying...
    default: Warning: Remote connection disconnect. Retrying...
    default: Warning: Remote connection disconnect. Retrying...
==> default: Machine booted and ready!
==> default: Checking for guest additions in VM...   ←(★バージョン チェックで問題がある部分)
    default: The guest additions on this VM do not match the installed version of
    default: VirtualBox! In most cases this is fine, but in rare cases it can
    default: prevent things such as shared folders from working properly. If you see
    default: shared folder errors, please make sure the guest additions within the
    default: virtual machine match the version of VirtualBox you have installed on
    default: your host and reload your VM.
    default:
    default: Guest Additions Version: 6.1.38   ←(現在のバージョン)
    default: VirtualBox Version: 7.0           ←(現在のバージョン)
==> default: Mounting shared folders...   ←(●「共有フォルダ」機能が有効です)
    default: /vagrant => /home/ubn/ダウンロード/vm/ubn2204
==> default: Machine already provisioned. Run `vagrant provision` or use the `--provision`
==> default: flag to force provisioning. Provisioners marked to run always will still run.
ubn@ubn-box:~/ダウンロード/vm/ubn2204$     ←(プロンプトに戻りました)
★バージョン チェックの部分を和訳:
仮想マシン での guest additions の追加を確認しています...

この VM に追加された guest additions は、
インストールされている VirtualBox のバージョンと一致しません。
ほとんどの場合、問題ありませんが、
まれに、共有フォルダなどが正常に動作しなくなることがあります。

共有フォルダのエラーが表示された場合は、仮想マシン内の guest additions の追加が
ホストにインストールされている VirtualBox のバージョンと一致していることを確認し、
仮想マシン をリロードしてください。

    Guest Additions Version: 6.1.38     ←(仮想マシン側: 低いまま)
    VirtualBox Version: 7.0             ←(ホストOS 側: 最新)
-
-- -- -- -- -- -- -- -- -- -- -- -- -- -- -- -- -- -- -- -- -- -- -- --
追記:
●バージョンは一致してませんが、今回は「共有フォルダ」機能が有効です:
「作業フォルダ」が「仮想マシン」に共有フォルダ「/vagrant」としてマウントされました:
==> default: Mounting shared folders...
    default: /vagrant => /home/ubn/ダウンロード/vm/ubn2204
-
VirtualBox マネージャを起動して確認:
→画面下の「共有フォルダー」に、「共有フォルダ」の設定が 1つ登録されています:
-
「共有フォルダー」をクリックして、設定を確認:

→「共有フォルダー」が自動で登録されました:
というより、「共有フォルダー」が登録されているイメージを「Box」として登録している(するべき?な)のかも。
-
-
- --- - --- - --- - --- - --- - --- - --- - --- - ----- ----- ---
7-2. 回避策:「仮想マシン」の「Guest Additions」をアップグレードしました:
-
「項番 7. 」にて、
「仮想マシン」の立ち上げ時に「Guest Additions」のバージョンが合わないとの警告が表示:
その回避策です:
-
1). 「仮想マシン」を立ち上げ:
$ cd ~/ダウンロード/vm/ubn2204/
$ vagrant up
-
2). 「Guest Additions …」をアップグレード:
「仮想マシン」の画面の上部のメニューバー →「Devices」→(一番下の)「Upgrade Guest Additions …」
仮想マシンのウィンドウの右側のエリアに「Installing image ...」が表示
バーグラフは「77%」の表示が続きます →だいぶ待つと、通知エリアが消えました。
-
3). 「仮想マシン」の再起動:
「仮想マシン」の停止:
$ vagrant halt
:
==> default: Attempting graceful shutdown of VM...
-
「仮想マシン」の立ち上げ:
$ vagrant up
:
Bringing machine 'default' up with 'virtualbox' provider...
==> default: Checking if box 'nercceh/ubuntu22.04-desktop' version '4.0.3' is up to date...
==> default: Clearing any previously set forwarded ports...
==> default: Clearing any previously set network interfaces...
==> default: Preparing network interfaces based on configuration...
    default: Adapter 1: nat
==> default: Forwarding ports...
    default: 22 (guest) => 2222 (host) (adapter 1)
==> default: Running 'pre-boot' VM customizations...
==> default: Booting VM...
==> default: Waiting for machine to boot. This may take a few minutes...
    default: SSH address: 127.0.0.1:2222
    default: SSH username: vagrant
    default: SSH auth method: private key
    default: Warning: Connection reset. Retrying...
    default: Warning: Remote connection disconnect. Retrying...
    default: Warning: Remote connection disconnect. Retrying...
==> default: Machine booted and ready!
==> default: Checking for guest additions in VM...      ←(★チェック時の警告が消えました)
==> default: Mounting shared folders...
    default: /vagrant => /home/ubn/ダウンロード/vm/ubn2204
==> default: Machine already provisioned. Run `vagrant provision` or use the `--provision`
==> default: flag to force provisioning. Provisioners marked to run always will still run.
ubn@ubn-box:~/ダウンロード/vm/ubn2204$
→バージョン違いの警告が表示されなくなりました。
ただし、起動された「仮想マシン」の画面は、「真っ暗」のままです。
-
-
- --- - --- - --- - --- - --- - --- - --- - --- - ----- ----- ----
8. 問題点2: 立ち上げた「仮想マシン」のデスクトップ画面が時々「真っ暗」で、表示されてもマウス操作できず:
-
1). 仮想マシンを再起動してみる:
「仮想マシン」を停止:
$ vagrant halt
:
==> default: Attempting graceful shutdown of VM...
-
「仮想マシン」を立ち上げ:
$ vagrant up
→起動された「仮想マシン」の画面は真っ暗です。
-
2). ホストOS を再起動してみる:
「仮想マシン」を停止:
$ vagrant halt
-
ホストOS を再起動:
$ reboot
-
3). 「仮想マシン」を立ち上げ:
$ cd ~/ダウンロード/vm/ubn2204/
$ vagrant up
Bringing machine 'default' up with 'virtualbox' provider...
==> default: Checking if box 'nercceh/ubuntu22.04-desktop' version '4.0.3' is up to date...
==> default: Clearing any previously set forwarded ports...
==> default: Clearing any previously set network interfaces...
==> default: Preparing network interfaces based on configuration...
    default: Adapter 1: nat
==> default: Forwarding ports...
    default: 22 (guest) => 2222 (host) (adapter 1)
==> default: Running 'pre-boot' VM customizations...
==> default: Booting VM...
==> default: Waiting for machine to boot. This may take a few minutes...
    default: SSH address: 127.0.0.1:2222
    default: SSH username: vagrant
    default: SSH auth method: private key
    default: Warning: Connection reset. Retrying...
    default: Warning: Remote connection disconnect. Retrying...
    default: Warning: Remote connection disconnect. Retrying...
==> default: Machine booted and ready!
==> default: Checking for guest additions in VM...
==> default: Mounting shared folders...
    default: /vagrant => /home/ubn/ダウンロード/vm/ubn2204
==> default: Machine already provisioned. Run `vagrant provision` or use the `--provision`
==> default: flag to force provisioning. Provisioners marked to run always will still run.
ubn@ubn-box:~/ダウンロード/vm/ubn2204$
-
4). 気づいたこと1: デスクトップ画面が真っ暗です:
「VirtualBox」のステータスエリアが画面右側に表示されたので、そのままにして、立ち上げ終わってから、
ステータスエリアを閉じたら、そのエリアだけ、デスクトップの背景が表示されました:
うまく表示できるパターンです。
-
5). デスクトップの再描画:
仮想マシンのウィンドウのメニューバーにて、「View」 →「Virtual Screen 1」→「Scale to Resize to 100%」→「Scale to Resize to 125%」→「Scale to Resize to 100%」
→デスクトップ画面が表示されました。画面右のドックパネルも表示されています。
-
6). 気づいたこと2: デスクトップ画面が表示されたとき、ホストOS のマウスを動かしても、「仮想マシン」(ゲストOS)の黒いマウスカーソルが動きません:
「仮想マシン」(ゲストOS)を操作するには、ゲストOS の黒いマウスカーソルを動かす必要があります。
-
7). 気づいたこと3: デスクトップ画面が表示されたとき、Ubuntu 画面の左のドックが表示されません:
ホストOS のマウスを動かしても、「仮想マシン」(ゲストOS)の黒いマウスカーソルが動きません:
-
8). 再度、「仮想マシン」を再起動したら、「VirtualBox」のステータスエリアが画面右側に表示されず、画面真っ暗のままになりました:
「Scale to Resize」を変更しても、真っ暗のままで変わりません。
-
9). 「デスクトップ」画面の表示が不安定です:
-
「VirtualBox」の「ディスプレイドライバー」が合っていないみたい。
→下記の「項番 8-2.」で対応:
-
-
- --- - --- - --- - --- - --- - --- - --- - --- - ----- ----- -----
8-2. 回避策: 「VirtualBox マネージャ」にて「ディスプレイ」の設定を変更:
-
「項番 8. 」にて、
立ち上げた「仮想マシン」のデスクトップ画面が時々真っ暗で、表示されてもマウス操作できず、などの件の回避策:
-
「VMSVGA」に変更することで解消:
-
1). ホストOS にて、「VirtualBox マネージャ」を起動:
-
2). 「ディスプレイ」の設定を(VirtualBox ではデフォルトの)「VMSVGA」に変更:
ディスプレイ:
ビデオメモリ: 256 MB
グラフィックスコントローラー: VBoxVGA  →「VMSVGA」に変更
アクセラレーション: 3D
リモートディスクトップサーバーポート: 5902
レコーディング: 無効
-
3). 「VirtualBox マネージャ」を右上の「x」で閉じます:
-
4). 「仮想マシン」を起動して確認:
$ cd ~/ダウンロード/vm/ubn2204/
$ vagrant up
→デスクトップ画面が正常に表示されました。
画面の左のドックが表示され、マウスで操作できるようになりました。
-
このやり方だと、「仮想マシン」を再作成すると、設定が消えてしまいます:
-
5). 恒久的な対策として、「Vagrantfile」を修正:
「仮想マシン」のディスプレイ設定を「VMSVGA」に変更:
vb.customize ["modifyvm", :id, "--graphicscontroller", "vmsvga"]
-
編集:
$ cd ~/ダウンロード/vm/ubn2204/
$ featherpad Vagrantfile
↓ すべて置換:
# -*- mode: ruby -*-
# vi: set ft=ruby :

Vagrant.configure("2") do |config|
  config.vm.box = "nercceh/ubuntu22.04-desktop"
  config.vm.provider "virtualbox" do |vb|
    # Display the VirtualBox GUI when booting the machine
    vb.gui = true
    #vb.memory = "2048"
    vb.memory = "4096"
    vb.cpus = 2
    vb.customize ["modifyvm", :id, "--graphicscontroller", "vmsvga"]
  end
end
-
6). 「仮想マシン」を再作成して、起動:
$ cd ~/ダウンロード/vm/ubn2204/
$ vagrant reload
→デスクトップ画面が正常に表示されました。
-
-
- --- - --- - --- - --- - --- - --- - --- - --- - ----- ----- ----- -
9. 参考: Vagrant にて、お気に入りの「Box」を元に、新しい「Box」を作成して「共有」:
-
「Vagrant」で管理されている、現在の「仮想マシン」の環境(「作業フォルダ」と該当の「仮想マシン」)から、新しい「.box」ファイルを生成できます:
開発メンバーで「同じ環境」を使いたい場合や、ベースを元にカスタマイズした「仮想マシン」を保存したい場合、などに使えます:
-
参考: 「vagrant package」コマンドの使い方:
コマンドの詳細(ヘルプ)は、「こちら 」を参照:
-
コマンドの使い方:
使い方: vagrant package [オプション] [name|id]

オプション:

  --base NAME            ベース ボックスとしてパッケージ化したい
                         VirtualBox 内の VM の名前 (VirtualBox の場合)
  --output NAME          出力するファイルの名前
  --include FILE,FILE..  ボックスにパッケージ化するカンマ区切りの追加ファイル
  --info FILE            追加のボックス情報を含むカスタム info.jsonファイルへのパス
  --vagrantfile FILE     ボックスに同梱する Vagrantfile
→パッケージ化するときに、色々なファイルを同梱できます。
-
1). 作業前の確認:
「仮想マシン」を作成後の状態:
$ ls -1A ~/ダウンロード/vm/ubn2204/
:
.vagrant
Vagrantfile
sudo-cat-etc-sudoers.txt
→「sudo-cat-etc-sudoers.txt」は、「共有フォルダ」のテスト時の残がいです。 通常は存在しません。
-
2). 「.box」ファイルの生成:
-
時間がかかるので、時間の余裕があるときに実施:
-
-
- --- - --- - --- - --- - --- - --- - --- - --- - ----- ----- ----- --
9-a. 「Vagrantfile」のある「作業フォルダ」に移動して、「vagrant package」コマンドを実行する場合:
-
「仮想マシン」名を指定せずに、「.box」ファイルを生成できます。
簡単なのが利点です:
-
「仮想マシン」は停止した状態です:
-
1). 生成:
$ cd ~/ダウンロード/vm/ubn2204/
$ vagrant package
==> default: Clearing any previously set forwarded ports...
==> default: Exporting VM...
和訳:
==> default: 以前に設定された転送ポートをクリア...
==> default: 「仮想マシン」の転送中...
↓ 時間がかかりました:(18分でした)
==> default: Compressing package to: /home/ubn/ダウンロード/vm/ubn2204/package.box
和訳:
==> default: パッケージの圧縮中: /home/ubn/ダウンロード/vm/ubn2204/package.box
↓ 時間がかかりました:(24分でした)
ubn@ubn-box:~/ダウンロード/vm/ubn2204$
プロンプトに戻りました。(合計: 42分でした)
-
2). ファイルを確認:
$ ls -1A ~/ダウンロード/vm/ubn2204/
:
.vagrant
Vagrantfile
package.box      ←(追加されました)
sudo-cat-etc-sudoers.txt
-
ファイルサイズを確認:
$ ls -lA ~/ダウンロード/vm/ubn2204/p*
-rw-rw-r-- 1 ubn ubn 7917759690 12月 11 07:46 /home/ubn/ダウンロード/vm/ubn2204/package.box
→「7.9 GB」ほどでした。
-
3). 作成した「package.box」ファイルと、稼働中の「Vagrantfile」を開発メンバーに配布:
-
-
- --- - --- - --- - --- - --- - --- - --- - --- - ----- ----- ----- ---
9-b. 「仮想マシン」の ID を指定して、「vagrant package」コマンドを実行する場合:
-
「Box」ファイルを生成するフォルダを指定できることと、「作業フォルダ」を汚さないのが利点です:
-
コマンドの使い方:
$ vagrant package --base [対象の「仮想マシン」の名前か、id] --output [ファイル名].box
→「仮想マシン」の名前だと、「Vagrant」では共通の「default」なので、「作業フォルダ」に移動しないと使えません。それなら、「項番 9-a.」の手順が使えます。
なので、「id」で指定します。
-
1). 「仮想マシン」は停止しておきます:
-
2). パッケージ化の対象となる「仮想マシン」の「id」を取得:
$ vagrant global-status
id       name    provider   state    directory
-------------------------------------------------------------------------
d4b57c8  default virtualbox poweroff /home/ubn/ダウンロード/vm/test3
5770428  default virtualbox poweroff /home/ubn/ダウンロード/vm/ubn2204 ←(対象)

:
→id は「5770428」です
-
3). 「.box」ファイルを生成したい場所を準備:
$ mkdir -p ~/ダウンロード/vm/box-share
-
4). 作成:
$ cd ~/ダウンロード/vm/box-share/
$ vagrant package "5770428" --output package-ubn2204-2023-1211.box
==> default: Exporting VM...
==> default: Compressing package to: /home/ubn/ダウンロード/vm/box-share/package-ubn2204-2023-1211.box
-
5). 確認:
$ ls -lA
:
-rw-rw-r-- 1 ubn ubn 7917759632 12月 11 19:16 package-ubn2204-2023-1211.box
→「7.9 GB」ほどでした。
-
6). 作成した「package.box」ファイルと、稼働中の「Vagrantfile」を開発メンバーに配布:
-
-
- --- - --- - --- - --- - --- - --- - --- - --- - ----- ----- ----- ----
9-2. 参考: 配布された「.box」ファイルを使って、「仮想マシン」を共有するやり方:
-
「~/ダウンロード/vm/box-share/」フォルダに、共有のために配布された「.box」ファイルを保存した場合:
-
1). ファイルの確認:
$ cd ~/ダウンロード/vm/box-share/

$ ls -1A
package-ubn2204-2023-1211.box
-
2). 共有する「Box」をホームフォルダの「Box」の一覧に保存:
→URL を指定しなくて、ローカルにある「Box」のパスの指定でもOK です。
$ cd ~/ダウンロード/vm/box-share/
$ vagrant box add ubn2204-dev package-ubn2204-2023-1211.box
==> box: Box file was not detected as metadata. Adding it directly...
==> box: Adding box 'ubn2204-dev' (v0) for provider:
    box: Unpacking necessary files from: file:///home/ubn/%E3%83%80%E3%82%A6%E3%83%B3%E3%83%AD%E3%83%BC%E3%83%89/vm/box-share/package-ubn2204-2023-1211.box
==> box: Successfully added box 'ubn2204-dev' (v0) for ''!
→日本語("ダウンロード")が含まれるパスがあるので、表示が見づらいです。
ファイルがコピーされるので、少し時間がかかります。
-
3). 保存された「Box」の一覧を表示:
-
(1). 「Box」の一覧を表示:
$ vagrant box list
CentOS7-test                (virtualbox, 0)
CentOS7_test3_2             (virtualbox, 0)
generic/fedora38            (virtualbox, 4.3.6, (amd64))
nercceh/ubuntu22.04-desktop (virtualbox, 4.0.3)
ubn2204-dev                 (virtualbox, 0)     ←(追加)
-
(2). 保存された「Box」のファイル(フォルダ)を表示:
$ ls -1 ~/.vagrant.d/boxes/
CentOS7-test
CentOS7_test3_2
generic-VAGRANTSLASH-fedora38
nercceh-VAGRANTSLASH-ubuntu22.04-desktop
ubn2204-dev
-
$ cd ~/.vagrant.d/boxes/
$ ls -1 ubn2204-dev/0/virtualbox/
Vagrantfile
box-disk001.vmdk
box.ovf
metadata.json
vagrant_private_key
-
(3). 「Vagrantfile」の内容を確認:
$ cat ubn2204-dev/0/virtualbox/Vagrantfile
Vagrant::Config.run do |config|
  # This Vagrantfile is auto-generated by `vagrant package` to contain
  # the MAC address of the box. Custom configuration should be placed in
  # the actual `Vagrantfile` in this box.
  config.vm.base_mac = "080027E17009"
end

# Load include vagrant file if it exists after the auto-generated
# so it can override any of the settings
include_vagrantfile = File.expand_path("../include/_Vagrantfile", __FILE__)
load include_vagrantfile if File.exist?(include_vagrantfile)

Vagrant.configure("2") do |config|
  config.ssh.private_key_path = File.expand_path("../vagrant_private_key", __FILE__)
end
-
コメント部分の和訳:
この Vagrantfile は「vagrant package」によって自動生成され、
ボックスの MAC アドレスが含まれます。
カスタム設定は、このボックス内の実際の `Vagrantfile` に配置する必要があります。
自動生成後にインクルード vagrant ファイルが存在する場合は、
それをロードして設定をオーバーライドできるようにします。
-
4). 「作業フォルダ」の準備:
$ mkdir -p ~/ダウンロード/vm/ubn2204-dev
-
5). 「Vagrantfile」を作成:
-
(1). 「Vagrantfile」の作成:
$ cd ~/ダウンロード/vm/ubn2204-dev/
$ vagrant init -m ubn2204-dev
A `Vagrantfile` has been placed in this directory. You are now
ready to `vagrant up` your first virtual environment! Please read
the comments in the Vagrantfile as well as documentation on
`vagrantup.com` for more information on using Vagrant.
→いつもの表示メッセージ
-
-
(2). ファイルの確認:
$ ls -1A
Vagrantfile
-
(3). 「Vagrantfile」の内容を確認:
$ cat Vagrantfile
# -*- mode: ruby -*-
# vi: set ft=ruby :

Vagrant.configure("2") do |config|
  config.vm.box = "ubn2204-dev"
end
→初期の内容です。
-
6). 「仮想マシン」の生成と立ち上げ:
$ cd ~/ダウンロード/vm/ubn2204-dev/
$ vagrant up
Bringing machine 'default' up with 'virtualbox' provider...
==> default: Importing base box 'ubn2204-dev'...
==> default: Matching MAC address for NAT networking...
==> default: Setting the name of the VM: ubn2204-dev_default_1702297021428_72001
==> default: Clearing any previously set network interfaces...
==> default: Preparing network interfaces based on configuration...
    default: Adapter 1: nat
==> default: Forwarding ports...
    default: 22 (guest) => 2222 (host) (adapter 1)
==> default: Booting VM...
==> default: Waiting for machine to boot. This may take a few minutes...
    default: SSH address: 127.0.0.1:2222
    default: SSH username: vagrant
    default: SSH auth method: private key
==> default: Machine booted and ready!
==> default: Checking for guest additions in VM...
==> default: Mounting shared folders...
    default: /vagrant => /home/ubn/ダウンロード/vm/ubn2204-dev
ubn@ubn-box:~/ダウンロード/vm/ubn2204-dev$
問題: →「仮想マシン」は起動されますが、画面が表示されません。
-
「仮想マシン」は起動しています:
$ vagrant status
Current machine states:

default                   running (virtualbox)

The VM is running. To stop this VM, you can run `vagrant halt` to
shut it down forcefully, or you can run `vagrant suspend` to simply
suspend the virtual machine. In either case, to restart it again,
simply run `vagrant up`.
-
停止:
$ vagrant halt
==> default: Attempting graceful shutdown of VM...
-
$ vagrant status
Current machine states:

default                   poweroff (virtualbox)

The VM is powered off. To restart the VM, simply run `vagrant up`
-
7). ホストOS を再起動:
$ reboot
-
8). 仮想マシンの立ち上げ:
$ cd ~/ダウンロード/vm/ubn2204-dev/
$ vagrant up
Bringing machine 'default' up with 'virtualbox' provider...
==> default: Clearing any previously set forwarded ports...
==> default: Clearing any previously set network interfaces...
==> default: Preparing network interfaces based on configuration...
    default: Adapter 1: nat
==> default: Forwarding ports...
    default: 22 (guest) => 2222 (host) (adapter 1)
==> default: Booting VM...
==> default: Waiting for machine to boot. This may take a few minutes...
    default: SSH address: 127.0.0.1:2222
    default: SSH username: vagrant
    default: SSH auth method: private key
==> default: Machine booted and ready!
==> default: Checking for guest additions in VM...
==> default: Mounting shared folders...
    default: /vagrant => /home/ubn/ダウンロード/vm/ubn2204-dev
==> default: Machine already provisioned. Run `vagrant provision` or use the `--provision`
==> default: flag to force provisioning. Provisioners marked to run always will still run.
ubn@ubn-box:~/ダウンロード/vm/ubn2204-dev$
→先ほどと違い、最後の 2行が表示されました。
-
でも、画面が起動されません。
「仮想マシン」のイメージが「Vagrant」で(完全に)管理しきれていないみたい。
-
$ vagrant halt
==> default: Attempting graceful shutdown of VM...
-
9). 「Vagrantfile」を稼働していたときの内容に修正:
$ cd ~/ダウンロード/vm/ubn2204-dev/
$ featherpad Vagrantfile
↓ すべて置換:
# -*- mode: ruby -*-
# vi: set ft=ruby :

Vagrant.configure("2") do |config|
  config.vm.box = "ubn2204-dev"
  config.vm.provider "virtualbox" do |vb|
    # Display the VirtualBox GUI when booting the machine
    vb.gui = true
    #vb.memory = "2048"
    vb.memory = "4096"
    vb.cpus = 2
    vb.customize ["modifyvm", :id, "--graphicscontroller", "vmsvga"]
  end
end
Ctrl+S で保存
-
10). 「vagrant reload」を実行:
$ cd ~/ダウンロード/vm/ubn2204-dev/
$ vagrant reload
==> default: Clearing any previously set forwarded ports...
==> default: Clearing any previously set network interfaces...
==> default: Preparing network interfaces based on configuration...
    default: Adapter 1: nat
==> default: Forwarding ports...
    default: 22 (guest) => 2222 (host) (adapter 1)
==> default: Running 'pre-boot' VM customizations...
==> default: Booting VM...
==> default: Waiting for machine to boot. This may take a few minutes...
    default: SSH address: 127.0.0.1:2222
    default: SSH username: vagrant
    default: SSH auth method: private key
    default: Warning: Connection reset. Retrying...
==> default: Machine booted and ready!
==> default: Checking for guest additions in VM...
==> default: Mounting shared folders...
    default: /vagrant => /home/ubn/ダウンロード/vm/ubn2204-dev
==> default: Machine already provisioned. Run `vagrant provision` or use the `--provision`
==> default: flag to force provisioning. Provisioners marked to run always will still run.
ubn@ubn-box:~/ダウンロード/vm/ubn2204-dev$
「仮想マシン」が起動され、仮想マシンの画面が表示されました。
-
「VirtualBox」マネージャで確認したときには、稼働中の設定と同じ値(メモリ "4096"、"vmsvga")だったので、
「Vagrantfile」の内容と、「仮想マシン」のイメージに違いがあると、完全に「Vagrant」で管理できないようです。
どちらにしても、「Vagrantfile」は同じ内容にした方が良いです。
-
「共有フォルダ」を有効にするため、ホストOS を再起動する必要はあるので、
手順を見直すとしたら、「項番 6).」(up) の前に「項番 9).」(編集)を行うことかな。
-
参考: 「Vagrantfile」の管理について:
-
「Vagrantfile」の内容は(稼働していた元の環境から)引き継がれない」ようです:
-
「Box」ファイルを作成する(パッケージ化する)ときに、「Vagrantfile」ファイルを同梱しても良いですが、 手順が複雑になるよりも、できるだけシンプルな手順の方が楽です。
-
配布するときは、稼働中の「Vagrantfile」と「.box」ファイルを「一緒に渡す」と良いです:
例えば、「Dropbox」等に、稼働中の「Vagrantfile」と共有する「.box」ファイルを一緒にUP しておけば安心です。
-
11). 次の「項番 9-3.」で手順を見直すので、今までのファイルをクリア:
-
(1). (VirtualBox の)「仮想マシン」の確認:
$ vagrant global-status
id       name    provider   state    directory
-------------------------------------------------------------------------
d4b57c8  default virtualbox poweroff /home/ubn/ダウンロード/vm/test3
5770428  default virtualbox poweroff /home/ubn/ダウンロード/vm/ubn2204
e64c6ad  default virtualbox poweroff /home/ubn/ダウンロード/vm/ubn2204-dev ←(こちら)
 :
-
(2). (VirtualBox の)「仮想マシン」の削除:
$ cd ~/ダウンロード/vm/ubn2204-dev/
$ vagrant destroy
    default: Are you sure you want to destroy the 'default' VM? [y/N] y
==> default: Destroying VM and associated drives...
-
(3). 「Box」名を確認:
$ vagrant box list
CentOS7-test                (virtualbox, 0)
CentOS7_test3_2             (virtualbox, 0)
generic/fedora38            (virtualbox, 4.3.6, (amd64))
nercceh/ubuntu22.04-desktop (virtualbox, 4.0.3)
ubn2204-dev                 (virtualbox, 0)  ←(こちら)
-
(4). 「Box」ファイルを一覧から削除:
$ vagrant box remove ubn2204-dev
-
(5). 作業フォルダのファイルを削除:
$ cd ~/ダウンロード/vm/ubn2204-dev
$ rm -r .vagrant
$ rm Vagrantfile
-
-
- --- - --- - --- - --- - --- - --- - --- - --- - ----- ----- ----- -----
9-3. 参考: 配布された「.box」ファイルを使って、「仮想マシン」を共有するやり方(改訂版):
-
スムーズに共有できるように、手順を見直しました:
-
「~/ダウンロード/vm/box-share/」フォルダに、共有のために配布された「.box」ファイル保存した場合:
-
1). ファイルの確認:
$ cd ~/ダウンロード/vm/box-share/
$ ls -1A
package-ubn2204-2023-1211.box
-
2). 共有する「Box」をホームフォルダの「Box」の一覧に保存:
ローカルにある「Box」のパスを指定:
$ cd ~/ダウンロード/vm/box-share/
$ vagrant box add ubn2204-dev package-ubn2204-2023-1211.box
→ファイルがコピーされるので、少し時間がかかります。
-
3). 保存された「Box」の一覧を表示:
$ vagrant box list
CentOS7-test                (virtualbox, 0)
CentOS7_test3_2             (virtualbox, 0)
generic/fedora38            (virtualbox, 4.3.6, (amd64))
nercceh/ubuntu22.04-desktop (virtualbox, 4.0.3)
ubn2204-dev                 (virtualbox, 0)     ←(追加)
-
4). 「作業フォルダ」の準備:
$ mkdir -p ~/ダウンロード/vm/ubn2204-dev
-
5). 「Vagrantfile」を稼働していたときの内容で、新規に作成:
$ cd ~/ダウンロード/vm/ubn2204-dev/
$ featherpad Vagrantfile
↓ すべて貼付け:
# -*- mode: ruby -*-
# vi: set ft=ruby :

Vagrant.configure("2") do |config|
  config.vm.box = "ubn2204-dev"
  config.vm.provider "virtualbox" do |vb|
    # Display the VirtualBox GUI when booting the machine
    vb.gui = true
    #vb.memory = "2048"
    vb.memory = "4096"
    vb.cpus = 2
    vb.customize ["modifyvm", :id, "--graphicscontroller", "vmsvga"]
  end
end
Ctrl+S で保存
-
ファイルの確認:
$ ls -1A
Vagrantfile
-
6). 「仮想マシン」の生成と立ち上げ:
$ cd ~/ダウンロード/vm/ubn2204-dev/
$ vagrant up
→「仮想マシン」が起動され、「仮想マシン」の画面が表示されました:
-
7). 「共有フォルダ」を有効にするため、ホストOS を再起動
-
(1). 「仮想マシン」の停止:
$ vagrant halt
-
(2). ホストOS を再起動:
$ reboot
-
(3). 「仮想マシン」の立ち上げ:
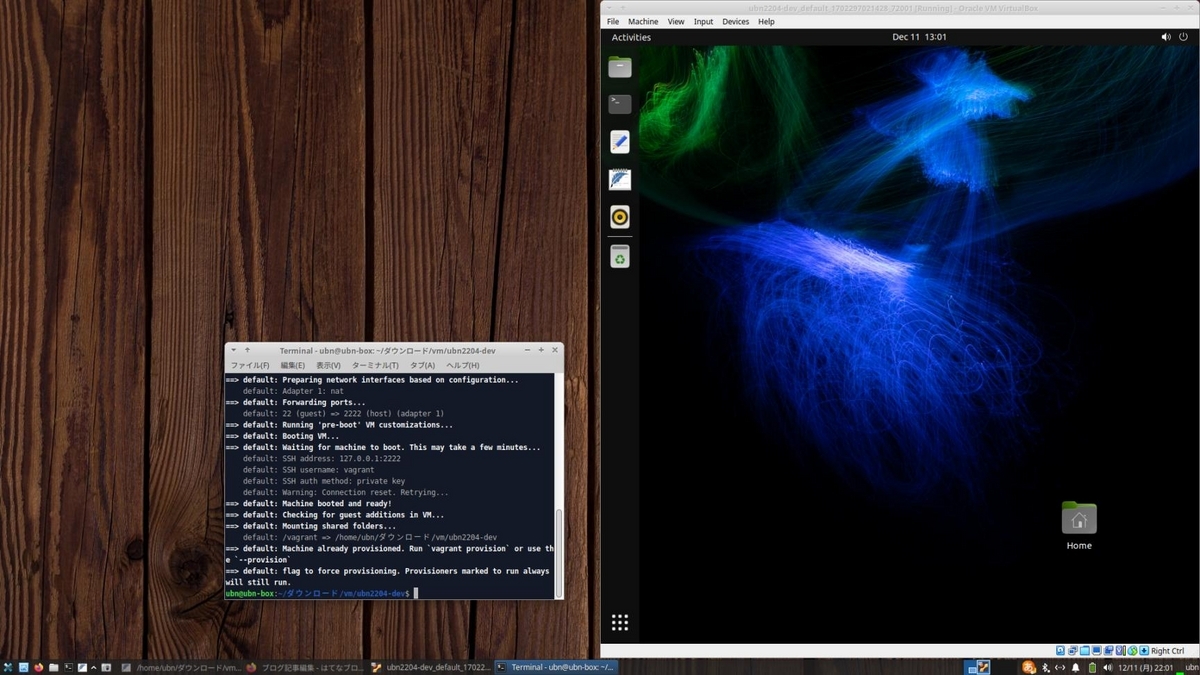
$ cd ~/ダウンロード/vm/ubn2204-dev/
$ vagrant up
Bringing machine 'default' up with 'virtualbox' provider...
==> default: Clearing any previously set forwarded ports...
==> default: Clearing any previously set network interfaces...
==> default: Preparing network interfaces based on configuration...
    default: Adapter 1: nat
==> default: Forwarding ports...
    default: 22 (guest) => 2222 (host) (adapter 1)
==> default: Running 'pre-boot' VM customizations...
==> default: Booting VM...
==> default: Waiting for machine to boot. This may take a few minutes...
    default: SSH address: 127.0.0.1:2222
    default: SSH username: vagrant
    default: SSH auth method: private key
    default: Warning: Connection reset. Retrying...
==> default: Machine booted and ready!
==> default: Checking for guest additions in VM...
==> default: Mounting shared folders...
    default: /vagrant => /home/ubn/ダウンロード/vm/ubn2204-dev
==> default: Machine already provisioned. Run `vagrant provision` or use the `--provision`
==> default: flag to force provisioning. Provisioners marked to run always will still run.
ubn@ubn-box:~/ダウンロード/vm/ubn2204-dev$
→「仮想マシン」が起動され、「仮想マシン」の画面が表示されました。
-
-
まとめ
今回は「Xubuntu 22.04.3 LTS」の「VirtualBox 7.0.10」にて、「Vagrant」を使えるようにしてから、
「Vagrant」で実際に Ubuntu 22.04(デスクトップ) の「仮想マシン」を作成してみました。
また、「Box」の共有も試しました。
-
実際に行って確認した項目は、その都度、(覚書き編)〈H170〉の投稿に反映させています。 なので、だいぶ使える資料になってきていると思います。
色々と試してみて、個人的には、手間ひまかけてカスタマイズした「仮想マシン」を保存する手段として、
「Vagrant」は使うつもりです。
次回の(実践編2) 〈H170-3〉では、その辺りにトライしました。
-
-
-
-
-
目次
-
-
- 目次
- - --- - --- - --- - --- - --- - --- - --- - --- - -
- 「Xubuntu 22.04 LTS」を起動:
- - --- - --- - --- - --- - --- - --- - --- - --- - --
- 「VirtualBox」について:
- - --- - --- - --- - --- - --- - --- - --- - --- - ---
- 「Vagrant」 (ベイグラント) について:
- - --- - --- - --- - --- - --- - --- - --- - --- - ----
- 1. 事前に、Vagrant で使う「Box」を検索:
- - --- - --- - --- - --- - --- - --- - --- - --- - -----
- 2. 「Xubuntu 22.04 LTS」にて、「VirtualBox」をインストール:
- - --- - --- - --- - --- - --- - --- - --- - --- - ----- -
- 3. ホストOS に「Vagrant」をインストール:
- - --- - --- - --- - --- - --- - --- - --- - --- - ----- --
- 3-a. 参考: 最新の「VirtualBox 7.0」の環境で、(楽をしようと)apt で「Vagrant」をインストール:
- - --- - --- - --- - --- - --- - --- - --- - --- - ----- ---
- 3-b. 最新の「VirtualBox 7.0」の環境で、最新の「Vagrant」をインストール:
- - --- - --- - --- - --- - --- - --- - --- - --- - ----- ----
- 4. 「仮想マシン」の(初回の作成と)立ち上げ:
- - --- - --- - --- - --- - --- - --- - --- - --- - ----- -----
- 5. 参考: Vagrantfile を修正して、仮想マシンのメモリを「4096 MB」に増やしました:
- - --- - --- - --- - --- - --- - --- - --- - --- - ----- ----- -
- 6. Vagrant の「仮想マシン」に SSH で接続して、ログイン:
- - --- - --- - --- - --- - --- - --- - --- - --- - ----- ----- --
- 7. 問題点1: 「仮想マシン」の立ち上げ時に「Guest Additions」のバージョンが合わないとの警告が表示:
- - --- - --- - --- - --- - --- - --- - --- - --- - ----- ----- ---
- 7-2. 回避策:「仮想マシン」の「Guest Additions」をアップグレードしました:
- - --- - --- - --- - --- - --- - --- - --- - --- - ----- ----- ----
- 8. 問題点2: 立ち上げた「仮想マシン」のデスクトップ画面が時々「真っ暗」で、表示されてもマウス操作できず:
- 1). 仮想マシンを再起動してみる:
- 2). ホストOS を再起動してみる:
- 3). 「仮想マシン」を立ち上げ:
- 4). 気づいたこと1: デスクトップ画面が真っ暗です:
- 5). デスクトップの再描画:
- 6). 気づいたこと2: デスクトップ画面が表示されたとき、ホストOS のマウスを動かしても、「仮想マシン」(ゲストOS)の黒いマウスカーソルが動きません:
- 7). 気づいたこと3: デスクトップ画面が表示されたとき、Ubuntu 画面の左のドックが表示されません:
- 8). 再度、「仮想マシン」を再起動したら、「VirtualBox」のステータスエリアが画面右側に表示されず、画面真っ暗のままになりました:
- 9). 「デスクトップ」画面の表示が不安定です:
- - --- - --- - --- - --- - --- - --- - --- - --- - ----- ----- -----
- 8-2. 回避策: 「VirtualBox マネージャ」にて「ディスプレイ」の設定を変更:
- - --- - --- - --- - --- - --- - --- - --- - --- - ----- ----- ----- -
- 9. 参考: Vagrant にて、お気に入りの「Box」を元に、新しい「Box」を作成して「共有」:
- - --- - --- - --- - --- - --- - --- - --- - --- - ----- ----- ----- --
- 9-a. 「Vagrantfile」のある「作業フォルダ」に移動して、「vagrant package」コマンドを実行する場合:
- - --- - --- - --- - --- - --- - --- - --- - --- - ----- ----- ----- ---
- 9-b. 「仮想マシン」の ID を指定して、「vagrant package」コマンドを実行する場合:
- - --- - --- - --- - --- - --- - --- - --- - --- - ----- ----- ----- ----
- 9-2. 参考: 配布された「.box」ファイルを使って、「仮想マシン」を共有するやり方:
- - --- - --- - --- - --- - --- - --- - --- - --- - ----- ----- ----- -----
- 9-3. 参考: 配布された「.box」ファイルを使って、「仮想マシン」を共有するやり方(改訂版):
- まとめ
- -
-
-
-