登録日: 2024-01-11 更新日: 2024-03-14
「Xubuntu 22.04 LTS」および「Windows11」(22H2) の「VirtualBox 7.0」の仮想マシンに、色々なLinux ディストリビューションをインストールして、自分に最適なものはないか試しています。
開発環境では、それらの仮想マシン(ボックス)の管理に「Vagrant」(ベイグラント) というツールが、よく使われています。
-
実践編1 の投稿で、「Xubuntu 22.04.3 LTS」の「VirtualBox 7.0.10」にて「Vagrant」を使えるようにしました。
実践編3 の投稿で、コミュニティ版のベースとなる、「EndeavourOS」(デスクトップ環境なし) の英語の環境(日本語キーボード指定、ユーザ名は vagrant )の「Box」を作成しました。
-
(実践編4):
今回は、その作成した「Box」を使って、
(公開はしませんが、)「Vagrant」の「Box」の公開を前提にした ssh 接続等の設定を加えて、「Box」ファイルを作成しました。
-
その備忘録です。
-
-
(注)リンクを戻るときはブラウザの左上の「←」をクリック
スマホの場合は、「ホーム」ボタンの横の「<」キーをタップ
-
-
目次
-
「Vagrant」での参考:
-
今回の作業:
-
-
-
- --- - --- - --- - --- - --- - --- - --- - --- - -
Vagrant で「EndeavourOS」の「仮想マシン」を立ち上げ:
-
1). 「デスクトップ環境なし」でインストールしているので、コンソール画面が立ち上がりました:
→早めに「ssh 接続」の設定をすると設定作業が楽になります:
コンソール画面を直接操作するよりも、「ssh 接続」して操作した方がホストOS 側の端末が使えるので、マウス操作での範囲指定や貼付けが使え、また、日本語が文字化けしません。
-
2). 「共有フォルダ」は自動設定されます:
「VirtualBox Guest Additions」をインストール、および「ssh 接続」できるように設定、
「vagrant up」して「仮想マシン」を作成すると、自動で「共有フォルダ」が作成されました:
→下から 2番目の「共有フォルダー」をクリック:
-
設定内容が表示:

→「vagrant up」するときの「作業フォルダ」がデフォルトの「共有フォルダ」となります。
-
「共有フォルダ」を自動設定するには、パスワードなしのsudo を使える設定が必要でした。
Vagrant は内部的に「ssh 接続」での通信を使い、プロバイダー(VirutalBox)を制御しているようです。
-
-
現在のバージョンを表示:
-
ホストOS : 「Xubuntu 22.04.3 LTS」
2024-01-28 現在
カーネル:
$ uname -r
5.15.0-92-generic
リリース:
$ cat /etc/lsb-release
:
DISTRIB_ID=Ubuntu
DISTRIB_RELEASE=22.04
DISTRIB_CODENAME=jammy
DISTRIB_DESCRIPTION="Ubuntu 22.04.3 LTS"
→「22.04.3」にアップしています。
-
-
ゲストOS : EndeavourOS
2024-01-28 現在
カーネル:
$ uname -r
6.6.7-arch1-1
リリース:
$ cat /etc/lsb-release
:
DISTRIB_ID="EndeavourOS"
DISTRIB_RELEASE="rolling"
DISTRIB_DESCRIPTION="EndeavourOS Linux"
DISTRIB_CODENAME="rolling"
$ cat /etc/os-release
:
NAME="EndeavourOS"
PRETTY_NAME="EndeavourOS"
ID="endeavouros"
ID_LIKE="arch"
BUILD_ID=rolling             ←(注目)
ANSI_COLOR="38;2;23;147;209"
HOME_URL="https://endeavouros.com"
DOCUMENTATION_URL="https://discovery.endeavouros.com"
SUPPORT_URL="https://forum.endeavouros.com"
BUG_REPORT_URL="https://forum.endeavouros.com/c/arch-based-related-questions/bug-reports"
PRIVACY_POLICY_URL="https://endeavouros.com/privacy-policy-2"
LOGO="endeavouros"
→インストール時に使用したイメージの作成日付でしたが、 再び、「BUILD_ID=rolling」の表示に戻っています。
-
「Welcome」のバージョン:
$ eos-welcome --version
:
3.85-1
→バージョン表示にて、「ログの登録」の行が表示される場合は「こちら 」を参照:
-
-
- --- - --- - --- - --- - --- - --- - --- - --- - --
「VirtualBox」について:
-
「VirtualBox」は、Oracle が開発している「仮想マシン」を構築するためのソフトウェアです。
-
- 仮想マシンを使うことで、ハードウェアで問題となりそうなPC でも、最新のLinux ディストリビューションをインストールできる可能性が高くなります。
-
-
- --- - --- - --- - --- - --- - --- - --- - --- - ---
「Vagrant」 (ベイグラント) について:
-
公式サイト:
-
「仮想マシン」の管理や操作をコマンドで使うための「フロントエンド」のソフトウェアです:
-
→詳細は、以前に投稿した「こちら 」を参照:
-
-
- --- - --- - --- - --- - --- - --- - --- - --- - ----
「EndeavorOS」について:
-
公式サイト:
-
-
→詳細は、以前に投稿した「こちら 」を参照:
-
-
- --- - --- - --- - --- - --- - --- - --- - --- - -----
「EndeavourOS」(OpenBox) について:
-
公式サイト:
EndeavourOS-Community-Editions/openbox
→サイトに置かれた情報は「こちら 」を参照:
-
その他の詳細は「こちら 」を参照:
-
-
- --- - --- - --- - --- - --- - --- - --- - --- - ----- -
公開する「Box」の元となる「仮想マシン」を作成するときの留意点:
-
インストールする環境は、基本「英語」の環境:
-
言語は「英語」指定、キーボードは「日本語キーボート」指定、でインストールしました:
言語を「日本語」にすると、「ホーム」フォルダが日本語になることと、デフォルトのコンソールでは日本語が文字化けして、設定作業が面倒です:
-
→詳細は、以前に投稿した「こちら 」を参照:
-
-
- --- - --- - --- - --- - --- - --- - --- - --- - ----- --
(前回の作業):
-
Vagrant 実践編3: 新規に「EndeavourOS」(デスクトップなし) の「Box」を作成〈H170-4〉
-
「EndeavourOS」にて、「デスクトップ環境なし」 の英語の環境(日本語キーボード指定、ユーザ名は vagrant )をインストールして、「Box」を作成しました。
-
-
(前回の作業の続き):
-
-
- --- - --- - --- - --- - --- - --- - --- - --- - ----- ---
1. 「仮想マシン」のクリア:
-
前回の投稿をした後に、「仮想マシン」を色々といじったので、「仮想マシン」を作成し直しました:
-
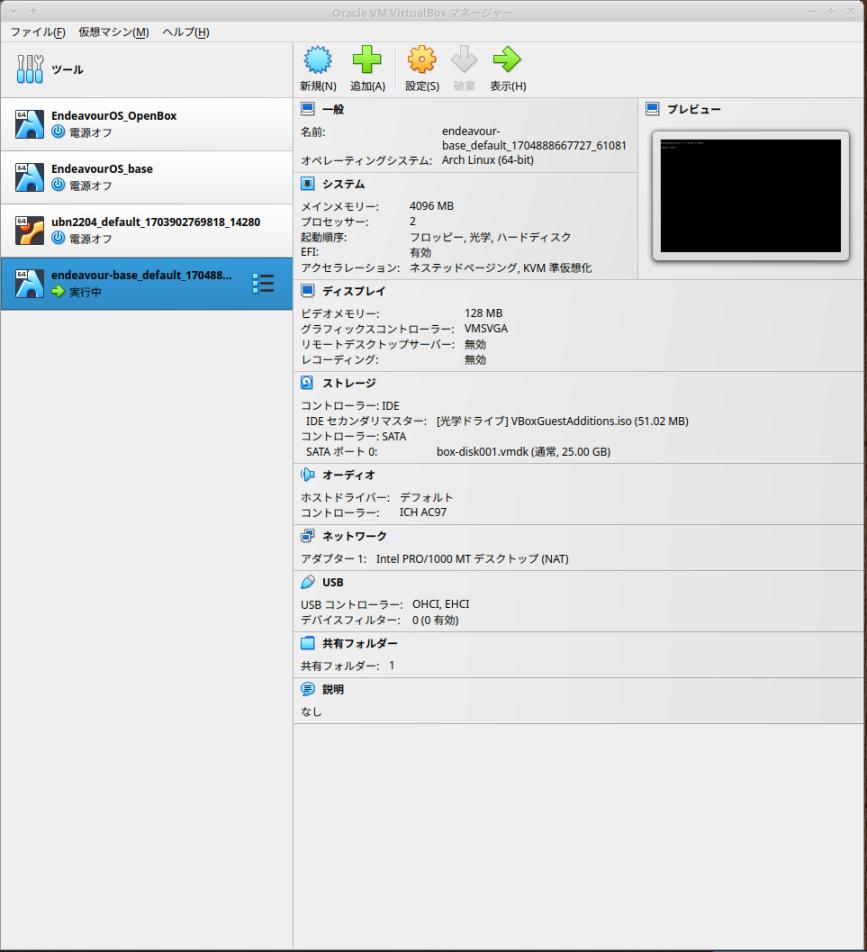
1). 「仮想マシン」の状態を確認:
$ cd ~/ダウンロード/vm/endeavour-base/
$ vagrant status
Current machine states:

default                   running (virtualbox)
:
→「仮想マシン」の「default」が、「起動中」です。
-
「VirtualBox」に作成された仮想マシン名は、「作業フォルダ」名と「default」と任意の数字の組合せになります:
例: 「endeavour-base_default_1704888667727_61081」
-
「Vagrant」から見える仮想マシン名は「default」です。
-
2). 「仮想マシン」の停止(電源オフ):
$ cd ~/ダウンロード/vm/endeavour-base/
$ vagrant halt
==> default: Attempting graceful shutdown of VM...
    default: Guest communication could not be established! This is usually because
    default: SSH is not running, the authentication information was changed,
    default: or some other networking issue. Vagrant will force halt, if
    default: capable.
==> default: Forcing shutdown of VM...
和訳:
==> default: 「仮想マシン」の正常なシャットダウンを試みています...
    default: ゲスト通信が確立できませんでした。
    default: これは通常、SSH が実行されていない、認証情報が変更された、
    default: またはその他のネットワークの問題が原因です。
    default: 可能であれば、Vagrant は強制的に停止します。
==> default: 「仮想マシン」を強制的にシャットダウンします...
→ssh 接続の設定がされていないので、警告が表示されますが無視。
-
3). 「仮想マシン」の削除:
$ cd ~/ダウンロード/vm/endeavour-base/
$ vagrant destroy
    default: Are you sure you want to destroy the 'default' VM? [y/N] y
==> default: Destroying VM and associated drives...
和訳:
    default: 「仮想マシン」の「default」を削除してもよろしいですか? [y/N] y
==> default: 「仮想マシン」と関連ドライブを削除しています...
→「y」Enter にて、削除
-
-
- --- - --- - --- - --- - --- - --- - --- - --- - ----- ----
2. 「仮想マシン」の作成と立ち上げ:
-
「仮想マシン」の立ち上げ:
$ cd ~/ダウンロード/vm/endeavour-base/
$ vagrant up
Bringing machine 'default' up with 'virtualbox' provider...
==> default: Importing base box 'Endeav-base-00'...
Progress: 70%
しばらく待ちます:
==> default: Matching MAC address for NAT networking...
==> default: Setting the name of the VM: endeavour-base_default_1704888667727_61081
==> default: Clearing any previously set network interfaces...
==> default: Preparing network interfaces based on configuration...
    default: Adapter 1: nat
==> default: Forwarding ports...
    default: 22 (guest) => 2222 (host) (adapter 1)
==> default: Running 'pre-boot' VM customizations...
==> default: Booting VM...
==> default: Waiting for machine to boot. This may take a few minutes...
    default: SSH address: 127.0.0.1:2222
    default: SSH username: vagrant
    default: SSH auth method: private key
    default: Warning: Remote connection disconnect. Retrying...
    default: Warning: Connection reset. Retrying...
    default: Warning: Remote connection disconnect. Retrying...
    default: Warning: Connection reset. Retrying...
    default: Warning: Remote connection disconnect. Retrying...
    default: Warning: Connection reset. Retrying...
前回、ssh 接続のループ回避の設定 を行っているので、プロンプトに戻り、端末が開放されました:
-
赤色の警告表示:
Timed out while waiting for the machine to boot. This means that
Vagrant was unable to communicate with the guest machine within
the configured ("config.vm.boot_timeout" value) time period.

If you look above, you should be able to see the error(s) that
Vagrant had when attempting to connect to the machine. These errors
are usually good hints as to what may be wrong.

If you're using a custom box, make sure that networking is properly
working and you're able to connect to the machine. It is a common
problem that networking isn't setup properly in these boxes.
Verify that authentication configurations are also setup properly,
as well.

If the box appears to be booting properly, you may want to increase
the timeout ("config.vm.boot_timeout") value.
ubn@ubn-box:~/ダウンロード/vm/endeavour-base$
-
実際の「端末」画面:
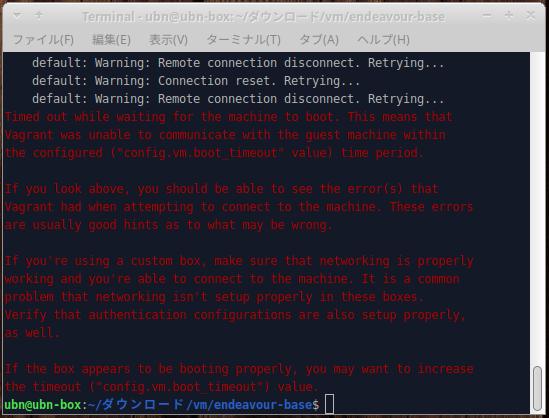
→ssh 接続は未設定なので、警告は無視
-
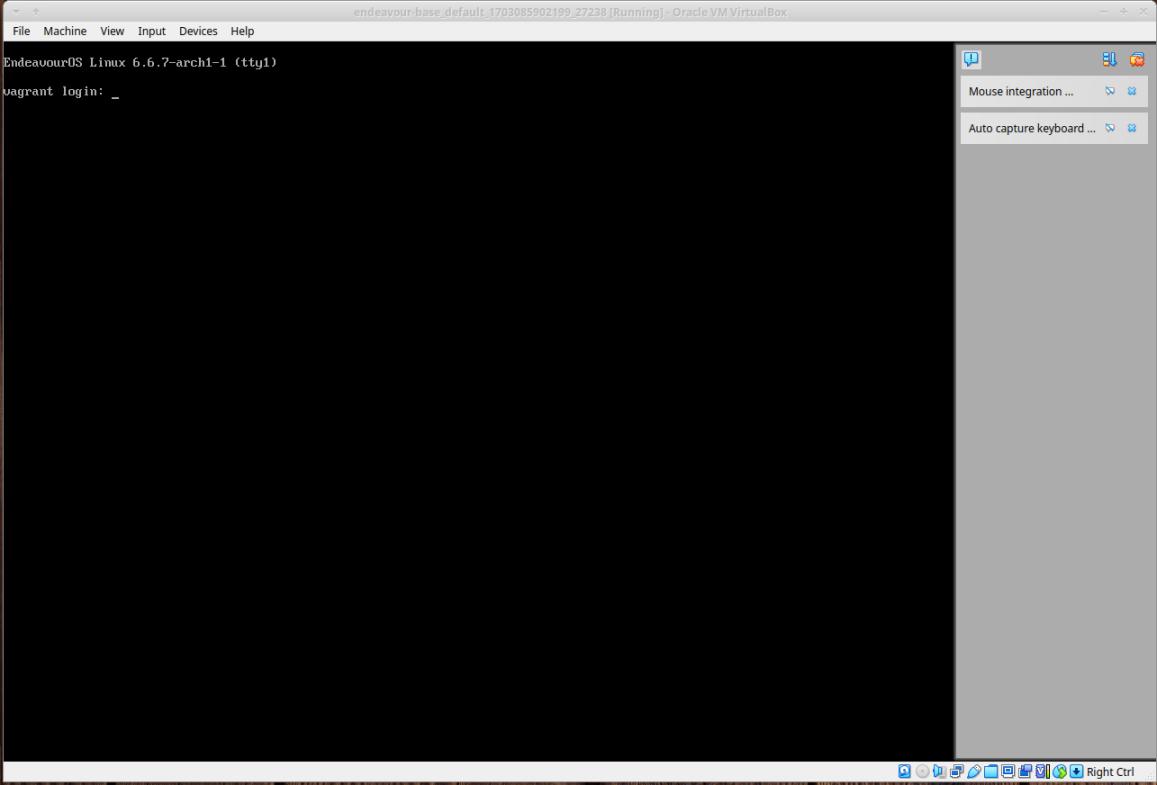
「仮想マシン」が立ち上がりました:
→「デスクトップ環境なし」でインストールしているので、コンソール画面が立ち上がりました。
-
-
- --- - --- - --- - --- - --- - --- - --- - --- - ----- -----
3. 現在の「仮想マシン」の状態を確認:
-
「ホストOS」の端末にて確認:
-
1). 参考: 現在、Vagrant で管理されている「仮想マシン」:
$ vagrant global-status
id       name    provider   state    directory
-------------------------------------------------------------------------
5d12367  default virtualbox poweroff /home/ubn/ダウンロード/vm/ubn2204
f104680  default virtualbox running  /home/ubn/ダウンロード/vm/endeavour-base  ←(注目)
→「仮想マシン」の「id」と、その管理に使われている「作業フォルダ」名がわかります。
-
2). VirtualBox の「仮想マシン」の実際のフォルダ:
$ ls -1Ap ~/'VirtualBox VMs'
EndeavourOS_OpenBox/
EndeavourOS_base/
endeavour-base_default_1704888667727_61081/  ←(Vagrant で管理)
ubn2204_default_1703902769818_14280/         ←(Vagrant で管理)
→上記のすべてのフォルダ名が、VirtualBox で見える「仮想マシン」名です。
下の 2つのフォルダ名に含まれている「default」が、Vagrant で見える「仮想マシン」名です。
-
3). Vagrant に登録(ローカルのホームに保存)されている「Box」:
$ vagrant box list
Endeav-base-00     (virtualbox, 0)                 ←(注目)
generic/ubuntu2204 (virtualbox, 4.3.8, (amd64))
→Vagrant で見える「仮想マシン」のベース(元)として使える(使われた)「Box」です。
各「作業フォルダ」の Vagrantfile で利用されるベースが指定されています。
-
-
- --- - --- - --- - --- - --- - --- - --- - --- - ----- ----- -
4. 「仮想マシン」にて、「vagrant」ユーザでログイン:
-
「仮想マシン」のコンソール画面にて操作:
ssh 接続の設定が済んでいないので、直接、コンソール画面で操作します:
-
「vagrant」ユーザでログイン:
EndeavourOS Linux 6.6.7-arch1-1 (tty1)

vagrant login:
→ユーザ名に「vagrant」を入力
-
password:
→パスワードに「vagrant」を入力
-
[vagrant@vagrant ~]$
→コマンドプロンプトが変わりました。
-
-
- --- - --- - --- - --- - --- - --- - --- - --- - ----- ----- --
4-2. 参考: 「vagrant」ユーザが追加されていない場合:
-
他のユーザにログイン後に 「vagrant」ユーザを追加:
-
1). 「root」になります:
$ su -
Password:
→パスワードは、ログインしたユーザのパスワード
-
2). 「vagrant」ユーザの作成:
# useradd -m vagrant
-
3). 「vagrant」ユーザのパスワード設定:
# passwd vagrant
→パスワードは「vagrant」
-
4). 「vagrant」でログイン:
# su - vagrant
-
-
- --- - --- - --- - --- - --- - --- - --- - --- - ----- ----- ---
5. 「仮想マシン」の「vagrant」ユーザで操作:
-
「仮想マシン」のコンソール画面にて操作:
-
1). 確認:
[vagrant@vagrant ~]$ pwd
/home/vagrant
[vagrant@vagrant ~]$ id
uid=1000(vagrant) gid=1000(vagrant) groups=1000(vagrant),3(sys),981(rfkill),998(wheel)
→「ベースボックス」にするには、余分なグループがあります。
-
-- -- -- -- -- -- -- -- -- -- -- -- -- -- -- -- -- -- -- -- -- -- -- --
参考: 「wheel」グループについて:
「wheel」グループに属すると、コマンドに関しては「root」と同等の権限を持ちます:
-
「root」のパスワードを知っていれば、直接、コンソールを操作して「root」でログインできます。 また、「su」コマンドで「root」ユーザにスイッチできます。
ただし、「/etc/pam.d/su」の設定次第では、「wheel」グループに属していない人は、「root」のパスワードを知っていても「su」コマンドで「root」になれません。
また、ネット経由の ssh だと「root」でログインできないのが普通です。
-
-- -- -- -- -- -- -- -- -- -- -- -- -- -- -- -- -- -- -- -- -- -- -- --
参考: 「rfkill」について:
Power_Management_Guide/RFKill から抜粋:
多くのコンピュータが、Wi-Fi、Bluetooth、及び 3G のデバイスを含む電波発信器を内蔵しています。 これらのデバイスは電力を消費し、 使用されない時は無駄になります。
-
Rfkill は、システム上の RFKill 対応のデバイスをクエリ、変更できるコマンドラインツール(rfkill パッケージ)です。 RFkill をサポートしたカーネルドライバーは、この API を使用してカーネルに登録し、デバイスを有効にしたり無効にできます。
-
デバイスの一覧を確認するには:
$ rfkill list
$
-
2). sudo が使えるか確認:
[vagrant@vagrant ~]$ sudo ls
[sudo] password for vagrant:
Desktop  Documents  Downloads  Music  Pictures  Public  Templates  Videos
-
「/etc/sudoers*」の確認:
[vagrant@vagrant ~]$ sudo ls /etc/sudoers*
/etc/sudoers

/etc/sudoers.d:
10-installer
-
「/etc/sudoers」の確認:
[vagrant@vagrant ~]$ sudo cat /etc/sudoers
:
## Read dop-in files from /etc/sudoers.d
@includedir /etc/sudoers.d
→設定ファイルの最後に「外部ファイル」を取り込むフォルダの定義がありました。
-
「/etc/sudoers.d/10-installer」の確認:
[vagrant@vagrant ~]$ sudo cat /etc/sudoers.d/10-installer
%wheel ALL=(ALL) ALL
外部ファイルに「wheel」グループの権限の定義がありました。
ファイル名からして、OS のインストールのユーザ作成時に追加されたと思われます。
-
3). 余分なグループから「vagrant」ユーザを削除:
「Box」を公開しないのであれば、要らない作業です:
-
(1). 「root」になります:
[vagrant@vagrant ~]$ su -
Password:
→パスワードは「vagrant」
[root@vagrant ~]#
→プロンプトが「root」になりました。
-
(2). 「sys」グループから、「vagrant」ユーザを削除:
[root@vagrant ~]# gpasswd -d vagrant sys
-
(3). 「rfkill」グループから、「vagrant」ユーザを削除:
[root@vagrant ~]# gpasswd -d vagrant rfkill
-
(4). 「wheel」グループから、「vagrant」ユーザを削除:
[root@vagrant ~]# gpasswd -d vagrant wheel
-
(5). 確認:
[root@vagrant ~]# id vagrant
uid=1000(vagrant) gid=1000(vagrant) groups=1000(vagrant)
→削除できました。完全に反映させるには再起動が必要。
-
4). 「wheel」グループから抜けたので、「vagrant」で sudo が使えるように設定:
「wheel」グループから抜けて、そのままだと、「vagrant」で sudo が使えなくなります:
-
「/etc/sudoers」の修正:
[root@vagrant ~]# visudo
「nano」でなく、「vi」が起動されました。
-
「↓」キーでファイルの最後の行に移動
「End」キーで行末に移動
「Esc」「Esc」「a」
最後の行の行末で、キー入力が可能になるので、2回、改行してから、下記を入力:
## Allow root to run any commands anywhere
root    ALL=(ALL)   ALL
Defaults:vagrant    !requiretty
vagrant ALL=(ALL)   NOPASSWD: ALL
大きなすき間は、半角スペース x 4つ にすると良いです
-
説明:
下から 2行目:
全ユーザではなく、特定の「vagrant」ユーザだけに「tty なしでの sudo」を認めます:
→sudo エラーの回避
下から 1行目:「vagrant」ユーザが、sudo をパスワードなしで実行できるようにします:
-
「Esc」「Esc」「:wq」Enter
→書き込み後に、終了しました:
[root@vagrant ~]#
→「visudo」にて入力ミスがあると、やり直さないとコマンドプロンプトに戻りません。
コマンドプロンプトに戻ったということは、構文のミスはなかったということ。
-
5). 「vagrant」に抜けます:
[root@vagrant ~]# exit
logout
[vagrant@vagrant ~]$
→プロンプトが「vagrant」に戻りました:
-
[vagrant@vagrant ~]$ pwd
/home/vagrant
-
6). sudo が使えるかの確認と、修正されたかの確認:
[vagrant@vagrant ~]$ sudo cat /etc/sudoers
パスワードなしで、下記が表示:
:
## Read dop-in files from /etc/sudoere.d
@includedir /etc/sudoers.d

## Allow root to run any commands anywhere
root    ALL=(ALL)   ALL
Defaults:vagrant    !requiretty
vagrant ALL=(ALL)   NOPASSWD: ALL
→OK
-
ファイルの最終行に記述すれば、外部ファイルの定義を取り込んでも、上書きして、最優先になります。
-
7). 再起動:
[vagrant@vagrant ~]$ reboot
-
8). 「vagrant」ユーザでログイン:
EndeavourOS Linux 6.6.7-arch1-1 (tty1)

vagrant login:
→ユーザ名に「vagrant」を入力
-
password:
→パスワードに「vagrant」を入力
-
[vagrant@vagrant ~]$
→コマンドプロンプトが変わりました。
-
9). 確認:
-
[vagrant@vagrant ~]$ ls
水色表示:
Desktop Documents Downloads Music Pictures Public Templates Videos
-
[vagrant@vagrant ~]$ sudo ls
パスワードを聞いてきません:
白色表示:
Desktop Documents Downloads Music Pictures Public Templates Videos
-
[vagrant@vagrant ~]$ id
uid=1000(vagrant) gid=1000(vagrant) groups=1000(vagrant)
→余分なグループが表示されません。
-
-
- --- - --- - --- - --- - --- - --- - --- - --- - ----- ----- ----
6. ssh 関連の設定:
-
「仮想マシン」のコンソール画面にて操作:
-
1). 確認:
-
[vagrant@vagrant ~]$ ls -1Ap
色分けして表示:
.bash_history
.bash_logout
.bash_Profile
.bashrc
.config/
Desktop/
Documents/
Downloads/
Music/
Pictures/
Public/
Templates/
Videos/
→「~/.ssh」はありません
-
2). Vagrant 用公開鍵認証キーを取得:
$ mkdir -p /home/vagrant/.ssh
$ chmod 700 /home/vagrant/.ssh

$ cd /home/vagrant/.ssh
$ curl -k -L -o authorized_keys 'https://raw.github.com/mitchellh/vagrant/master/keys/vagrant.pub'
$ chmod 600 /home/vagrant/.ssh/authorized_keys
$ chown -R vagrant:vagrant /home/vagrant/.ssh
-
3). ホームに移動:
[vagrant@vagrant ~]$ cd
-
4). 確認:
[vagrant@vagrant ~]$ ls -lAp /home/vagrant/ | grep ssh
:
drwx------   2 vagrant vagrant   4096 1■ 10 23:42 .ssh/
→ファイル属性は「700」で、「vagrant:vagrant」の所有
-
[vagrant@vagrant ~]$ ls -lAp /home/vagrant/.ssh
:
-rw-------   1 vagrant vagrant   409 1■ 10 23:42 authorized_keys
→ファイル属性は「600」で、「vagrant:vagrant」の所有
-
5). ssh 関連のアプリがインストールされているかを確認:
「EndeavourOS」の場合:
$ pacman -Ss ssh | grep installed
:
core/libssh2 1.11.0-1 [installed]
core/openssh 9.6p1-1 [installed] ←(注目)
extra/libssh 0.10.6-1 [installed]
→「openssh」がインストールされています。
-
-- -- -- -- -- -- -- -- -- -- -- -- -- -- -- -- -- -- -- -- -- -- -- --
参考: 「Ubuntu」の場合:
$ apt list *ssh* --installed
:
libssh-4/jammy-updates,jammy-security,now 0.9.6-2ubuntu0.22.04.1 amd64 [installed,automatic]
openssh-client/jammy-updates,now 1:8.9p1-3ubuntu0.4 amd64 [installed,automatic]  ←(注目)
openssh-server/jammy-updates,now 1:8.9p1-3ubuntu0.4 amd64 [installed]  ←(注目)
openssh-sftp-server/jammy-updates,now 1:8.9p1-3ubuntu0.4 amd64 [installed,automatic]
ssh-import-id/jammy,now 5.11-0ubuntu1 all [installed]
→「openssh-client」と「openssh-server」がインストールされています。
-
Linux ディストリビューションによって、パッケージ名や機能の分割のやり方は異なります。
-
6). ssh 関連のサービスが起動されているか確認:
$ sudo systemctl status sshd
○ sshd.service - OpenSSH Daemon
     Loaded: loaded (/usr/lib/systemd/system/sshd.service; disabled; preset: disabled)
     Active: inactive (dead)
-
7). sshd サービスの有効化:
$ sudo systemctl enable sshd
Created symlink /etc/systemd/system/multi-user.target.wants/sshd.service → /usr/lib/systemd/system/sshd.service.
→サービス名に付く(.service) は省略できます
-
8). sshd サービス(ssh サーバー)の起動:
$ sudo systemctl start sshd
$
→サービス名に付く(.service) は省略できます
-
9). sshd サービスが起動されたか確認:
$ sudo systemctl status sshd
● ssh.service - OpenSSH Daemon
     Loaded: loaded (/usr/lib/systemd/system/sshd.service; enabled; preset: disabled)
     Active: active (running) since Thu 2024-01-11 00:22:02 JST; 1min 39S ago
   Main PID: 655 (sshd)
      Tasks: 1 (limit: 4642)
     Memory: 2.1M (peak: 2.3M)
        CPU: 22ms
     CGroup: /system.slice/sshd.service
             └─655 "sshd: /usr/bin/sshd -D [listener] 0 of 10-100 startups"

:
→「q」で表示の終了
-
10). 再起動:
[vagrant@vagrant ~]$ reboot
-
11). ログイン画面にて、ログインせずにそのまま:
-
-
- --- - --- - --- - --- - --- - --- - --- - --- - ----- ----- -----
7. 「仮想マシン」に「ssh 接続」:
-
ホストOS の端末にて:
-
1). 「仮想マシン」が起動していることを確認:
$ pwd
/home/ubn/ダウンロード/vm/endeavour-base
-
$ vagrant status
Current machine states:

default                   running (virtualbox)
-
2). 「ssh-config」の確認:
$ vagrant ssh-config
Host default
  HostName 127.0.0.1
  User vagrant
  Port 2222
  UserKnownHostsFile /dev/null
  StrictHostKeyChecking no
  PasswordAuthentication no
  IdentityFile /home/ubn/.vagrant.d/insecure_private_keys/vagrant.key.ed25519
  IdentityFile /home/ubn/.vagrant.d/insecure_private_keys/vagrant.key.rsa
  IdentitiesOnly yes
  LogLevel FATAL
  PubkeyAcceptedKeyTypes +ssh-rsa
  HostKeyAlgorithms +ssh-rsa
-
3). 「ssh 接続」:
$ vagrant ssh
Last login: Wed Jan 10 23:19:24 2024
[vagrant@vagrant ~]$
→パスワードなしで自動ログインされました。
[vagrant@vagrant ~]$ date
2024年  1月 11日 木曜日 00:43:55 JST
→「date」コマンドが文字化けしません。
-
[vagrant@vagrant ~]$ ls -lAp
:
-rw------- 1 vagrant vagrant  808  1月 11 00:32 .bash_history
-rw-r--r-- 1 vagrant vagrant   21 11月 23 00:26 .bash_logout
-rw-r--r-- 1 vagrant vagrant   57 11月 23 00:26 .bash_profile
-rwxr-xr-x 1 vagrant vagrant 2691 11月 17 20:33 .bashrc
drwxr-xr-x 3 vagrant vagrant 4096  1月 10 21:29 .config/
drwxr-xr-x 2 vagrant vagrant 4096  1月 10 21:29 Desktop/
drwxr-xr-x 2 vagrant vagrant 4096  1月 10 21:29 Documents/
drwxr-xr-x 2 vagrant vagrant 4096  1月 10 21:29 Downloads/
drwxr-xr-x 2 vagrant vagrant 4096  1月 10 21:29 Music/
drwxr-xr-x 2 vagrant vagrant 4096  1月 10 21:29 Pictures/
drwxr-xr-x 2 vagrant vagrant 4096  1月 10 21:29 Public/
drwx------ 2 vagrant vagrant 4096  1月 10 23:42 .ssh/
drwxr-xr-x 2 vagrant vagrant 4096  1月 10 21:29 Templates/
drwxr-xr-x 2 vagrant vagrant 4096  1月 10 21:29 Videos/
-
4). ssh サーバー設定で 「UseDNS」設定を no に設定:
サーバーへ ssh 接続を行うと、サーバー側で接続元IPアドレスの逆引きを行うため、 DNS サーバーへの問い合わせを行います。
-
マシンまたは Vagrant マシンがインターネットに接続されていない場合(ローカルネットワーク上のサーバーへのSSH接続)でも ssh の速度を維持するには、 ssh サーバー設定で 「UseDNS」設定を no(SSHサーバーの逆引きを無効)に設定することで、 接続している ssh クライアントで何秒もかかる可能性がある「逆引き DNS ルックアップ」が回避されます。
-
「/etc/ssh/sshd_config」の修正:
$ sudo nano /etc/ssh/sshd_config
Ctrl+W で、検索
Search: DNS
-
修正:
#UseDNS no
↓ コメント行を解除:
UseDNS no
Ctrl+O で、保存
Ctrl+X で、終了
-
-
- --- - --- - --- - --- - --- - --- - --- - --- - ----- ----- ----- -
8. 「仮想マシン」にて、「VirtualBox Guest Additions」を追加:
-
-
「EndeavourOS」の公式のデスクトップ環境には、標準で(専用にカスタマイズした)「VBoxGuestAdditions」がインストールされていますが、デスクトップなしの環境には「VBoxGuestAdditions」はインストールされていません。
-
1). 必要なツールのインストール:
「EndeavourOS」の場合:
[vagrant@vagrant ~]$ sudo pacman -S dkms
resolving dependencies...
looking for conflicting packages...

Package (1)  New Version  Net Change

extra/dkms   3.0.11-1       0.11 MiB

Total Installed Size:  0.11 MiB

:: Proceed with installation? [Y/n]
→Enter
-
[vagrant@vagrant ~]$ sudo pacman -S gcc make perl

:: Proceed with installation? [Y/n]
→Enter
インストールされている可能性が高いですが、再インストールでもOK
-
-- -- -- -- -- -- -- -- -- -- -- -- -- -- -- -- -- -- -- -- -- -- -- --
参考: 「Ubuntu」の場合:
$ sudo apt update
$ sudo apt install linux-headers-$(uname -r) build-essential dkms
→ダイアログ画面が表示されたら、Tab キーで「OK」を選び、Enter
-
$ sudo apt install gcc make perl
-
2). 「仮想マシン」の画面にて、
「Devices」 →「Upgrade Guest Additions...」をクリック
-
「Install Guest Additions CD images...」でなく、「Upgrade Guest Additions...」が選べるならクリックすると、
「CD マウント」と「シェルスクリプトの実行」が自動で行われます:
-
→右の通知領域に「Installing image ...」60% が表示されるので、100% になるまで待ちます。
エラーの表示は無視。
-
3). ホストOS の端末にて、「ssh 接続」からログアウト:
[vagrant@vagrant ~]$ exit
logout
ubn@ubn-box:~/ダウンロード/vm/endeavour-base$
→プロンプトが戻りました。
-
4). 「仮想マシン」の停止(電源オフ):
$ cd ~/ダウンロード/vm/endeavour-base/
$ vagrant halt
==> default: Attempting graceful shutdown of VM...
    default:
    default: Vagrant insecure key detected. Vagrant will automatically replace
    default: this with a newly generated keypair for better security.
    default:
    default: Inserting generated public key within guest...
    default: Removing insecure key from the guest if it's present...
    default: Key inserted! Disconnecting and reconnecting using new SSH key...
和訳:
==> default: 仮想マシンの正常なシャットダウンを試行しています...
    default:
    default: Vagrant の安全でないキーが検出されました。
    default: Vagrant は、セキュリティを向上させるために、これを
    default: 新しく生成されたキーペアに自動的に置き換えます。
    default:
    default: 生成された公開キーをゲスト内に挿入します...
    default: ゲストに安全でないキーが存在する場合はそれを削除します...
    default: キーが挿入されました!新しい SSH キーを使用した切断と再接続...
→「項番 6 - 2) 」でわざと「安全でないキー」を配置しています。
-
「安全でないキー」を検出すると自動で「安全なキーペア」に置換えられます:
(そういうVagrant の仕組みにより、設定時のキーペアの生成をせずにダウンロードできます)
-
5). 「ホストOS」も再起動:
ホストOS にて、起動しているアプリを閉じます:
-
ホストOS の端末にて、
$ reboot
→「共有フォルダ」を有効にするための操作です。
-
-
- --- - --- - --- - --- - --- - --- - --- - --- - ----- ----- ----- --
9. 「仮想マシン」を立ち上げて確認:
-
「仮想マシン」の立ち上げ:
$ cd ~/ダウンロード/vm/endeavour-base/
$ vagrant up
Bringing machine 'default' up with 'virtualbox' provider...
==> default: Clearing any previously set forwarded ports...
==> default: Clearing any previously set network interfaces...
==> default: Preparing network interfaces based on configuration...
    default: Adapter 1: nat
==> default: Forwarding ports...
    default: 22 (guest) => 2222 (host) (adapter 1)
==> default: Running 'pre-boot' VM customizations...
==> default: Booting VM...
==> default: Waiting for machine to boot. This may take a few minutes...
    default: SSH address: 127.0.0.1:2222
    default: SSH username: vagrant
    default: SSH auth method: private key
==> default: Machine booted and ready!
==> default: Checking for guest additions in VM...
==> default: Mounting shared folders...
    default: /vagrant => /home/ubn/ダウンロード/vm/endeavour-base
ubn@ubn-box:~/ダウンロード/vm/endeavour-base$
→「ssh 接続」のリトライエラーが消えました。
「guest additions」のバージョンの整合性のチェックも OK。
-
「共有フォルダ」が自動でマウントされました:
-
→「Virtualbox」マネージャの画面でも、「共有フォルダ」が有効になったことが確認できます:
→下から 2番目の「共有フォルダー」をクリック:
-
設定内容が表示:
→「vagrant up」するときの「作業フォルダ」が「共有フォルダ」となります。
-
-
- --- - --- - --- - --- - --- - --- - --- - --- - ----- ----- ----- ---
10. 設定の完了した「仮想マシン」から、「Box」を作成:
-
参考:「vagrant package」コマンドの使い方:
$ vagrant package [--base 対象の「仮想マシン」の名前]、または[id] --output [ファイル名].box
→「id」は「Vagrant」で管理されている「仮想マシン」のみで使えます:
-
1). 「仮想マシン」の「id」を確認:
$ vagrant global-status
id       name    provider   state    directory
-------------------------------------------------------------------------
f104680  default virtualbox running  /home/ubn/ダウンロード/vm/endeavour-base ←(注目)
→「id」は「f104680」です
-
2). 「仮想マシン」の停止(電源オフ):
$ cd ~/ダウンロード/vm/endeavour-base/
$ vagrant halt
==> default: Attempting graceful shutdown of VM...
→「ssh 接続」の警告が消えました。
-
3). 「.box」ファイルを作成したい場所を準備:
すでに作成済みです:
$ mkdir -p ~/ダウンロード/vm/box-share/
-
4). 「.box」ファイルを作成:
-
(1). 場所の移動:
$ cd ~/ダウンロード/vm/box-share/
$ ls -lA
:
-rw-rw-r-- 1 ubn ubn 2958974232 12月 20 21:30 pkg-EndeavourOS_base-inst.box
-
(2). 作成:
$ cd ~/ダウンロード/vm/box-share/
$ vagrant package f104680 --output pkg-EndeavourOS_base-jp.box
==> default: Clearing any previously set forwarded ports...
==> default: Exporting VM...
==> default: Compressing package to: /home/ubn/ダウンロード/vm/box-share/pkg-EndeavourOS_base-jp.box
「id」指定にすると、「--base」を付けると実行できませんでした。外すと実行できました。
「id」指定時の書式が違うみたい。
時間がかかります:
-
(3). 確認:
$ ls -lA ~/ダウンロード/vm/box-share/
:
-rw-rw-r-- 1 ubn ubn 2958974232 12月 20 21:30 pkg-EndeavourOS_base-inst.box
-rw-rw-r-- 1 ubn ubn 2979814018  1月 11 17:31 pkg-EndeavourOS_base-jp.box
-
-
- --- - --- - --- - --- - --- - --- - --- - --- - ----- ----- ----- ----
11. 作成された「Box」ファイルを「Box」の一覧に追加:
-
1). できた「Box」ファイルをホームの「Box」一覧に追加:
$ cd ~/ダウンロード/vm/box-share/
$ vagrant box add --name Endeav-base-jp pkg-EndeavourOS_base-jp.box
==> box: Box file was not detected as metadata. Adding it directly...
==> box: Adding box 'Endeav-base-jp' (v0) for provider:
    box: Unpacking necessary files from: file:///home/ubn/%E3%83%80%E3%82%A6%E3%83%B3%E3%83%AD%E3%83%BC%E3%83%89/vm/box-share/pkg-EndeavourOS_base-jp.box
==> box: Successfully added box 'Endeav-base-jp' (v0) for ''!
時間がかかります:
-
2). 「Box」の一覧に追加されたか確認:
$ vagrant box list
Endeav-base-00 (virtualbox, 0)
Endeav-base-jp (virtualbox, 0)             ←(追加)
-
3). 参考: ホームの「Box」の一覧にあるファイルを確認:
$ ls -lA ~/.vagrant.d/boxes/Endeav-base-jp/0/virtualbox/
-rw-rw-r-- 1 ubn ubn        630  1月 11 17:35 Vagrantfile
-rw-rw-r-- 1 ubn ubn 3014952448  1月 11 17:36 box-disk001.vmdk
-rwx------ 1 ubn ubn       9183  1月 11 17:36 box.ovf
-rw-rw-r-- 1 ubn ubn         25  1月 11 17:36 metadata.json
-rw------- 1 ubn ubn        400  1月 11 17:36 vagrant_private_key ←(注目)
-
ホームの「Box」の一覧にある「Vagrantfile」ファイルを確認:
$ cat ~/.vagrant.d/boxes/Endeav-base-jp/0/virtualbox/Vagrantfile
Vagrant::Config.run do |config|
  # This Vagrantfile is auto-generated by `vagrant package` to contain
  # the MAC address of the box. Custom configuration should be placed in
  # the actual `Vagrantfile` in this box.
  config.vm.base_mac = "080027B2BB06"
end

# Load include vagrant file if it exists after the auto-generated
# so it can override any of the settings
include_vagrantfile = File.expand_path("../include/_Vagrantfile", __FILE__)
load include_vagrantfile if File.exist?(include_vagrantfile)

Vagrant.configure("2") do |config|
  config.ssh.private_key_path = File.expand_path("../vagrant_private_key", __FILE__)
end
→「Vagrantfile」の元ファイルになります。
MAC アドレスと、「Vagrantfile」の組み込みと、ssh 接続の「private_key」のパスが定義されています。
-
これに、「作業フォルダ」の「Vagrantfile」が 上書き(追加)されます。
-
-
- --- - --- - --- - --- - --- - --- - --- - --- - ----- ----- ----- -----
12. 「Vagrantfile」の修正:
-
1). 「仮想マシン」を管理する「作業フォルダ」を準備:
別の「作業フォルダ」を準備:
$ mkdir -p ~/ダウンロード/vm/endeavour-base-jp/
→「仮想マシン」を管理する場所になります
-
「作業フォルダ」は使い回すのでなく、新しい名前で作成した方が混乱しないと思います。
-
2). 「Vagrantfile」の作成:
$ cd ~/ダウンロード/vm/endeavour-base-jp/
$ featherpad Vagrantfile
↓ すべて貼付け:
# -*- mode: ruby -*-
# vi: set ft=ruby :

Vagrant.configure("2") do |config|
  config.vm.box = "Endeav-base-jp"
  #config.vm.boot_timeout = 300
  config.vm.boot_timeout = 60
  config.vm.provider "virtualbox" do |vb|
    # Display the VirtualBox GUI when booting the machine
    vb.gui = true
    #vb.memory = "2048"
    vb.memory = "4096"
    vb.cpus = 2
    #vb.customize ["modifyvm", :id, "--graphicscontroller", "vboxsvga"]
    vb.customize ["modifyvm", :id, "--graphicscontroller", "vmsvga"]
  end
end
-
参考:「config.vm.box = "Endeav-base-jp"」の行を変更すれば、他の「仮想マシン」でも使い回し出来ます:
-
追記: GUI(デスクトップ環境)を使う場合:
「Ubuntu」の場合は、「vb.customize ["modifyvm", :id, "--graphicscontroller", "vmsvga"]」を有効にすると、 ウィンドウサイズの拡大で、リアルタイムに解像度が調整されます。
「EndeavourOS」の場合は、「vb.customize ["modifyvm", :id, "--graphicscontroller", "vboxsvga"]」を有効にすると、 再ログインでログアウト直前の解像度に調整されます。
-
3). 確認:
$ ls -1Ap
:
Vagrantfile         ←(追加)
-
-
- --- - --- - --- - --- - --- - --- - --- - --- - ----- ----- ----- ----- -
13. 「仮想マシン」の生成と立ち上げ:
-
1). 「仮想マシン」の生成と立ち上げ:
$ cd ~/ダウンロード/vm/endeavour-base-jp/
$ vagrant up
Bringing machine 'default' up with 'virtualbox' provider...
==> default: Importing base box 'Endeav-base-jp'...
==> default: Matching MAC address for NAT networking...
==> default: Setting the name of the VM: endeavour-base-jp_default_1704962773770_3717
==> default: Clearing any previously set network interfaces...
==> default: Preparing network interfaces based on configuration...
    default: Adapter 1: nat
==> default: Forwarding ports...
    default: 22 (guest) => 2222 (host) (adapter 1)
==> default: Running 'pre-boot' VM customizations...
==> default: Booting VM...
==> default: Waiting for machine to boot. This may take a few minutes...
    default: SSH address: 127.0.0.1:2222
    default: SSH username: vagrant
    default: SSH auth method: private key
==> default: Machine booted and ready!
==> default: Checking for guest additions in VM...
==> default: Mounting shared folders...
    default: /vagrant => /home/ubn/ダウンロード/vm/endeavour-base-jp
ubn@ubn-box:~/ダウンロード/vm/endeavour-base-jp$
→エラーなしで、プロンプトに戻りました。
-
2). 「仮想マシン」が立ち上がりました
→「デスクトップ環境なし」なので、コンソール画面が立ち上がりました。
-
-
- --- - --- - --- - --- - --- - --- - --- - --- - ----- ----- ----- ----- --
14. 「仮想マシン」に「ssh 接続」:
-
ホストOS の端末にて:
-
1). 「仮想マシン」が起動していることを確認:
$ pwd
/home/ubn/ダウンロード/vm/endeavour-base-jp
-
$ vagrant status
Current machine states:

default                   running (virtualbox)
-
2). 「ssh-config」の確認:
$ cd ~/ダウンロード/vm/endeavour-base-jp/
$ vagrant ssh-config
Host default
  HostName 127.0.0.1
  User vagrant
  Port 2222
  UserKnownHostsFile /dev/null
  StrictHostKeyChecking no
  PasswordAuthentication no
  IdentityFile /home/ubn/.vagrant.d/boxes/Endeav-base-jp/0/virtualbox/vagrant_private_key
  IdentitiesOnly yes
  LogLevel FATAL
  PubkeyAcceptedKeyTypes +ssh-rsa
  HostKeyAlgorithms +ssh-rsa
→「IdentityFile」の行が 1行に変わりました。
-
3). 「ssh 接続」:
$ cd ~/ダウンロード/vm/endeavour-base-jp/
$ vagrant ssh
Last login: Thu Jan 11 17:09:57 2024 from xx.xx.xx.xx
[vagrant@vagrant ~]$
→パスワードなしで自動ログインされました。
[vagrant@vagrant ~]$ date
2024年  1月 11日 木曜日 17:51:29 JST
→「date」コマンドが文字化けしません。
-
[vagrant@vagrant ~]$ ls -lAp
:
-rw------- 1 vagrant vagrant 1209  1月 11 17:11 .bash_history
-rw-r--r-- 1 vagrant vagrant   21 11月 23 00:26 .bash_logout
-rw-r--r-- 1 vagrant vagrant   57 11月 23 00:26 .bash_profile
-rwxr-xr-x 1 vagrant vagrant 2691 11月 17 20:33 .bashrc
drwxr-xr-x 3 vagrant vagrant 4096  1月 10 21:29 .config/
drwxr-xr-x 2 vagrant vagrant 4096  1月 10 21:29 Desktop/
drwxr-xr-x 2 vagrant vagrant 4096  1月 10 21:29 Documents/
drwxr-xr-x 2 vagrant vagrant 4096  1月 10 21:29 Downloads/
drwxr-xr-x 2 vagrant vagrant 4096  1月 10 21:29 Music/
drwxr-xr-x 2 vagrant vagrant 4096  1月 10 21:29 Pictures/
drwxr-xr-x 2 vagrant vagrant 4096  1月 10 21:29 Public/
drwx------ 2 vagrant vagrant 4096  1月 11 01:53 .ssh/
drwxr-xr-x 2 vagrant vagrant 4096  1月 10 21:29 Templates/
drwxr-xr-x 2 vagrant vagrant 4096  1月 10 21:29 Videos/
-
[vagrant@vagrant ~]$ ls -lAp ~/.ssh/
:
-rw------- 1 vagrant vagrant 89  1月 11 01:53 authorized_keys
-
[vagrant@vagrant ~]$ id
uid=1000(vagrant) gid=1000(vagrant) groups=1000(vagrant)
→余計なグループに属していません。
-
4). 参考:「ssh 接続」で再起動する場合:
[vagrant@vagrant ~]$ reboot
ピンク表示:
Call to Reboot failed: Interactive authentication required.
和訳:
再起動の呼び出しが失敗しました: 対話型認証が必要です。
-
再起動する場合は:
[vagrant@vagrant ~]$ sudo reboot
→「ssh 接続」での「reboot」は「sudo」が必要です
-
5). ログアウト:
[vagrant@vagrant ~]$ logout
もしくは、
[vagrant@vagrant ~]$ exit
もしくは、
Ctrl+D
→コマンドプロンプトが変わりました:
ubn@ubn-box:~/ダウンロード/vm/endeavour-base-jp$
-
6). 「仮想マシン」を停止:
ホストOS の端末にて、
$ cd ~/ダウンロード/vm/endeavour-base-jp/
$ vagrant halt
==> default: Attempting graceful shutdown of VM...
→「仮想マシン」が電源オフ
「ssh 接続」の警告は表示されません。
-
7). 参考: 「仮想マシン」についての確認:
-
Vagrant で管理されている「仮想マシン」:
$ vagrant global-status
:
id       name    provider   state    directory
---------------------------------------------------------------------------
2483206  default virtualbox poweroff /home/ubn/ダウンロード/vm/endeavour-base-jp
→「仮想マシン」の「id」と、その管理に使われている「作業フォルダ」名がわかります。
-
VirtualBox の「仮想マシン」の実際のフォルダ:
$ ls -1Ap ~/'VirtualBox VMs'
:
$ ls -1Ap ~/'VirtualBox VMs'
EndeavourOS_OpenBox/
EndeavourOS_base/
endeavour-base-jp_default_1704962773770_3717/  ←(Vagrant で管理)注目
endeavour-base_default_1704914580912_2584/  ←(Vagrant で管理)
→「作業フォルダ」を使い回すと、新しい「仮想マシン」か分かりづらいので、
「作業フォルダ」の名前を変えました。
-
Vagrant に登録(ローカルのホームに保存)されている「Box」:
$ vagrant box list
:
Endeav-base-00 (virtualbox, 0)
Endeav-base-jp (virtualbox, 0)  ←(注目)
→Vagrant で見える「仮想マシン」のベース(元)になった「Box」です。
各「作業フォルダ」ごとに、Vagrantfile で利用されるベースが指定されます。
-
-
- --- - --- - --- - --- - --- - --- - --- - --- - ----- ----- ----- ----- ---
15. 参考: 本来であれば、最低限行うべき「ssh 接続」の設定:
-
作業は要りません。
Vagrant 以外の環境での設定についてです。
鍵の生成を行っているのが違うようです。Vagrant ではダウンロードしています。
-
参考:
-
1). 最低限のセキュリティ事項:
- ポート番号の変更:
- root ユーザへのログインを禁止:
- パスワードによるログインを禁止:
-
2). ssh 設定ファイルの修正:
-
(1). ssh を 22番ポート以外に変更:
→ssh を 22番ポートのまま使用すると、無差別攻撃の的になります
-
(2). ssh 接続では、root ユーザとしてログインできないように設定:
→root ユーザとして作業したい場合は、一旦、一般ユーザとしてログインし、
その後、su コマンドで root ユーザのパスワードを入力してログインします
-
(3). ssh でログインする方法を「鍵のみ」に絞り、「パスワード」によるログインを無効化:
→パスワードによるログインを許可していると、総当たり攻撃の的になります
-
3). 「公開鍵」の配置:
鍵の生成はサーバではなくクライアント(PC)側で行います:
生成された 2つの鍵のうち、pub が付かない「id_rsa」が秘密鍵で、pubが付く「id_rsa.pub」が公開鍵です。
id_rsa.pub(公開鍵)をサーバ側(仮想マシン側)に配置します:
場所は「~/.ssh」直下で、ファイル名は「authorized_keys」とします。
-
(1). ホームディレクトリに「.ssh」ディレクトリを作成:
$ cd
$ mkdir .ssh
$ chmod 700 .ssh
$ cd .ssh
-
(2). 認証される公開鍵リストのファイルを作成:
$ nano authorized_keys
これに、
$ cat [鍵名].pub
で表示される公開鍵の内容を貼り付けて保存
-
(3). パーミッションを設定:
$ chmod 600 authorized_keys
→オーナーのみ読み書き可能に設定します
-
4). 「sshd_config」の書き換え:
公開鍵認証を許可し、パスワードログインを禁止します:
$ sudo nano /etc/ssh/sshd_config
(1). 公開鍵認証を許可(コメント行を解除):
PubkeyAuthentication yes
-
(2). パスワードでのログインを禁止:
PasswordAuthentication no
-
5). ssh 設定ファイルの変更:
★1: Port をデフォルトの 22 番から別の番号に変更。番号は 1024 〜 65535 までの任意の数値
★2: PermitRootLogin を prohibit-password から no に変更
★3: PasswordAuthentication が yes になっている場合は no に変更
$ cat /etc/ssh/sshd_config
# Package generated configuration file
# See the sshd_config(5) manpage for details

# What ports, IPs and protocols we listen for
- Port 22     ←★1
+ Port 2222
# Use these options to restrict which interfaces/protocols sshd will bind to
#ListenAddress ::
#ListenAddress 0.0.0.0
Protocol 2
# HostKeys for protocol version 2
HostKey /etc/ssh/ssh_host_rsa_key
HostKey /etc/ssh/ssh_host_dsa_key
HostKey /etc/ssh/ssh_host_ecdsa_key
HostKey /etc/ssh/ssh_host_ed25519_key
#Privilege Separation is turned on for security
UsePrivilegeSeparation yes

# Lifetime and size of ephemeral version 1 server key
KeyRegenerationInterval 3600

# Logging
SyslogFacility AUTH
LogLevel INFO

# Authentication:
LoginGraceTime 120
- PermitRootLogin prohibit-password     ←★2
+ PermitRootLogin no
StrictModes yes

RSAAuthentication yes
PubkeyAuthentication yes
#AuthorizedKeysFile %h/.ssh/authorized_keys

# Don't read the user's ~/.rhosts and ~/.shosts files
IgnoreRhosts yes
# For this to work you will also need host keys in /etc/ssh_known_hosts
RhostsRSAAuthentication no
# similar for protocol version 2
HostbasedAuthentication no
# Uncomment if you don't trust ~/.ssh/known_hosts for RhostsRSAAuthentication
#IgnoreUserKnownHosts yes

# To enable empty passwords, change to yes (NOT RECOMMENDED)
PermitEmptyPasswords no

# Change to yes to enable challenge-response passwords (beware issues with
# some PAM modules and threads)
ChallengeResponseAuthentication no

# Change to no to disable tunnelled clear text passwords
- #PasswordAuthentication yes     ←★3
+ PasswordAuthentication no

# Kerberos options
#KerberosAuthentication no
#KerberosGetAFSToken no
#KerberosOrLocalPasswd yes
#KerberosTicketCleanup yes

# GSSAPI options
#GSSAPIAuthentication no
#GSSAPICleanupCredentials yes

X11Forwarding yes
X11DisplayOffset 10
PrintMotd no
PrintLastLog yes
TCPKeepAlive yes
#UseLogin no

#MaxStartups 10:30:60
#Banner /etc/issue.net

# Allow client to pass locale environment variables
AcceptEnv LANG LC_*

Subsystem sftp /usr/lib/openssh/sftp-server

# Set this to 'yes' to enable PAM authentication, account processing,
# and session processing. If this is enabled, PAM authentication will
# be allowed through the ChallengeResponseAuthentication and
# PasswordAuthentication.  Depending on your PAM configuration,
# PAM authentication via ChallengeResponseAuthentication may bypass
# the setting of "PermitRootLogin without-password".
# If you just want the PAM account and session checks to run without
# PAM authentication, then enable this but set PasswordAuthentication
# and ChallengeResponseAuthentication to 'no'.
UsePAM yes
-
-
- --- - --- - --- - --- - --- - --- - --- - --- - ----- ----- ----- ----- ----
16. 参考: もし、PC のディスクに余裕がない場合:
-
1). 「仮想マシン」を一度、削除:
$ cd ~/ダウンロード/vm/ubn2204
$ vagrant destroy
default: Are you sure you want to destroy the 'default' VM? [y/N]
→「y」
-
2). それでも足りなければ、「Box」ファイルを削除:
$ vagrant box list
→「Box」名を確認:
$ vagrant box remove generic/ubuntu2204
-
-
まとめ
前回は、(学習を兼ねて)「OpenBox」等のベースになる、デスクトップ環境なしの「仮想マシン」を作り、 インストール直後の「仮想マシン」で、「Vagrant」の「Box」ファイルを作成しました。
-
今回は、その作成した「Box」を使って、
「Vagrant」の「Box」に公開時に推奨される(ssh 接続等の)設定を加えて、再度「Box」ファイルを作成しました。
-
「日本語キーボード」に設定したのは正解で、設定時の工数が削減できました。
-
次回は、その作成した「Box」(Endeav-base-jp) を使って、コミュニティ版の「OpenBox」をインストールする予定です。
-
-
-
-
-
目次
-
-
- 目次
- - --- - --- - --- - --- - --- - --- - --- - --- - -
- Vagrant で「EndeavourOS」の「仮想マシン」を立ち上げ:
- - --- - --- - --- - --- - --- - --- - --- - --- - --
- 「VirtualBox」について:
- - --- - --- - --- - --- - --- - --- - --- - --- - ---
- 「Vagrant」 (ベイグラント) について:
- - --- - --- - --- - --- - --- - --- - --- - --- - ----
- 「EndeavorOS」について:
- - --- - --- - --- - --- - --- - --- - --- - --- - -----
- 「EndeavourOS」(OpenBox) について:
- - --- - --- - --- - --- - --- - --- - --- - --- - ----- -
- 公開する「Box」の元となる「仮想マシン」を作成するときの留意点:
- - --- - --- - --- - --- - --- - --- - --- - --- - ----- --
- (前回の作業):
- - --- - --- - --- - --- - --- - --- - --- - --- - ----- ---
- 1. 「仮想マシン」のクリア:
- - --- - --- - --- - --- - --- - --- - --- - --- - ----- ----
- 2. 「仮想マシン」の作成と立ち上げ:
- - --- - --- - --- - --- - --- - --- - --- - --- - ----- -----
- 3. 現在の「仮想マシン」の状態を確認:
- - --- - --- - --- - --- - --- - --- - --- - --- - ----- ----- -
- 4. 「仮想マシン」にて、「vagrant」ユーザでログイン:
- - --- - --- - --- - --- - --- - --- - --- - --- - ----- ----- --
- 4-2. 参考: 「vagrant」ユーザが追加されていない場合:
- - --- - --- - --- - --- - --- - --- - --- - --- - ----- ----- ---
- 5. 「仮想マシン」の「vagrant」ユーザで操作:
- - --- - --- - --- - --- - --- - --- - --- - --- - ----- ----- ----
- 6. ssh 関連の設定:
- - --- - --- - --- - --- - --- - --- - --- - --- - ----- ----- -----
- 7. 「仮想マシン」に「ssh 接続」:
- - --- - --- - --- - --- - --- - --- - --- - --- - ----- ----- ----- -
- 8. 「仮想マシン」にて、「VirtualBox Guest Additions」を追加:
- - --- - --- - --- - --- - --- - --- - --- - --- - ----- ----- ----- --
- 9. 「仮想マシン」を立ち上げて確認:
- - --- - --- - --- - --- - --- - --- - --- - --- - ----- ----- ----- ---
- 10. 設定の完了した「仮想マシン」から、「Box」を作成:
- - --- - --- - --- - --- - --- - --- - --- - --- - ----- ----- ----- ----
- 11. 作成された「Box」ファイルを「Box」の一覧に追加:
- - --- - --- - --- - --- - --- - --- - --- - --- - ----- ----- ----- -----
- 12. 「Vagrantfile」の修正:
- - --- - --- - --- - --- - --- - --- - --- - --- - ----- ----- ----- ----- -
- 13. 「仮想マシン」の生成と立ち上げ:
- - --- - --- - --- - --- - --- - --- - --- - --- - ----- ----- ----- ----- --
- 14. 「仮想マシン」に「ssh 接続」:
- - --- - --- - --- - --- - --- - --- - --- - --- - ----- ----- ----- ----- ---
- 15. 参考: 本来であれば、最低限行うべき「ssh 接続」の設定:
- - --- - --- - --- - --- - --- - --- - --- - --- - ----- ----- ----- ----- ----
- 16. 参考: もし、PC のディスクに余裕がない場合:
- まとめ
- -
-
-
-