登録日: 2025-06-30 更新日: 2025-06-30
前回、手持ちのPC に「VirtualBox 7.1.4」と「Vagrant 2.4.3」をインストールしました:
-
前回の投稿:
「Xubuntu 24.04 LTS」に、「VirtualBox 7.1.4」と「Vagrant 2.4.3」をインストール〈H173 改〉
「Windows11」(23H2) に、「VirtualBox 7.1.4」と「Vagrant 2.4.3」をインストール〈H173改w〉
-
現在、「VirtualBox 7.1.10」と「Vagrant 2.4.7」が最新です。
できるだけ最新にするのが望ましいので、それらをインストール、うまく動くか試してみました:
-
その備忘録です。
-
-
使用したPC は、以前に購入した ミニPC「MINISFORUM NAB5」で、Linux マシンとして運用中です。
プロセッサは「Core i5-12450H」で、メモリ 16GB、SSD 512GB です。
-
(注)リンクを戻るときはブラウザの左上の「←」をクリック
Android スマホであれば「ホーム」ボタン隣の「<」をタップ
-
-
目次
-
今回の作業:
1. 「仮想マシン」の整理:
(1). Vagrant で管理されている「仮想マシン」を削除:
(2). VirtualBox マネージャで管理している「仮想マシン」を削除:
3. 最新の「VirtualBox 7.1.10」をダウンロード:
4. 「VirtualBox 7.1.10」をインストール:
5. 「VirtualBox Extension Pack」をインストール:
6. 最新の「Vagrant 2.4.7」をダウンロードしてインストール:
7. Vagrant に「vagrant-vbguest」プラグインをインストール:
8. Vagrant で「Ubuntu Cinnamon 24.04 LTS」をインストールして確認:
9. 参考: インストールした「Ubuntu Cinnamon 24.04 LTS」を日本語化:
10. 参考:「VirtualBox マネージャ」で「仮想マシン」の設定を確認:
11. 参考: 「ゲストOS」の起動が遅いので、余計なものが動いていないか確認:
-
-
-
- --- - --- - --- - --- - --- - --- - --- - --- - -
Xubuntu 24.04.2 LTS の立ち上げ:
-
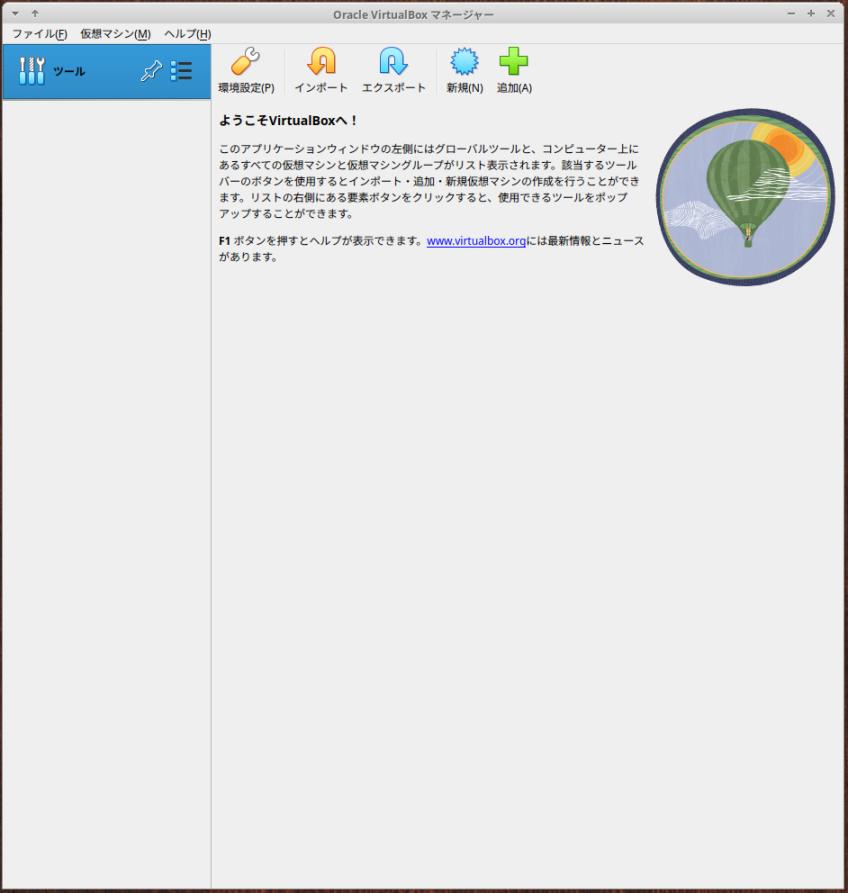
VirtualBox マネージャを起動した場合:
→ヘルプの表示のデザインは、7.1 系で共通です:
-
「Vagrant」で仮想マシンを起動した場合:
→VirtualBox マネージャは起動されずに、仮想マシンは起動されます:
-
-
- --- - --- - --- - --- - --- - --- - --- - --- - --
現在のOS のバージョンを表示:
-
2025-06-30 現在
-
-- -- -- -- -- -- -- -- -- -- -- -- -- -- -- -- -- -- -- -- -- -- -- --
ホストOS : 「Xubuntu 24.04.2 LTS」
カーネル:
$ uname -r
6.8.0-62-generic
→安定志向なので、更新は少なめです:
-
リリース:
$ cat /etc/lsb-release
DISTRIB_ID=Ubuntu
DISTRIB_RELEASE=24.04
DISTRIB_CODENAME=noble
DISTRIB_DESCRIPTION="Ubuntu 24.04.2 LTS"
→LTS 版の更新(ポイントリリース)は、ほぼ 6ヶ月ごとです:
-
「x11」と「Wayland」のどちらで動作しているか確認:
$ echo $XDG_SESSION_TYPE
x11
→「Wayland」ではなく、「x11」で動作しています。
-
-
- --- - --- - --- - --- - --- - --- - --- - --- - ---
「Xubuntu」について:
-
Ubuntu の公式フレーバー(性格の違う兄弟?)です
Ubuntu ベースの、軽量な「Xfce」デスクトップ環境です。
個人的には使い慣れた環境です。
安定していることと、カスタマイズしやすく、自分にとって使い勝手の良い環境を再現しやすいのが利点です。
-
-
- --- - --- - --- - --- - --- - --- - --- - --- - ----
「VirtualBox」について:
-
「VirtualBox 」は、Oracle が開発している「仮想マシン」を構築するためのソフトウェアです。
-
「VirtalBox」は「仮想的なパソコン」(仮想デバイス)を実現するソフトウェアです。別のパソコンに「Linux」をインストールするのと変わりません。
仮想マシンを使うことで、ハードウェアで問題になりそうなPC でも、最新のLinux ディストリビューションをインストールできる可能性が高くなります。
-
-
- --- - --- - --- - --- - --- - --- - --- - --- - -----
「Vagrant」について:
-
公式サイト:
-
「Vagrant」 (ベイグラント) は、「仮想マシン」の管理をしやすくするための「フロントエンド」のソフトウェアです:
「仮想マシン」の管理を「vagrant コマンド」で行います:
複数の「仮想マシン」の環境(ベンダーと言います)に対応しており、
ベンダー指定を省略した時のデフォルトは「VirtualBox」です。
-
例えば、「VirtualBox」の場合は、
「vagrant コマンド」の実行で、「VirtualBox」が内蔵する「VBoxManage」コマンドを発行して、「仮想マシン」の制御を行っています。
つまり、「VirtualBox」がインストールされていないと使えません。
また、「Vagrant」は、仮想環境を統一するのに便利なので、共同作業の多い「ソフト開発」でよく使われています。
-
個人的にはいろいろなOS にトライしており、ssh 接続よりも、GUI をよく使っていて、 GUI で使うときに便利になる、Guest Additions のインストールを手動で行うのですが、 その都度環境が違うので、よく失敗します。
-
なので、Guest Additions を(ほぼ 100% の成功率で)仮想マシンに自動インストールしてくれる、「vagrant plugin」機能を使うために、「Vagrant」を使っています。
-
-
- --- - --- - --- - --- - --- - --- - --- - --- - ----- -
1. 「VirtualBox」のインストール状況を確認:
-
1). 現在のインストール状況を確認:
$ apt search virtualbox | grep 済
:
virtualbox-7.1/now 7.1.4-165100~Ubuntu~noble amd64 [インストール済み、ローカル]
→「ローカル」の表示は、.deb ファイルからインストールされているということです
-
パッケージ名が「virtualbox-7.1」でインストールされています:
-
2). インストールされている「VirtualBox」の詳細バージョンをコマンドで確認:
$ VBoxManage --version
7.1.4r165100
-
3). 「VirtualBox マネージャ」を起動して、作成された「仮想マシン」をGUI で確認:
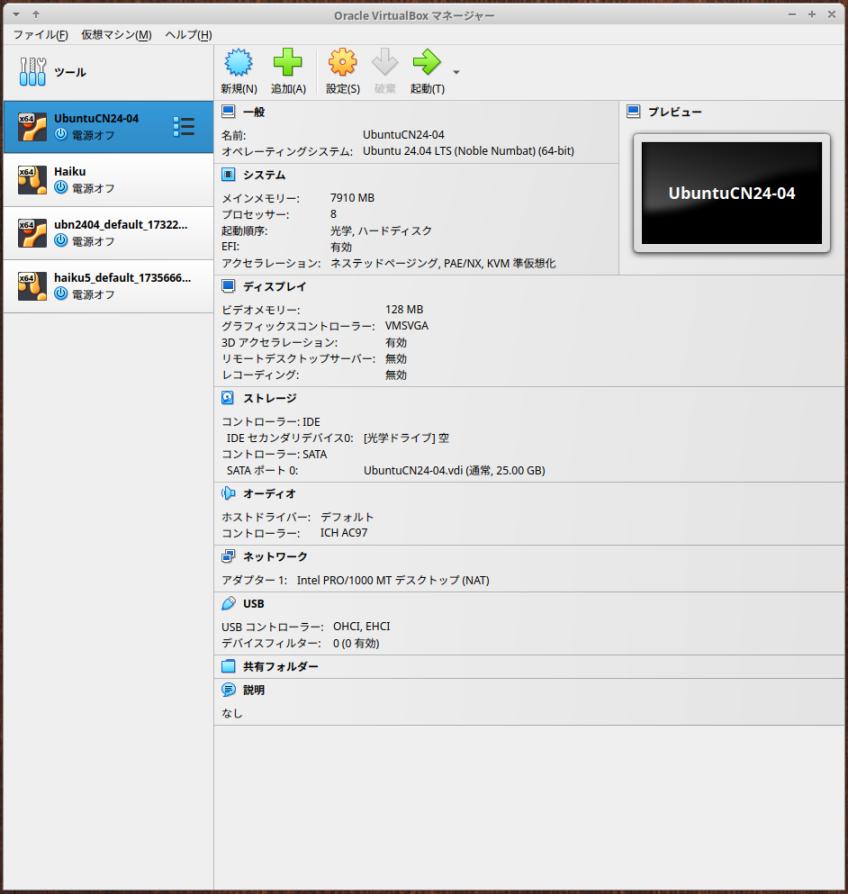
-
コマンドでも確認できます:
$ ls -lA ~/'VirtualBox VMs'
:
drwxrwxr-x 3 ubn ubn 4096  1月 12 20:59 Haiku
drwxrwxr-x 3 ubn ubn 4096 11月 13  2024 UbuntuCN24-04
drwx------ 3 ubn ubn 4096  1月 24 11:13 haiku5_default_1735666924757_81252
drwx------ 3 ubn ubn 4096 12月 10  2024 ubn2404_default_1732203971971_45140
→「仮想マシン」を作るごとに自動で作成されたフォルダの一覧です:
上 2つが、「VirtualBox マネージャ」で、手動で作成した「仮想マシン」です
下 2つが、「Vagrant」コマンドの実行で、自動で作成された「仮想マシン」です
「Vagrant」では、「default」の文字列(Vagrant での仮想マシン名)が含まれ、また、ファイル属性が異なる(権限が制限されている)ことに注目
-
-
- --- - --- - --- - --- - --- - --- - --- - --- - ----- --
2. 事前に、不要な「仮想マシン」を整理:
-
ディスクの空きを増やすため、今回は、すべての「仮想マシン」を削除しました:
もし、必要な「仮想マシン」があれば、削除の必要はありません。
-
ただし、vagrant で管理されている場合は、今回は vagrant のバージョンをアップするので、「仮想マシン」を(制御ファイルを含めて)再作成する必要がある(?)かもしれません。
-
-
- --- - --- - --- - --- - --- - --- - --- - --- - ----- ---
2-1. Vagrant で管理されている「仮想マシン」を削除:
-
操作例です。各々の環境で異なります。
-
1). 現在の「仮想マシン」の確認:
$ vagrant global-status
==> vagrant: A new version of Vagrant is available: 2.4.7 (installed version: 2.4.3)!
==> vagrant: To upgrade visit: https://www.vagrantup.com/downloads.html

id       name    provider   state    directory
-------------------------------------------------------------------------
37b9301  default virtualbox running  /home/ubn/ダウンロード/vm/ubn2404
d376608  default virtualbox poweroff /home/ubn/ダウンロード/vm/haiku5

The above shows information about all known Vagrant environments
on this machine. This data is cached and may not be completely
up-to-date (use "vagrant global-status --prune" to prune invalid
entries). To interact with any of the machines, you can go to that
directory and run Vagrant, or you can use the ID directly with
Vagrant commands from any directory. For example:
"vagrant destroy 1a2b3c4d"
→「Vagrant」の最新バージョンがあるとの通知が表示されました:
ここでは、Vagrant で管理されている「仮想マシン」は 2つあり、
その管理に使われている「作業フォルダ」の位置が確認できます
その下の英文は、コマンドの使い方の説明です
-
(1). 「仮想マシン」の確認1:
Ubuntu Cinnamon
$ ls -lA ~/ダウンロード/vm/ubn2404
:
drwxrwxr-x 5 ubn ubn 4096 11月 22  2024 .vagrant
-rw-rw-r-- 1 ubn ubn 3441 11月 22  2024 Vagrantfile
-
参考: Vagrantfile の内容の確認(念の為、ブログ上に退避):
$ cat ~/ダウンロード/vm/ubn2404/Vagrantfile
# -*- mode: ruby -*-
# vi: set ft=ruby :

# All Vagrant configuration is done below. The "2" in Vagrant.configure
# configures the configuration version (we support older styles for
# backwards compatibility). Please don't change it unless you know what
# you're doing.
Vagrant.configure("2") do |config|
  # The most common configuration options are documented and commented below.
  # For a complete reference, please see the online documentation at
  # https://docs.vagrantup.com.

  # Every Vagrant development environment requires a box. You can search for
  # boxes at https://vagrantcloud.com/search.
  config.vm.box = "aaronvonawesome/ubuntu-2404-cinnamon"
  config.vm.box_version = "1.0.2"

  # Disable automatic box update checking. If you disable this, then
  # boxes will only be checked for updates when the user runs
  # `vagrant box outdated`. This is not recommended.
  # config.vm.box_check_update = false

  # Create a forwarded port mapping which allows access to a specific port
  # within the machine from a port on the host machine. In the example below,
  # accessing "localhost:8080" will access port 80 on the guest machine.
  # NOTE: This will enable public access to the opened port
  # config.vm.network "forwarded_port", guest: 80, host: 8080

  # Create a forwarded port mapping which allows access to a specific port
  # within the machine from a port on the host machine and only allow access
  # via 127.0.0.1 to disable public access
  # config.vm.network "forwarded_port", guest: 80, host: 8080, host_ip: "127.0.0.1"

  # Create a private network, which allows host-only access to the machine
  # using a specific IP.
  # config.vm.network "private_network", ip: "192.168.33.10"

  # Create a public network, which generally matched to bridged network.
  # Bridged networks make the machine appear as another physical device on
  # your network.
  # config.vm.network "public_network"

  # Share an additional folder to the guest VM. The first argument is
  # the path on the host to the actual folder. The second argument is
  # the path on the guest to mount the folder. And the optional third
  # argument is a set of non-required options.
  # config.vm.synced_folder "../data", "/vagrant_data"

  # Disable the default share of the current code directory. Doing this
  # provides improved isolation between the vagrant box and your host
  # by making sure your Vagrantfile isn't accessible to the vagrant box.
  # If you use this you may want to enable additional shared subfolders as
  # shown above.
  # config.vm.synced_folder ".", "/vagrant", disabled: true

  # Provider-specific configuration so you can fine-tune various
  # backing providers for Vagrant. These expose provider-specific options.
  # Example for VirtualBox:
  #
   config.vm.provider "virtualbox" do |vb|
  #   # Display the VirtualBox GUI when booting the machine
     vb.gui = true
  #
  #   # Customize the amount of memory on the VM:
  #   vb.memory = "1024"
   end
  #
  # View the documentation for the provider you are using for more
  # information on available options.

  # Enable provisioning with a shell script. Additional provisioners such as
  # Ansible, Chef, Docker, Puppet and Salt are also available. Please see the
  # documentation for more information about their specific syntax and use.
  # config.vm.provision "shell", inline: <<-SHELL
  #   apt-get update
  #   apt-get install -y apache2
  # SHELL
end
→自動で作成された設定ファイルを動くように修正しました:
-
(2). 「仮想マシン」の確認2:
Haiku
$ ls -lA ~/ダウンロード/vm/haiku5
:
drwxrwxr-x 5 ubn ubn 4096  1月  1 02:40 .vagrant
-rw-rw-r-- 1 ubn ubn  666  1月  3 17:09 Vagrantfile
drwxrwxr-x 2 ubn ubn 4096  1月  2 13:13 data
→「data」フォルダは共有フォルダのテストで試した名残です。その後、Vagrantfile ファイルを修正して無効にしました
-
参考: Vagrantfile の内容の確認(念の為、ブログ上に退避):
$ cat ~/ダウンロード/vm/haiku5/Vagrantfile
# -*- mode: ruby -*-
# vi: set ft=ruby :

Vagrant.configure("2") do |config|
  config.vm.box = "haiku-os/r1beta4-x86_64"
  # ホストの作業フォルダ内の data フォルダと
  # 仮想マシン内の /boot/home/My/vagrant_data フォルダを共有:
  # 指定のフォルダがない場合は、フォルダを作成:
  # config.vm.synced_folder "./data", "/boot/home/My/vagrant_data", create: true
  # デフォルトの共有フォルダを無効にします:
  config.vm.synced_folder ".", "/vagrant", disabled: true
  config.vm.provider "virtualbox" do |vb|
    # 仮想マシンの起動時に VirtualBox 画面 を表示:
    vb.gui = true
  end
end
→個人的に作成した設定ファイルは、小さくできます:
-
2). 不要な「仮想マシン」の削除:
-
削除1:
$ vagrant destroy 37b9301
    default: Are you sure you want to destroy the 'default' VM? [y/N] y
==> default: Destroying VM and associated drives...
-
削除2:
$ vagrant destroy d376608
    default: Are you sure you want to destroy the 'default' VM? [y/N] y
==> default: Destroying VM and associated drives...
-
確認:
$ vagrant global-status
id       name    provider   state    directory
-------------------------------------------------------------------------
There are no active Vagrant environments on this computer! Or,
you haven't destroyed and recreated Vagrant environments that were
started with an older version of Vagrant.
和訳:
このコンピューターにはアクティブな Vagrant 環境がありません。
または、古いバージョンの Vagrant で開始された Vagrant 環境を破棄して
再作成していない可能性があります。
-
3). 不要な「Box」の削除:
確認:
$ vagrant box list
aaronvonawesome/ubuntu-2404-cinnamon (virtualbox, 1.0.2, (amd64))
haiku-os/r1beta4-x86_64              (virtualbox, 20230114)
→Haiku は r1beta5 のBox の登録がなかったので、r1beta4 の更新で対応したみたい
-
削除1:
$ vagrant box remove aaronvonawesome/ubuntu-2404-cinnamon
Removing box 'aaronvonawesome/ubuntu-2404-cinnamon' (v1.0.2) with provider 'virtualbox'...
-
削除2:
$ vagrant box remove haiku-os/r1beta4-x86_64
Removing box 'haiku-os/r1beta4-x86_64' (v20230114) with provider 'virtualbox'...
-
確認:
$ vagrant box list
There are no installed boxes! Use `vagrant box add` to add some.
-
4). 不要な「作業フォルダ」の削除:
個人的に管理しやすいように、「作業フォルダ」を置くフォルダを決めています:
-
作業フォルダ名の確認:
$ ls -1 ~/ダウンロード/vm/
:
haiku5
ubn2404
-
削除1:
$ rm -r ~/ダウンロード/vm/haiku5
-
削除2:
$ rm -r ~/ダウンロード/vm/ubn2404
-
確認:
$ ls -1 ~/ダウンロード/vm/
$
-
5). 作成されている「仮想マシン」を確認:
$ ls -lA ~/'VirtualBox VMs'
:
drwxrwxr-x 3 ubn ubn 4096  1月 12 20:59 Haiku
drwxrwxr-x 3 ubn ubn 4096 11月 13  2024 UbuntuCN24-04
→Vagrant で管理されている「仮想マシン」が削除されました
-
-
- --- - --- - --- - --- - --- - --- - --- - --- - ----- ----
2-2. VirtualBox マネージャで管理している「仮想マシン」を削除:
-
操作例です。各々の環境で異なります。
-
1). VirtualBox マネージャにて、不要な「仮想マシン」を削除:
-
(1). 「仮想マシン」の削除1:
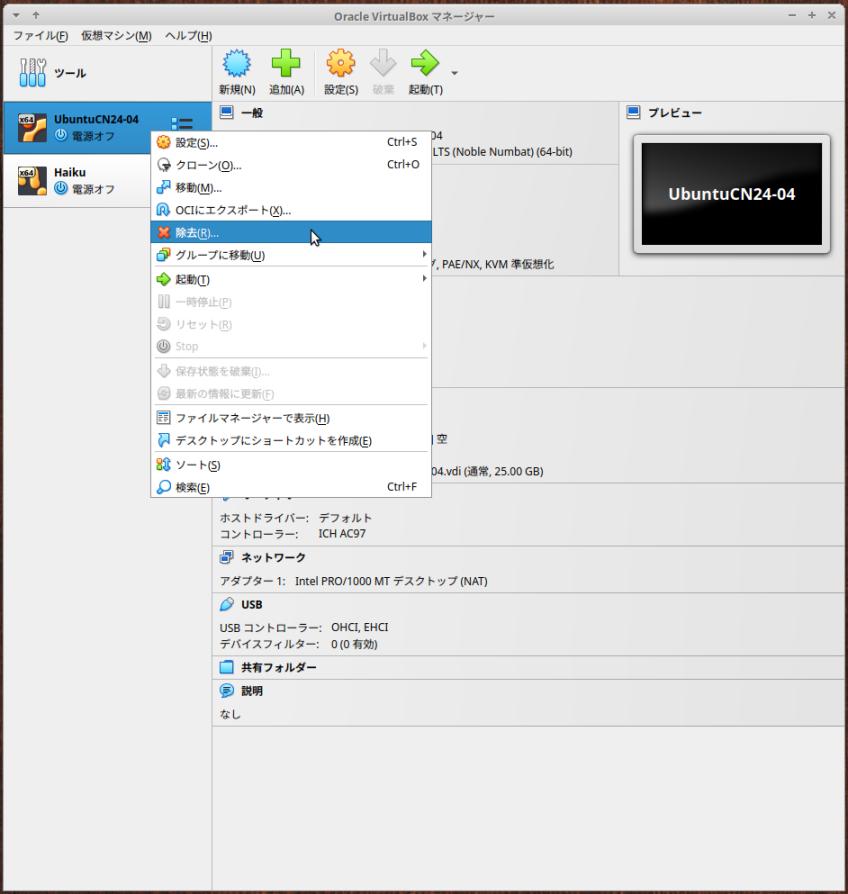
VirtualBox マネージャにて、左の一覧から「UbuntuCN24-04」を右クリック→「除去」
→「すべてのファイルを削除」
-
(2). 「仮想マシン」の削除2:
VirtualBox マネージャにて、左の一覧から「Haiku」を右クリック→「除去」
→「すべてのファイルを削除」
-
2). VirtualBox マネージャを起動して、確認:
-
-
- --- - --- - --- - --- - --- - --- - --- - --- - ----- -----
3. 「VirtualBox」のインストール準備:
-
1). システム更新:
$ sudo apt update
$ sudo apt upgrade
:
アップグレード: 0 個、新規インストール: 0 個、削除: 0 個、保留: 0 個。
→「アップグレード:」の行が、すべて 0 かを確認:
-
-- -- -- -- -- -- -- -- -- -- -- -- -- -- -- -- -- -- -- -- -- -- -- --
参考: 対応例: もし、保留: 2 個と表示された場合:
$ sudo apt upgrade
:
パッケージリストを読み込んでいます... 完了
依存関係ツリーを作成しています... 完了
状態情報を読み取っています... 完了
アップグレードパッケージを検出しています... 完了
Get more security updates through Ubuntu Pro with 'esm-apps' enabled:
  libvlc5 libzvbi-common vlc-data libvlccore9 libcjson1 libpostproc57
  libavcodec60 libgstreamer-plugins-bad1.0-0 libzvbi0t64 libavutil58
  libswscale7 libswresample4 vlc-plugin-video-output 7zip libavformat60
  libvlc-bin vlc-plugin-base libavfilter9
Learn more about Ubuntu Pro at https://ubuntu.com/pro

The following upgrades have been deferred due to phasing:    ←(注目)
  alsa-ucm-conf firmware-sof-signed
アップグレード: 0 個、新規インストール: 0 個、削除: 0 個、保留: 2 個。
→注目: 保留されているパッケージ名が表示されています
-
保留を解除するには、個別でインストールします:
もしくは、無視しても OK
$ sudo apt install alsa-ucm-conf firmware-sof-signed
→Linux であれば、「注目」のパッケージ名の行を選択後、マウスに中央ボタンで貼り付けできます
改行を含む複数行のときは、貼付け後に改行を削除して、1行のコマンドに編集後に Enter
-
$ sudo apt update
$ sudo apt upgrade
:
アップグレード: 0 個、新規インストール: 0 個、削除: 0 個、保留: 0 個。
-
2). 「dkms」のインストール:
「.deb」ファイルから(最新の)「VirtualBox」をインストールしたい場合に、パッケージ名「dkms」をインストールしておきます:
カーネルの更新があったときに自動で依存が解決(システム更新に、カーネルのビルドに必要なカーネルヘッダー等が追加)されます:
$ sudo apt install dkms
:
dkms はすでに最新バージョン (3.0.11-1ubuntu13) です。
-
注意: パッケージ名は似ていますが、違う環境に間違えてインストールすると、正しく機能しません:
「.deb」ファイルから(最新の)「VirtualBox」をインストールしたい場合に、
→パッケージ名「dkms」をインストールしておきます:apt コマンドで(最新ではないけど問題の少ない)「VirtualBox」をインストールする場合は、
→パッケージ名「virtualbox-dkms」をインストールしておきます:
-
3). 再起動:
「端末」以外のすべてのウィンドウを閉じてから、
$ reboot
-
-
- --- - --- - --- - --- - --- - --- - --- - --- - ----- ----- -
4. 使用できる「Virtualbox」の最新バージョンを確認:
-
1). Ubuntu の(開発)「コード名」を確認:
$ cat /etc/lsb-release
DISTRIB_ID=Ubuntu
DISTRIB_RELEASE=24.04
DISTRIB_CODENAME=noble          ←(コード名)
DISTRIB_DESCRIPTION="Ubuntu 24.04.2 LTS"
→Xubuntu は「Ubuntu」が元(デスクトップ環境が異なるだけ)なので、「Ubuntu」と同じイメージファイルを使います:
-
使用しているホストOS の種類とリリース番号によって、ダウンロードするファイルを選びます:
-
2). ブラウザで「virtualbox」の最新版を確認:
抜粋:
:
7.0.18/         15-May-2024 18:06         ←「2024年5月15日」
7.0.20/         16-Jul-2024 11:17         ←「2024年7月16日」
7.0.22/         15-Oct-2024 13:48         ←「2024年10月15日」
7.0.24/         21-Jan-2025 17:59         ←「2025年1月21日」
7.0.26/         15-Apr-2025 15:33         ←「22025年4月15日」最近の更新

7.1.0/          27-Sep-2024 15:35         ←「2024年9月27日」
7.1.2/          27-Sep-2024 15:35         ←「2024年9月27日」
7.1.4/          15-Oct-2024 13:48         ←「2024年10月15日」前回の投稿時に使用
7.1.6/          22-Jan-2025 19:44         ←「2025年1月22日」
7.1.8/          03-Jun-2025 17:32         ←「2025年6月3日」
7.1.10/         03-Jun-2025 17:32         ←「2025年6月3日」  最新のリリース
→「virtualbox」の最新リリースは「7.1.10」です。
最新の「7.1 版」の更新だけでなく、既存の「7.0 版」の更新もあることに感謝。
つまり、最新版でなくても、問題があれば対応される可能性があります。
-
リモートで「virtualbox」の操作を行うときに使う Vagrant にて、
Vagrant 2.4.1 で管理できるのは、「virtualbox 7.0.22」までで、
Vagrant 2.4.3 で、「virtualbox 7.1.4」までの管理に使えました。
今回は、Vagrant 2.4.7 で「virtualbox 7.1.10」がうまく動くか、確認します。
-
-
- --- - --- - --- - --- - --- - --- - --- - --- - ----- ----- --
5. 最新の「virtualbox 7.1.10」をダウンロード:
-
1). ファイルのダウンロード:
「 Index of /virtualbox/7.1.10」
-
→ファイルを「~/ダウンロード/virtualbox/」フォルダに移動:
-
→ファイルを「~/ダウンロード/virtualbox/」フォルダに移動:
-
表示される内容から抜粋:
e020755711849fa0ee23d3bc47bc90cb0ea595da7dda804499568a0dc2387989 *Oracle_VirtualBox_Extension_Pack-7.1.10-169112.vbox-extpack
:
5ec7e550588d33de36a361378d4f36f27cd17729ae63e03d4ed8482241796bae *virtualbox-7.1_7.1.10-169112~Ubuntu~noble_amd64.deb
-
2). ファイルの確認:
$ cd ~/ダウンロード/virtualbox/
$ ls -1
:
Oracle_VirtualBox_Extension_Pack-7.1.10-169112.vbox-extpack
virtualbox-7.1_7.1.10-169112~Ubuntu~noble_amd64.deb
-
3). ファイルの「チェックサム」を確認:
「VirtualBox」:
$ sha256sum virtualbox-7.1_7.1.10-169112~Ubuntu~noble_amd64.deb
:
5ec7e550588d33de36a361378d4f36f27cd17729ae63e03d4ed8482241796bae  virtualbox-7.1_7.1.10-169112~Ubuntu~noble_amd64.deb
-
「VirtualBox Extension Pack」:
$ sha256sum Oracle_VirtualBox_Extension_Pack-7.1.10-169112.vbox-extpack
:
e020755711849fa0ee23d3bc47bc90cb0ea595da7dda804499568a0dc2387989  Oracle_VirtualBox_Extension_Pack-7.1.10-169112.vbox-extpack
-
-
- --- - --- - --- - --- - --- - --- - --- - --- - ----- ----- ---
6. 「.deb」ファイルから「VirtualBox」をインストール:
-
こちらは「Xubuntu 24.04 LTS」にて、「virtualbox 7.1.10」をインストールする場合ですが、
違う「.deb」ファイルにすれば、そのバージョンがインストール出来ます:
-
1). インストール:
$ cd ~/ダウンロード/virtualbox/
$ sudo apt install ./virtualbox-7.1_7.1.10-169112~Ubuntu~noble_amd64.deb
[sudo] パスワード:
:
パッケージリストを読み込んでいます... 完了
依存関係ツリーを作成しています... 完了
状態情報を読み取っています... 完了
注意、'./virtualbox-7.1_7.1.10-169112~Ubuntu~noble_amd64.deb' の代わりに 'virtualbox-7.1' を選択します
以下のパッケージはアップグレードされます:
  virtualbox-7.1
アップグレード: 1 個、新規インストール: 0 個、削除: 0 個、保留: 0 個。
109 MB 中 0 B のアーカイブを取得する必要があります。
この操作後に追加で 19.3 MB のディスク容量が消費されます。
取得:1 /home/ubn/ダウンロード/virtualbox/virtualbox-7.1_7.1.10-169112~Ubuntu~noble_amd64.deb virtualbox-7.1 amd64 7.1.10-169112~Ubuntu~noble [109 MB]
パッケージを事前設定しています ...
(データベースを読み込んでいます ... 現在 251451 個のファイルとディレクトリがイン
ストールされています。)
.../virtualbox-7.1_7.1.10-169112~Ubuntu~noble_amd64.deb を展開する準備をしていま
す ...
virtualbox-7.1 (7.1.10-169112~Ubuntu~noble) で (7.1.4-165100~Ubuntu~noble に) 上
書き展開しています ...
virtualbox-7.1 (7.1.10-169112~Ubuntu~noble) を設定しています ...
info: グループ `vboxusers' はシステムグループとしてすでに存在しています。終了し
ます。
hicolor-icon-theme (0.17-2) のトリガを処理しています ...
gnome-menus (3.36.0-1.1ubuntu3) のトリガを処理しています ...
shared-mime-info (2.4-4) のトリガを処理しています ...
desktop-file-utils (0.27-2build1) のトリガを処理しています ...
N: ファイル '/home/ubn/ダウンロード/virtualbox/virtualbox-7.1_7.1.10-169112~Ubuntu~noble_amd64.deb' がユーザ '_apt' からアクセスできないため、ダウンロードは root でサンドボックスを通さずに行われます。 - pkgAcquire::Run (13: 許可がありません)
ubn@ubnbox:~/ダウンロード/virtualbox$
-
2). インストールされたか確認:
$ apt search virtualbox | grep 済
:
virtualbox-7.1/now 7.1.10-169112~Ubuntu~noble amd64 [インストール済み、ローカル]
→「ローカル」の表示に注目:
-
パッケージ名が「virtualbox-7.1」でインストールされました:
-
3). コマンドでバージョンを確認:
$ VBoxManage --version
7.1.10r169112
→上記に、エラーメッセージが含まれていなければ、「VirtualBox マネージャ」が使える状態です:
つまり、Vagrant で仮想マシンを作成して立ち上げできます:
-
参考: もし、上記で、エラーメッセージが含まれている場合の対応は:
→「こちら」を参照:
-
4). 再起動:
「端末」画面以外を閉じてから、
$ reboot
-
5). ログイン後、デスクトップ画面が表示:
-
6). 「VirtualBox」を起動して確認:
メニュー →「システム」→「Oracle VirtualBox」
→正常に立ち上がりました:
-
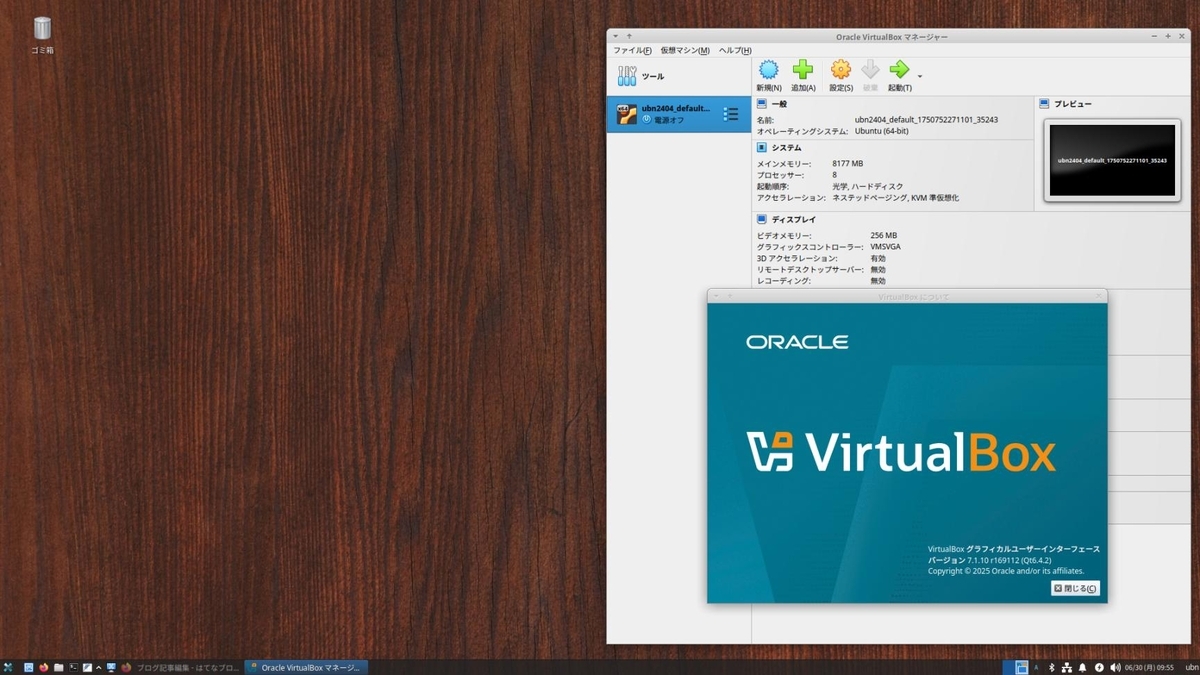
ヘルプ表示を確認:
ヘルプ →「VirtualBox について」:
-
VirtualBox グラフィカルユーザーインターフェース
バージョン 7.1.10 r169112 (Qt6.4.2)
Copyright © 2025 Oracle and/or its affiliates.
→「閉じる」
-
「VirtualBox」マネージャを画面右上の「x」で閉じました:
-
7). 任意: 「VirtualBox」の「USB 機能」を使いたい場合の確認:
→「こちら」を参照:
-
-
- --- - --- - --- - --- - --- - --- - --- - --- - ----- ----- ----
7. 任意:「VirtualBox Extension Pack」をインストール:
-
「virtualbox 7.1.10」をインストールした場合です:
-
続けて、機能拡張パッケージをインストールしました。
インストールされている VirtualBox のバージョンと同じバージョンの「拡張パック」が必要です:
作業は任意です。
-
拡張パックで提供される追加機能:
VirtualBox リモート デスクトップ プロトコル (VirtualBox RDP) のサポート:
ホスト Web カメラ パススルー:
AES アルゴリズムによる「ディスク イメージ」の暗号化:
クラウド統合機能:
→リモートで使うなら必要だけど、必要がなければ要らない機能です。
-
1). ファイルマネージャで、「~/ダウンロード/virtualbox/」フォルダを開きます:

フォルダ名は任意なので変わります。
-
2). ダウンロードした、緑色で四角いボックスのアイコンの「Oracle_VirtualBox_Extension_Pack-7.1.10-169112.vbox-extpack」をダブルクリック:
「virtualbox」(「VirtualBox」マネージャ)をインストールしたことで使える機能です:
-
3). 「VirtualBox」マネージャが起動されて、ダイアログが表示:

→「アップグレード」が表示されていれば、「アップグレード」をクリック:
→「インストール」が表示されていれば、「インストール」をクリック:
-
4). ライセンス画面が表示:
一番下までスクロール:
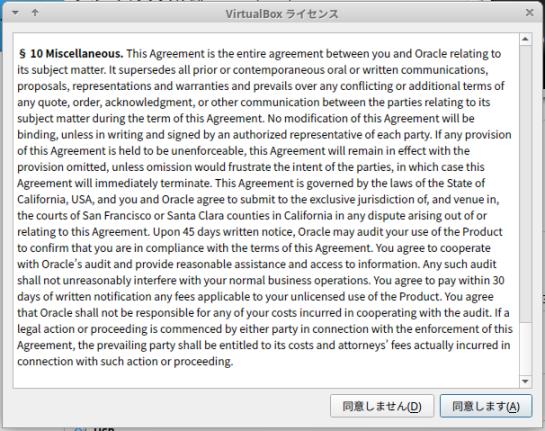
→「同意します」をクリック
→パスワード入力:
-
5). 「VirtualBox」マネージャの画面に戻りました:
-
6). 「機能拡張」がインストールされたか確認:
左側の「ツール」をクリックして、その右側の「横3本線」ボタンをクリック→「機能拡張」
-
「機能拡張」がインストールされたか確認できます:

-
参考: もし、以前の「7.1.4」の「機能拡張」が残ったままだったら、
「7.1.14」をクリック→「アンインストール」をクリック
→「除去」
→「パスワード」入力
-
7). 左側の「ツール」の右側の「横3本線」ボタンをクリック→ 一番上の「ようこそ」
→元の画面に戻りました:
-
-
- --- - --- - --- - --- - --- - --- - --- - --- - ----- ----- -----
8. 最新の「Vagrant 2.4.7」をインストール:
-
最新の「Vagrant 2.4.7」をインストールする場合です:
違う「.deb」ファイルにすれば、そのバージョンがインストール出来ます:
-
-- -- -- -- -- -- -- -- -- -- -- -- -- -- -- -- -- -- -- -- -- -- -- --
参考: 「Vagrant」の更新履歴:
-
v2.4.7 vagrant/CHANGELOG.md から抜粋:
-
最新のリリース:
2.4.7 (June 17, 2025) 2025年6月17日
-
上記の不具合対応が公開されています:
2.4.8.dev (UNRELEASED)
→複数のネットワークインターフェースが存在する場合のゲストネットワーク構成を修正
-
-- -- -- -- -- -- -- -- -- -- -- -- -- -- -- -- -- -- -- -- -- -- -- --
-
1). 「Vagrant 2.4.7」のダウンロード:
→ダウンロードしたファイルを「~/ダウンロード/virtualbox」フォルダに移動(任意):
-
2). チェックサムのダウンロード:
→ダウンロードしたファイルを「~/ダウンロード/virtualbox」に移動(任意):
-
3). ダウンロードしたチェックサムの「書類ファイル」をダブルクリック:
表示の中から、チェックサムを抜粋:
9e25280bab6368882d14ffb012dd4754c076a8455cdc689ba43991688060ad6d vagrant_2.4.7-1_amd64.deb
-
4). ファイルの確認:
$ cd ~/ダウンロード/virtualbox
$ ls -lA
:
-rw-rw-r-- 1 ubn ubn  22971684  6月 20 12:11 Oracle_VirtualBox_Extension_Pack-7.1.10-169112.vbox-extpack
-rw-rw-r-- 1 ubn ubn  90407962  6月 20 20:18 vagrant_2.4.7-1_amd64.deb
-rw-rw-r-- 1 ubn ubn       952  6月 20 20:19 vagrant_2.4.7_SHA256SUMS
-rw-rw-r-- 1 ubn ubn 109183888  6月 20 12:08 virtualbox-7.1_7.1.10-169112~Ubuntu~noble_amd64.deb
-
5). ダウンロードしたファイルのチェックサムを確認:
$ sha256sum vagrant_2.4.7-1_amd64.deb
:
9e25280bab6368882d14ffb012dd4754c076a8455cdc689ba43991688060ad6d  vagrant_2.4.7-1_amd64.deb
-
6). すでに「Vagrant」、および、そのプラグインをインストールしていたら、完全削除が必要です:
「上書きインストール」を行なうと、依存関連のエラーでプラグインがインストールできませんでした:
-
プラグインを削除した後に、「Vagrant」と設定ファイルを含めての削除が必要です:
-
(1). 「vagrant」がインストールされているか確認:
$ apt list vagrant
:
vagrant/now 2.4.3-1 amd64 [インストール済み、ローカル]
-
(2). インストールされているプラグインを確認:
$ vagrant plugin list
==> vagrant: A new version of Vagrant is available: 2.4.7 (installed version: 2.4.3)!
==> vagrant: To upgrade visit: https://www.vagrantup.com/downloads.html
vagrant-vbguest (0.32.0, global)
→最新バージョンへの通知が表示されました:
プラグインはひとつのみインストールされています:
-
(3). インストールされているプラグインを削除:
$ vagrant plugin uninstall vagrant-vbguest
:
Uninstalling the 'vagrant-vbguest' plugin...
Successfully uninstalled micromachine-3.0.0
Successfully uninstalled vagrant-vbguest-0.32.0
-
(4). インストールされているプラグインを確認:
$ vagrant plugin list
:
No plugins installed.
→プラグインはなし:
-
(5). 「vagrant」を完全に削除:
$ sudo apt purge vagrant
[sudo] パスワード:
:
以下のパッケージは「削除」されます:
  vagrant*
アップグレード: 0 個、新規インストール: 0 個、削除: 1 個、保留: 0 個。
この操作後に 391 MB のディスク容量が解放されます。
続行しますか? [Y/n]
→Enter
vagrant (2.4.2-1) を削除しています ...
dpkg: 警告: vagrant の削除中、ディレクトリ '/opt' が空でないため削除できませんで
した
-
(6). 「/opt」フォルダを確認:
$ ls -A /opt
firefox
→「firefox」は別件につき、問題なし
-
(7). 「vagrant」が削除されたか確認:
$ apt list vagrant
$
→なし:
-
(8). 念の為、一度再起動:
「端末」以外の画面を閉じてから、
$ reboot
-
7). 「.deb」ファイルから「Vagrant」をインストール:
$ cd ~/ダウンロード/virtualbox/
$ sudo apt install ./vagrant_2.4.7-1_amd64.deb
[sudo] パスワード:
:
パッケージリストを読み込んでいます... 完了
依存関係ツリーを作成しています... 完了
状態情報を読み取っています... 完了
注意、'./vagrant_2.4.7-1_amd64.deb' の代わりに 'vagrant' を選択します
以下のパッケージが新たにインストールされます:
  vagrant

アップグレード: 0 個、新規インストール: 1 個、削除: 0 個、保留: 0 個。
90.4 MB 中 0 B のアーカイブを取得する必要があります。
この操作後に追加で 274 MB のディスク容量が消費されます。
取得:1 /home/ubn/ダウンロード/virtualbox/vagrant_2.4.7-1_amd64.deb vagrant amd64 2.4.7-1 [90.4 MB]
以前に未選択のパッケージ vagrant を選択しています。
(データベースを読み込んでいます ... 現在 243081 個のファイルとディレクトリがインストールされています。)
.../vagrant_2.4.7-1_amd64.deb を展開する準備をしています ...
vagrant (2.4.7-1) を展開しています...
vagrant (2.4.7-1) を設定しています ...
N: ファイル '/home/ubn/ダウンロード/virtualbox/vagrant_2.4.7-1_amd64.deb' がユーザ '_apt' からアクセスできないため、ダウンロードは root でサンドボックスを通さずに行われます。 - pkgAcquire::Run (13: 許可がありません)
ubn@ubnbox:~/ダウンロード/virtualbox$
→「新たにインストールされます:」であることを確認:
-
8). インストールされたか確認:
$ apt list vagrant
:
vagrant/now 2.4.7-1 amd64 [インストール済み、ローカル]
→「ローカル」の表示に注目:
-
9). バージョンを確認:
$ vagrant --version
:
Vagrant 2.4.7
-
-
- --- - --- - --- - --- - --- - --- - --- - --- - ----- ----- ----- -
9. 「vagrant-vbguest」プラグインをインストール:
-
ホストOS 側の「Vagrant」のインストールをしたら、「vagrant-vbguest」プラグインをインストールしておくと、
「vagrant up」や「vagrant reload」時、及び「vagrant vbguest」実行時に
「Guest Additions」のバージョンを自動でチェックして、 自動で「Guest Additions」をインストールしてくれます。
-
手動だと半分しかうまく行かなかった「Guest Additions」のインストールがほぼ成功するのが利点:
-
1). 「vagrant-vbguest」プラグインを確認:
$ vagrant plugin list
:
No plugins installed.
→プラグインなし:
エラーの表示はありません:
-
参考: 先にプラグインを削除せずに、「vagrant」を再インストールすると、ここでエラーが出る場合があり、面倒なことになります:
-
2). 「vagrant-vbguest」プラグインのインストール:
$ vagrant plugin install vagrant-vbguest
:
Installing the 'vagrant-vbguest' plugin. This can take a few minutes...
Fetching micromachine-3.0.0.gem
Fetching vagrant-vbguest-0.32.0.gem
Installed the plugin 'vagrant-vbguest (0.32.0)'!
→赤い警告が表示されなければ OK:
プラグイン自体のバージョンは上がっていません
-
3). ホストOS を再起動:
「端末」以外のすべてのウィンドウを閉じてから、
$ reboot
-
-
- --- - --- - --- - --- - --- - --- - --- - --- - ----- ----- ----- --
10. 「Vagrant」の動作を確認:
-
「Vagrant 2.4.7」を確認するには、「仮想マシン」をイチから作ってみないと、テストになりません:
-
1). vagrant のプラグインを確認:
$ vagrant plugin list
:
vagrant-vbguest (0.32.0, global)
-
2). 登録された「Box」を確認:
$ vagrant box list
:
There are no installed boxes! Use `vagrant box add` to add some.
→なし
-
3). 作成された「仮想マシン」を確認:
$ vagrant global-status
:
id       name    provider   state    directory
-------------------------------------------------------------------------
-
4). 「Vagrant 2.4.7」を確認するには、「仮想マシン」をイチから作ってみないと、テストになりません:
-
-
- --- - --- - --- - --- - --- - --- - --- - --- - ----- ----- ----- ---
10-1. 「Vagrant」にて、「仮想マシン」を作成して動作を確認:
-
例:「Ubuntu Cinnamon 24.04 LTS」を「Vagrant」でインストールしてみました:
公式サイトの「aaronvonawesome/ubuntu-2404-cinnamon」のBox を使用:
-
1). 「作業フォルダ」を作成:
$ mkdir -p ~/ダウンロード/vm/ubn2404
-
2). 「Box」をダウンロード、および「Vagrantfile」を作成:
$ cd ~/ダウンロード/vm/ubn2404
$ vagrant init aaronvonawesome/ubuntu-2404-cinnamon --box-version 1.1.0
:
A `Vagrantfile` has been placed in this directory. You are now
ready to `vagrant up` your first virtual environment! Please read
the comments in the Vagrantfile as well as documentation on
`vagrantup.com` for more information on using Vagrant.
→ファルひとつの作成だけなので、すぐに応答が返ってきます:
-
3). 確認:
$ ls -lA ~/ダウンロード/vm/ubn2404
:
-rw-rw-r-- 1 ubn ubn 3444  6月 24 11:28 Vagrantfile
→自動で「Vagrantfile」が作られました
-
-
- --- - --- - --- - --- - --- - --- - --- - --- - ----- ----- ----- ----
10-2. 仮想マシンの(初回の作成と)立ち上げにてエラー:
-
1). 仮想マシンの立ち上げ:
$ cd ~/ダウンロード/vm/ubn2404
$ vagrant up
Bringing machine 'default' up with 'virtualbox' provider...
==> default: Box 'aaronvonawesome/ubuntu-2404-cinnamon' could not be found. Attempting to find and install...
    default: Box Provider: virtualbox
    default: Box Version: 1.1.0
==> default: Loading metadata for box 'aaronvonawesome/ubuntu-2404-cinnamon'
    default: URL: https://vagrantcloud.com/api/v2/vagrant/aaronvonawesome/ubuntu-2404-cinnamon
==> default: Adding box 'aaronvonawesome/ubuntu-2404-cinnamon' (v1.1.0) for provider: virtualbox (amd64)
    default: Downloading: https://vagrantcloud.com/aaronvonawesome/boxes/ubuntu-2404-cinnamon/versions/1.1.0/providers/virtualbox/amd64/vagrant.box
しばらく時間がかかります
    default: Calculating and comparing box checksum...
==> default: Successfully added box 'aaronvonawesome/ubuntu-2404-cinnamon' (v1.1.0) for 'virtualbox (amd64)'!
==> default: Importing base box 'aaronvonawesome/ubuntu-2404-cinnamon'...
しばらく時間がかかります
==> default: Matching MAC address for NAT networking...
==> default: Checking if box 'aaronvonawesome/ubuntu-2404-cinnamon' version '1.1.0' is up to date...
==> default: Setting the name of the VM: ubn2404_default_1750732751766_68158
==> default: Clearing any previously set network interfaces...
==> default: Preparing network interfaces based on configuration...
    default: Adapter 1: nat
==> default: Forwarding ports...
    default: 22 (guest) => 2222 (host) (adapter 1)
==> default: Booting VM...
==> default: Waiting for machine to boot. This may take a few minutes...
    default: SSH address: 127.0.0.1:2222
    default: SSH username: vagrant
    default: SSH auth method: private key
    default:
    default: Vagrant insecure key detected. Vagrant will automatically replace
    default: this with a newly generated keypair for better security.
    default:
    default: Inserting generated public key within guest...
    default: Removing insecure key from the guest if it's present...
    default: Key inserted! Disconnecting and reconnecting using new SSH key...
==> default: Machine booted and ready!
Got different reports about installed GuestAdditions version:
Virtualbox on your host claims:   6.0.0
VBoxService inside the vm claims: 7.0.16
Going on, assuming VBoxService is correct...
[default] A Virtualbox Guest Additions installation was found but no tools to rebuild or start them.
Got different reports about installed GuestAdditions version:
Virtualbox on your host claims:   6.0.0
VBoxService inside the vm claims: 7.0.16
Going on, assuming VBoxService is correct...
rmmod: ERROR: Module vboxguest is in use
Reading package lists...
プラグインによる、依存パッケージの自動インストール:
Building dependency tree...
Reading state information...
E: Unable to locate package virtualbox-guest-dkms
Reading package lists...
Building dependency tree...
Reading state information...
linux-headers-6.8.0-60-generic is already the newest version (6.8.0-60.63).
linux-headers-6.8.0-60-generic set to manually installed.
build-essential is already the newest version (12.10ubuntu1).
build-essential set to manually installed.
Suggested packages:
  menu
The following NEW packages will be installed:
  dkms
0 upgraded, 1 newly installed, 0 to remove and 1 not upgraded.
Need to get 51.5 kB of archives.
After this operation, 196 kB of additional disk space will be used.
Get:1 http://us.archive.ubuntu.com/ubuntu noble/main amd64 dkms all 3.0.11-1ubuntu13 [51.5 kB]
Fetched 51.5 kB in 1s (35.4 kB/s)
Selecting previously unselected package dkms.
(Reading database ... 271520 files and directories currently installed.)
Preparing to unpack .../dkms_3.0.11-1ubuntu13_all.deb ...
Unpacking dkms (3.0.11-1ubuntu13) ...
Setting up dkms (3.0.11-1ubuntu13) ...
Processing triggers for man-db (2.12.0-4build2) ...
Skipping unmount of Virtualbox Guest Additions ISO, because it was not mounted.
==> default: Checking for guest additions in VM...
    default: The guest additions on this VM do not match the installed version of
    default: VirtualBox! In most cases this is fine, but in rare cases it can
    default: prevent things such as shared folders from working properly. If you see
    default: shared folder errors, please make sure the guest additions within the
    default: virtual machine match the version of VirtualBox you have installed on
    default: your host and reload your VM.
    default:
    default: Guest Additions Version: 7.0.16
    default: VirtualBox Version: 7.1
==> default: Attempting graceful shutdown of VM...
==> default: Forcing shutdown of VM...
==> default: Destroying VM and associated drives...
これ以降は、エラーが表示:
/home/ubn/.vagrant.d/gems/3.3.8/gems/vagrant-vbguest-0.32.0/lib/vagrant-vbguest/hosts/virtualbox.rb:84:in `block in guess_local_iso': undefined method `exists?' for class File (NoMethodError)

            path && File.exists?(path)
                        ^^^^^^^^
Did you mean?  exist?
    from /home/ubn/.vagrant.d/gems/3.3.8/gems/vagrant-vbguest-0.32.0/lib/vagrant-vbguest/hosts/virtualbox.rb:83:in `each'
    from /home/ubn/.vagrant.d/gems/3.3.8/gems/vagrant-vbguest-0.32.0/lib/vagrant-vbguest/hosts/virtualbox.rb:83:in `find'
    from /home/ubn/.vagrant.d/gems/3.3.8/gems/vagrant-vbguest-0.32.0/lib/vagrant-vbguest/hosts/virtualbox.rb:83:in `guess_local_iso'
    from /home/ubn/.vagrant.d/gems/3.3.8/gems/vagrant-vbguest-0.32.0/lib/vagrant-vbguest/hosts/virtualbox.rb:48:in `local_path'
    from /home/ubn/.vagrant.d/gems/3.3.8/gems/vagrant-vbguest-0.32.0/lib/vagrant-vbguest/hosts/base.rb:48:in `additions_file'
    from /home/ubn/.vagrant.d/gems/3.3.8/gems/vagrant-vbguest-0.32.0/lib/vagrant-vbguest/installers/base.rb:223:in `iso_file'
    from /home/ubn/.vagrant.d/gems/3.3.8/gems/vagrant-vbguest-0.32.0/lib/vagrant-vbguest/installers/linux.rb:66:in `install'
: 省略
    from /opt/vagrant/embedded/gems/gems/vagrant-2.4.7/lib/vagrant/machine.rb:199:in `call'
    from /opt/vagrant/embedded/gems/gems/vagrant-2.4.7/lib/vagrant/machine.rb:199:in `action'
    from /opt/vagrant/embedded/gems/gems/vagrant-2.4.7/lib/vagrant/batch_action.rb:88:in `block (2 levels) in run'
ubn@ubnbox:~/ダウンロード/vm/ubn2404$
残念ながら、「仮想マシン」の作成に失敗しました:
-
2). 以前に投稿〈H173改w〉した「項番 9.」のエラー内容と同じみたい:
-
原因は、Vagrant ではなく、(個人が提供した)「vagrant-vbguest」プラグインの修正の漏れでした:
Ruby のバージョンが上がったことで、「File.exists?(path)」を「File.exist?(path)」に修正する必要がでたけど、
「vagrant-vbguest」プラグインの管理はされておらず(勝手に修正もできないので)、ソースの修正がないからです。
-
便利なプラグインで、(個人的には)これを使うために「Vagrant」を使っていると言えますが、ソースの修正のプルリクエストができないのは惜しいです:
-
参考: 「vagrant-vbguest」プラグインの不具合報告
vagrant-vbguest/hosts/virtualbox.rb typo error #13404
-
3). エラーへの対応:
いろいろな対応があるけど、一番楽な、
該当するファイルのエラー行を修正:
-
(1). エラー行の抜粋:
/home/ubn/.vagrant.d/gems/3.3.8/gems/vagrant-vbguest-0.32.0/lib/vagrant-vbguest/hosts/virtualbox.rb:84:in `block in guess_local_iso': undefined method `exists?' for class File (NoMethodError)

            path && File.exists?(path)
                        ^^^^^^^^
-
(2). 修正:
$ nano ~/.vagrant.d/gems/3.3.8/gems/vagrant-vbguest-0.32.0/lib/vagrant-vbguest/hosts/virtualbox.rb
検索:
Ctrl+W で検索 →Search:「File.exists」Enter
修正:
「File.exists」 →「File.exist」に修正
-
Ctrl+O で保存先を確認して、Enter
Ctrl+X で終了
-
(3). ホストOS を再起動:
「端末」以外のすべてのウィンドウを閉じてから、
$ reboot
-
-
- --- - --- - --- - --- - --- - --- - --- - --- - ----- ----- ----- -----
10-3. 仮想マシンを再立ち上げして確認:
-
1). 仮想マシンの立ち上げ:
$ cd ~/ダウンロード/vm/ubn2404
$ vagrant up
Bringing machine 'default' up with 'virtualbox' provider...
==> default: Importing base box 'aaronvonawesome/ubuntu-2404-cinnamon'...
==> default: Matching MAC address for NAT networking...
==> default: Checking if box 'aaronvonawesome/ubuntu-2404-cinnamon' version '1.1.0' is up to date...
==> default: Setting the name of the VM: ubn2404_default_1750752271101_35243
==> default: Clearing any previously set network interfaces...
==> default: Preparing network interfaces based on configuration...
    default: Adapter 1: nat
==> default: Forwarding ports...
    default: 22 (guest) => 2222 (host) (adapter 1)
==> default: Booting VM...
==> default: Waiting for machine to boot. This may take a few minutes...
    default: SSH address: 127.0.0.1:2222
    default: SSH username: vagrant
    default: SSH auth method: private key
    default:
    default: Vagrant insecure key detected. Vagrant will automatically replace
    default: this with a newly generated keypair for better security.
    default:
    default: Inserting generated public key within guest...
    default: Removing insecure key from the guest if it's present...
    default: Key inserted! Disconnecting and reconnecting using new SSH key...
==> default: Machine booted and ready!
Got different reports about installed GuestAdditions version:
Virtualbox on your host claims:   6.0.0
VBoxService inside the vm claims: 7.0.16
Going on, assuming VBoxService is correct...
[default] A Virtualbox Guest Additions installation was found but no tools to rebuild or start them.
Got different reports about installed GuestAdditions version:
Virtualbox on your host claims:   6.0.0
VBoxService inside the vm claims: 7.0.16
Going on, assuming VBoxService is correct...
rmmod: ERROR: Module vboxguest is in use
Reading package lists...
Building dependency tree...
Reading state information...
E: Unable to locate package virtualbox-guest-dkms
Reading package lists...
プラグインによる、依存パッケージの自動インストール:
Building dependency tree...
Reading state information...
linux-headers-6.8.0-60-generic is already the newest version (6.8.0-60.63).
linux-headers-6.8.0-60-generic set to manually installed.
build-essential is already the newest version (12.10ubuntu1).
build-essential set to manually installed.
Suggested packages:
  menu
The following NEW packages will be installed:
  dkms
0 upgraded, 1 newly installed, 0 to remove and 1 not upgraded.
Need to get 51.5 kB of archives.
After this operation, 196 kB of additional disk space will be used.
Get:1 http://us.archive.ubuntu.com/ubuntu noble/main amd64 dkms all 3.0.11-1ubuntu13 [51.5 kB]
Fetched 51.5 kB in 1s (38.3 kB/s)
Selecting previously unselected package dkms.
(Reading database ... 271520 files and directories currently installed.)
Preparing to unpack .../dkms_3.0.11-1ubuntu13_all.deb ...
Unpacking dkms (3.0.11-1ubuntu13) ...
Setting up dkms (3.0.11-1ubuntu13) ...
Processing triggers for man-db (2.12.0-4build2) ...
プラグインによる、VBoxGuestAdditions の自動インストール:
Copy iso file /usr/share/virtualbox/VBoxGuestAdditions.iso into the box /tmp/VBoxGuestAdditions.iso
Mounting Virtualbox Guest Additions ISO to: /mnt
mount: /mnt: WARNING: source write-protected, mounted read-only.
Installing Virtualbox Guest Additions 7.1.10 - guest version is 7.0.16
Verifying archive integrity...  100%   MD5 checksums are OK. All good.
Uncompressing VirtualBox 7.1.10 Guest Additions for Linux  100%
VirtualBox Guest Additions installer
This system appears to have a version of the VirtualBox Guest Additions
already installed.  If it is part of the operating system and kept up-to-date,
there is most likely no need to replace it.  If it is not up-to-date, you
should get a notification when you start the system.  If you wish to replace
it with this version, please do not continue with this installation now, but
instead remove the current version first, following the instructions for the
operating system.

If your system simply has the remains of a version of the Additions you could
not remove you should probably continue now, and these will be removed during
installation.

Do you wish to continue? [yes or no]
touch: cannot touch '/var/lib/VBoxGuestAdditions/skip-6.8.0-45-generic': No such file or directory
touch: cannot touch '/var/lib/VBoxGuestAdditions/skip-6.8.0-60-generic': No such file or directory
VirtualBox Guest Additions: Starting.
VirtualBox Guest Additions: Setting up modules
VirtualBox Guest Additions: Building the VirtualBox Guest Additions kernel
modules.  This may take a while.
VirtualBox Guest Additions: To build modules for other installed kernels, run
VirtualBox Guest Additions:   /sbin/rcvboxadd quicksetup <version>
VirtualBox Guest Additions: or
VirtualBox Guest Additions:   /sbin/rcvboxadd quicksetup all
VirtualBox Guest Additions: Building the modules for kernel 6.8.0-60-generic.
update-initramfs: Generating /boot/initrd.img-6.8.0-60-generic
VirtualBox Guest Additions: Running kernel modules will not be replaced until
the system is restarted or 'rcvboxadd reload' triggered
VirtualBox Guest Additions: reloading kernel modules and services
VirtualBox Guest Additions: kernel modules and services 7.1.10 r169112 reloaded
VirtualBox Guest Additions: NOTE: you may still consider to re-login if some
user session specific services (Shared Clipboard, Drag and Drop, Seamless or
Guest Screen Resize) were not restarted automatically
→「Guest Additions」の自動インストールで、正常終了時に、
「端末」画面にプロンプトが返らなくなるのは、いつものことです:
-
2). 「端末」画面を右上の「x」で閉じました:
→「ウィンドウを閉じる」をクリック:
-
3). 別の「端末」画面を起動:
$ cd ~/ダウンロード/vm/ubn2404
$ vagrant status
:
Current machine states:

default                   running (virtualbox)
→「仮想マシン」は起動していますが、GUI 画面が表示されません:
vagrant の公式Box の場合、ssh 接続がメインなのか、ほとんどが GUI 表示オフの設定です:
-
4). Vagrantfile の設定を修正:
-
(1). 「仮想マシン」の停止:
$ vagrant halt
==> default: Attempting graceful shutdown of VM...
ubn@ubnbox:~/ダウンロード/vm/ubn2404$
-
$ pwd
/home/ubn/ダウンロード/vm/ubn2404
$ ls
Vagrantfile
$ ls -1A
.vagrant
Vagrantfile
→制御ファイルは隠されています
-
(2). 「Vagrantfile」ファイルを修正:
$ nano Vagrantfile
一部を抜粋:
  #
  # config.vm.provider "virtualbox" do |vb|
  #   # Display the VirtualBox GUI when booting the machine
  #   vb.gui = true
  #
  #   # Customize the amount of memory on the VM:
  #   vb.memory = "1024"
  # end
  #
↓ 下記に修正:(コメントを 3つ解除)
  #
   config.vm.provider "virtualbox" do |vb|
  #   # Display the VirtualBox GUI when booting the machine
     vb.gui = true
  #
  #   # Customize the amount of memory on the VM:
  #   vb.memory = "1024"
   end
  #
Ctrl+O で保存先を確認して、Enter
Ctrl+X で終了
-
(3). 正しく修正されたか確認:
$ cat Vagrantfile
-
5). ホストOS を再起動:
「端末」以外のすべての画面を閉じてから、
$ reboot
-
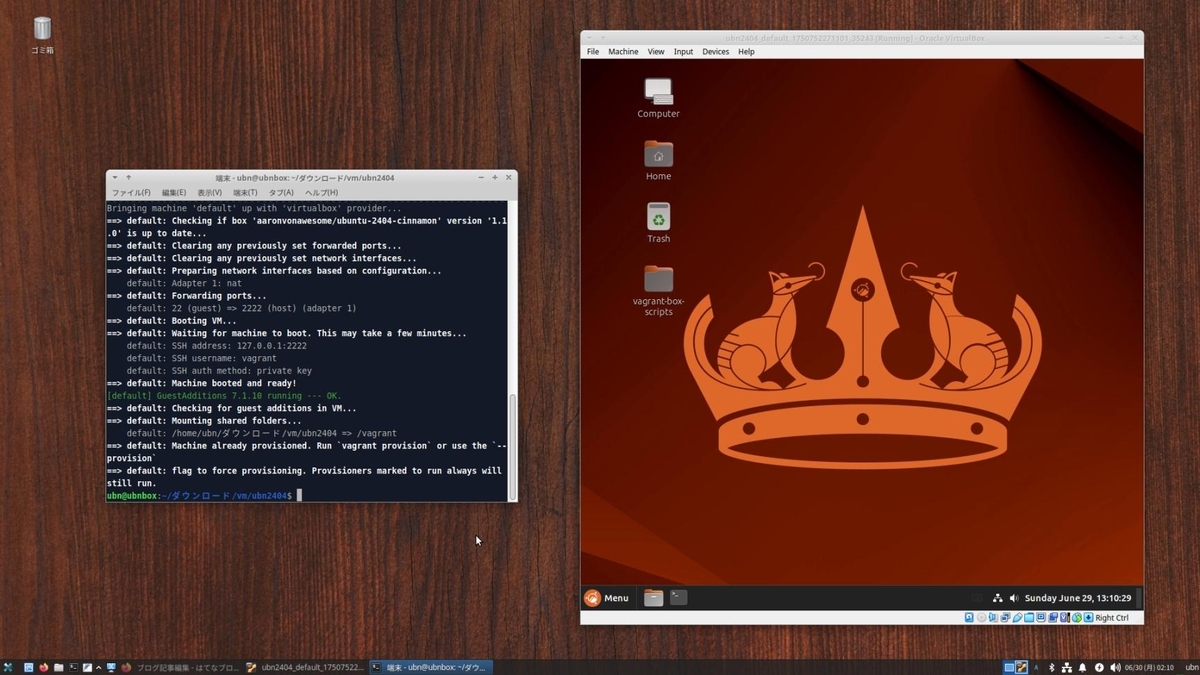
6). 「仮想マシン」に(GUI 表示するように)修正した Vagrantfile を反映:
$ cd ~/ダウンロード/vm/ubn2404
$ vagrant reload
==> default: Checking if box 'aaronvonawesome/ubuntu-2404-cinnamon' version '1.1.0' is up to date...
==> default: Clearing any previously set forwarded ports...
==> default: Clearing any previously set network interfaces...
==> default: Preparing network interfaces based on configuration...
    default: Adapter 1: nat
==> default: Forwarding ports...
    default: 22 (guest) => 2222 (host) (adapter 1)
==> default: Booting VM...
==> default: Waiting for machine to boot. This may take a few minutes...
    default: SSH address: 127.0.0.1:2222
    default: SSH username: vagrant
    default: SSH auth method: private key
==> default: Machine booted and ready!
[default] GuestAdditions 7.1.10 running --- OK.
==> default: Checking for guest additions in VM...
==> default: Mounting shared folders...
    default: /home/ubn/ダウンロード/vm/ubn2404 => /vagrant ←(注目)
ubn@ubnbox:~/ダウンロード/vm/ubn2404$
→「仮想マシン」が「全画面」で起動しました。「英語」の環境です:

「ログイン」画面なし、パスワードなしで、直接「デスクトップ」画面が表示されました:
vagrant の公式 Box だと普通です:
違いは、こちらのBox の場合、自動化のためのスクリプトのフォルダがデスクトップに置かれています:
-
ちなみに、「vagrant だと立ち上げ時にスクリプトを実行できる」ので、Box の丸呑みはリスクが高いです。 参考だけにして、本番で使うBox はイチから自分で作るのが、確実で安全で、勉強になります。(個人的な意見)
-
↓ 全画面から、上下のパネルの幅(高さ)を除いた、解像度 (1920 x 988) で表示されていました:
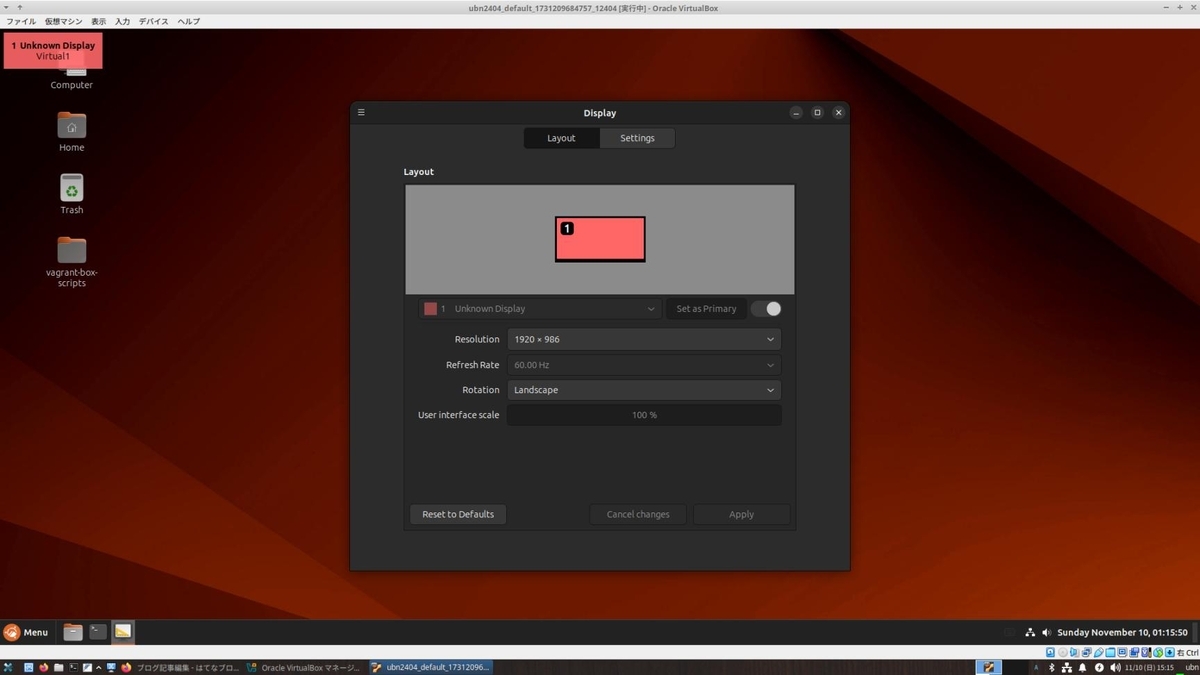
↓ 上記以外の解像度も選べます:
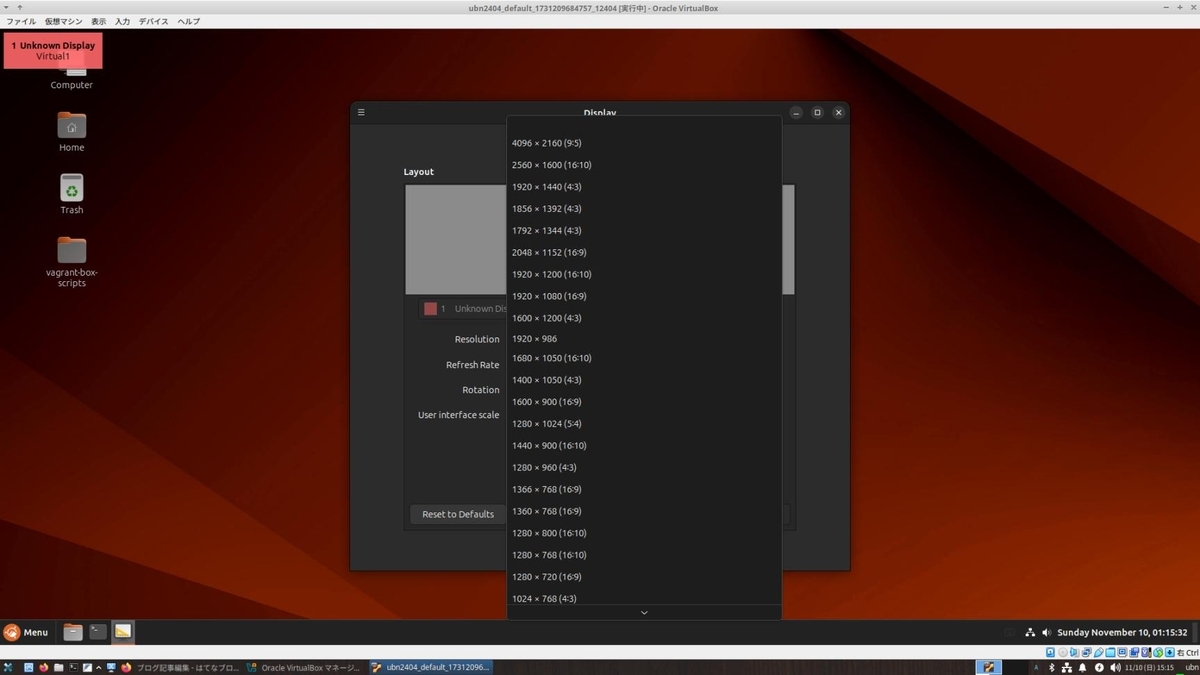
-
- 「解像度の自動調整」機能だけでなく、「クリップボードの共有」機能も使え、「端末」画面からホストOS 側のエディタに貼り付けできました:
vagrant@uc2404-vm:~$ ls
Desktop    Downloads  Pictures  snap       Videos
Documents  Music      Public    Templates
vagrant@uc2404-vm:~$
-
- ちなみに、「共有フォルダ」機能も有効で、立ち上げ時に「共有フォルダ」が自動マウントされています:
==> default: Mounting shared folders...
    default: /home/ubn/ダウンロード/vm/ubn2404 => /vagrant
- つまり、「Guest Additions」の機能が有効で、すでに動いています:
-
7). 「仮想マシン」の確認:
$ cd ~/ダウンロード/vm/ubn2404
$ vagrant status
:
Current machine states:

default                   running (virtualbox)
ちなみに、「default」は仮想マシン名です:
vagrant で認識される、仮想マシン名は「default」に統一?されています:
「VirtualBox」で認識される、仮想マシン名は違うので注意。
-
8). 「仮想マシン」の停止:
$ cd ~/ダウンロード/vm/ubn2404
$ vagrant halt
:
==> default: Attempting graceful shutdown of VM...
==> default: Forcing shutdown of VM...
ubn@ubnbox:~/ダウンロード/vm/ubn2404$
-
9). 「仮想マシン」の確認:
$ vagrant status
:
Current machine states:

default                   poweroff (virtualbox)
-
10). 「仮想マシン」の情報を確認:
-
ローカルに登録されている Box:
$ vagrant box list
:
aaronvonawesome/ubuntu-2404-cinnamon (virtualbox, 1.1.0, (amd64))
-
「VirtualBox」が管理している「仮想マシン」(イメージが置かれているフォルダ):
$ ls -1 ~/'VirtualBox VMs'
:
Haiku
ubn2404_default_1750752271101_35243  ←「Vagrant」が管理
「仮想マシン」名をよく見ると、下記の情報の一部が使われていることに気付きます:
なので、ひと目でわかるように vagrant の「作業フォルダ」名は工夫する必要があります:
-
→ちなみに、「Haiku」のフォルダが残っているのは、
仮想マシンは削除したけど、スクリーンショット(ゲストOS 内で、右Ctrl+E)のファイルがあったので、「Haiku」のフォルダの削除ができなかったみたい:
$ ls -1 ~/'VirtualBox VMs'/Haiku
VirtualBox_Haiku_19_12_2024_04_35_35.png
VirtualBox_Haiku_19_12_2024_04_37_42.png
VirtualBox_Haiku_19_12_2024_04_38_00.png
VirtualBox_Haiku_19_12_2024_04_50_24.png
VirtualBox_Haiku_19_12_2024_04_52_27.png
VirtualBox_Haiku_19_12_2024_04_53_24.png
VirtualBox_Haiku_19_12_2024_04_54_22.png
-
「Vagrant」が管理している「仮想マシン」:
$ vagrant global-status
:
id       name    provider   state   directory
------------------------------------------------------------------------
adb835a  default virtualbox poweroff /home/ubn/ダウンロード/vm/ubn2404
「VirtualBox」が管理している「仮想マシン」のひとつで、「Vagrant」の管理対象です:
というか、「Vagrant」は「VirtualBox」の内部コマンドを制御して「仮想マシン」を作るためのツール(コマンド群)になります:
-
状態は「poweroff」ですが、反映のタイミングは遅れることがあるので、
現在の状態の確認には、作業フォルダに移動してから「vagrant status」を使うのが確実です:
-
-
- --- - --- - --- - --- - --- - --- - --- - --- - ----- ----- ----- ----- -
10-4. 「ssh 接続」できるか確認:
-
1). 「仮想マシン」を通常立ち上げ:
$ cd ~/ダウンロード/vm/ubn2404
$ vagrant up
Bringing machine 'default' up with 'virtualbox' provider...
==> default: Checking if box 'aaronvonawesome/ubuntu-2404-cinnamon' version '1.1.0' is up to date...
==> default: Clearing any previously set forwarded ports...
==> default: Clearing any previously set network interfaces...
==> default: Preparing network interfaces based on configuration...
    default: Adapter 1: nat
==> default: Forwarding ports...
    default: 22 (guest) => 2222 (host) (adapter 1)
==> default: Booting VM...
==> default: Waiting for machine to boot. This may take a few minutes...
    default: SSH address: 127.0.0.1:2222
    default: SSH username: vagrant
    default: SSH auth method: private key
→「仮想マシン」は立ち上がりましたが、「端末」画面は途中から表示が止まって、プロンプトが返ってきません:
だいぶしてタイムアウトで、赤色表示:
Timed out while waiting for the machine to boot. This means that
Vagrant was unable to communicate with the guest machine within
the configured ("config.vm.boot_timeout" value) time period.

If you look above, you should be able to see the error(s) that
Vagrant had when attempting to connect to the machine. These errors
are usually good hints as to what may be wrong.

If you're using a custom box, make sure that networking is properly
working and you're able to connect to the machine. It is a common
problem that networking isn't setup properly in these boxes.
Verify that authentication configurations are also setup properly,
as well.

If the box appears to be booting properly, you may want to increase
the timeout ("config.vm.boot_timeout") value.
ubn@ubnbox:~/ダウンロード/vm/ubn2404$
-
「仮想マシン」の確認:
$ vagrant status
Current machine states:

default                   running (virtualbox)
-
2). 「ssh 接続」の設定を確認:
$ vagrant ssh-config
:
Host default
  HostName 127.0.0.1
  User vagrant
  Port 2222
  UserKnownHostsFile /dev/null
  StrictHostKeyChecking no
  PasswordAuthentication no
  IdentityFile /home/ubn/ダウンロード/vm/ubn2404/.vagrant/machines/default/virtualbox/private_key
  IdentitiesOnly yes
  LogLevel FATAL
  PubkeyAcceptedKeyTypes +ssh-rsa
  HostKeyAlgorithms +ssh-rsa
→こちらは、Linux の「ssh」コマンドで接続するときに必要となる「情報」です:
-
3). ssh 接続:
$ cd ~/ダウンロード/vm/ubn2404
$ vagrant ssh
しばらくして、
$
→ssh 接続できません:
$ vagrant halt
==> default: Attempting graceful shutdown of VM...
    default: Guest communication could not be established! This is usually because
    default: SSH is not running, the authentication information was changed,
    default: or some other networking issue. Vagrant will force halt, if
    default: capable.
==> default: Forcing shutdown of VM...
ubn@ubnbox:~/ダウンロード/vm/ubn2404$
→正常時とは異なる、余分なメッセージが表示されています
-
-
- --- - --- - --- - --- - --- - --- - --- - --- - ----- ----- ----- ----- --
10-5. まずは、「VirtualBox」マネージャを起動して、「仮想マシン」の設定を見直し:
-
1). GUI で使うので、「仮想マシン」の設定を見直しました:
-
システム:
メインメモリー: →「8177 MB」
ポインティングデバイス: 「PS/2 マウス」→「USB タブレット」
プロセッサー: 「2」→「8」
-
ディスプレイ:
ビデオメモリー: →「256 MB」
-
2). 「VirtualBox」マネージャの「起動」ボタンをクリック:
ログイン画面なしで、デスクトップ画面が表示されました:
-
3). ゲストOS の「端末」画面を起動:
vagrant@uc2404-vm:~$ ls
Desktop  Documents  Downloads  Music  Pictures  Public  snap  Templates  Videos
-
4). システム更新:
vagrant@uc2404-vm:~$ sudo apt update
:
Hit:1 http://security.ubuntu.com/ubuntu noble-security InRelease
Hit:2 http://us.archive.ubuntu.com/ubuntu noble InRelease
Hit:3 http://us.archive.ubuntu.com/ubuntu noble-updates InRelease
Hit:4 http://us.archive.ubuntu.com/ubuntu noble-backports InRelease
Reading package lists... Done
Building dependency tree... Done
Reading state information... Done
70 packages can be upgraded. Run 'apt list --upgradable' to see them.
→更新が貯まっていました
-
更新を実行:
vagrant@uc2404-vm:~$ sudo apt upgrade
:
Reading package lists... Done
Building dependency tree... Done
Reading state information... Done
Calculating upgrade... Done
Get more security updates through Ubuntu Pro with 'esm-apps' enabled:
  libzvbi-common libcjson1 libpostproc57 libavcodec60
  libgstreamer-plugins-bad1.0-0 libzvbi0t64 libavutil58 libswscale7
  gir1.2-gst-plugins-bad-1.0 libswresample4 libavformat60
  gstreamer1.0-plugins-bad libavfilter9
Learn more about Ubuntu Pro at https://ubuntu.com/pro
The following NEW packages will be installed:
  linux-headers-6.8.0-62 linux-headers-6.8.0-62-generic
  linux-image-6.8.0-62-generic linux-modules-6.8.0-62-generic
  linux-modules-extra-6.8.0-62-generic linux-tools-6.8.0-62
  linux-tools-6.8.0-62-generic
The following upgrades have been deferred due to phasing:
  alsa-ucm-conf firmware-sof-signed ubuntu-drivers-common
The following packages will be upgraded:
  amd64-microcode apport apport-core-dump-handler apport-gtk cloud-init
  gir1.2-javascriptcoregtk-4.1 gir1.2-webkit2-4.1 ibverbs-providers
  libblockdev-crypto3 libblockdev-fs3 libblockdev-loop3 libblockdev-mdraid3
  libblockdev-nvme3 libblockdev-part3 libblockdev-swap3 libblockdev-utils3
  libblockdev3 libibverbs1 libjavascriptcoregtk-4.1-0
  libjavascriptcoregtk-6.0-1 libnss-systemd libpam-modules libpam-modules-bin
  libpam-runtime libpam-systemd libpam0g libpython3.12-minimal
  libpython3.12-stdlib libpython3.12t64 libqt5qml5 libqt5qmlmodels5
  libqt5quick5 libsystemd-shared libsystemd0 libtraceevent1
  libtraceevent1-plugin libudev1 libudisks2-0 libvpx9 libwebkit2gtk-4.1-0
  libwebkitgtk-6.0-4 linux-firmware linux-generic linux-headers-generic
  linux-image-generic linux-libc-dev linux-tools-common openssh-client
  openssh-server openssh-sftp-server python3-apport python3-problem-report
  python3-requests python3.12 python3.12-minimal systemd systemd-dev
  systemd-resolved systemd-sysv systemd-timesyncd udev udisks2 update-notifier
  update-notifier-common xserver-common xserver-xorg-core xserver-xorg-legacy
67 upgraded, 7 newly installed, 0 to remove and 3 not upgraded.
54 standard LTS security updates
Need to get 6,275 kB/803 MB of archives.
After this operation, 302 MB of additional disk space will be used.
Do you want to continue? [Y/n]
→Enter
-
更新に伴う、「openssh-server」の設定画面が表示:
→自動で選択されている項目をそのまま選びました:

Tab キーで「OK」、Enter
-
次に続きました:
:
 * dkms: running auto installation service for kernel 6.8.0-62-generic
 * dkms: autoinstall for kernel 6.8.0-62-generic
   ...done.
/etc/kernel/postinst.d/initramfs-tools:
update-initramfs: Generating /boot/initrd.img-6.8.0-62-generic
/etc/kernel/postinst.d/vboxadd:
VirtualBox Guest Additions: Building the modules for kernel 6.8.0-62-generic.
update-initramfs: Generating /boot/initrd.img-6.8.0-62-generic
/etc/kernel/postinst.d/zz-update-grub:
Sourcing file `/etc/default/grub'
Generating grub configuration file ...
Found linux image: /boot/vmlinuz-6.8.0-62-generic
Found initrd image: /boot/initrd.img-6.8.0-62-generic
Found linux image: /boot/vmlinuz-6.8.0-60-generic
Found initrd image: /boot/initrd.img-6.8.0-60-generic
Found linux image: /boot/vmlinuz-6.8.0-45-generic
Found initrd image: /boot/initrd.img-6.8.0-45-generic
Found memtest86+x64 image: /boot/memtest86+x64.bin
Warning: os-prober will not be executed to detect other bootable partitions.
Systems on them will not be added to the GRUB boot configuration.
Check GRUB_DISABLE_OS_PROBER documentation entry.
Adding boot menu entry for UEFI Firmware Settings ...
done
vagrant@uc2404-vm:~$
→カーネルの更新も含まれていました:
「dkms」の機能が働いていることに注目:
-
5). 「端末」画面を閉じてから、メニューで「シャットダウン」
-
6). 「VirtualBox」マネージャの「起動」ボタンをクリック:
ログイン画面なしで、デスクトップ画面が表示されました:
-
7). ゲストOS の「端末」画面を起動:
vagrant@uc2404-vm:~$
-
8). システム更新:
vagrant@uc2404-vm:~$ sudo apt update
:
Hit:1 http://security.ubuntu.com/ubuntu noble-security InRelease
Hit:2 http://us.archive.ubuntu.com/ubuntu noble InRelease
Hit:3 http://us.archive.ubuntu.com/ubuntu noble-updates InRelease
Hit:4 http://us.archive.ubuntu.com/ubuntu noble-backports InRelease
Reading package lists... Done
Building dependency tree... Done
Reading state information... Done
3 packages can be upgraded. Run 'apt list --upgradable' to see them.
-
vagrant@uc2404-vm:~$ sudo apt upgrade
:
Reading package lists... Done
Building dependency tree... Done
Reading state information... Done
Calculating upgrade... Done
The following packages were automatically installed and are no longer required:
  linux-headers-6.8.0-45 linux-headers-6.8.0-45-generic
  linux-image-6.8.0-45-generic linux-modules-6.8.0-45-generic
  linux-modules-extra-6.8.0-45-generic linux-tools-6.8.0-45
  linux-tools-6.8.0-45-generic
Use 'sudo apt autoremove' to remove them.
Get more security updates through Ubuntu Pro with 'esm-apps' enabled:
  libzvbi-common libcjson1 libpostproc57 libavcodec60
  libgstreamer-plugins-bad1.0-0 libzvbi0t64 libavutil58 libswscale7
  gir1.2-gst-plugins-bad-1.0 libswresample4 libavformat60
  gstreamer1.0-plugins-bad libavfilter9
Learn more about Ubuntu Pro at https://ubuntu.com/pro

The following upgrades have been deferred due to phasing:
  alsa-ucm-conf firmware-sof-signed ubuntu-drivers-common
0 upgraded, 0 newly installed, 0 to remove and 3 not upgraded.
-
個別でパッケージをインストール:
3つの保留されている(3 not upgraded)パッケージ:
vagrant@uc2404-vm:~$ sudo apt install alsa-ucm-conf firmware-sof-signed ubuntu-drivers-common
-
不要なパッケージを削除:(更新により古くなったカーネル)
vagrant@uc2404-vm:~$ sudo apt autoremove
-
vagrant@uc2404-vm:~$ sudo apt update
-
vagrant@uc2404-vm:~$ sudo apt upgrade
:
0 upgraded, 0 newly installed, 0 to remove and 0 not upgraded.
→保留がないことを確認
-
9). sudo が使えるかの確認と、sudo の動作の確認:
vagrant@uc2404-vm:~$ pwd
/home/vagrant
vagrant@uc2404-vm:~$ id
uid=1000(vagrant) gid=1000(vagrant) groups=1000(vagrant),4(adm),24(cdrom),27(sudo),30(dip),46(plugdev),100(users),115(lpadmin)
-
vagrant@vagrant:~$ sudo ls
Desktop  Documents  Downloads  Music  Pictures  Public  Templates  Videos  snap
→パスワードなしで、sudo(管理者モード)で表示されました:
→OK
-
Vagrant のデフォルトの設定です。使いやすいけど、セキュリティとしてはヤバイ状態なので、
動くことを確認したら、すぐにパスワードを設定するのが無難
-
10). 「ssh 接続」できるように設定:
-
(1). 確認:
vagrant@vagrant:~$ pwd
:
/home/vagrant
→ユーザのホームフォルダです
-
vagrant@vagrant:~$ ls -1Ap | grep ssh
:
.lesshst
.ssh/
→「~/.ssh」フォルダがありました:
-
vagrant@vagrant:~$ ls -1Ap .ssh/
:
authorized_keys
→鍵もありました:
-
(2). ssh 関連のアプリがインストールされているか確認:
vagrant@uc2404-vm:~$ apt search ssh | grep installed | grep openssh
:
openssh-client/noble-updates,now 1:9.6p1-3ubuntu13.12 amd64 [installed,automatic]
openssh-server/noble-updates,now 1:9.6p1-3ubuntu13.12 amd64 [installed]
openssh-sftp-server/noble-updates,now 1:9.6p1-3ubuntu13.12 amd64 [installed,automatic]
→「openssh-client」と「openssh-server」がインストールされています
-
(3). ssh 関連のサービスが起動されているか確認:
vagrant@uc2404-vm:~$ sudo systemctl status sshd
:
Unit sshd.service could not be found.
→「sshd.service」は見つかりません:
-
vagrant@uc2404-vm:~$ sudo systemctl status ssh
:
Warning: The unit file, source configuration file or drop-ins of ssh.service changed on disk. Run 'systemctl daemon-reload' to reload units.
○ ssh.service - OpenBSD Secure Shell server
     Loaded: loaded (/usr/lib/systemd/system/ssh.service; disabled; preset: enabled)
     Active: inactive (dead)
TriggeredBy: ● ssh.socket
       Docs: man:sshd(8)
             man:sshd_config(5)
→「ssh.service」にしたら見つかりました:
サービス名に付く(.service) は省略できます
-
(4). ssh サービスの有効化:
vagrant@uc2404-vm:~$ sudo systemctl enable ssh
:
Synchronizing state of ssh.service with SysV service script with /usr/lib/systemd/systemd-sysv-install.
Executing: /usr/lib/systemd/systemd-sysv-install enable ssh
Created symlink /etc/systemd/system/sshd.service → /usr/lib/systemd/system/ssh.service.
Created symlink /etc/systemd/system/multi-user.target.wants/ssh.service → /usr/lib/systemd/system/ssh.service.
→シンボリックリンクが張られました
-
以降は、「sshd」と「ssh」のどちらでもステータスが見れました:
vagrant@uc2404-vm:~$ sudo systemctl status sshd
:
○ ssh.service - OpenBSD Secure Shell server
     Loaded: loaded (/usr/lib/systemd/system/ssh.service; enabled; preset: enabled)
     Active: inactive (dead)
TriggeredBy: ● ssh.socket
       Docs: man:sshd(8)
             man:sshd_config(5)
-
vagrant@uc2404-vm:~$ sudo systemctl status ssh
:
○ ssh.service - OpenBSD Secure Shell server
     Loaded: loaded (/usr/lib/systemd/system/ssh.service; enabled; preset: enabled)
     Active: inactive (dead)
TriggeredBy: ● ssh.socket
       Docs: man:sshd(8)
             man:sshd_config(5)
つまり、「sshd」でステータスが見れないと「vagrant ssh」で ssh 接続できません:
-
(5). 「仮想マシン」の再起動:
vagrant@uc2404-vm:~$ reboot
-
(6). sshd サービスが起動されたか確認:
vagrant@uc2404-vm:~$ sudo systemctl status sshd
:
● ssh.service - OpenBSD Secure Shell server
     Loaded: loaded (/usr/lib/systemd/system/ssh.service; enabled; preset: enabled)
     Active: active (running) since Tue 2025-06-24 07:07:21 EDT; 2min 0s ago
TriggeredBy: ● ssh.socket
       Docs: man:sshd(8)
             man:sshd_config(5)
    Process: 1279 ExecStartPre=/usr/sbin/sshd -t (code=exited, status=0/SUCCESS)
   Main PID: 1287 (sshd)
      Tasks: 1 (limit: 9417)
     Memory: 2.2M (peak: 2.5M)
        CPU: 22ms
     CGroup: /system.slice/ssh.service
             └─1287 "sshd: /usr/sbin/sshd -D [listener] 0 of 10-100 startups"

Jun 24 07:07:21 uc2404-vm systemd[1]: Starting ssh.service - OpenBSD Secure Shell server...
Jun 24 07:07:21 uc2404-vm sshd[1287]: Server listening on :: port 22.
Jun 24 07:07:21 uc2404-vm systemd[1]: Started ssh.service - OpenBSD Secure Shell server.
→「q」で表示終了:
ログが表示されるようになれば、動いているということ:
-
(7). こちらで確認してもOK:
vagrant@uc2404-vm:~$ sudo systemctl status ssh
-
11). 「端末」画面を閉じてから、メニューで「シャットダウン」
→「仮想マシン」の電源が落ちるまで、だいぶ待たされました
-
12). ホストOS を再起動:
「端末」以外のすべての画面を閉じてから、
$ reboot
-
-
- --- - --- - --- - --- - --- - --- - --- - --- - ----- ----- ----- ----- ---
10-6. 仮想マシンを再立ち上げして確認:
-
1). 仮想マシンの立ち上げ:
$ cd ~/ダウンロード/vm/ubn2404
$ vagrant up
Bringing machine 'default' up with 'virtualbox' provider...
==> default: Checking if box 'aaronvonawesome/ubuntu-2404-cinnamon' version '1.1.0' is up to date...
==> default: Clearing any previously set forwarded ports...
==> default: Clearing any previously set network interfaces...
==> default: Preparing network interfaces based on configuration...
    default: Adapter 1: nat
==> default: Forwarding ports...
    default: 22 (guest) => 2222 (host) (adapter 1)
==> default: Booting VM...
==> default: Waiting for machine to boot. This may take a few minutes...
    default: SSH address: 127.0.0.1:2222
    default: SSH username: vagrant
    default: SSH auth method: private key
==> default: Machine booted and ready!
[default] GuestAdditions 7.1.10 running --- OK.
==> default: Checking for guest additions in VM...
==> default: Mounting shared folders...
    default: /home/ubn/ダウンロード/vm/ubn2404 => /vagrant
==> default: Machine already provisioned. Run `vagrant provision` or use the `--provision`
==> default: flag to force provisioning. Provisioners marked to run always will still run.
ubn@ubnbox:~/ダウンロード/vm/ubn2404$
→「端末」画面にプロンプトは返りましたが、
クルクル表示のままで、デスクトップ画面が表示されません:
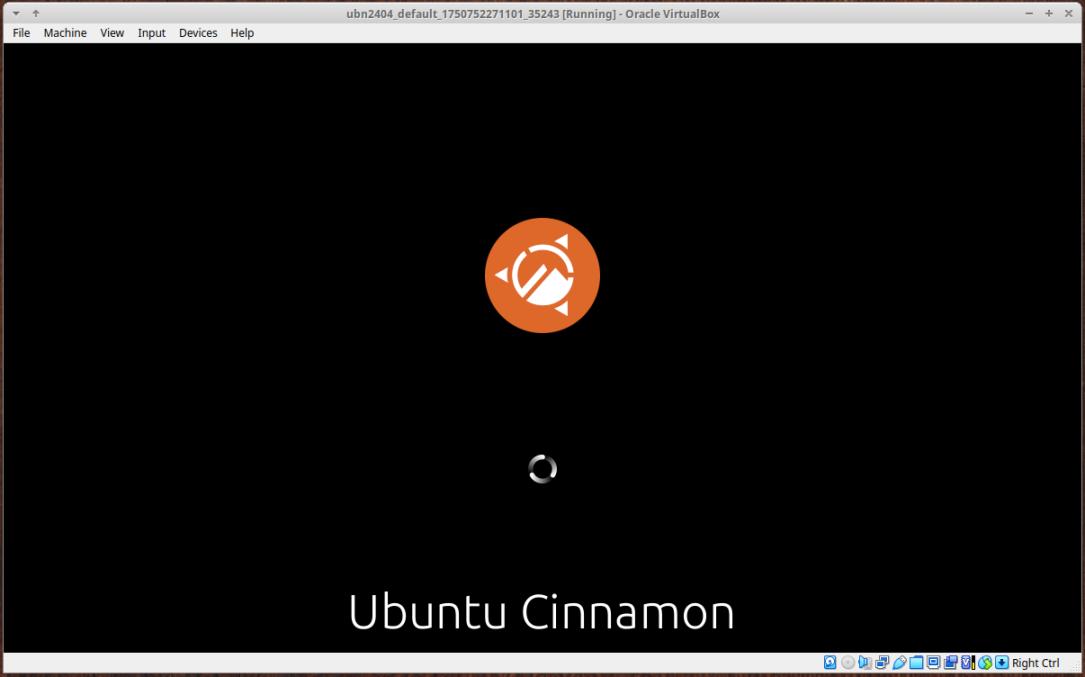
GUI 表示で、問題があるみたい。
-
$ vagrant status
Current machine states:

default                   running (virtualbox)
→仮想マシンは起動しています
-
2). ssh 接続:
$ vagrant ssh
:
Welcome to Ubuntu 24.04.2 LTS (GNU/Linux 6.8.0-62-generic x86_64)

 * Documentation:  https://help.ubuntu.com
 * Management:     https://landscape.canonical.com
 * Support:        https://ubuntu.com/pro

Expanded Security Maintenance for Applications is not enabled.

0 updates can be applied immediately.

13 additional security updates can be applied with ESM Apps.
Learn more about enabling ESM Apps service at https://ubuntu.com/esm

vagrant@uc2404-vm:~$
→ssh 接続できました:
ゲストOS のプロンプトに変わりました
-
動くか確認:
vagrant@uc2404-vm:~$ ls
Desktop  Documents  Downloads  Music  Pictures  Public  Templates  Videos  snap
-
3). sudo の動作を確認:
vagrant@uc2404-vm:~$ sudo ls
Desktop  Documents  Downloads  Music  Pictures  Public  Templates  Videos  snap
→パスワード無しで「sudo」が実行できます:
-
4). ゲストOS の状態を確認:
vagrant@uc2404-vm:~$ uname -n
uc2404-vm
→ホスト名(PC 名)が「vagrant」ではなく、任意の名前「uc2404-vm」です:
-
参考:
ホスト名を任意の名前、例えば「vagrant」に変更したい場合:
→「こちら」を参照
-
vagrant@uc2404-vm:~$ uname -a
Linux uc2404-vm 6.8.0-62-generic #65-Ubuntu SMP PREEMPT_DYNAMIC Mon May 19 17:15:03 UTC 2025 x86_64 x86_64 x86_64 GNU/Linux
-
vagrant@uc2404-vm:~$ uname -r
6.8.0-62-generic
→システム更新で最新になりました:
-
vagrant@uc2404-vm:~$ cat /etc/lsb-release
DISTRIB_ID=Ubuntu
DISTRIB_RELEASE=24.04
DISTRIB_CODENAME=noble
DISTRIB_DESCRIPTION="Ubuntu 24.04.2 LTS"
-
5). 「Guest Additions」のバージョンを確認:
vagrant@uc2404-vm:~$ modinfo vboxguest | grep ^version
version:        7.1.10 r169112
→「Guest Additions」がちゃんとインストールされています:
-
6). 「Guest Additions」の動作を確認:
vagrant@uc2404-vm:~$ pwd
/home/vagrant
-
vagrant@uc2404-vm:~$ ls -A
.Xauthority
.bash_history
.bash_logout
.bashrc
.cache
.config
.face
.face.icon
.lesshst
.local
.profile
.ssh
.sudo_as_admin_successful
.vboxclient-clipboard-tty7-control.pid            ←「注目」
.vboxclient-display-svga-x11-tty7-control.pid     ←「注目」
.vboxclient-draganddrop-tty7-control.pid          ←「注目」
.vboxclient-hostversion-tty7-control.pid          ←「注目」
.vboxclient-seamless-tty7-control.pid             ←「注目」
.vboxclient-vmsvga-session-tty7-control.pid       ←「注目」
.xsession-errors
.xsession-errors.old
Desktop
Documents
Downloads
Music
Pictures
Public
Templates
Videos
snap
→「Guest Additions」がちゃんと動いています:
-
7). ssh 接続を抜けました:
vagrant@uc2404-vm:~$ exit
logout
ubn@ubnbox:~/ダウンロード/vm/ubn2404$
-
8). 「仮想マシン」の停止:
$ vagrant halt
==> default: Attempting graceful shutdown of VM...
==> default: Forcing shutdown of VM...
ubn@ubnbox:~/ダウンロード/vm/ubn2404$
-
-
- --- - --- - --- - --- - --- - --- - --- - --- - ----- ----- ----- ----- ----
10-7. 参考:「VirtualBox マネージャ」で「仮想マシン」の設定を確認:
-
うまく動くには、下記の設定にするのがポイント:
設定1:

- ディスプレイ→「スクリーン」タブ→「グラフィックコントローラー」:
 「VMSVGA」で、「3Dアクセラレーション」にチェック:
→追記:
ちなみに、OS タイプを「Other」にした場合、「3Dアクセラレーション」にチェックさせてもらえません:
-
設定2:
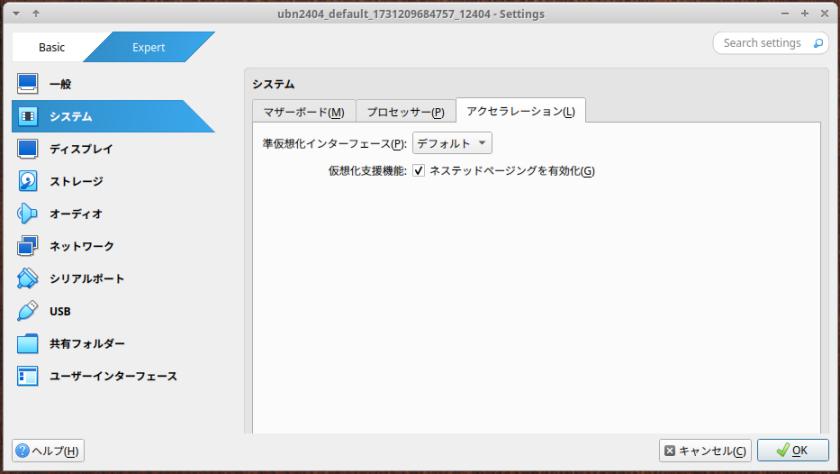
- システム→「アクセラレーション」タブ:
 「デフォルト」で、「ネステッドページンクを有効化」にチェック:
-
1). 「3Dアクセラレーション」のチェックを外して、「起動」ボタンをクリック:
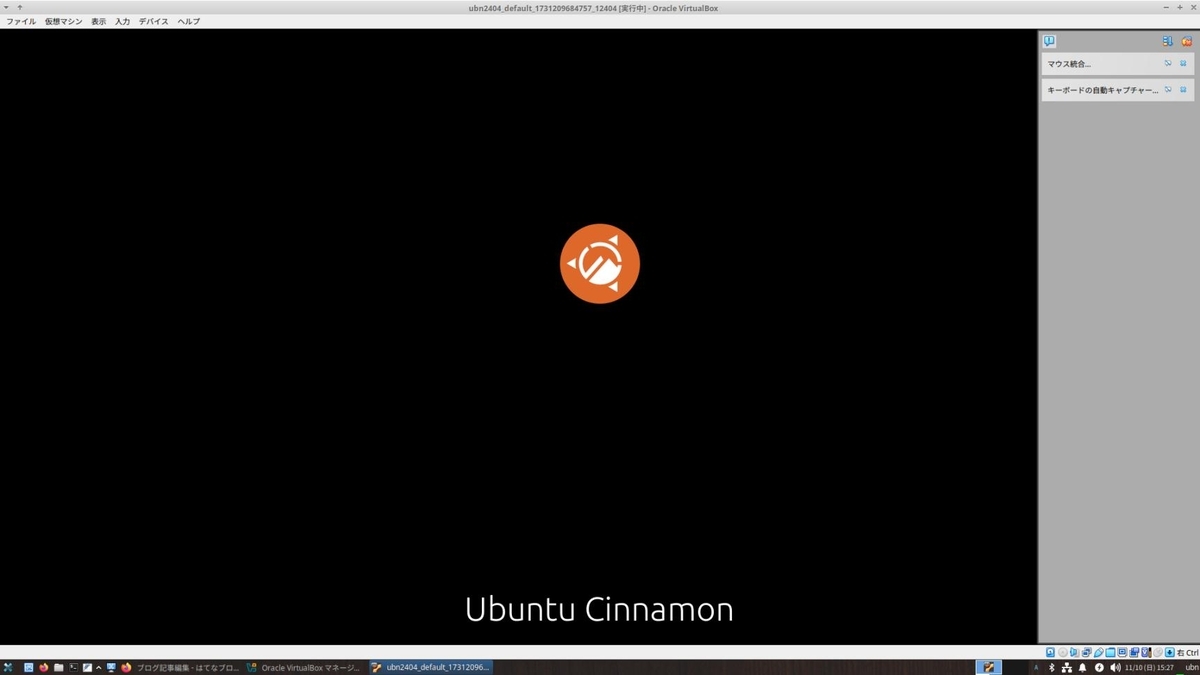
→「仮想マシン」が途中の表示で止まり、立ち上がりませんでした:
以前の投稿と、まったく同じ現象です:
-
2). 「3Dアクセラレーション」にチェックして、「起動」ボタンをクリック:
→「仮想マシン」が立ち上がりました:
-
3). 「Ubuntu Cinnamon 24.04 LTS」が動く「仮想マシン」の設定:
- ディスプレイ→「スクリーン」タブ→「グラフィックコントローラー」:
 「VMSVGA」で、「3Dアクセラレーション」にチェック:

- システム→「アクセラレーション」タブ:
 「デフォルト」で、「ネステッドページンクを有効化」にチェック:
-
-
- --- - --- - --- - --- - --- - --- - --- - --- - ----- ----- ----- ----- -----
11. 参考: インストールした「Ubuntu Cinnamon 24.04 LTS」を日本語化:
-
せっかく「Ubuntu Cinnamon 24.04 LTS」をインストールしたので、
使いやすいように、日本語化とアプリのインストールを行いました:
-
下記を参照:
-
-
- --- - --- - --- - --- - --- - --- - --- - --- - ----- ----- ----- ----- ----- -
12. 参考: 動作確認に使った「ゲストOS」の起動が遅いので、余計なものが動いていないか確認:
-
1).「Ubuntu Cinnamon 24.04 LTS」に ssh 接続して確認:
vagrant@uc2404-vm:~$ systemctl list-units --type=service --state=running | cat
:
  UNIT                           LOAD   ACTIVE SUB     DESCRIPTION
  accounts-daemon.service        loaded active running Accounts Service
  avahi-daemon.service           loaded active running Avahi mDNS/DNS-SD Stack
  colord.service                 loaded active running Manage, Install and Generate Color Profiles
  cron.service                   loaded active running Regular background program processing daemon
  cups-browsed.service           loaded active running Make remote CUPS printers available locally
  cups.service                   loaded active running CUPS Scheduler
  dbus.service                   loaded active running D-Bus System Message Bus
  fwupd.service                  loaded active running Firmware update daemon
  getty@tty1.service             loaded active running Getty on tty1
  kerneloops.service             loaded active running Tool to automatically collect and submit kernel crash signatures
  lightdm.service                loaded active running Light Display Manager
  ModemManager.service           loaded active running Modem Manager
  NetworkManager.service         loaded active running Network Manager
  polkit.service                 loaded active running Authorization Manager
  rsyslog.service                loaded active running System Logging Service
  rtkit-daemon.service           loaded active running RealtimeKit Scheduling Policy Service
  snapd.service                  loaded active running Snap Daemon
  ssh.service                    loaded active running OpenBSD Secure Shell server
  systemd-journald.service       loaded active running Journal Service
  systemd-logind.service         loaded active running User Login Management
  systemd-resolved.service       loaded active running Network Name Resolution
  systemd-timesyncd.service      loaded active running Network Time Synchronization
  systemd-udevd.service          loaded active running Rule-based Manager for Device Events and Files
  udisks2.service                loaded active running Disk Manager
  unattended-upgrades.service    loaded active running Unattended Upgrades Shutdown
  upower.service                 loaded active running Daemon for power management
  user@1000.service              loaded active running User Manager for UID 1000
  virtualbox-guest-utils.service loaded active running Virtualbox guest utils
  wpa_supplicant.service         loaded active running WPA supplicant

Legend: LOAD   → Reflects whether the unit definition was properly loaded.
        ACTIVE → The high-level unit activation state, i.e. generalization of SUB.
        SUB    → The low-level unit activation state, values depend on unit type.

29 loaded units listed.
-
2). 比較のため、ホストOS の「Xubuntu 24.04 LTS」でも確認:
$ systemctl list-units --type=service --state=running | cat
:
  UNIT                        LOAD   ACTIVE SUB     DESCRIPTION
  accounts-daemon.service     loaded active running Accounts Service
  avahi-daemon.service        loaded active running Avahi mDNS/DNS-SD Stack
  bluetooth.service           loaded active running Bluetooth service
  colord.service              loaded active running Manage, Install and Generate Color Profiles
  cron.service                loaded active running Regular background program processing daemon
  cups-browsed.service        loaded active running Make remote CUPS printers available locally
  cups.service                loaded active running CUPS Scheduler
  dbus.service                loaded active running D-Bus System Message Bus
  fwupd.service               loaded active running Firmware update daemon
  getty@tty1.service          loaded active running Getty on tty1
  kerneloops.service          loaded active running Tool to automatically collect and submit kernel crash signatures
  lightdm.service             loaded active running Light Display Manager
  ModemManager.service        loaded active running Modem Manager
  NetworkManager.service      loaded active running Network Manager
  polkit.service              loaded active running Authorization Manager
  rsyslog.service             loaded active running System Logging Service
  rtkit-daemon.service        loaded active running RealtimeKit Scheduling Policy Service
  snapd.service               loaded active running Snap Daemon
  switcheroo-control.service  loaded active running Switcheroo Control Proxy service
  systemd-journald.service    loaded active running Journal Service
  systemd-logind.service      loaded active running User Login Management
  systemd-resolved.service    loaded active running Network Name Resolution
  systemd-timesyncd.service   loaded active running Network Time Synchronization
  systemd-udevd.service       loaded active running Rule-based Manager for Device Events and Files
  thermald.service            loaded active running Thermal Daemon Service
  udisks2.service             loaded active running Disk Manager
  unattended-upgrades.service loaded active running Unattended Upgrades Shutdown
  upower.service              loaded active running Daemon for power management
  user@1000.service           loaded active running User Manager for UID 1000
  wpa_supplicant.service      loaded active running WPA supplicant

Legend: LOAD   → Reflects whether the unit definition was properly loaded.
        ACTIVE → The high-level unit activation state, i.e. generalization of SUB.
        SUB    → The low-level unit activation state, values depend on unit type.

30 loaded units listed.
→個別の負荷率はわかりませんが、動いている数はそれほど変わりません。
起動が遅いのは、「デスクトップ環境」の差が大きいのかな。
-
-
まとめ
今回は、「Xubuntu 24.04.2 LTS」に、最新の「VirtualBox 7.1.10」と「Vagrant 2.4.7」をインストールして、動作を確認しました。
-
「Vagrant 2.4.7」で、最新の「VirtualBox 7.1.10」が使えることを確認できました。
残念ながら、(個人的に必要な)vagrant plugin を使うには、(メンテナがおらず、以前の不具合 が残っていて)ソースの修正が必要でした。ただし、簡単な修正 につき、それほど面倒ではありません。
-
-
-
-
-
目次
-
-
- 目次
- - --- - --- - --- - --- - --- - --- - --- - --- - -
- Xubuntu 24.04.2 LTS の立ち上げ:
- - --- - --- - --- - --- - --- - --- - --- - --- - --
- 現在のOS のバージョンを表示:
- - --- - --- - --- - --- - --- - --- - --- - --- - ---
- 「Xubuntu」について:
- - --- - --- - --- - --- - --- - --- - --- - --- - ----
- 「VirtualBox」について:
- - --- - --- - --- - --- - --- - --- - --- - --- - -----
- 「Vagrant」について:
- - --- - --- - --- - --- - --- - --- - --- - --- - ----- -
- 1. 「VirtualBox」のインストール状況を確認:
- - --- - --- - --- - --- - --- - --- - --- - --- - ----- --
- 2. 事前に、不要な「仮想マシン」を整理:
- - --- - --- - --- - --- - --- - --- - --- - --- - ----- ---
- 2-1. Vagrant で管理されている「仮想マシン」を削除:
- - --- - --- - --- - --- - --- - --- - --- - --- - ----- ----
- 2-2. VirtualBox マネージャで管理している「仮想マシン」を削除:
- - --- - --- - --- - --- - --- - --- - --- - --- - ----- -----
- 3. 「VirtualBox」のインストール準備:
- - --- - --- - --- - --- - --- - --- - --- - --- - ----- ----- -
- 4. 使用できる「Virtualbox」の最新バージョンを確認:
- - --- - --- - --- - --- - --- - --- - --- - --- - ----- ----- --
- 5. 最新の「virtualbox 7.1.10」をダウンロード:
- - --- - --- - --- - --- - --- - --- - --- - --- - ----- ----- ---
- 6. 「.deb」ファイルから「VirtualBox」をインストール:
- - --- - --- - --- - --- - --- - --- - --- - --- - ----- ----- ----
- 7. 任意:「VirtualBox Extension Pack」をインストール:
- 拡張パックで提供される追加機能:
- 1). ファイルマネージャで、「~/ダウンロード/virtualbox/」フォルダを開きます:
- 2). ダウンロードした、緑色で四角いボックスのアイコンの「Oracle_VirtualBox_Extension_Pack-7.1.10-169112.vbox-extpack」をダブルクリック:
- 3). 「VirtualBox」マネージャが起動されて、ダイアログが表示:
- 4). ライセンス画面が表示:
- 5). 「VirtualBox」マネージャの画面に戻りました:
- 6). 「機能拡張」がインストールされたか確認:
- 7). 左側の「ツール」の右側の「横3本線」ボタンをクリック→ 一番上の「ようこそ」
- - --- - --- - --- - --- - --- - --- - --- - --- - ----- ----- -----
- 8. 最新の「Vagrant 2.4.7」をインストール:
- - --- - --- - --- - --- - --- - --- - --- - --- - ----- ----- ----- -
- 9. 「vagrant-vbguest」プラグインをインストール:
- - --- - --- - --- - --- - --- - --- - --- - --- - ----- ----- ----- --
- 10. 「Vagrant」の動作を確認:
- - --- - --- - --- - --- - --- - --- - --- - --- - ----- ----- ----- ---
- 10-1. 「Vagrant」にて、「仮想マシン」を作成して動作を確認:
- - --- - --- - --- - --- - --- - --- - --- - --- - ----- ----- ----- ----
- 10-2. 仮想マシンの(初回の作成と)立ち上げにてエラー:
- - --- - --- - --- - --- - --- - --- - --- - --- - ----- ----- ----- -----
- 10-3. 仮想マシンを再立ち上げして確認:
- - --- - --- - --- - --- - --- - --- - --- - --- - ----- ----- ----- ----- -
- 10-4. 「ssh 接続」できるか確認:
- - --- - --- - --- - --- - --- - --- - --- - --- - ----- ----- ----- ----- --
- 10-5. まずは、「VirtualBox」マネージャを起動して、「仮想マシン」の設定を見直し:
- 1). GUI で使うので、「仮想マシン」の設定を見直しました:
- 2). 「VirtualBox」マネージャの「起動」ボタンをクリック:
- 3). ゲストOS の「端末」画面を起動:
- 4). システム更新:
- 5). 「端末」画面を閉じてから、メニューで「シャットダウン」
- 6). 「VirtualBox」マネージャの「起動」ボタンをクリック:
- 7). ゲストOS の「端末」画面を起動:
- 8). システム更新:
- 9). sudo が使えるかの確認と、sudo の動作の確認:
- 10). 「ssh 接続」できるように設定:
- 11). 「端末」画面を閉じてから、メニューで「シャットダウン」
- 12). ホストOS を再起動:
- - --- - --- - --- - --- - --- - --- - --- - --- - ----- ----- ----- ----- ---
- 10-6. 仮想マシンを再立ち上げして確認:
- - --- - --- - --- - --- - --- - --- - --- - --- - ----- ----- ----- ----- ----
- 10-7. 参考:「VirtualBox マネージャ」で「仮想マシン」の設定を確認:
- - --- - --- - --- - --- - --- - --- - --- - --- - ----- ----- ----- ----- -----
- 11. 参考: インストールした「Ubuntu Cinnamon 24.04 LTS」を日本語化:
- - --- - --- - --- - --- - --- - --- - --- - --- - ----- ----- ----- ----- ----- -
- 12. 参考: 動作確認に使った「ゲストOS」の起動が遅いので、余計なものが動いていないか確認:
- まとめ
- -
-
-
-