登録日: 2022-12-31 更新日: 2023-02-24
Xubuntu 22.04.1 の「Boxes」に、「Arch Linux」ベースの「EndeavourOS」(Nova) の「i3-wm」をインストールしました。
EndeavourOS の公式版で、タイル型ウィンドウマネージャ(WM)で「キーボード操作」メインでも使える、GUI 環境です。
どのようなものか確認しました。その備忘録です。
-
-
追記: 2023-02-04
システム更新で失敗する場合の対応は「こちら 」を参照:
-
追記: 2023-02-22
「Welcome」に「翻訳漏れ」があると「Welcome」のバージョン確認時に「ログ報告」されるようになりました:
詳細は「項番 21. 」を参照:
-
-
使用したPC は「ASUS Chromebox CN60 」で、 プロセッサは第4世代の「Intel Celeron 2955U 」です。
「UEFI 立ち上げ」のPC です。
-
(注)リンクを戻るときはブラウザの左上の「←」をクリック
-
-
目次
-
今回の作業:
-
「EndeavourOS」の機能:
→バージョンアップにより日本語化され、作業は不要になりました。
-
「i3-wm」の機能:
-
-
-
- --- - --- - --- - --- - --- - --- - --- - --- - -
Xubuntu 22.04.1 LTS で、「Boxes」を使う:
-
ボックスの「EndeavourOS」(i3-wm) を起動:
-
(1).「端末」アプリは、Windows + Enter で起動:
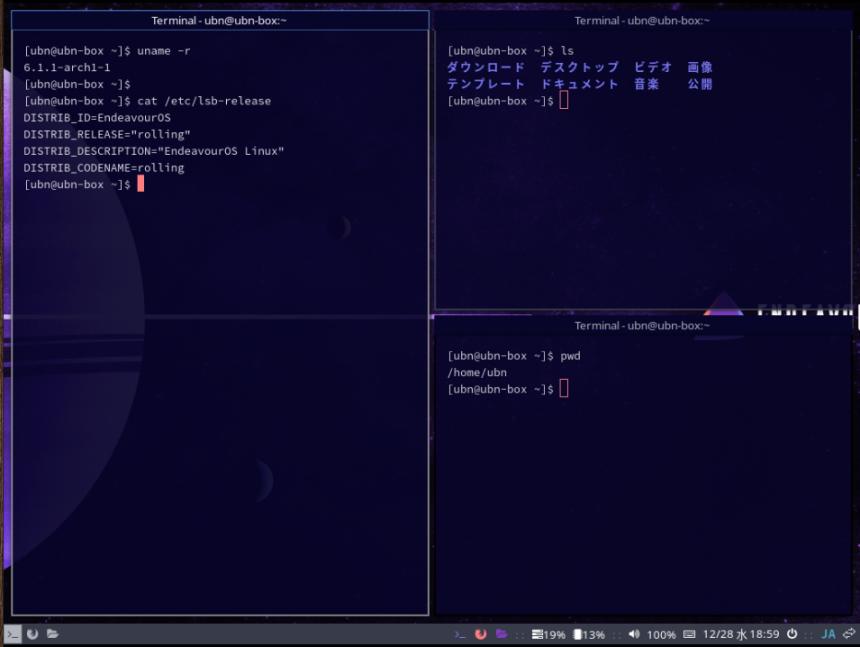
ウィンドウのタイトルバーを表示するように変更しました。
→アプリは、パネル左の「ワークスペース1」に表示されます。すき間(Gap)付きの最大化表示です。
パネル中央のランチャーアイコンをクリックしても起動できます。
-
(2).「ブラウザ」は、Windows + W で起動:
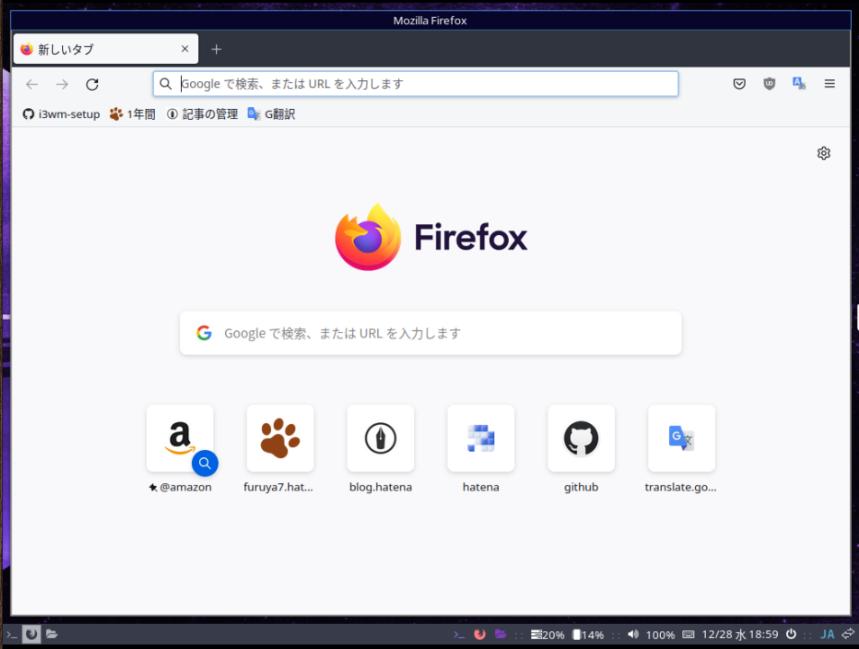
「ブラウザ」は、ESR 版の「Firefox」に変更しました。
→アプリは、パネル左の「ワークスペース2」に表示されます。すき間(Gap)付きの最大化表示です。
パネル中央のランチャーアイコンをクリックしても起動できます。
-
(3).「ファイルマネージャ」は、Windows + N で起動:

→アプリは、パネル左の「ワークスペース3」に表示されます。すき間(Gap)付きの最大化表示です。
パネル中央のランチャーアイコンをクリックしても起動できます。
-
(4).「Welcome」は、Windows + X で起動:
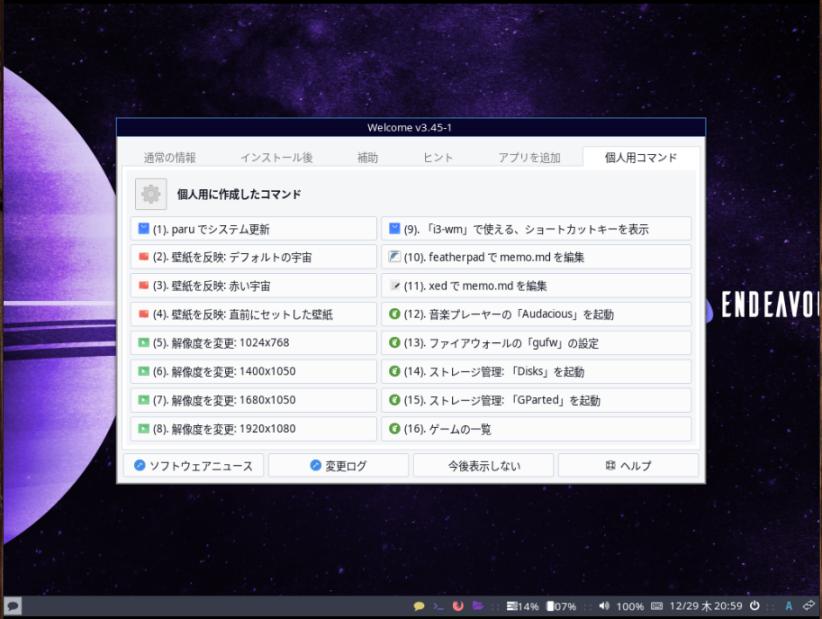
個人的に日本語化して、ショートカットキーの登録と、パネルへの追加をしました。
→アプリは、パネル左の「ワークスペース5」に表示されます。「フローティング」表示です。
パネルの中央の黄色の「吹き出し」アイコンをクリックしても起動できます。
-
「Welcome」の「個人用コマンド」タブには、好きなコマンドを登録できます。
-
(5). Windows + D で、「アプリの一覧」を表示:
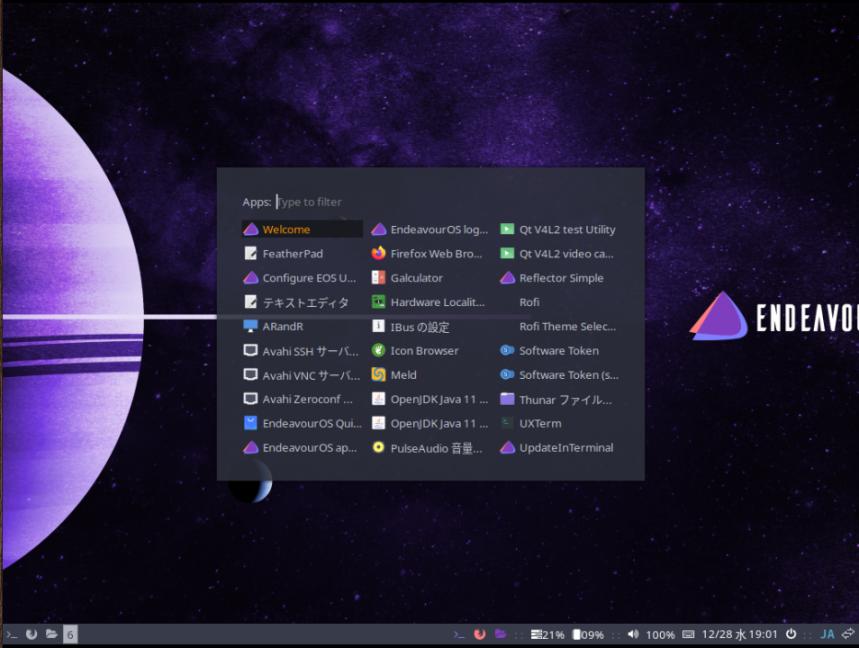
→パラメータは渡せませんが、簡単なランチャー代わりに使えます。
キーを打つことで絞り込み検索できます。
-
Windows + 6 で、「ワークスペース6」を表示してから起動しました。
ワークスペースは「ワークスペース1」(Windows + 1) 〜「ワークスペース10」(Windows + 0) が使えます。
-
(6). アプリの終了は、Windows + Q です。
-
-
- --- - --- - --- - --- - --- - --- - --- - --- - --
「Boxes」について:
-
公式サイト:
-
-
バージョン:
$ flatpak run org.gnome.Boxes --version
43.1
→Flatpak で入れた最新の「43.1」です。
-
Flatpak 版にすると「USB リダイレクト」機能が使えませんが、安定動作を考えると最新の方が良いので移行 しました。
-
-
- --- - --- - --- - --- - --- - --- - --- - --- - ---
「EndeavorOS」について:
-
EndeavorOS は、インストールが楽で、使い勝手をよくした「Arch Linux」です。
(リポジトリも、リスクも同等)
試してみる と、楽にカスタマイズできるのが魅力です。 「Arch Linux」を GUI 環境で使いたいときは、オススメです。 ローリングリリースです。
-
1). 公式サイト:
-
2). 最新のニュース:
現在のリリース「アルテミス・ノヴァ」 Artemis Nova 22.9
2022年9月14日 発行
Nova は暫定的なリリースです。主要な新機能は開発中、まだ同梱されていません。
-
3). 現在のリリースの特徴:
独自のパッケージは、自社開発の「reflector-auto」、「eos-welcome」、「eos-update-notifier」、「eos-downgrade」などです。
残りのパッケージは、Arch リポジトリや AUR (Arch User Repository) からダウンロードされます。
独自のカスタマイズや変更は行われていません。
GUI 環境が使えるし、「welcome」があるので、初心者でも使えそう。
-
4). インストールについて:
- EndeavorOS のインストーラは、「Calamares」です。
→Debian、Manjaro Linux で使われており、実績があります。
-
iso イメージは、「公式版のインストール」も、「コミュニティ版」のインストールも共通です。
-
「公式版」で「Xfce」以外の環境をインストールする場合:
最初に起動される「Welcome」画面にて、1番めのメニューを選択します。
「オフライン」、「オンライン」を選ぶ画面で、「オンライン」を選択
→以下から、インストールする GUI 環境を選べます:
今回は「i3-wm」にトライしました。
-
5). 「EndeavourOS」の現在のバージョンを表示:
2022-12-23 現在
カーネル:
$ uname -r
6.1.12-arch1-1
リリース:
$ cat /etc/lsb-release
:
DISTRIB_ID=EndeavourOS
DISTRIB_RELEASE="rolling"
DISTRIB_DESCRIPTION="EndeavourOS Linux"
DISTRIB_CODENAME=rolling
$ cat /etc/os-release
:
NAME=EndeavourOS
PRETTY_NAME=EndeavourOS
ID=endeavouros
ID_LIKE=arch
BUILD_ID=rolling
ANSI_COLOR="38;2;23;147;209"
HOME_URL='https://endeavouros.com'
DOCUMENTATION_URL='https://discovery.endeavouros.com'
SUPPORT_URL='https://forum.endeavouros.com'
BUG_REPORT_URL='https://forum.endeavouros.com/c/arch-based-related-questions/bug-reports'
PRIVACY_POLICY_URL="https://terms.archlinux.org/docs/privacy-policy/"
LOGO=endeavouros
→「BUILD_ID」の日付がなくなりました。
-
Welcome アプリ:
$ eos-welcome --version
3.51-1
-
6). 「x11」と「Wayland」のどちらで動作しているかの確認:
$ echo $XDG_SESSION_TYPE
x11
→「Wayland」ではなく、「x11」で動作。
「Welcome」アプリは「yad」プログラムのノートブック機能に基づいて構築されています。 「Yad」は「Wayland」と完全には連携しておらず、「Welcome」を使うには「X11」を使用する必要があります。
-
-
- --- - --- - --- - --- - --- - --- - --- - --- - ----
「EndeavourOS」の「i3-wm」について:
-
i3-wm は、キーボードのみで動作する軽量のタイル型ウィンドウ マネージャです。
-
1). 元になった、「i3」の公式ガイド:
-
2). 「EndeavourOS」の「i3-wm」のサイト:
Github: endeavouros-team/endeavouros-i3wm-setup
-
3). 「EndeavourOS」(i3-wm) では、$mod が Windows キー (Mod4) に変更されています:
「i3-wm」の設定ファイル:
~/.config/i3/config
-
設定ファイルの詳細は、「項番 23. 」を参照:
-
4). 使用されているアプリ:
-
-
- --- - --- - --- - --- - --- - --- - --- - --- - -----
1. 事前に iso イメージをダウンロード:
-
事前に iso イメージのダウンロードをしておき、インストールするのが確実です。
今回は、前回の投稿で使った「iso イメージ」が使えます。
-
1). ダウンロード:
-
2). 最新のリリース:
EndeavourOS_Artemis_nova_22_9.iso
-
3). ダウンロードするミラーを選びます:
You can download it over here:
例: Github: World wide
-
ファイルを選択:
「ISO 」
「Sha512sum 」
「GPG sig file 」
-
4). ダウンロードしたファイルを任意のフォルダに移動:
$ mkdir -p ~/ダウンロード/Endeavour
$ cd ~/ダウンロード/
$ mv EndeavourOS* Endeavour/
$ ls ~/ダウンロード/Endeavour/
EndeavourOS_Artemis_nova_22_9.iso
EndeavourOS_Artemis_nova_22_9.iso.sha512sum
-
5). チェックサム値の確認:
$ cd ~/ダウンロード/Endeavour/
$ sha512sum -c EndeavourOS_Artemis_nova_22_9.iso.sha512sum
EndeavourOS_Artemis_nova_22_9.iso: OK
-
念の為:
$ sha512sum EndeavourOS_Artemis_nova_22_9.iso
fb3a82d9d57bde47fc38bc34b3ca1caab5db4f01e25931a5b739e78f0a188e167660dcc729e578539dfb6216ec5a8793a4590761af0722e441ca32538d62c87a  EndeavourOS_Artemis_nova_22_9.iso
→故意に両方が修正されていても気付けます。GPG キーでのチェックをすれば確実。
-
-
- --- - --- - --- - --- - --- - --- - --- - --- - ----- -
2. ボックス(仮想マシン環境)の作成:
-
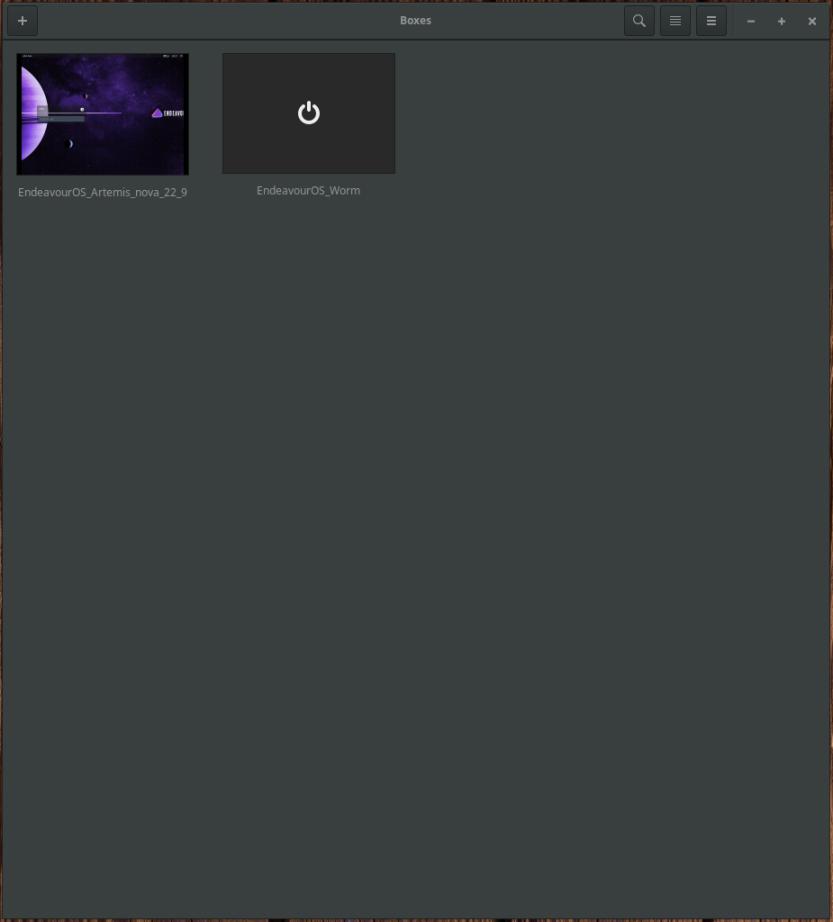
1). 「Boxes」を起動:
メニュー →開発 →「Boxes」
→「Boxes」の起動:
-
2). ウィンドウの左上の「+」(新規)
→「仮想マシンを作成…」
-
3). 「仮想マシンを作成」画面:
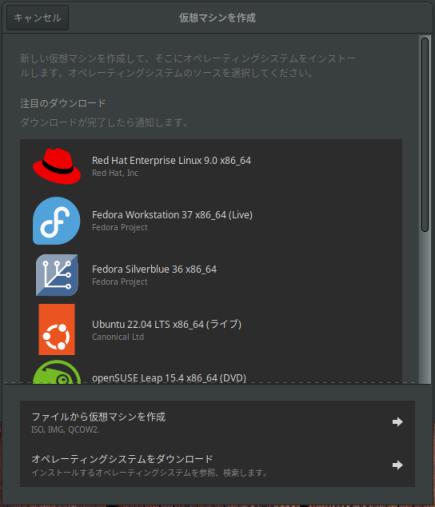
-
4). 画面下にある「ファイルから仮想マシンを作成」をクリック:
ファイルを指定:
~/ダウンロード/Endeavour/EndeavourOS_Artemis_nova_22_9.iso
→「開く」
-
5). 「準備中…」画面:
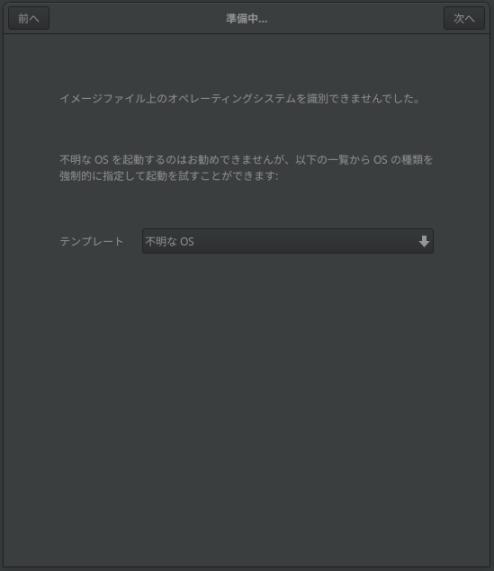
-
テンプレート: 不明な OS
→右上の「次へ」をクリック
-
参考: 「Arch Linux」がベースということで、「Arch Linux」を選ぶと立ち上がりませんでした
→「不明な OS」のままにします。
-
6). 「確認と作成」画面:
-
(1). 次のプロパティで新しいボックスをセットアップする準備ができました:
メモリ: 2.0 GiB
ストレージの上限: 20.0 GiB
-
(2). 上記の項目を変更したい場合は、右にある「ー」「+」ボタンをクリック
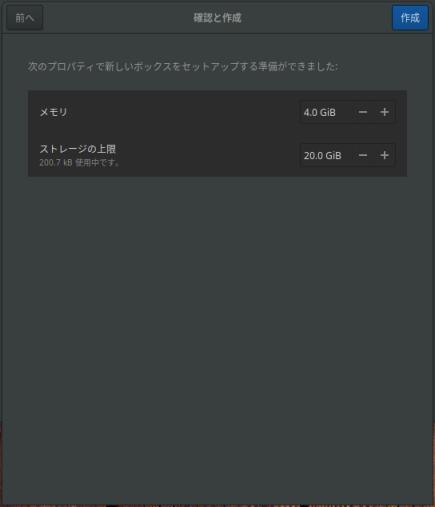
メモリ: 2.0 GiB         →4.0 GiB に変更
ストレージの上限: 20.0 GiB
-
(3). この時点では、ボックスの名前は変更できません
→インストール完了後に(一覧のボックスを右クリック →設定にて)変更します。
-
-
- --- - --- - --- - --- - --- - --- - --- - --- - ----- --
3. 「EndeavourOS」のインストール:
-
1). 右上の「作成」をクリックすると、自動でボックスが起動されました
-
2). ブート選択画面が表示
DVD/CD イメージで立ち上がりました:
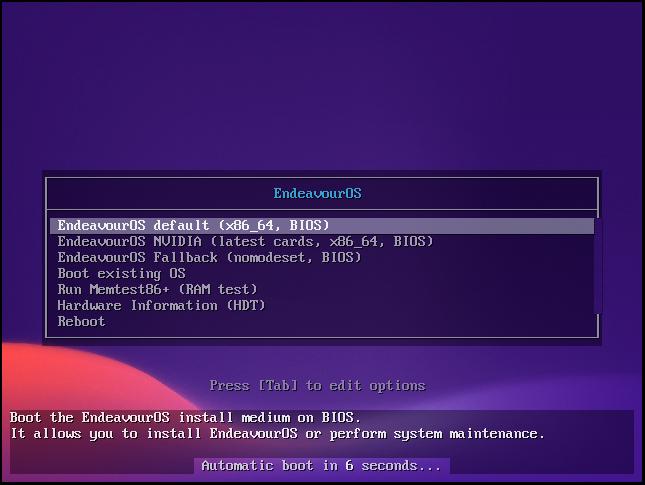
グラフィックカードの選択ができるみたい。そのままにしておきました。
-
その後、画面真っ暗で少し時間がかかりました。
-
3). デスクトップ画面が表示:
-
4). しばらくすると、「Welcome v3.34-1」画面が表示:
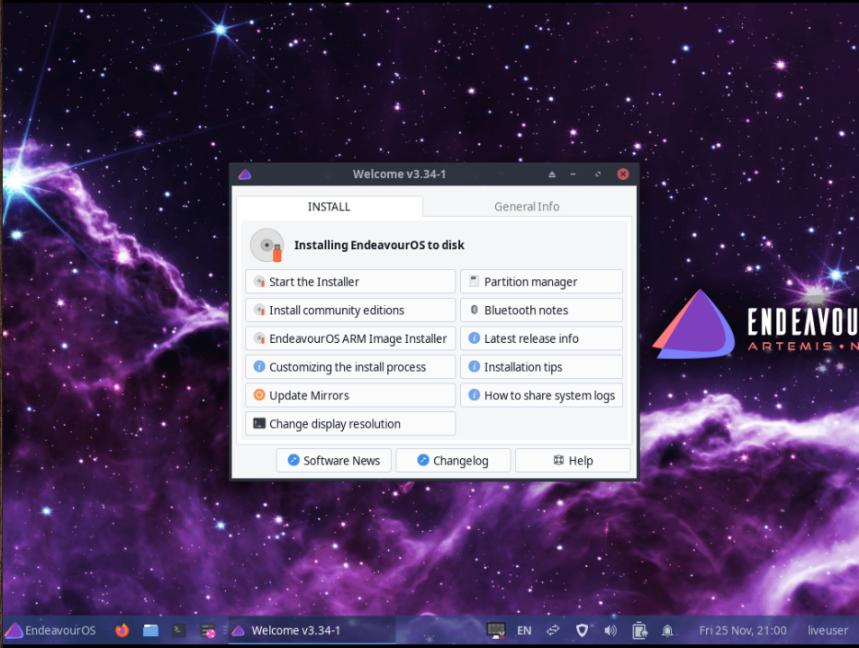
→メニューの 1番目にある「Start the Installer」をクリック
-
5). 「Choose installation method」画面が表示:
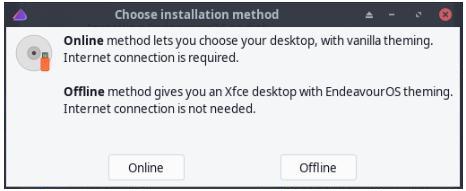
→「Online」をクリック
-
6). 「EndeavourOS インストーラー」画面が表示:
自動的に「日本語」で表示されました:
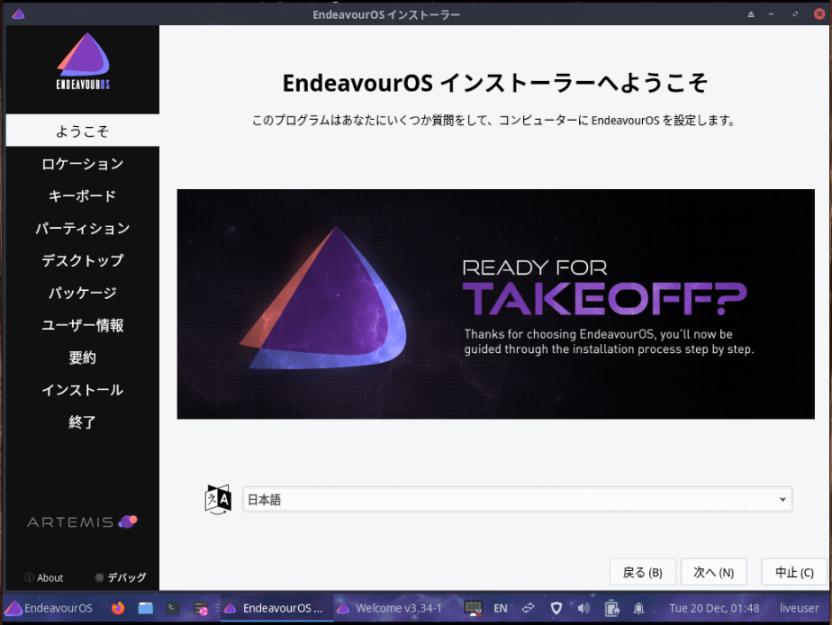
「EndeavourOS インストーラーへようこそ」
-
(1). ようこそ:
「日本語」が自動でセットされています:
-
このインストーラのポイントはここ。自動認識できるかです。
-
→右下の「次へ」
-
(2). ロケーション:
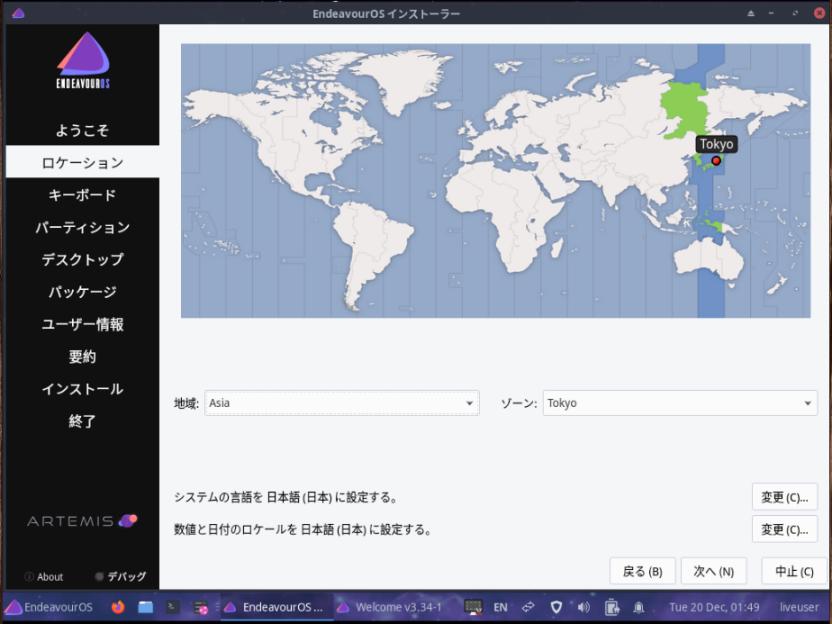
地域: Asia、ゾーン: Tokyo
(地図で日本をクリックしても設定されます)
-
→「次へ」
-
(3). キーボード:
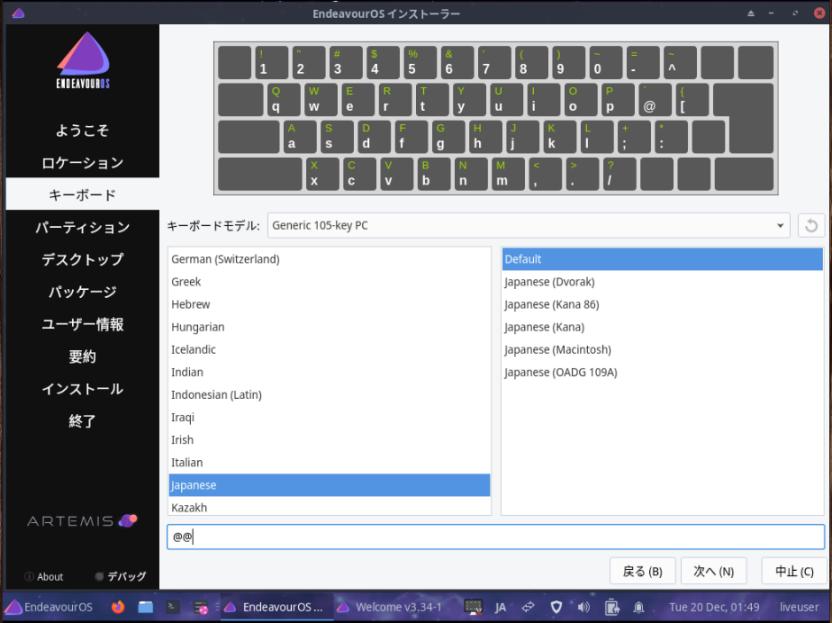
キーボードモデル: Generic 105-key PC
Japanese、Default
「ここでタイプしてキーボードをテストしてください」→ @@ で確認。
-
→「次へ」
-
(4). パーティション:
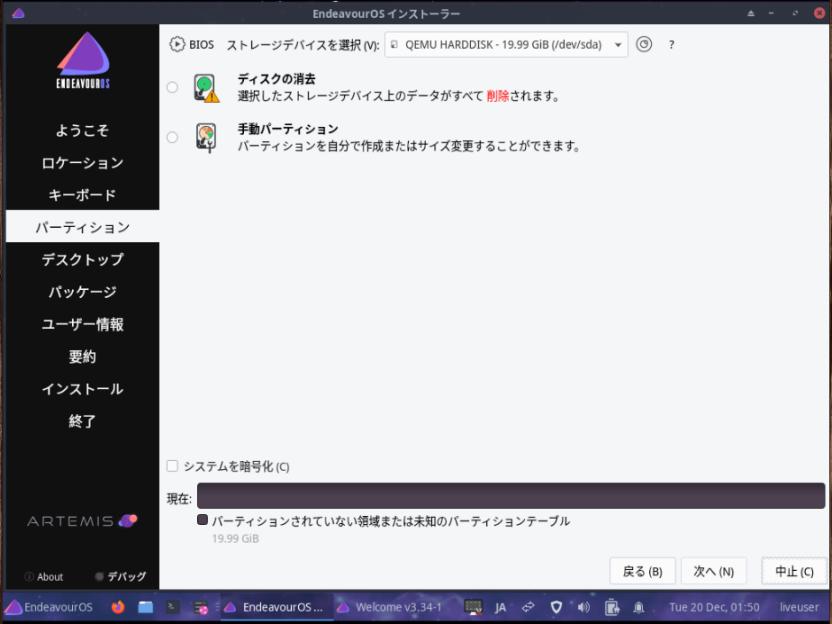
ストレージデバイスを選択: (QEMU HARDDISK - 19.99 GiB /dev/sda) ←(メーカ名とサイズが参考)
-
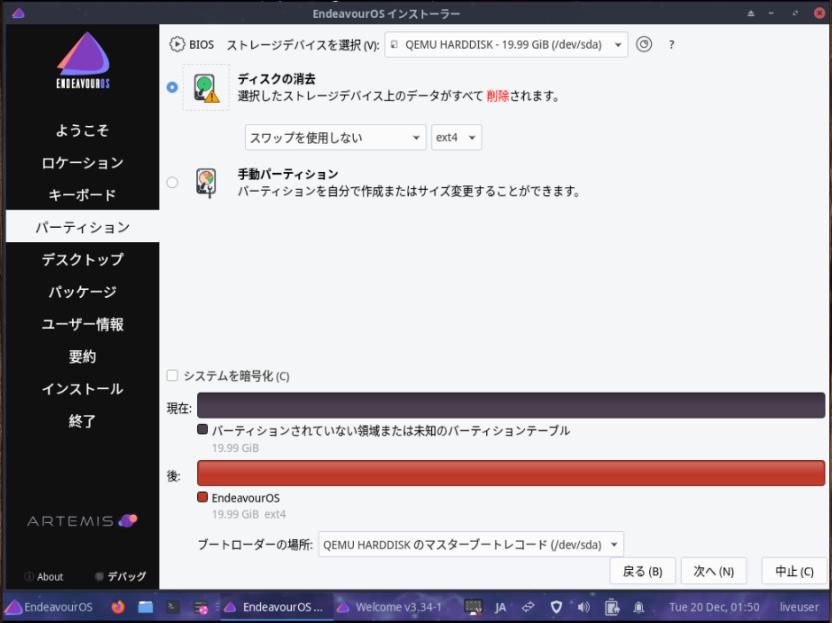
→「ディスクの消去」にチェック:
-
現在: すべて黒

後: すべて赤(EndeavourOS 19.99 GiB ext4)
ブートローダーの場所: QEMU HARDDISK のマスターブートレコード (/dev/sda) ←忘れずに確認
-
→「次へ」
-
(5). デスクトップ:
No Desktop が選択されていました:
-
Desktop の一覧から 1つを選択:
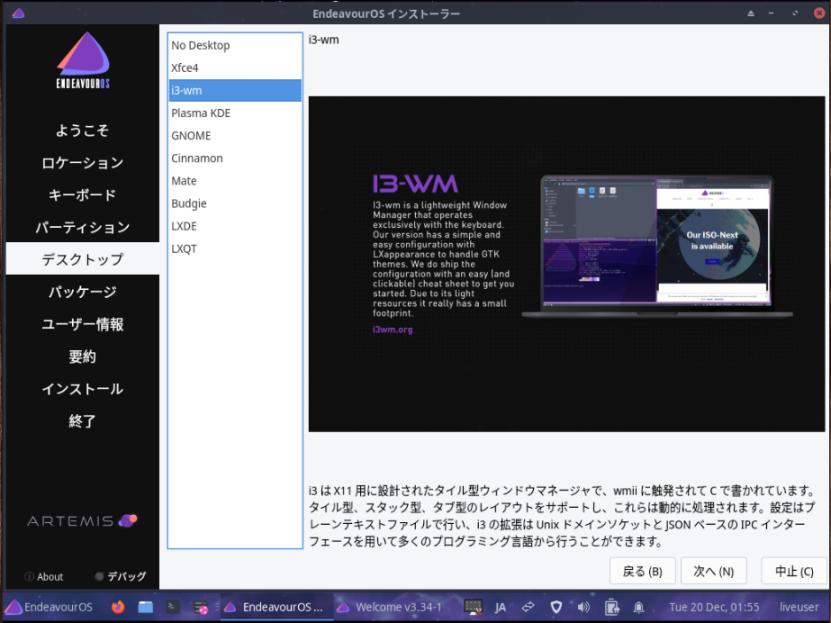
→「i3-wm」をクリック:
-
→「次へ」
-
(6). パッケージ:
インストールされるパッケージの一覧が表示されます:
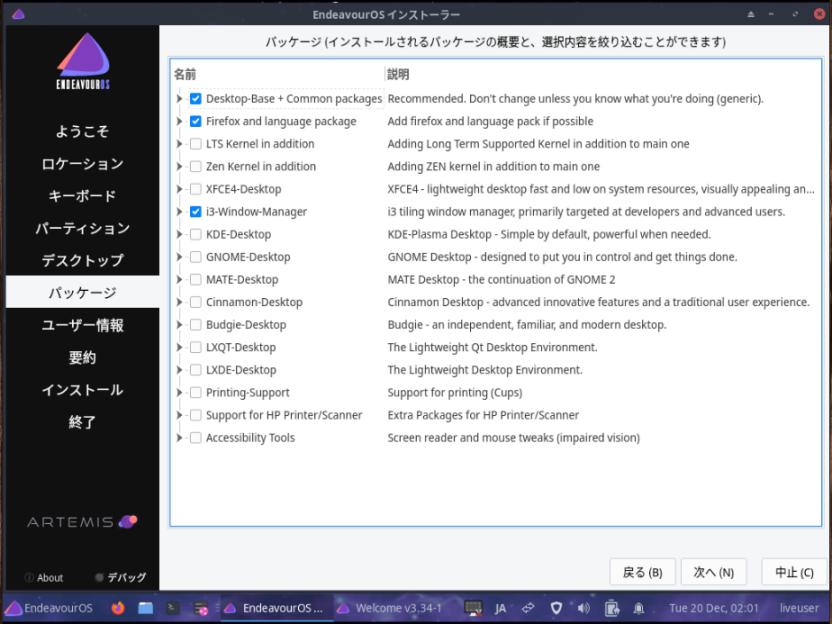
「Desktop-Base + Common packages」にチェックあり
「Firefox and language package」にチェックあり
「i3-Window-Manager」にチェックあり
-
→「次へ」
-
(7). ユーザー情報:
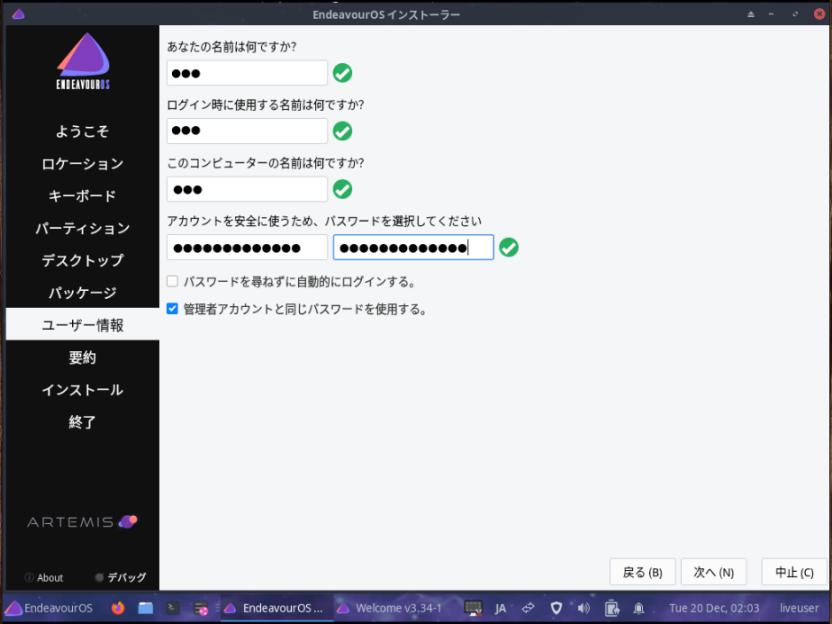
任意設定
「管理者アカウントと同じパスワードを使用する」にチェック。
-
→「次へ」
-
(8). 要約:
今までに設定した内容が表示:
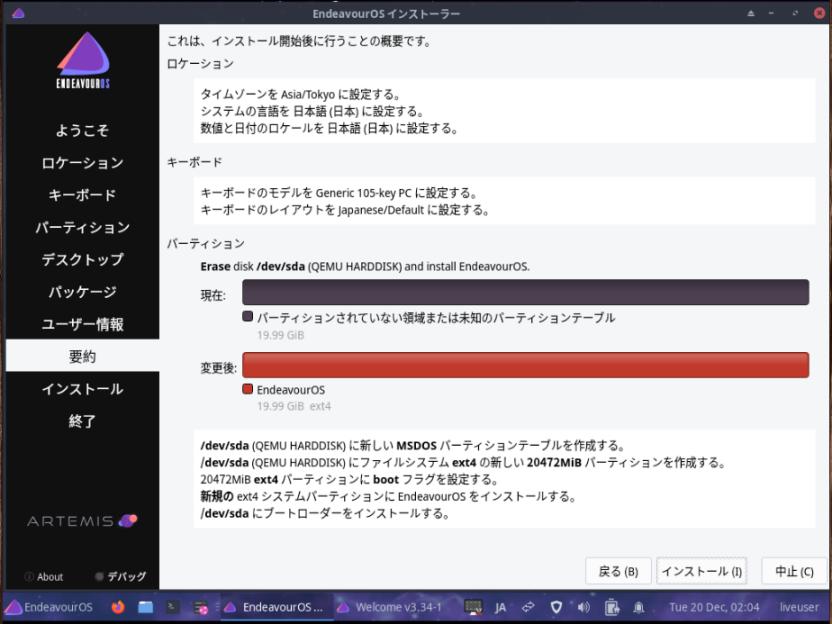
-
表示が隠れているかもしれないので、必ず、スクロールさせて、
「/dev/sda にブートローダーをインストールする。」が表示されることを確認。
-
→「インストール」
→「今すぐインストール」
-
(9). インストール:
インストールが開始しました:

→バーグラフが伸びて行きます。
-
(10). 終了:
「すべて完了しました。」表示:
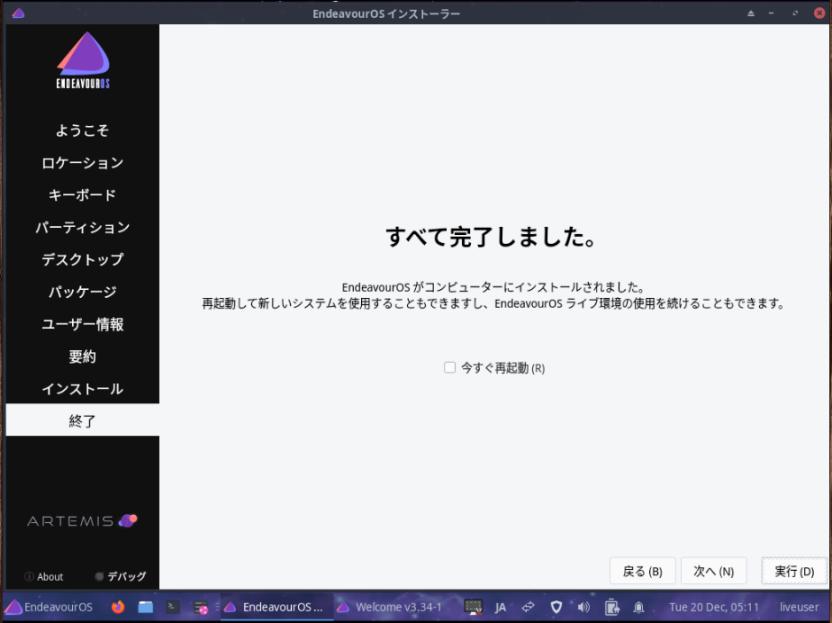
-
ボックスの名前を変更したいので、
「今すぐ再起動」にチェックせずに、
-
→「実行」
-
7). デスクトップ画面に戻りました:
画面下のパネルにて、「端末」を起動:
[liveuser@eos-2022.09.10 ~]$ uname -r
5.19.7-arch1-1
[liveuser@eos-2022.09.10 ~]$ cat /etc/os-release
NAME=EndeavourOS
PRETTY_NAME=EndeavourOS
ID=endeavouros
ID_LIKE=arch
BUILD_ID=rolling
ANSI_COLOR="38;2;23;147;209"
HOME_URL='https://endeavouros.com'
DOCUMENTATION_URL='https://discovery.endeavouros.com'
SUPPORT_URL='https://forum.endeavouros.com'
BUG_REPORT_URL='https://forum.endeavouros.com/c/arch-based-related-questions/bug-reports'
LOGO=endeavouros
IMAGE_ID=endeavouros
IMAGE_VERSION=2022.09.10
[liveuser@eos-2022.09.10 ~]$ cat /etc/lsb-release
DISTRIB_ID=EndeavourOS
DISTRIB_RELEASE="rolling"
DISTRIB_DESCRIPTION="EndeavourOS Linux"
DISTRIB_CODENAME=rolling
[liveuser@eos-2022.09.10 ~]$ uname -n
EndeavourOS
[liveuser@eos-2022.09.10 ~]$ uname -a
Linux EndeavourOS 5.19.7-arch1-1 #1 SMP PREEMPT_DYNAMIC Mon, 05 Sep 2022 18:09:09 +0000 x86_64 GNU/Linux
[liveuser@eos-2022.09.10 ~]$ ls
Desktop                LICENSE   Templates           work.eos-install-mode-run-calamares.xyz
Documents              Music     user_commands.bash
Downloads              Pictures  user_pkglist.txt
endeavour-install.log  Public    Videos
-
Boxes の「クリップボードの共有」機能が使えるか確認:
→ライブ立ち上げの場合、ゲストOS の端末のメッセージを、ホストOS に貼り付けできました。
[liveuser@eos-2022.09.10 ~]$ pacman -Ss spice-vdagent
community/spice-vdagent 0.22.1-2 [installed]
    Spice agent for Linux guests
→「spice-vdagent」パッケージがインストールされていました。
-
ライブ立ち上げで使われていたのは、「EndeavourOS」(Xfce) のシステムでした。
メニューが使え、右クリックのメニューも表示されます。
「i3-wm」ではないので、ここで調べても参考になりません。
-
[liveuser@eos-2022.09.10 ~]$ exit
-
8). 電源オフ:
すべてのウィンドウを閉じて、
右下のユーザ名「liveuser」をクリック→「Shut down」
→「Shut down」
-
-
- --- - --- - --- - --- - --- - --- - --- - --- - ----- ---
4. Boxes のボックス名を変更:
-
1). Boxes の一覧画面に戻りました:
電源オフしたつもりですが、電源オフされていません。
-
ボックスを右クリック →設定
名前: →「EndeavourOS_i3」に変更
-
2). ダイアログの右上の「x」で閉じます。
-
3). Boxes の一覧画面を、右上の「x」で閉じます。
-
4). ホストOS を再起動:
-
5). Boxes を起動:
Boxes および、ホストOS を再起動しないと、ボックス名は反映されません。
-
6). Boxes のボックスの一覧画面に戻りました:
→ボックスをクリック
-
-
- --- - --- - --- - --- - --- - --- - --- - --- - ----- ----
5. 最初の起動:
-
1). 「ログイン」画面
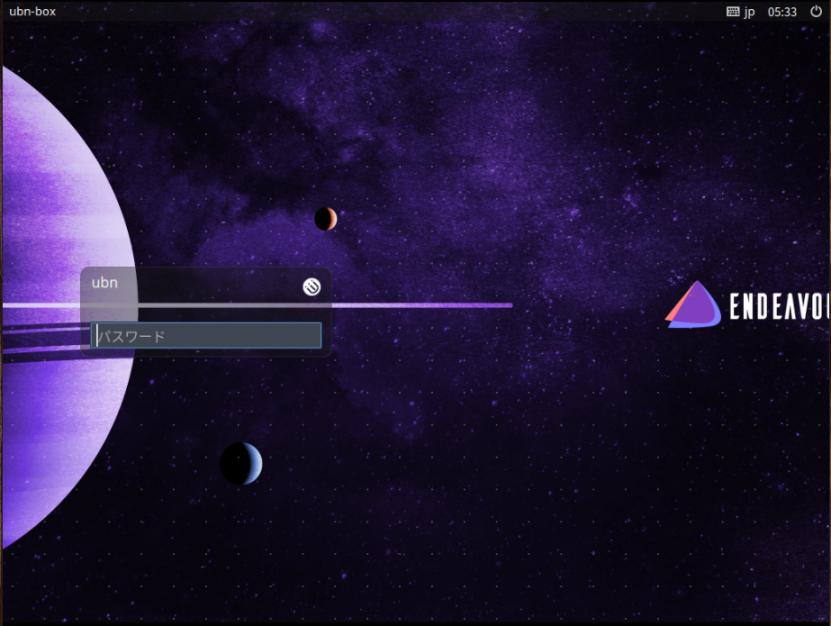
ユーザ名が入力されています:
→パスワードを入力
-
2). 「デスクトップ」画面が表示されました:
-
しばらく待つと、Firefox が起動、続いて、それに重なって「Welcome」の「After Install」のタブの画面が表示されました:
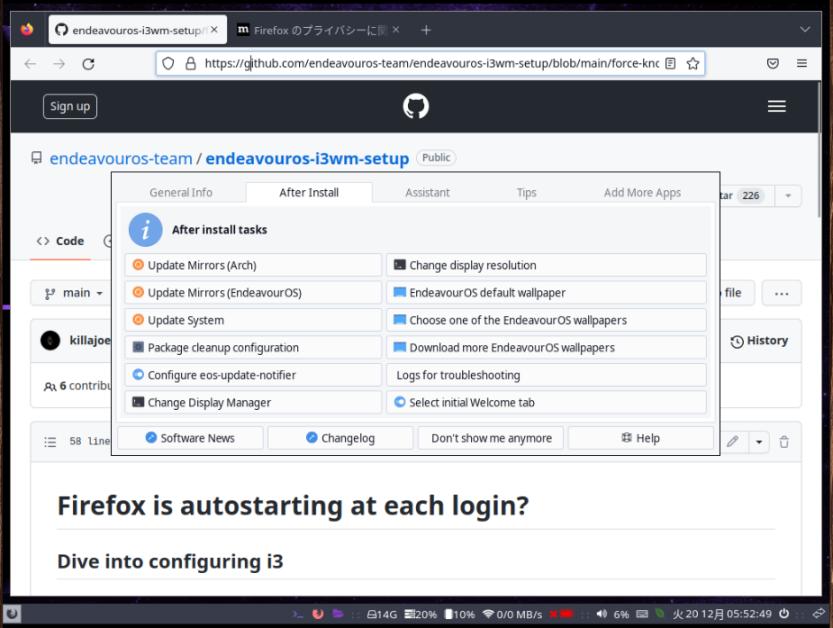
-
Firefox には、「EndeavourOS」の「i3-wm」のサイトが開きました:
Github: endeavouros-team/endeavouros-i3wm-setup
-
Firefox のウィンドウをクリックしても、「Welcome」のウィンドウは上に重なったままです。
Windows + Q で閉じてもいいけど、
Windows + Shift + 0 ゼロ で、「ワークスペース10」に移動しました。
Windows + 0 ゼロ で、「ワークスペース10」を表示:
→ここなら邪魔になりません。
-
試しに、Windows + Shift + 1 イチ として、「ワークスペース1」を表示:
-
もう一度、Windows + Shift + 0 ゼロ で、「ワークスペース10」を表示:
-
-
- --- - --- - --- - --- - --- - --- - --- - --- - ----- -----
6. パネルについて:
-
1). パネルの要素とショートカットキーとの対応:
Windows + 1 白色の「端末」のワークスペース(起動時のみ左詰めで表示)
Windows + 2 白色の「ブラウザ」と「Welcome」のワークスペース(起動時のみ左詰めで表示)
Windows + 3 白色の「ファイルマネージャ」のワークスペース(起動時のみ左詰めで表示)
Windows + 4 白色の「メッセンジャー ?」のワークスペース(起動時のみ左詰めで表示)
Windows + 5 白色の「チャット ?」のワークスペース(起動時のみ左詰めで表示)
Windows + 6 ワークスペース6(起動時のみ左詰めで表示)
Windows + 7 ワークスペース7(起動時のみ左詰めで表示)
Windows + 8 ワークスペース8(起動時のみ左詰めで表示)
(長めの空き)
Windows + Enter 「端末」(xfce4-terminal) のアイコン(アプリランチャー)黒色
Windows + W 「ブラウザ」(firefox) のアイコン(アプリランチャー)オレンジ色
Windows + N 「ファイルマネージャ」(thunar) のアイコン(アプリランチャー)紫色
(4つの点)セパレーター
ディスク空き容量
メモリ 使用率
CPU モニタ
無線ネットワーク(電波強度)
バッテリのアイコン(バッテリ残量)赤色
(4つの点)セパレーター
システムトレイ(スピーカ、音量)
キーボードの説明
緑色のアイコン(少電力モードの設定)
時計(秒まで表示)
電源メニュー(ログアウト、再起動、電源オフ)
(4つの点)セパレーター
有線ネットワーク(接続)
-
メニューボタンがありません。 デスクトップやパネルで右クリックしても、ダイアログが開きません。 ただし、アプリのウィンドウの空きで右クリックすれば、アプリの右クリックメニューが開きます。
-
-
- --- - --- - --- - --- - --- - --- - --- - --- - ----- ----- -
7. 「i3-wm」で使える、ショートカットキー:
-
1). 主なショートカットキーの一覧:
見やすいように大文字を使っていますが、実際は「小文字」を使ってください:
- Windows + 1 〜 9, 0  →  「ワークスペース」1 〜 10 を選択

- Windows + Shift + 1 〜 9, 0  →  選択したアプリを「ワークスペース」1 〜 10 に移動

- Windows + H       → 選択したアプリの、次に起動するアプリを「横」方向に分割

- Windows + V       → 選択したアプリの、次に起動するアプリを「縦」方向に分割


- Windows + D       →  アプリの選択一覧を表示(アプリの起動)

- Windows + Enter   → 「端末」を起動 (xfce4-terminal)

- Windows + W       → 「ブラウザ」を起動 (firefox)

- Windows + N       → 「ファイルマネージャ」を起動 (thunar)

- Windows + Q       →  選択しているアプリのウィンドウを終了
→「Windows + Shift + 1 〜 9, 0」としたら、「Windows + 1 〜 9, 0」としないと、反映されたかはわかりません。
-
2). その他のショートカットキー:
「Welcome」アプリの、「ショートカットキーを表示」メニューに、追加分は登録してます。
-
3). 参考: 「i3」デフォルトのショートカットキー:
-
-
- --- - --- - --- - --- - --- - --- - --- - --- - ----- ----- --
8. 「クリップボードの共有」機能が使えるか確認:
-
デフォルトの「i3-wm」環境では、「spice-vdagent」パッケージが入っていないので、「クリップボードの共有」機能は使えません。
「spice-vdagent」パッケージをインストールしました。
-
1).「spice-vdagent」をインストール:
$ sudo pacman -S spice-vdagent
:
パッケージ (1)           新しいバージョン  最終的な変化  ダウンロード容量
community/spice-vdagent  0.22.1-2              0.14 MiB          0.05 MiB
-
確認:
$ pacman -Ss spice-vdagent
:
community/spice-vdagent 0.22.1-2 [0B 140.25KiB] [インストール済み]
    Spice agent for Linux guests
→通常のデスクトップ環境であれば、ホストOS の再起動後に使えます。
-
2). シャットダウン:
-
3). ホストOS の再起動:
→ゲストOS の再起動だけでは、機能は有効になりません。
-
4). 「EndeavourOS」(i3-wm) の起動:
-
5). ログイン画面にて、右上の「縦3点」アイコンにて、「ファイルを送る…」がちゃんと表示されています。
→「spice-vdagent」の機能が有効になると、「ファイル送信」機能が使えます。
-
6). ログイン後、「クリップボードの共有」が使えました。
→コミュニティ版の「EndeavourOS」(Worm) では有効になりませんでしたが、
公式版の「EndeavourOS」(i3-wm) では、「spice-vdagent」の機能が有効になりました。
-
7). 画面を広げて、ログアウト →ログインすると、解像度が「自動調整」されました。
ログアウトしなくても、画面を広げると、文字が拡大されます。
ただし、解像度を広げるには、ログアウト →ログインが必要です。
-
-
- --- - --- - --- - --- - --- - --- - --- - --- - ----- ----- ---
9. できるだけ、システムの負荷を減らしました:
-
きっかけ:
「i3-wm にて、気づいたこと: 」を参照:
-
1). ESR 版の「Firefox」をインストール:
ブラウザの動きが軽くなるので、早めにインストールしておくのがオススメです。
→手順は、「こちら 」を参照:
-
2). 事前に「Featherpad」をインストール しておきます
好みですが、ついでにインストールしておきます。
$ sudo pacman -S featherpad
:
パッケージ (3)        新しいバージョン  最終的な変化  ダウンロード容量
extra/hunspell        1.7.1-1               1.04 MiB          0.32 MiB
extra/qt6-svg         6.4.1-1               0.63 MiB          0.17 MiB
community/featherpad  1.3.4-1               3.51 MiB          0.86 MiB
→paru での手順は、「こちら 」を参照:
-
3). パネル周りの設定を修正:
デスクトップPC なので、使っていない機能は非表示にしたり、タイマー値を変更しました:
特に、「時計」は無駄なので修正した方が良さそう。
-
$ xed ~/.config/i3/i3blocks.conf
-
(1). パネル(ディスクの空き):
# Disk usage # # The directory defaults to $HOME if the instance is not specified. # The script may be called with a optional argument to set the alert # (defaults to 10 for 10%). [disk] label= instance=/ command=~/.config/i3/scripts/disk interval=30
↓ コメント化:
## Disk usage ## ## The directory defaults to $HOME if the instance is not specified. ## The script may be called with a optional argument to set the alert ## (defaults to 10 for 10%). #[disk] #label= #instance=/ #command=~/.config/i3/scripts/disk #interval=30
-
(2).パネル(メモリの使用率):
# Memory usage
:
interval=2
↓ タイマー値の変更:
# Memory usage
:
#interval=2
interval=5
-
(3). パネル(CPUの使用率):
[cpu_usage]
:
interval=2
↓ タイマー値の変更:
[cpu_usage]
:
#interval=2
interval=5
-
(4). パネル(CPUの温度)表示されないのでコメント化
[CPU-temperature]
label=
command=~/.config/i3/scripts/temperature
interval=30
#T_WARN=70
#T_CRIT=90
#SENSOR_CHIP=""
# where SENSOR_CHIP can be find with sensors output
# can be used also for GPU temperature or other temperature sensors lm-sensors detects.
# showing name of connected network (enable for wifi use)
#[net]
#label=
#command=echo "$(LANG=C nmcli d | grep connected | awk '{print $4}')"
#interval=30
↓ コメント化:
#[CPU-temperature]
#label=
#command=~/.config/i3/scripts/temperature
#interval=30
##T_WARN=70
##T_CRIT=90
##SENSOR_CHIP=""
## where SENSOR_CHIP can be find with sensors output
## can be used also for GPU temperature or other temperature sensors lm-sensors detects.
## showing name of connected network (enable for wifi use)
##[net]
##label=
##command=echo "$(LANG=C nmcli d | grep connected | awk '{print $4}')"
##interval=30
-
(5). パネル(無線LAN の電波強度):
[bandwidth]
command=~/.config/i3/scripts/bandwidth2
interval=persist
↓ コメント化:
#[bandwidth]
#command=~/.config/i3/scripts/bandwidth2
#interval=persist
-
(6). パネル(バッテリ残量):
# Battery indicator
[battery]
command=~/.config/i3/scripts/battery2
# for alternative battery script  change to battery1
# change this to battery-pinebook-pro if you are running on pinebook-pro
label=
interval=30
↓ コメント化:
## Battery indicator
#[battery]
#command=~/.config/i3/scripts/battery2
## for alternative battery script  change to battery1
## change this to battery-pinebook-pro if you are running on pinebook-pro
#label=
#interval=30
-
(7). パネル(少電力モードの設定):
#set power-profile [ppd_menu] full_text= command=~/.config/i3/scripts/power-profiles color=#407437 #Show the current power-profile [ppd-status] command=~/.config/i3/scripts/ppd-status interval=5
↓ コメント化:
##set power-profile #[ppd_menu] #full_text= #command=~/.config/i3/scripts/power-profiles #color=#407437 ##Show the current power-profile #[ppd-status] #command=~/.config/i3/scripts/ppd-status #interval=5
-
(8). パネル(時計)秒を変更:
[time] #label= command=date '+%a %d %b %H:%M:%S' interval=1
↓ 修正:
[time] #label= #command=date '+%a %d %b %H:%M:%S' command=date '+%m/%d %a %H:%M' #interval=1 interval=60
→「interval=」の修正を忘れると効果がないので注意
-
4). ログアウト→ログイン:
-
5). 確認:
パネル左端のワークスペースの領域は使い方で変化するので、無視して下さい:
-
(1). 作業前のパネルの表示:
![]()
-
(2). 作業後のパネルの表示:
![]()
→表示するアイテムを減らして、時計の表示の周期を長くしました。
ちなみに右端にある「A」は日本語入力 (ibus-mozc) のアイコンです。
-
-
- --- - --- - --- - --- - --- - --- - --- - --- - ----- ----- ----
10. AUR ヘルパーを「paru」に変更:
-
すでに AUR ヘルパーとして「yay」が入っていますが、表示されるメッセージが自然なので好みの「paru」に変更:
-
「AUR ヘルパー」は、公式リポジトリにないパッケージを、ビルド用のスクリプトをダウンロードして動作することで、「ソースからビルドしてパッケージ化、インストールする」作業を半自動化してくれるツールです。
手動でのビルドと違うのは、「パッケージ化」の工程が入ることで、パッケージの共有ができます。 AUR ヘルパーはいくつかあり、微妙に機能が異なるので、好みで選べます。
-
インストール:
$ yay -S paru
:
パッケージ (1)    新しいバージョン  最終的な変化  ダウンロード容量

endeavouros/paru  1.11.2-1              7.19 MiB          2.35 MiB
→Enter と、パスワード入力だけで完了します。
-
-
- --- - --- - --- - --- - --- - --- - --- - --- - ----- ----- -----
11. 「paru」でシステム更新:
-
システム更新により、「Welcome」アプリ等を最新にしておき、日本語化しました。
-
1). システム更新:
$ paru
[sudo] パスワード:
:
:: yad-eos を endeavouros/yad に置き換えますか? [Y/n]
パッケージ (3)      古いバージョン  新しいバージョン  最終的な変化  ダウンロード容量
community/parallel  20221122-1      20221222-1            0.00 MiB          0.31 MiB
endeavouros/yad                     12.3-1.1              0.60 MiB          0.21 MiB
yad-eos             12.3-1
→たまたま、更新があるパッケージがありました。
-
2). システム更新を再実行:
$ paru
:
:: パッケージデータベースの同期中...
 endeavouros は最新です
 core は最新です
 extra は最新です
 community は最新です
 multilib は最新です
:: システム全体の更新を開始...
 何も行うことがありません
:: AUR の更新を確認しています...
:: 開発の更新を確認しています...
 何も行うことがありません
→これが、更新するパッケージがないときの表示です。
-
3). 「yay」は、削除せずにそのままにしました
支障が出るかはわからないので、そのままにしました。使わなければいいだけ。
-
-
- --- - --- - --- - --- - --- - --- - --- - --- - ----- ----- ----- -
12. 日本語入力:
-
1). インストールされている入力メソッドを確認:
$ paru -Ss uim | grep インストール済み
$ paru -Ss fcitx | grep インストール済み
$
→インストールされてません。
$ paru -Ss ibus | grep インストール済み
:
core/libusb 1.0.26-1 [70.91KiB 211.04KiB] [インストール済み]
extra/libgusb 0.4.2-1 [0B 2.48MiB] [インストール済み]
extra/libusbmuxd 2.0.2-1 [33.35KiB 113.15KiB] [インストール済み]
community/hidapi 0.12.0-1 [27.78KiB 87.76KiB] [インストール済み]
→インストールされているのは入力メソッドとは関係ないパッケージです。 まぎらわしいですが、入力メソッドはインストールされていません。
-
2). ~/.xprofile を作成:
$ xed ~/.xprofile
下記の3行を追記:
export GTK_IM_MODULE=ibus
export XMODIFIERS=@im=ibus
export QT_IM_MODULE=ibus
-
3). ibus-mozc の確認:
$ paru
$ paru -Ss ibus-mozc
:
aur/ibus-mozc 2.28.4880.102-1 [+10 ~1.55]
    Mozc module for IBus
aur/ibus-mozc-ut-united 2.28.4880.102_20221022_2.28.4880.102.r14.g05ec1326-1 [+6 ~0.04]
    IBus engine module for Mozc with UT dictionary
aur/ibus-mozc-ut-full 2.28.4800.102.20220723-1 [+1 ~0.14] [古いバージョン: 2022-11-05]
    IBus engine module for Mozc with UT dictionary
→AUR にありました。インストールできます。
ちなみに、「古いバージョン」の表示がある場合は注意が必要です。長い間更新されていないということです。 その後、いつの間にかリポジトリから削除されてしまうことがよくあります。 逆に新しいバージョン名で登場するかもしれません。
-
4). ibus-mozc のインストール:
- 「mozc」に 45分、「ibus-mozc」に 25分ほど、ビルドに時間がかかります。 時間の余裕があるときに実行すると良いかも。
パスワード入力がタイムアウトしますが、再実行すれば、途中から開始されます。
-
インストール:
$ paru -S ibus-mozc
:
:: 依存関係を解決しています...
:: 2 個の選択肢が ibus-mozc にはあります:
:: リポジトリ AUR:
    1) ibus-mozc  2) ibus-mozc-ut-united
数字を入力してください (デフォルト=1):
→Enter
リポジトリ (9)                 古いバージョン  新しいバージョン  Makeのみ
community/bazel                                5.3.2-1           はい
extra/ibus                                     1.5.27-1          いいえ
extra/java-environment-common                  3-3               はい
extra/java-runtime-common                      3-3               はい
extra/jdk11-openjdk                            11.0.17.u1-1      はい
extra/jre11-openjdk                            11.0.17.u1-1      はい
extra/jre11-openjdk-headless                   11.0.17.u1-1      はい
extra/libibus                                  1.5.27-1          いいえ
extra/libnet                                   1:1.1.6-1         はい

Aur (2)                        古いバージョン  新しいバージョン  Makeのみ
aur/mozc                                       2.28.4880.102-1   いいえ
aur/ibus-mozc                                  2.28.4880.102-1   いいえ
:: レビューを続行しますか? [Y/n]:
→Enter
:: PKGBUILD をダウンロードしています...
 (2/2) mozc-2.28.4880.102-1                          [--------------------------------------------]
/home/ubn/.cache/paru/clone/mozc/PKGBUILD
# Maintainer: Nocifer <apmichalopoulos at gmail dot com>
# Contributor: UTUMI Hirosi <utuhiro78 at yahoo dot co dot jp>
# Contributor: Felix Yan <felixonmars@gmail.com>
# Contributor: ponsfoot <cabezon dot hashimoto at gmail dot com>

pkgname='mozc'
pkgver=2.28.4880.102
pkgrel=1
pkgdesc='The Open Source edition of Google Japanese Input'
arch=('x86_64')
url='https://github.com/google/mozc'
license=('Apache' 'BSD' 'LGPL' 'custom')
depends=('qt5-base')
makedepends=('bazel' 'git' 'python')
optdepends=('fcitx5-mozc-ut: Fcitx5 integration'
            'fcitx-mozc-ut: Fcitx integration'
            'ibus-mozc: IBus integration'
            'emacs-mozc: Emacs integration')
conflicts=('mozc-ut')
options=(!distcc !ccache)
source=("${pkgname}-git::git+https://github.com/google/mozc.git#commit=05ec1326a17121f4ddd42303fcdb>
sha256sums=('SKIP')

:            ←(コマンド待ち)
→Enter で 1行送り、「スペース」で ページ送り(less と同じ操作)
スペースを連打
(END)
→「q」で(PKGBUILD の表示が)終了
:: インストールを行いますか? [Y/n]:
→Enter
→パスワード入力
:: インストールを行いますか? [Y/n]
→Enter
パッケージ (9)                 新しいバージョン  最終的な変化  ダウンロード容量

community/bazel                6.0.0-1             110.26 MiB         80.40 MiB
extra/ibus                     1.5.27-1              7.52 MiB          0.80 MiB
extra/java-environment-common  3-3                   0.00 MiB          0.00 MiB
extra/java-runtime-common      3-3                   0.01 MiB          0.00 MiB
extra/jdk11-openjdk            11.0.17.u1-1         88.63 MiB         77.52 MiB
extra/jre11-openjdk            11.0.17.u1-1          0.53 MiB          0.19 MiB
extra/jre11-openjdk-headless   11.0.17.u1-1        159.78 MiB         35.97 MiB
extra/libibus                  1.5.27-1             93.57 MiB          9.66 MiB
extra/libnet                   1:1.1.6-1             0.30 MiB          0.09 MiB

:: インストールを行いますか? [Y/n]
→Enter
:
==> パッケージを作成 "mozc"...
  -> .PKGINFO ファイルを生成...
  -> .BUILDINFO ファイルを生成...
  -> .MTREE ファイルを生成...
  -> パッケージの圧縮...
==> fakeroot 環境を終了。
==> 作成完了: mozc 2.28.4880.102-1 (2022年11月30日 16時25分38秒)
==> 清掃...
時間が 45分ほどで「mozc」のビルドが終了
[sudo] パスワード:
→パスワード入力
:
パッケージ (1)  新しいバージョン  最終的な変化

mozc            2.28.4880.102-1      25.19 MiB

合計インストール容量:  25.19 MiB

:: インストールを行いますか? [Y/n]
→Enter を押さなくても次(ibus-mozc のビルド、パッケージ作成)に進みました:
==> パッケージを作成: ibus-mozc 2.28.4880.102-1 (2022年11月30日 16時29分10秒)
==> ソースを取得...
  -> ibus-mozc-git git リポジトリを複製...

==> source で sha256sums ファイルを検証...
:
==> ソースの準備ができました。
ibus-mozc-2.28.4880.102-1: パッケージリストを解析しています...
==> パッケージを作成: ibus-mozc 2.28.4880.102-1 (2022年11月30日 16時33分26秒)
==> ランタイムの依存関係を確認...
==> ビルドタイムの依存関係を確認...
==> 警告: 既存の $srcdir/ ツリーを使用
==> build() を開始...
:
==> fakeroot 環境を開始します...
==> package() を開始...
:
==> インストールを整理...
  -> libtool ファイルを削除...
  -> 不要なファイルを削除...
  -> スタティックライブラリファイルを削除しています...
  -> バイナリとライブラリから不要なシンボルを削除...
  -> man と info ページを圧縮...
==> パッケージの問題をチェック...
==> パッケージを作成 "ibus-mozc"...
  -> .PKGINFO ファイルを生成...
  -> .BUILDINFO ファイルを生成...
  -> .MTREE ファイルを生成...
  -> パッケージの圧縮...
==> fakeroot 環境を終了。
==> 作成完了: ibus-mozc 2.28.4880.102-1 (2022年11月30日 16時54分54秒)
==> 清掃...
[sudo] パスワード:
sudo: パスワードの読み込みがタイムしました
sudo: パスワードが必要です
$
→時間がかかるので放って置いたら、
パスワード待ちでタイムアウトして、終了しました。
-
5). インストールを再実行:
最初の開始部分は同じですが、ビルドはスキップして、実行されます。
$ paru -S ibus-mozc
:: 依存関係を解決しています...
:: 2 個の選択肢が ibus-mozc にはあります:
:: リポジトリ AUR:
    1) ibus-mozc  2) ibus-mozc-ut-united
数字を入力してください (デフォルト=1):
→Enter
Aur (1)         古いバージョン  新しいバージョン  Makeのみ
aur/ibus-mozc                   2.28.4880.102-1   いいえ

:: レビューを続行しますか? [Y/n]:
→Enter
:
==> ソースの準備ができました。
ibus-mozc-2.28.4880.102-1: パッケージリストを解析しています...
:: ibus-mozc-2.28.4880.102-1 は最新です -- ビルドをスキップ
[sudo] ubn のパスワード:
→パスワード入力
パッケージをロード...
依存関係を解決しています...
衝突するパッケージがないか確認しています...

パッケージ (1)  新しいバージョン  最終的な変化

ibus-mozc       2.28.4880.102-1       3.92 MiB

合計インストール容量:  3.92 MiB

:: インストールを行いますか? [Y/n]
(1/1) キーリングのキーを確認                                 [--------------------------------] 100%
(1/1) パッケージの整合性をチェック                           [--------------------------------] 100%
(1/1) パッケージファイルのロード                             [--------------------------------] 100%
(1/1) ファイルの衝突をチェック                               [--------------------------------] 100%
:: パッケージの変更を処理しています...
(1/1) インストール ibus-mozc                                 [--------------------------------] 100%
:: トランザクション後のフックを実行...
(1/1) Arming ConditionNeedsUpdate...
→インストール完了。
-
-
6). インストールされたか確認:
$ paru -Ss ibus-mozc
:
aur/ibus-mozc 2.28.4880.102-1 [+10 ~1.55] [インストール済み]        ←(注目)
    Mozc module for IBus
aur/ibus-mozc-ut-united 2.28.4880.102_20221022_2.28.4880.102.r14.g05ec1326-1 [+6 ~0.04]
    IBus engine module for Mozc with UT dictionary
aur/ibus-mozc-ut-full 2.28.4800.102.20220723-1 [+1 ~0.14] [古いバージョン: 2022-11-05]
    IBus engine module for Mozc with UT dictionary
-
$ paru -Ss ibus | grep インストール済み
:
core/libusb 1.0.26-1 [70.91KiB 211.04KiB] [インストール済み]
extra/ibus 1.5.27-1 [0B 7.52MiB] [インストール済み]
extra/libgusb 0.4.2-1 [0B 2.48MiB] [インストール済み]
extra/libibus 1.5.27-1 [0B 93.57MiB] [インストール済み]
extra/libusbmuxd 2.0.2-1 [33.35KiB 113.15KiB] [インストール済み]
community/hidapi 0.12.0-1 [27.78KiB 87.76KiB] [インストール済み]
aur/ibus-mozc 2.28.4880.102-1 [+10 ~1.55] [インストール済み]       ←(注目)
-
$ paru -Ss mozc | grep インストール済み
:
aur/mozc 2.28.4880.102-1 [+70 ~0.92] [インストール済み]
aur/ibus-mozc 2.28.4880.102-1 [+10 ~1.55] [インストール済み]
-
7). ログアウト →ログイン
-
8). キーボードアイコンが表示されません。
→「ibus デーモン」が自動起動に登録されていないようです。
-
9). 「自動起動」の設定ファイル
$ ls -1 ~/.config/autostart/
firewall-applet.desktop
-
$ ls -1 /etc/xdg/autostart/
:
at-spi-dbus-bus.desktop
eos-update-notifier.desktop
firewall-applet.desktop
nm-applet.desktop
user-dirs-update-gtk.desktop
wallpaper-once.desktop
welcome.desktop
xapp-sn-watcher.desktop
-
9). 「自動起動」の設定ファイルに追加:
$ sudo xed /etc/xdg/autostart/ibus-daemon.desktop
[Desktop Entry]
Encoding=UTF-8
Version=0.9.4
Type=Application
Name=IBus daemon
Comment=ibus デーモンの起動
Exec=/usr/bin/ibus-daemon -drx
StartupNotify=false
Terminal=false
Hidden=false
-
10). 再起動
$ reboot
-
11). キーボードアイコンが表示され、「半角/全角」キーで日本語オンになりました。
-
12). 日本語入力できるかの確認:
-
テキストエディタ「xed」を起動:
- パネルのキーボードアイコン、または「JA」をクリックして「日本語 - Mozc」を選ぶか、
または、
- 「Windows+スペース」キーを押してから、
→「半角/全角」キーを押すと、日本語入力できました:
→右上の「あ」の色が見やすい水色に変更されていることに注目。
-
13). 参考: 入力メソッドのアイコンは、明るい水色に変更されています
以前行っていた「オレンジ色」に変更する、下記のコマンドは必要はありません:
$ gsettings set org.freedesktop.ibus.panel xkb-icon-rgba '#f57900'
-
-
14). 任意:「Windows+スペース」では面倒なので、「半角/全角」キーに割当てを変更:
-
(1). パネルの「JA」または、「あ」を右クリック → 設定 →「IBusの設定」画面
「一般」タブ
「キーボードショートカット」
-
(2). 「次の入力メソッド: space」の右にある「…」をクリック
「Super」のチェックを外して、キーコード「space」の右にある「…」をクリック→「無効」をクリック→「新しいアクセレータ」で「半角/全角」キーを押します。
「適用」ボタンを押します。
→「Zenkaku_Hankaku」に変わりました。
→「OK」
-
(3). 「ibus-mozc」が登録されているか確認:
-
「入力メソッド」タブ

→「日本語 - 日本語」以外は削除。「日本語 - Mozc」を追加で登録。
-
(4). これで、「半角/全角」キーで、「JA」、「あ」の切り替えができます。
-
15). 任意:「日本語 キーボード」の個別のキーに割当てを定義:
- 「半角/全角」キーだけで日本語オン・オフするなら、この作業は不要です。
-
(1). パネルの「JA」または、「あ」を左クリック → ツール →プロパティ →「Mozc プロパティ」画面
-
(1)'. パネルの「JA」または、「あ」を右クリック → 設定 →「IBusの設定」画面 →「入力メソッド」タブ→「日本語 - Mozc」を選んで「設定」→「Mozc プロパティ」画面
-
「一般」タブ
-
(2). 左下の「初期値に戻す」 →OK
-
(3). キー設定の選択: →「カスタム」を選んで右の「編集…」
→「Mozc キー設定」画面
-
(4). 左下の「編集」→「定義済みのキーマップからインポート」→「MS-IME」→OK
-
(5). 再び、「編集…」(ウィンドウはマウスで縦に広げておくと、作業しやすいです)
上段にある表題の「入力キー」の項目名をクリックして、ソート
-
(6). 下記のキーのコマンドを修正:
| モード | 入力キー | コマンド | 備考 |
|---|---|---|---|
| 変換前入力中 | Hiragana | IME を有効化 | |
| 変換中 | Hiragana | IME を有効化 | |
| 直接入力 | Hiragana | IME を有効化 | |
| 入力文字なし | Hiragana | IME を有効化 | |
| : | |||
| 変換前入力中 | Muhenkan | IME を無効化 | |
| 変換中 | Muhenkan | IME を無効化 | |
| 直接入力 | Muhenkan | IME を無効化 | エントリーの追加が必要 |
| 入力文字なし | Muhenkan | IME を無効化 |
-
→OK →OK
→適用 →OK
→「閉じる」
-
(7). これで「あ」を見なくても操作できます:
(mozc は入力メソッドのオン、オフを別々のキーに簡単に割当てできるので便利です)
-
-
- --- - --- - --- - --- - --- - --- - --- - --- - ----- ----- ----- --
13. 「i3-wm」環境を使いやすくする設定:
-
-
- --- - --- - --- - --- - --- - --- - --- - --- - ----- ----- ----- ---
13-1. ログインで「Firefox」が起動、「i3-setup」のサイトが開くので、起動しないように変更:
-
「i3-wm」の設定ファイルを修正:
$ xed ~/.config/i3/config
# Autostart apps as you like
#exec --no-startup-id sleep 2 && xfce4-terminal
exec --no-startup-id sleep 7 && firefox https://github.com/endeavouros-team/endeavouros-i3wm-setup/blob/main/force-knowledge.md
#exec --no-startup-id sleep 3 && thunar
↓ コメント化:
# Autostart apps as you like
#exec --no-startup-id sleep 2 && xfce4-terminal
#exec --no-startup-id sleep 7 && firefox https://github.com/endeavouros-team/endeavouros-i3wm-setup/blob/main/force-knowledge.md
#exec --no-startup-id sleep 3 && thunar
-
-
- --- - --- - --- - --- - --- - --- - --- - --- - ----- ----- ----- ----
13-2. Windows + w のショートカットで、ESR 版の「Firefox」が起動しないので修正:
-
「i3-wm」の設定ファイルを修正:
$ xed ~/.config/i3/config
-
「shortcut」で検索:
276行目:
## App shortcuts
bindsym $mod+w exec /usr/bin/firefox
↓ 修正:
## App shortcuts
bindsym $mod+w exec /usr/local/bin/firefox
-
-
- --- - --- - --- - --- - --- - --- - --- - --- - ----- ----- ----- -----
13-3. 「Print Screen」キーを押したときに作られるファイル名を修正:
-
1). 「scrot」がインストールされているか確認:
$ pacman -Ss scrot
:
community/scrot 1.7-1 [インストール済み]
    Simple command-line screenshot utility for X
-
バージョン表示:
$ scrot --version
scrot version 1.7
-
2). 「i3-wm」の設定ファイルを修正:
$ xed ~/.config/i3/config
-
「shortcut」で検索:
276行目:
## App shortcuts
279行目:
bindsym Print exec scrot ~/%Y-%m-%d-%T-screenshot.png && notify-send "Screenshot saved to ~/$(date +"%Y-%m-%d-%T")-screenshot.png"
↓ 修正:
# bindsym Print exec scrot ~/%Y-%m-%d-%T-screenshot.png && notify-send "Screenshot saved to ~/$(date +"%Y-%m-%d-%T")-screenshot.png"
bindsym Print exec scrot ~/"画像/Screenshots-%Y-%m-%d-%T.png" && notify-send "Screenshot saved to screenshot.png"
-
(3). 再起動:
$ reboot
-
(4). 「Print Screen」キーを押して確認:
$ ls -1 ~/画像/
:
Screenshots-2022-12-16_18:03:50.png
→全画面で画像が作成されました。
-
-
- --- - --- - --- - --- - --- - --- - --- - --- - ----- ----- ----- ----- -
13-4. 「ショートカットを表示」するメニューを「Welcome」アプリに追加:
→「項番 17. 1). 」を参照:
-
-
- --- - --- - --- - --- - --- - --- - --- - --- - ----- ----- ----- ----- --
13-5. 解像度と壁紙をセットするコマンドを「ショートカットキー」の Windows + Z に登録:
-
(1). セットするコマンドの動作確認:
$ xrandr --output Virtual-1 --mode 1680x1050 && ~/.fehbg
-
(2). 「ショートカットキー」に登録:
$ xed ~/.config/i3/config
-
「shortcut」で検索:
276行目:
## App shortcuts
↓ 項目の後ろに追記:
281行目:
bindsym $mod+z exec xrandr --output Virtual-1 --mode 1680x1050 && ~/.fehbg
→解像度は任意で置換えのこと
-
(3). 再起動:
$ reboot
-
(4). 動作確認:
デスクトップ上で、Windows + Z
→画面の解像度が広がり、壁紙もきっちりとセットされました。
-
(5). ちょうど良い画面サイズに調整:
-
Boxes のウィンドウの「左下」をマウスでドラッグして、解像度よりも少し広い大きさにします:
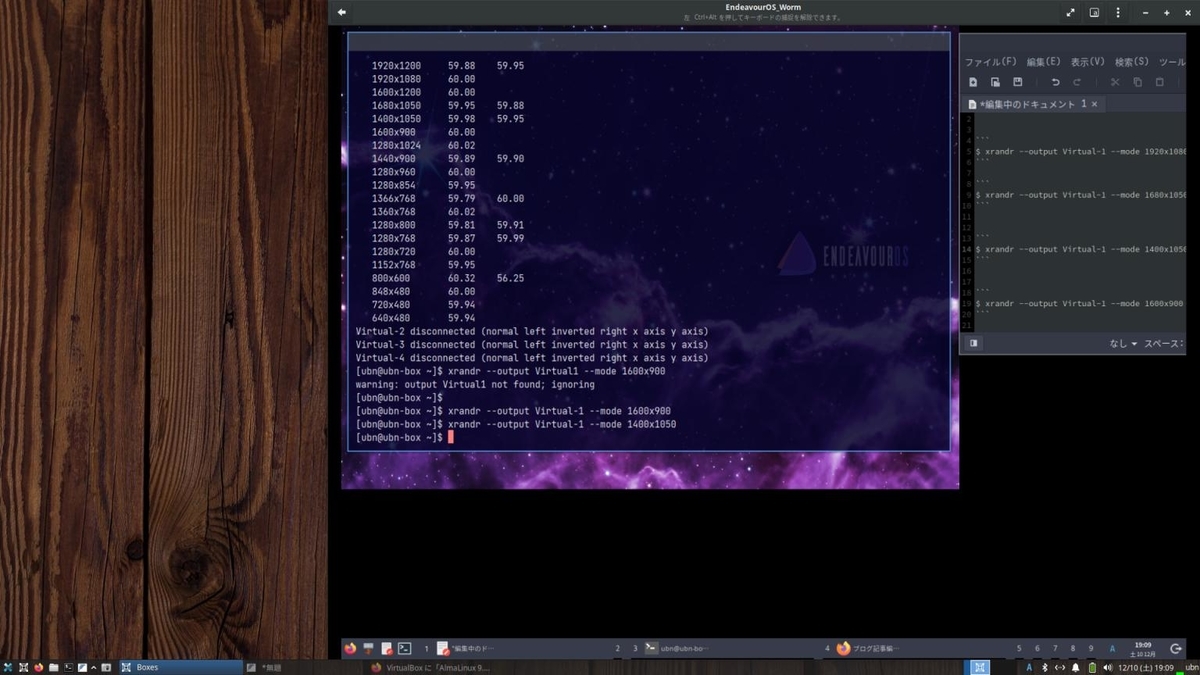
こちらの画面では壁紙の再セットを行っていない状態です。
→その解像度での、文字が一番大きいサイズになるようにします。
「左下」隅をマウスでドラッグするのがコツです。下方向にも広げないと、文字は大きくなりません。
-
今度は逆に、左右の黒い余白が少なくなるように右に縮めます
解像度よりも狭くなると、画面が縮小され、文字も小さくなります。
作業しやすい画面の広さで、文字が判読できる大きさで止めます。
-
-
- --- - --- - --- - --- - --- - --- - --- - --- - ----- ----- ----- ----- ---
13-6. ウィンドウの「リサイズ」の機能を使えるように設定:
-
Windows + R のデフォルトは「リサイズモード」に入るショートカットですが、コメント化されています。
-
使えるようにコメントを解除:
$ xed ~/.config/i3/config
-
「resize」で検索: 144 行目付近
# resize window (you can also use the mouse for that):    ←(ウィンドウサイズ変更、マウス使用可)
#mode "resize" {
# These bindings trigger as soon as you enter the resize mode
# Pressing left will shrink the window's width.    ←(「左へドラッグ」幅が縮小)
# Pressing right will grow the window's width.    ←(「右へドラッグ」幅が拡大)
# Pressing up will shrink the window's height.    ←(「上へドラッグ」縦が縮小)
# Pressing down will grow the window's height.    ←(「下へドラッグ」縦が拡大)
#        bindsym j resize shrink width 10 px or 10 ppt    ←(「j」幅が縮小)
#        bindsym k resize grow height 10 px or 10 ppt    ←(「k」縦が拡大)
#        bindsym l resize shrink height 10 px or 10 ppt    ←(「l」エル 縦が縮小)
#        bindsym ntilde resize grow width 10 px or 10 ppt    ←(「;」幅が拡大)

# same bindings, but for the arrow keys    ←(矢印キー用)
#   bindsym Left resize shrink width 10 px or 10 ppt    ←(「←」幅が縮小)
#        bindsym Down resize grow height 10 px or 10 ppt    ←(「↓」縦が拡大)
#        bindsym Up resize shrink height 10 px or 10 ppt    ←(「↑」縦が縮小)
#        bindsym Right resize grow width 10 px or 10 ppt    ←(「→」幅が拡大)

# back to normal: Enter or Escape    ←(通常のウィンドウサイズに戻る)
#   bindsym Return mode "default"
#        bindsym Escape mode "default"
#}

#bindsym $mod+r mode "resize"           ←(「リサイズモード」に入る)
↓ 修正:
# resize window (you can also use the mouse for that):
mode "resize" {
# These bindings trigger as soon as you enter the resize mode
# Pressing left will shrink the window's width.
# Pressing right will grow the window's width.
# Pressing up will shrink the window's height.
# Pressing down will grow the window's height.
        bindsym j resize shrink width 10 px or 10 ppt
        bindsym k resize grow height 10 px or 10 ppt
        bindsym l resize shrink height 10 px or 10 ppt
        bindsym ntilde resize grow width 10 px or 10 ppt

# same bindings, but for the arrow keys
        bindsym Left resize shrink width 10 px or 10 ppt
        bindsym Down resize grow height 10 px or 10 ppt
        bindsym Up resize shrink height 10 px or 10 ppt
        bindsym Right resize grow width 10 px or 10 ppt

# back to normal: Enter or Escape
#   bindsym Return mode "default"
        bindsym Escape mode "default"
}

bindsym $mod+r mode "resize"
→外し忘れに注意。
-
-
- --- - --- - --- - --- - --- - --- - --- - --- - ----- ----- ----- ----- ----
13-7. キーを押しても、「ショートカットキー」が働かないとき:
-
Windows + R で、「アプリケーションファインダ」(アプリの検索窓)が表示される場合:
ホストOS 側が選択されています。
ゲストOS のデスクトップかアプリをクリック後に操作します。
-
Windows + D で、Boxes のウィンドウが消えてしまう場合:
ホストOS 側でデスクトップ表示のみのショートカットキーが働きました。
もう一度、Windows + D すると、Boxes のウィンドウが表示されます。
ゲストOS のデスクトップかアプリをクリック後に操作します。
-
-
- --- - --- - --- - --- - --- - --- - --- - --- - ----- ----- ----- ----- -----
13-8. 参考: 「端末」の背景を透明にする設定:
-
参考:
-
$ xed ~/.config/i3/config
「transpar」(transparent の頭文字: 透明)で検索:
##############
# compositor #
##############

# transparency         ←(ヒット)330行目
# uncomment one of them to be used
# options could need changes, related to used GPU and drivers.
# to find the right setting consult the archwiki or ask at the forum.
和訳:
透明度

使用する GPU とドライバーに関連するオプションを変更する必要がある場合は、そのうちの 1つのコメントを解除します。適切な設定を見つけるには、archwiki を参照するか、フォーラムで質問してください。
-
パネル (i3bar) を透明にする箇所もありますが、今回は無視。
-
(1). 2つの手段のひとつ(テアリングの改修アプリ)を選択:
344行目:
# picom: https://wiki.archlinux.org/title/Picom
# manpage: https://man.archlinux.org/man/picom.1.en
# The default configuration is available in /etc/xdg/picom.conf
# For modifications, it can be copied to ~/.config/picom/picom.conf or ~/.config/picom.conf
# install picom package (yay -S picom)
# start using default config
#exec_always --no-startup-id picom -b
#
# for custom config:
#exec_always --no-startup-id picom --config  ~/.config/picom.conf
和訳:
デフォルト設定は「/etc/xdg/picom.conf」にあります
変更する場合は、「~/.config/picom/picom.conf」 または 「~/.config/picom.conf」にコピーします

picom パッケージをインストール (yay -S picom)

デフォルト設定を使う場合:
#exec_always --no-startup-id picom -b

カスタム設定を使う場合:
#exec_always --no-startup-id picom --config  ~/.config/picom.conf
ゆえに、
-
(2). 続けて、i3 設定ファイルを修正:
「picom -b」で検索:
350行目:
#exec_always --no-startup-id picom -b
↓ コメント解除:
exec_always --no-startup-id picom -b
→Ctrl + s で保存。
→Ctrl + q で閉じます。
-
(3). 「picom」のインストール:
X compositor that may fix tearing issues
テアリング(チラチラとナミナミ)の問題を修正する可能性のある X コンポジター
-
$ paru -S picom
:
パッケージ (2)       新しいバージョン  最終的な変化  ダウンロード容量
community/libconfig  1.7.3-1               0.24 MiB          0.09 MiB
community/picom      10.2-1                0.47 MiB          0.18 MiB
-
(4). 再起動:
$ reboot
-
(5). Windows + Enter で「端末」を起動して確認:
→「端末」画面が半透明になりました:
-
(6). 参考: picom の設定ファイルの内容を確認:
$ cat /etc/xdg/picom.conf
→長いので、表示は省略。
-
-
- --- - --- - --- - --- - --- - --- - --- - --- - ----- ----- ----- ----- ----- -
13-9. 参考: ウィンドウのタイトルバーを表示する設定:
-
タイトルバーの表示は、「i3gaps」では公式にはサポートされていません。
-
$ xed ~/.config/i3/config
「title」(タイトル)で検索:
ヒット 21行目:
# Font for window titles. Will also be used by the bar unless a different font
# is used in the bar {} block below.
# This font is widely installed, provides lots of unicode glyphs, right-to-left
# text rendering and scalability on retina/hidpi displays (thanks to pango).
font pango: Noto Sans Regular 10
和訳:
ウィンドウタイトルのフォント

以下の bar {} ブロックで別のフォントが使用されていない限り、バーでも使用されます。
このフォントは広くインストールされており、多数の Unicode グリフ、右から左へのテキスト レンダリング、および Retina / HiDPI ディスプレイでのスケーラビリティを提供します (pango に感謝)。

font pango: Noto Sans Regular 10
→フォントの指定はOK(日本語の表示)
-
ヒット 59行目:
# show window title bars (not officially supported with i3gaps)
#default_border normal

# window title alignment
#title_align center
和訳:
ウィンドウのタイトルバーを表示 (i3gaps では公式にはサポートされていません)
#default_border normal

ウィンドウのタイトル配置
#title_align center
ゆえに、
-
(1). 続けて、i3 設定ファイルを修正:
59行目:
# show window title bars (not officially supported with i3gaps)
#default_border normal

# window title alignment
#title_align center
↓ コメント解除:
# show window title bars (not officially supported with i3gaps)
default_border normal

# window title alignment
title_align center
-
-
- --- - --- - --- - --- - --- - --- - --- - --- - ----- ----- ----- ----- ----- --
13-10. 「Welcome」アプリをワークスペース 5 に割当て:
-
「Welcome」アプリを起動するショートカットを定義。
および、ワークスペース 5 の「TelegramDesktop」の代わりに「Welcome」を割当てました。
-
1).「Welcome」アプリを起動するショートカットを定義:
$ xed ~/.config/i3/config
276 行目:
## App shortcuts
↓ 項目の一番後ろに、下記の行を追記:
282 行目:
bindsym $mod+x exec "eos-welcome --once"
→Windows + X で、「Welcome」が起動
-
2). ワークスペース 5 に「Welcome」を割当て:
$ xed ~/.config/i3/config
-
修正1: 指定したワークスペースにて、アプリを起動:
313 行目:
# bind program to workspace and focus to them on startup:
-
318 行目:
assign [class="TelegramDesktop"] $ws5
↓ 下記に修正:
# assign [class="TelegramDesktop"] $ws5
assign [class="Yad"] $ws5
→ワークスペース5 に、「Welcome」を起動:
-
修正2: ワークスペースを選択(表示):
321 行目:
# automatic set focus new window if it opens on another workspace than the current:
-
326 行目:
for_window [class=TelegramDesktop] focus
↓ 下記に修正:
# for_window [class=TelegramDesktop] focus
for_window [class="Yad"] focus
→ワークスペース5 の「Welcome」を表示:
-
3). 再起動:
$ reboot
-
4). 念の為、設定ファイルを保存:
$ mkdir -p ~/ダウンロード/my-app
$ cp ~/.config/i3/config ~/ダウンロード/my-app/i3-config.2022-12-29
-
$ ls ~/ダウンロード/my-app/
i3-config.2022-12-29
-
-
- --- - --- - --- - --- - --- - --- - --- - --- - ----- ----- ----- ----- ----- ---
13-11. パネルに、「Welcome」のランチャーアイコンを追加:
-
1). パネルバー「i3blocks」の設定を修正:
$ xed ~/.config/i3/i3blocks.conf
-
50 行目:
[terminal] full_text= color=#807dfe command=i3-msg -q exec xfce4-terminal
↓ 「端末」のアイコンの前に「Welcome」のアイコンを挿入:
[welcome] full_text= color=#dbcb75 command=i3-msg -q exec "eos-welcome --once" [terminal] full_text= color=#807dfe command=i3-msg -q exec xfce4-terminal
-
2). 再起動:
$ reboot
-
3). 動作確認:
パネルの中央の黄色の「吹き出し」アイコンをクリック
→「Welcome」が「ワークスペース5」で起動
-
-
- --- - --- - --- - --- - --- - --- - --- - --- - ----- ----- ----- ----- ----- ----
14. 「Welcome」アプリを日本語化:
-
追記: 2023-01-15
「eos-translations」がバージョンアップして、「Welcome」アプリが日本語に対応:
→手動で「Welcome」アプリを日本語化しなくても良くなりました。
ただし、すでに、手動で日本語化している場合は、システム更新が失敗するので、
下記を実行してから、システム更新して下さい:
$ sudo rm /usr/share/endeavouros/scripts/translation-ja.bash
$ paru (もしくは、yay)
-
↓ 下記の作業は不要になりました。
-
「Welcome」アプリが便利なので、真っ先に日本語化しました。
-
翻訳関連:
-
1). 「Welcome」アプリが起動していたら、閉じて作業:
$ eos-welcome --version
3.44-1
-
2). Welcome アプリの、日本語の翻訳ファイルを作成:
$ cd /usr/share/endeavouros/scripts/
$ ls /usr/share/endeavouros/scripts/
:
eos-script-lib-yad   translation-fr.bash  translation-pt_BR.bash  translation-zh_CN.bash
ksetwallpaper.py     translation-hi.bash  translation-ro.bash     translation-zh_HK.bash
translation-de.bash  translation-hr.bash  translation-rs.bash     translation-zh_SG.bash
translation-en.bash  translation-is.bash  translation-ru.bash     translation-zh_TW.bash
translation-es.bash  translation-it.bash  translation-se.bash     translations.bash
translation-fa.bash  translation-pl.bash  translation-sk.bash     wallpaper-once
translation-fi.bash  translation-pt.bash  translation-th.bash     welcome
$ sudo xed /usr/share/endeavouros/scripts/translation-ja.bash
↓ 連続して、区切りは無視して、すべて貼り付けてください:
長いので、マウスで先頭の「#」をダブルクリックして選び、
Shift キーを押したまま、下矢印「↓」を押して選択すると良いです
# Translations for the Welcome app.
#
# Note: variables (like $PRETTY_PROGNAME below) may be used if they are already defined either
# - in the Welcome app
# - globally
#
#
# Any string should be defined like:
#
# _tr_add <language> <placeholder> "string"
# or
# _tr_add2 <placeholder> "string"
#
# where
#
# _tr_add A bash function that adds a "string" to the strings database.
# _tr_add2 Same as _tr_add but knows the language from the _tr_lang variable (below).
# <language> An acronym for the language, e.g. "en" for English (check the LANG variable!).
# <placeholder> A pre-defined name that identifies the place in the Welcome app where this string is used.
# "string" The translated string for the Welcome app.
# Japanese:
### First some useful definitions:
_tr_lang=ja # required helper variable for _tr_add2
# Help with some special characters (HTML). Yad has problems without them:
_exclamation='!' # '!'
_and='&' # '&'
_question='?' # '?'
###################### Now the actual strings to be translated: ######################
# func <placeholder> "string"
_tr_add2 welcome_disabled "$PRETTY_PROGNAME アプリは無効です。有効にするには、オプション --enable を使います(一時的には: --once)。" # changed 2022-Feb-21
_tr_add2 butt_later "また後で"
_tr_add2 butt_latertip "$PRETTY_PROGNAME を有効のままにします"
_tr_add2 butt_noshow "今後表示しない"
_tr_add2 butt_noshowtip "$PRETTY_PROGNAME を無効にします"
_tr_add2 butt_help "ヘルプ"
_tr_add2 nb_tab_INSTALL "インストール"
_tr_add2 nb_tab_GeneralInfo "通常の情報"
_tr_add2 nb_tab_AfterInstall "インストール後"
_tr_add2 nb_tab_AddMoreApps "アプリを追加"
_tr_add2 after_install_text "インストール後の作業"
_tr_add2 after_install_um "ミラーの更新"
_tr_add2 after_install_umtip "システム更新前にミラーのリストを更新します"
_tr_add2 after_install_us "システムの更新"
_tr_add2 after_install_ustip "システム ソフトウェアを更新します"
_tr_add2 after_install_dsi "システムの問題を検出"
_tr_add2 after_install_dsitip "システム パッケージなどの潜在的な問題を検出します"
_tr_add2 after_install_etl "EndeavourOS を最新にするには $_question"
_tr_add2 after_install_etltip "EndeavourOS を最新にするには何をすべきかを表示します"
_tr_add2 after_install_cdm "ディスプレイ マネージャの変更"
_tr_add2 after_install_cdmtip "別のディスプレイ マネージャを使います"
_tr_add2 after_install_ew "EndeavourOS にてデフォルトの壁紙を使う" # was: "EndeavourOS wallpaper"
_tr_add2 after_install_ewtip "デフォルトの壁紙にリセットします" # was: "Change desktop wallpaper to EOS default"
_tr_add2 after_install_pm "パッケージ管理"
_tr_add2 after_install_pmtip "pacman でパッケージを管理する方法"
_tr_add2 after_install_ay "AUR $_and yay $_exclamation"
_tr_add2 after_install_aytip "AUR と yay の情報"
_tr_add2 after_install_hn "ハードウェアとネットワーク"
_tr_add2 after_install_hntip "ハードウェアを機能させます"
_tr_add2 after_install_bt "Bluetooth"
_tr_add2 after_install_bttip "Bluetooth の使用上の注意"
_tr_add2 after_install_nv "NVIDIA ユーザへ $_exclamation"
_tr_add2 after_install_nvtip "NVIDIA インストーラーを使います"
_tr_add2 after_install_ft "フォーラムの便利な使い方"
_tr_add2 after_install_fttip "ヘルプの求め方 $_exclamation"
_tr_add2 general_info_text "EndeavourOS のWeb サイトを見る $_exclamation"
_tr_add2 general_info_ws "Web サイト"
_tr_add2 general_info_wi "Wiki"
_tr_add2 general_info_witip "注目の記事"
_tr_add2 general_info_ne "ニュース"
_tr_add2 general_info_netip "ニュースと記事"
_tr_add2 general_info_fo "フォーラム"
_tr_add2 general_info_fotip "フレンドリーなフォーラムで質問、コメント、チャット $_exclamation"
_tr_add2 general_info_do "寄付"
_tr_add2 general_info_dotip "EndeavourOS の実行を維持するためにご協力ください"
_tr_add2 general_info_ab "$PRETTY_PROGNAME について"
_tr_add2 general_info_abtip "このアプリの詳細"
_tr_add2 add_more_apps_text "人気のアプリをインストール"
_tr_add2 add_more_apps_lotip "Office ツール (libreoffice-fresh)"
_tr_add2 add_more_apps_ch "Chromium Web ブラウザ"
_tr_add2 add_more_apps_chtip "Web ブラウザ"
_tr_add2 add_more_apps_fw "ファイアウォール"
_tr_add2 add_more_apps_fwtip "Gufw ファイアウォール"
_tr_add2 add_more_apps_bt "Xfce 用 Bluetooth (blueberry)"
_tr_add2 add_more_apps_bt_bm "Xfce 用 Bluetooth (blueman)"
####################### NEW STUFF AFTER THIS LINE:
_tr_add2 settings_dis_contents "$PRETTY_PROGNAME を再実行するには、ターミナルを起動して次を実行します:\n<tt> $PROGNAME --enable</tt>\nor\n<tt> $PROGNAME --once</tt>\n" # slightly changed 2021-Dec-21; changed again 2022-Apr-06
_tr_add2 settings_dis_text "$PRETTY_PROGNAME の再有効化:"
_tr_add2 settings_dis_title "$PRETTY_PROGNAME を再度有効にする方法"
_tr_add2 settings_dis_butt "覚えました"
_tr_add2 settings_dis_buttip "約束します"
_tr_add2 help_butt_title "$PRETTY_PROGNAME のヘルプ"
_tr_add2 help_butt_text "$PRETTY_PROGNAME アプリの詳細"
_tr_add2 dm_title "ディスプレイマネージャを選択"
_tr_add2 dm_col_name1 "選択済み"
_tr_add2 dm_col_name2 "ディスプレイマネージャ名"
_tr_add2 dm_reboot_required "変更を有効にするには再起動が必要です。"
_tr_add2 dm_changed "ディスプレイマネージャが次のように変更されました: "
_tr_add2 dm_failed "ディスプレイマネージャの変更に失敗しました。"
_tr_add2 dm_warning_title "警告"
_tr_add2 install_installer "インストーラー"
_tr_add2 install_already "インストール済み"
_tr_add2 install_ing "インストール"
_tr_add2 install_done "終了。"
_tr_add2 sysup_no "更新はありません。"
_tr_add2 sysup_check "ソフトウェア更新を確認..."
_tr_add2 issues_title "パッケージの問題を検出"
_tr_add2 issues_grub "重要: ブート メニューを手動で再作成する必要があります。"
_tr_add2 issues_run "コマンドの実行:"
_tr_add2 issues_no "重要なシステムの問題は検出されませんでした。"
_tr_add2 cal_noavail "利用できません: " # installer program
_tr_add2 cal_warn "警告"
_tr_add2 cal_info1 "これはコミュニティが開発したリリースです。\n\n" # specials needed!
_tr_add2 cal_info2 "<b>オフライン</b> 方式は、EndeavourOS をテーマにした Xfce デスクトップを提供します。\nインターネット接続は必要ありません。\n\n"
_tr_add2 cal_info3 "<b>オンライン</b> 方式では、バニラのテーマでデスクトップを選択できます。\nインターネット接続が必要です。\n\n"
_tr_add2 cal_info4 "注意: このリリースは進行中です。バグを報告して、安定させるためにご協力ください。\n"
_tr_add2 cal_choose "インストールのやり方を選択"
_tr_add2 cal_method "方式"
_tr_add2 cal_nosupport "$PROGNAME: サポートされていないモードです: "
_tr_add2 cal_nofile "$PROGNAME: 必要なファイルが存在しません: "
_tr_add2 cal_istarted "インストールの開始"
_tr_add2 cal_istopped "インストールの完了"
_tr_add2 tail_butt "このウィンドウを閉じます"
_tr_add2 tail_buttip "このウィンドウだけを閉じます"
_tr_add2 ins_text "ディスクに EndeavourOS をインストール"
_tr_add2 ins_start "インストーラーを起動"
_tr_add2 ins_starttip "デバッグ端末とともに EndeavourOS インストーラーを起動"
_tr_add2 ins_up "このアプリを更新 $_exclamation"
_tr_add2 ins_uptip "このアプリを更新して再起動"
_tr_add2 ins_keys "pacman のキーの初期化"
_tr_add2 ins_keystip "pacman のキーを初期化します"
_tr_add2 ins_pm "パーティション管理マネージャ"
_tr_add2 ins_pmtip "Gparted アプリを使うと、ディスクのパーティションと構造を調査および管理できます"
_tr_add2 ins_rel "最新のリリース情報"
_tr_add2 ins_reltip "最新のリリースに関する詳細情報"
_tr_add2 ins_tips "インストールのヒント"
_tr_add2 ins_tipstip "インストールのヒント"
_tr_add2 ins_trouble "トラブル解決"
_tr_add2 ins_troubletip "システム復旧"
_tr_add2 after_install_us_from "更新 " # AUR or upstream
_tr_add2 after_install_us_el "管理者権限が必要です。"
_tr_add2 after_install_us_done "更新完了。"
_tr_add2 after_install_us_fail "更新に失敗しました $_exclamation"
# 2020-May-14:
_tr_add2 nb_tab_UsefulTips "ヒント"
_tr_add2 useful_tips_text "役立つヒント"
# 2020-May-16:
_tr_add2 butt_changelog "変更ログ"
_tr_add2 butt_changelogtip "Welcome の変更ログを表示します"
_tr_add2 after_install_themevan "Xfce バニラテーマ"
_tr_add2 after_install_themevantip "バニラの Xfce テーマを使います"
_tr_add2 after_install_themedef "Xfce EndeavourOS デフォルトテーマ"
_tr_add2 after_install_themedeftip "EndeavourOS のデフォルトの Xfce テーマを使います"
# 2020-Jun-28:
_tr_add2 after_install_pclean "パッケージのクリーンアップ設定"
_tr_add2 after_install_pcleantip "パッケージ キャッシュのクリーンアップ サービスを設定します"
# 2020-Jul-04:
_tr_add2 nb_tab_OwnCommands "個人用コマンド" # modified 2020-Jul-08
_tr_add2 nb_tab_owncmds_text "個人用に作成したコマンド" # modified 2020-Jul-08
# 2020-Jul-08:
_tr_add2 nb_tab_owncmdstip "個人用コマンドの追加に関するヘルプ"
_tr_add2 add_more_apps_akm "カーネル管理マネージャ"
_tr_add2 add_more_apps_akmtip "小さな Linux カーネル マネージャとソースの情報"
# 2020-Jul-15:
_tr_add2 butt_owncmds_help "チュートリアル: 個人用コマンド"
# 2020-Aug-05:
_tr_add2 butt_owncmds_dnd "個人用コマンド ドラッグ${_and}ドロップ"
_tr_add2 butt_owncmds_dnd_help "新しいボタンのフィールド項目をドラッグする、ウィンドウを表示します"
# 2020-Sep-03:
_tr_add2 ins_reso "ディスプレイの解像度を変更"
_tr_add2 ins_resotip "ディスプレイの解像度を今すぐ変更します"
# 2020-Sep-08:
_tr_add2 add_more_apps_arch "すべての Arch パッケージをブラウザで閲覧"
_tr_add2 add_more_apps_aur "すべての AUR パッケージをブラウザで閲覧"
_tr_add2 add_more_apps_done1_text "推奨アプリは既にインストールされています $_exclamation"
_tr_add2 add_more_apps_done2_text "またはすべての Arch および AUR パッケージをブラウザで閲覧"
_tr_add2 add_more_apps_done2_tip1 "インストールに、「pacman」または「AUR ヘルパー」を使います"
_tr_add2 add_more_apps_done2_tip2 "インストールに、「AUR ヘルパー」を使います"
# 2020-Sep-11:
_tr_add2 after_install_ew2 "EndeavourOS の壁紙の 1つを選択" # was: "EndeavourOS wallpaper (choose)"
_tr_add2 after_install_ewtip2 "壁紙を選択します" # was: "Choose from EndeavourOS default wallpapers"
# 2020-Sep-15:
# IMPORTANT NOTE:
# - line 71: changed text of 'after_install_ew'
# - line 72: changed text of 'after_install_ewtip'
# - line 249: changed text of 'after_install_ew2'
# - line 250: changed text of 'after_install_ewtip2'
# 2020-Oct-23:
_tr_add2 updt_update_check "更新の確認"
_tr_add2 updt_searching "検索中"
_tr_add2 updt_for_updates "にて更新"
_tr_add2 updt_failure "失敗 $_exclamation"
_tr_add2 updt_nothing_todo "やることが何もありません"
_tr_add2 updt_press_enter "ENTER を押してこのウィンドウを閉じます"
# 2020-Oct-24:
# IMPORTANT NOTE:
# - line 244: changed text of 'add_more_apps_done2_text'
# 2020-Dec-11:
_tr_add2 after_install_pacdiff_tip "pacnew、pacorig の管理 $_and pacdiff を使用した pacsave ファイル $_and"
# 2021-Apr-07:
_tr_add2 after_install_conf "設定" # a starting verb on a sentence "Configure eos-update-notifier"
_tr_add2 after_install_more_wall "EndeavourOS の壁紙をもっとダウンロード"
_tr_add2 after_install_more_wall_tip "EndeavourOS の以前の壁紙とコミュニティの壁紙をダウンロードします"
_tr_add2 after_install_info "情報" # last word on a sentence, means just any information
_tr_add2 butt_softnews "ソフトウェアニュース"
_tr_add2 butt_softnews_tip "EndeavourOS ソフトウェアに関する重要なお知らせ"
_tr_add2 install_community "コミュニティ エディションをインストール"
_tr_add2 install_community_tip "コミュニティ版コレクション (オンラインが必要)" # changed 2021-Oct-23
# 2021-May-01
_tr_add2 ins_syslog "システムログを共有する方法"
_tr_add2 ins_syslogtip "サポートが必要な場合にシステム ログを共有する方法について説明します"
_tr_add2 ins_logtool "トラブル解決用のログ"
_tr_add2 ins_logtooltip "ヘルプを求めるときにトラブル解決用のログを選択、作成、共有します"
# 2021-May-20
_tr_add2 nb_tab_DailyAssistant "補助"
_tr_add2 daily_assistant_text "日常的に使える便利なツール"
_tr_add2 after_install_itab "Welcome で最初に開くタブを選択"
_tr_add2 after_install_itab_tip "Welcome の開始時に表示するタブを設定します"
# 2021-Jun-08
_tr_add2 daily_assist_apps "アプリケーションのカテゴリ"
_tr_add2 daily_assist_apps_tip "カテゴリ別に分類されたアプリケーション"
_tr_add2 after_install_vbox1 "VirtualBox Guest ユーティリティを有効にする"
_tr_add2 after_install_vbox2 "VirtualBox Guest ユーティリティを有効にするには、「<b>AfterInstall</b>」タブを選択し、ボタンをクリックします "
# 2021-Jun-17
_tr_add2 after_install_r8168 "有線ネットワークの問題 $_question r8168 および r8169 ドライバーの切替え $_exclamation" # changed 2021-Dec-14 !!
_tr_add2 after_install_r8168_tip "r8168 ドライバーと r8169 ドライバーを切替えます (再起動が必要な場合があります)" # changed 2021-Dec-14 !!
# 2021-Oct-08
_tr_add2 daily_assist_DEinfo "情報" # assume prefix "DE:", e.g.: "Xfce: information"
_tr_add2 daily_assist_DEinfo_tip "このデスクトップ/ウィンドウ マネージャに関する詳細情報" # assume prefix "DE:", e.g.: "Xfce: more information ..."
# 2022-Feb-16
_tr_add2 add_more_apps_qs "インストールしたい人気のアプリを選択" # runs eos-quickstart
_tr_add2 add_more_apps_qstip "人気のあるアプリを選択してインストール"
# 2022-Mar-21
_tr_add2 ins_blue_notes "Bluetooth について"
_tr_add2 ins_blue_notes_tip "Bluetooth の設定に関する注意事項"
# 2022-Mar-27
_tr_add2 after_install_fw "ファイアウォールの情報"
_tr_add2 after_install_fwtip "デフォルトのファイアウォールに関する情報"
# 2022-Mar-30
_tr_add2 ins_custom "インストール処理のカスタマイズ"
_tr_add2 ins_custom_tip "インストール処理をカスタマイズする方法"
# 2022-Jul-15
_tr_add2 daily_assist_anews "Arch の最新ニュース"
_tr_add2 daily_assist_anewstip "Arch の最新ニュースをブラウザに表示"
# 2022-Sep-25
_tr_add2 nb_nofify_user1 "重要なお知らせがあります "
_tr_add2 nb_nofify_user2 "クリックしてください " # Software News
_tr_add2 nb_nofify_user3 "このウィンドウの左下隅にあるボタンを"
→連続して、すべて貼り付けてください:
Shift+下矢印「↓」を使って行き過ぎたら、
Shift キーを押したまま、「↓」だけを離して、「↑」で調整
Ctrl+C して、テキストエディタに Ctrl+V で貼り付け。
-
ファイルの最後は、337 行目の空行以降のはずです。
そこで、Ctrl+S で保存してください。
-
3). Welcome アプリの翻訳ファイルを確認:
$ ls /usr/share/endeavouros/scripts/
:
eos-script-lib-yad   translation-hi.bash     translation-ro.bash     translation-zh_SG.bash
ksetwallpaper.py     translation-hr.bash     translation-rs.bash     translation-zh_TW.bash
translation-de.bash  translation-is.bash     translation-ru.bash     translations.bash
translation-en.bash  translation-it.bash     translation-se.bash     wallpaper-once
translation-es.bash  translation-ja.bash     translation-sk.bash     welcome
translation-fa.bash  translation-pl.bash     translation-th.bash
translation-fi.bash  translation-pt.bash     translation-zh_CN.bash
translation-fr.bash  translation-pt_BR.bash  translation-zh_HK.bash
→日本語の翻訳ファイルができました。
-
4). 「Welcome」アプリの起動:
端末にて、
$ eos-welcome --once
→Welcome アプリを有効にするには、オプション --enable を使用します。 (一時的には: --once).
-
もしくは、Windows + D →「we」Enter
-
→日本語に変更されました。
-
5). 参考: 「Welcome」アプリの更新があった場合:
原本ファイルの更新日付が変わっていないか確認:
$ cd /usr/share/endeavouros/scripts/
$ ls -l | grep en
-rw-r--r-- 1 root root 14883 10月 31 02:16 translation-en.bash
-
ファイルの内容が変わっていないか確認:
$ cat /usr/share/endeavouros/scripts/translation-en.bash
:
# 2022-Sep-25
_tr_add2 nb_nofify_user1             "There is important news at"
_tr_add2 nb_nofify_user2             "Please click the"                                  # Software News
_tr_add2 nb_nofify_user3             "button at the low left corner of this window."
→今回は、「2022-09-25」までの記述です。
-
更新されても、上記以降に追加された部分を翻訳するだけなので楽です。
翻訳したら、下記に追記します:
$ xed /usr/share/endeavouros/scripts/translation-ja.bash
-
→ただし、翻訳して追記しなくても、一部が翻訳されないだけで、それほど影響はないと思います。
-
-
- --- - --- - --- - --- - --- - --- - --- - --- - ----- ----- ----- ----- ----- -----
15. 「eos-update-notifier 」スクリプトで、「paru」を使うように変更:
-
GUI の「Welcome」(3.45-1) 画面の「Update System」メニューでは、「yay」の機能が使われています。
「paru」が使われるように修正:
-
1).「/etc/eos-script-lib-yad.conf」の修正:
項目の「EOS_AUR_HELPER」に、使われるAUR ヘルパーが指定されています。
-
(1). エディタで開きました:
$ sudo xed /etc/eos-script-lib-yad.conf
-
(2). 検索 →検索 →「EOS_AUR_HELPER」で検索:
## EOS_AUR_HELPER contains the AUR helper program name.
## Supported values are yay and paru, but other helpers may work as well.
## The program must support options -Qua and -Sua.
#
EOS_AUR_HELPER="yay"
-
→「AUR ヘルパー」として、「yay」と「paru」が使えます。
-
(3). 設定の修正:
EOS_AUR_HELPER="yay"
↓ 修正:
EOS_AUR_HELPER="paru"
-
2). 再起動:
$ reboot
-
3). 「paru」に変更したので、「yay」を削除:
$ paru -R yay
:
依存関係を確認しています...
:: eos-update-notifier は任意で yay: alternative AUR helper supported by eos-update-notifier を必要とします

パッケージ (1)  古いバージョン  最終的な変化

yay             11.3.1-1           -7.29 MiB
-
4). 削除されたか確認:
$ pacman -Ss yay
:
endeavouros/yay 11.3.1-1
    Yet another yogurt. Pacman wrapper and AUR helper written in go.
community/ruby-yard 0.9.28-2
    YARD is a Ruby Documentation tool. The Y stands for "Yay!"
→削除されました。
-
5). コマンドで更新の通知ができるか確認:
$ eos-update-notifier
:
Checking for updates ...
Checking AUR updates ...
No updates available.
-
システム更新がない状態だと、画面中央に通知が表示されました:
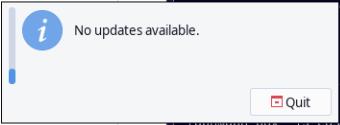
→「EndeavourOS」(i3-wm) で使われているいつもの表示とは違います。
-
6). 「paru」でシステム更新があるまで待ちます(放おっておきます)
「更新の通知」の動作確認は、システム更新が来ないとできません。
-
7). システム更新が来たら、システム更新せずに、自動で「更新の通知」がされるかを確認:
-
(1). コマンドで更新の通知ができるか確認:
$ eos-update-notifier
:
Checking for updates ...
Checking AUR updates ...
No updates available.
-
システム更新がある状態だと、画面右下に通知が表示されました:
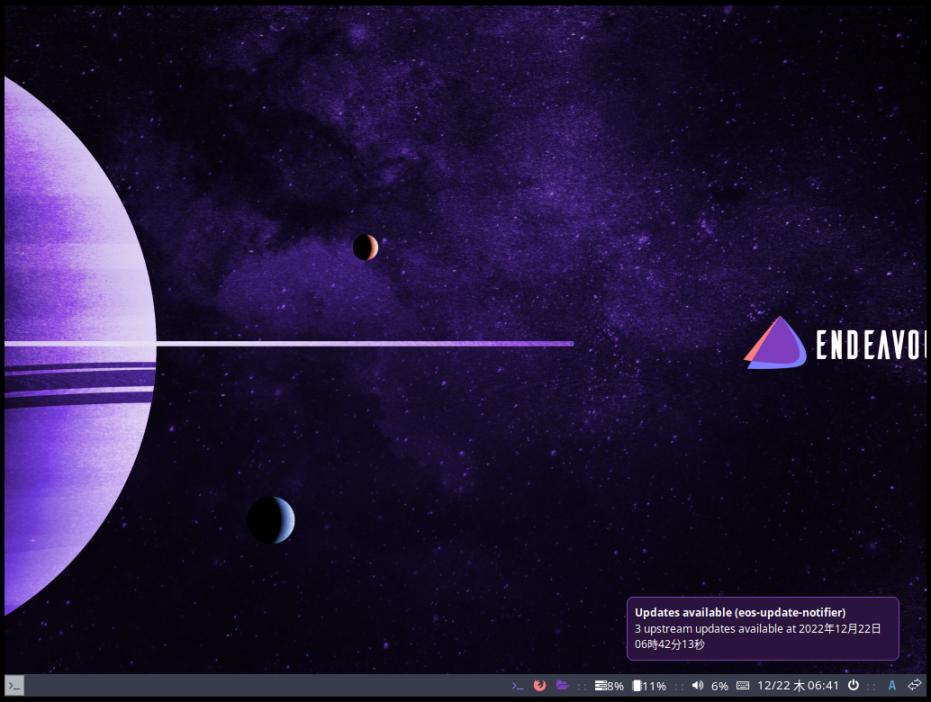
→「EndeavourOS」(i3-wm) で使われているいつもの表示です。
(2). ちなみに、Windows + D
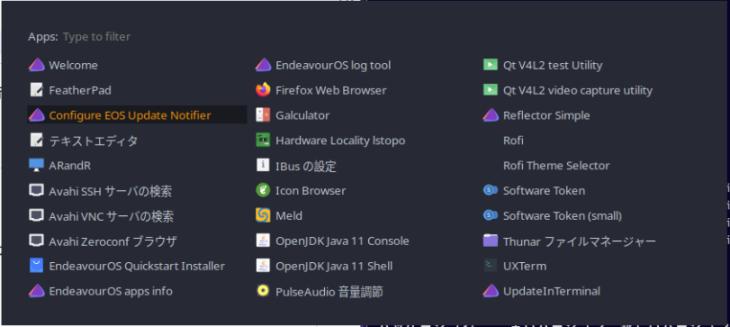
→「Configure EOS Update Notifier」
-
(3). 「Operation Test」(操作テスト)をクリック
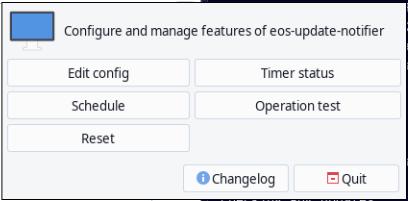
→画面右下に通知が表示されました。
-
システム更新があるかチェックして、それを通知する機能は働きました。
-
通知機能が働くのと、自動で起動されるかは別です。
-
(4). 「Timer Status」(タイマーの状態表示)をクリック
● eos-update-notifier.timer - EOS update notifier runs periodically (weekly) and soon after a reboot
     Loaded: loaded (/home/ubn/.config/systemd/user/eos-update-notifier.timer; enabled; preset: enabled)
     Active: active (waiting) since Thu 2022-12-22 00:58:19 JST; 4h 56min ago
      Until: Thu 2022-12-22 00:58:19 JST; 4h 56min ago
    Trigger: Mon 2022-12-26 00:00:00 JST; 3 days left
   Triggers: ● eos-update-notifier.service

12月 22 00:58:19 ubn-box systemd[445]: Started EOS update notifier runs periodically (weekly) and soon after a reboot.

ENTER を押してこのウィンドウを閉じます:
eos-update-notifier.timer のコメント:
EOS 更新通知機能は、定期的 (毎週) および再起動直後に実行されます
→Loaded:自動起動が有効、デフォルトは有効
-
通知機能は働きます。自動起動が有効。
-
8). サービスの設定ファイルを確認:
$ ls /etc/systemd/system/
:
dbus-org.fedoraproject.FirewallD1.service
dbus-org.freedesktop.Avahi.service
dbus-org.freedesktop.nm-dispatcher.service
dbus-org.freedesktop.timesync1.service
display-manager.service
getty.target.wants
multi-user.target.wants
network-online.target.wants
sockets.target.wants
sysinit.target.wants
timers.target.wants
$ ls -l /etc/systemd/user/
:
drwxr-xr-x 2 root root 4096 12月 20 02:12 default.target.wants
lrwxrwxrwx 1 root root   41 12月 20 02:12 pipewire-session-manager.service -> /usr/lib/systemd/user/wireplumber.service
drwxr-xr-x 2 root root 4096 12月 20 02:12 pipewire.service.wants
drwxr-xr-x 2 root root 4096 12月 20 02:12 sockets.target.wants
$ ls -l ~/.config/systemd/user/
:
-rw-r--r-- 1 ubn ubn  188 12月 20 05:35 eos-update-notifier.service
-rw-r--r-- 1 ubn ubn  188  4月 30  2022 eos-update-notifier.service.bak
-rw-r--r-- 1 ubn ubn  195 12月 20 05:35 eos-update-notifier.timer
-rw-r--r-- 1 ubn ubn  195  4月 30  2022 eos-update-notifier.timer.bak
drwxr-xr-x 2 ubn ubn 4096 12月 20 05:35 timers.target.wants
→ホームにありました。ファイルの実行属性がないけど、いいのかな?
-
(1). 2つの設定ファイルの内容を確認:
$ cat ~/.config/systemd/user/eos-update-notifier.service
[Unit]
Description=EOS update notifier service

[Service]
Type=oneshot
Environment=DISPLAY=:0
ExecStart=/usr/bin/eos-update-notifier -systemd

[Install]
WantedBy=eos-update-notifier.timer
→「Worm」と同じ内容です。
-
$ cat ~/.config/systemd/user/eos-update-notifier.timer
[Unit]
Description=EOS update notifier runs periodically (weekly) and soon after a reboot

[Timer]
OnStartupSec=300 seconds
OnCalendar=weekly
# Persistent=true

[Install]
WantedBy=timers.target
→ホームにサービスが書かれていました:
→「Worm」と同じ内容です。
-
(2). 参考: Wiki の、「systemd/user 」で確認:
「systemd/user」機能は、ホームにサービスを記述でき、ログイン時に有効にできます。
そして、管理に使われるコマンドが少し違います。(sudo は要りません)
-
9). 「systemd/user」が、どう認識しているかを確認:
$ systemctl --user status eos-update-notifier.service eos-update-notifier.timer
:
○ eos-update-notifier.service - EOS update notifier service
     Loaded: loaded (/home/ubn/.config/systemd/user/eos-update-notifier.service; disabled; preset: enabled)
     Active: inactive (dead) since Thu 2022-12-22 01:03:48 JST; 5h 13min ago
TriggeredBy: ● eos-update-notifier.timer
    Process: 7131 ExecStart=/usr/bin/eos-update-notifier -systemd (code=exited, status=0/SUCCESS)
   Main PID: 7131 (code=exited, status=0/SUCCESS)
        CPU: 6.541s

12月 22 01:03:31 ubn-box systemd[445]: Starting EOS update notifier service...
12月 22 01:03:42 ubn-box eos-update-notifier[7131]: Checking for updates ...
12月 22 01:03:46 ubn-box eos-update-notifier[7131]: Checking AUR updates ...
12月 22 01:03:48 ubn-box systemd[445]: Finished EOS update notifier service.
12月 22 01:03:48 ubn-box systemd[445]: eos-update-notifier.service: Consumed 6.541s CPU time.

● eos-update-notifier.timer - EOS update notifier runs periodically (weekly) and soon after a reboot
     Loaded: loaded (/home/ubn/.config/systemd/user/eos-update-notifier.timer; enabled; preset: enabled)
     Active: active (waiting) since Thu 2022-12-22 00:58:19 JST; 5h 18min ago
      Until: Thu 2022-12-22 00:58:19 JST; 5h 18min ago
    Trigger: Mon 2022-12-26 00:00:00 JST; 3 days left
   Triggers: ● eos-update-notifier.service

12月 22 00:58:19 ubn-box systemd[445]: Started EOS update notifier runs periodically (weekly) and soon after a reboot.
eos-update-notifier.service
→Loaded:自動起動が無効、デフォルトは有効
eos-update-notifier.timer
→Loaded:自動起動が有効、デフォルトは有効
-
10). 再起動してみると:
$ reboot
-
確認:
→いくら待っても通知されません。
-
11). プログラムの自動起動を行うように指示:
$ systemctl --user enable eos-update-notifier.service eos-update-notifier.timer
:
Created symlink /home/ubn/.config/systemd/user/eos-update-notifier.timer.wants/eos-update-notifier.service → /home/ubn/.config/systemd/user/eos-update-notifier.service.
-
12). 変更されたか確認:
$ systemctl --user status eos-update-notifier.service eos-update-notifier.timer
:
○ eos-update-notifier.service - EOS update notifier service
     Loaded: loaded (/home/ubn/.config/systemd/user/eos-update-notifier.service; enabled; preset: enabled)
     Active: inactive (dead) since Thu 2022-12-22 06:34:37 JST; 2min 33s ago
TriggeredBy: ● eos-update-notifier.timer
   Main PID: 7977 (code=exited, status=0/SUCCESS)
        CPU: 7.907s

12月 22 06:34:19 ubn-box systemd[453]: Starting EOS update notifier service...
12月 22 06:34:31 ubn-box eos-update-notifier[7977]: Checking for updates ...
12月 22 06:34:37 ubn-box systemd[453]: Finished EOS update notifier service.
12月 22 06:34:37 ubn-box systemd[453]: eos-update-notifier.service: Consumed 7.907s CPU time.

● eos-update-notifier.timer - EOS update notifier runs periodically (weekly) and soon after a reboot
     Loaded: loaded (/home/ubn/.config/systemd/user/eos-update-notifier.timer; enabled; preset: enabled)
     Active: active (waiting) since Thu 2022-12-22 06:28:19 JST; 8min ago
      Until: Thu 2022-12-22 06:28:19 JST; 8min ago
    Trigger: Mon 2022-12-26 00:00:00 JST; 3 days left
   Triggers: ● eos-update-notifier.service

12月 22 06:28:19 ubn-box systemd[453]: Started EOS update notifier runs periodically (weekly) and soon after a reboot.
eos-update-notifier.service
→Loaded:自動起動が有効、デフォルトは有効
eos-update-notifier.timer
→Loaded:自動起動が有効、デフォルトは有効
-
13). 再起動:
$ reboot
-
14). ログインにて、通知されるか確認:
→画面右下に通知がありました。
-
-
- --- - --- - --- - --- - --- - --- - --- - --- - ----- ----- ----- ----- ----- ----- -
16. ミラーの設定:
-
1). Windows + 0 →ウィンドウ内をクリックか、Enter
ゲストOS 内を選んでおかないと、次の Windows + D がホストOS のショートカットとみなされ、デスクトップ表示が消えます。もう一度押すと復活。
-
2). Windows + D →「We」で絞り込み、Enter →「Welcome」アプリを起動:
→「インストール後」タブが表示
-
3). 1番めのオレンジ色の「ミラーの更新 (Arch)」(Update Mirrors) をクリック
-
(1). 選択する国のミラーを設定する画面が表示:
→「OK」
-
(2). 下記の reflector が起動されました:
「端末」のワークスペース1 に移動して、「端末」が起動され、ミラーの検索の画面が表示されました:
reflector --verbose -c JP --protocol https --protocol http --sort rate --latest 10 --download-timeout 5
-
(3). 設定されたミラーが表示:
################################################################################
################# Arch Linux mirrorlist generated by Reflector #################
################################################################################
# With:       reflector --verbose -c JP --protocol https --protocol http --sort rate --latest 10 --download-timeout 5
# When:       2022-12-21 23:10:29 UTC
# From:       https://archlinux.org/mirrors/status/json/
# Retrieved:  2022-12-21 23:10:10 UTC
# Last Check: 2022-12-21 22:28:15 UTC

## Japan
Server = https://mirrors.cat.net/archlinux/$repo/os/$arch

## Japan
Server = http://mirrors.cat.net/archlinux/$repo/os/$arch
→曜日や時間帯でミラーが見つからなかったり、 調子が良いときは、3つのミラーが見つかります:
2022-12/21 11:05
## Japan
Server = https://mirrors.cat.net/archlinux/$repo/os/$arch

## Japan
Server = http://mirrors.cat.net/archlinux/$repo/os/$arch

## Japan
Server = http://ftp.tsukuba.wide.ad.jp/Linux/archlinux/$repo/os/$arch
→「Save to /etc/pacman.d/mirrorlist」をクリック
→パスワード入力
保存されました。
-
4). 2番めのオレンジ色の「ミラーの更新 (EndeavourOS)」(Update Mirrors) をクリック
「端末」のワークスペース1 に移動して、「端末」が起動され、ミラーの検索の画面が表示されました:
-
(1). 端末で、最速のミラーを検索する画面が表示:
==> Info: extracting /var/cache/pacman/pkg/endeavouros-mirrorlist-4.11-1-any.pkg.tar.zst ...
==> Info: ranking EndeavourOS mirrors, please wait ...
→しばらく待ちます:
==> Results of ranking EndeavourOS mirrors:

######################################################
####                                              ####
###        EndeavourOS Repository Mirrorlist       ###
####                                              ####
######################################################
#### Entry in file /etc/pacman.conf:
###     [endeavouros]
###     SigLevel = PackageRequired
###     Include = /etc/pacman.d/endeavouros-mirrorlist
######################################################
### Tip: Use the 'eos-rankmirrors' program to rank
###      these mirrors or re-order them manually.
######################################################

## Canada
#Server = https://ca.gate.endeavouros.com/endeavouros/repo/$repo/$arch

## China
#Server = https://mirrors.tuna.tsinghua.edu.cn/endeavouros/repo/$repo/$arch

## Germany
#Server = https://mirror.alpix.eu/endeavouros/repo/$repo/$arch
#Server = https://de.freedif.org/EndeavourOS/repo/$repo/$arch
#Server = https://mirror.moson.org/endeavouros/repo/$repo/$arch

## France
#Server = https://endeavour.remi.lu/repo/$repo/$arch
#Server = https://mirror.jordanrey.me/endeavouros/repo/$repo/$arch

## Singapore
#Server = https://mirror.jingk.ai/endeavouros/repo/$repo/$arch
#Server = https://mirror.freedif.org/EndeavourOS/repo/$repo/$arch

## South Korea
#Server = https://mirror.funami.tech/endeavouros/repo/$repo/$arch

## Sweden
#Server = https://ftp.acc.umu.se/mirror/endeavouros/repo/$repo/$arch
#Server = https://mirror.linux.pizza/endeavouros/repo/$repo/$arch

## Taiwan
#Server = https://mirror.archlinux.tw/EndeavourOS/repo/$repo/$arch

## Ukraine
#Server = https://fastmirror.pp.ua/endeavouros/repo/$repo/$arch

# Results of mirror ranking at (UTC) 2022年12月21日 23時14分09秒:
# The following fields are shown for each mirror:
#   mirror:          The mirror address
#   update-level:    Ordinal number of the latest update (larger is newer)
#   fetch-time:      Measures the speed of the mirror (smaller is faster)
#
# mirror                                                             update-level  fetch-time
# ~~~~~~                                                             ~~~~~~~~~~~~  ~~~~~~~~~~
# https://mirror.funami.tech/endeavouros/repo/$repo/$arch            1726          0.307443
# https://mirror.jingk.ai/endeavouros/repo/$repo/$arch               1726          0.693011
# https://mirrors.tuna.tsinghua.edu.cn/endeavouros/repo/$repo/$arch  1726          0.928214
# https://mirror.archlinux.tw/EndeavourOS/repo/$repo/$arch           1726          0.964599
# https://mirror.freedif.org/EndeavourOS/repo/$repo/$arch            1726          1.250661
# https://mirror.jordanrey.me/endeavouros/repo/$repo/$arch           1726          1.252005
# https://mirror.alpix.eu/endeavouros/repo/$repo/$arch               1726          1.508844
# https://de.freedif.org/EndeavourOS/repo/$repo/$arch                1726          1.516611
# https://ftp.acc.umu.se/mirror/endeavouros/repo/$repo/$arch         1726          1.594275
# https://mirror.moson.org/endeavouros/repo/$repo/$arch              1726          1.733175
# https://fastmirror.pp.ua/endeavouros/repo/$repo/$arch              1726          1.739566
# https://ca.gate.endeavouros.com/endeavouros/repo/$repo/$arch       1726          1.789197
# https://mirror.linux.pizza/endeavouros/repo/$repo/$arch            1726          2.222804
# https://endeavour.remi.lu/repo/$repo/$arch                         1726          2.695362

#~~~~~~~~~~~~~~~~~~~~~~~~~~~~~~~~~~~~~~~~~~~~~~~~~~~~~~~~~~~~~~~~~~~~~~~~~~~~~~~~~~~~~~~~
# EndeavourOS mirrorlist:
#~~~~~~~~~~~~~~~~~~~~~~~~~~~~~~~~~~~~~~~~~~~~~~~~~~~~~~~~~~~~~~~~~~~~~~~~~~~~~~~~~~~~~~~~
Server = https://mirror.funami.tech/endeavouros/repo/$repo/$arch
Server = https://mirror.jingk.ai/endeavouros/repo/$repo/$arch
Server = https://mirrors.tuna.tsinghua.edu.cn/endeavouros/repo/$repo/$arch
Server = https://mirror.archlinux.tw/EndeavourOS/repo/$repo/$arch
Server = https://mirror.freedif.org/EndeavourOS/repo/$repo/$arch
Server = https://mirror.jordanrey.me/endeavouros/repo/$repo/$arch
Server = https://mirror.alpix.eu/endeavouros/repo/$repo/$arch
Server = https://de.freedif.org/EndeavourOS/repo/$repo/$arch
Server = https://ftp.acc.umu.se/mirror/endeavouros/repo/$repo/$arch
Server = https://mirror.moson.org/endeavouros/repo/$repo/$arch
Server = https://fastmirror.pp.ua/endeavouros/repo/$repo/$arch
Server = https://ca.gate.endeavouros.com/endeavouros/repo/$repo/$arch
Server = https://mirror.linux.pizza/endeavouros/repo/$repo/$arch
Server = https://endeavour.remi.lu/repo/$repo/$arch
#~~~~~~~~~~~~~~~~~~~~~~~~~~~~~~~~~~~~~~~~~~~~~~~~~~~~~~~~~~~~~~~~~~~~~~~~~~~~~~~~~~~~~~~~

==> Moving old EndeavourOS mirrorlist to /etc/pacman.d/endeavouros-mirrorlist.2022.12.22-08.14.09.
==> Writing new ranked EndeavourOS mirrorlist to /etc/pacman.d/endeavouros-mirrorlist.
Root パスワード:
→パスワード入力
==> New mirrorlist saved.

ENTER を押してこのウィンドウを閉じます:
-
(2). 以前のミラーリストは保存されて、新しく置き換えられました。
→Enter で端末画面が閉じました。
-
5). 3番めのオレンジ色の「システムの更新」(Update System) をクリック
「端末」のワークスペース1 に移動して、「端末」が起動され、ミラーの検索の画面が表示されました:
Arch & EndeavourOS 更新の確認:
:: 検索中 Arch & EndeavourOS にて更新...
libiec61883 1.2.0-6 -> 1.2.0-7
libsoxr 0.1.3-2 -> 0.1.3-3
pciutils 3.9.0-1 -> 3.9.0-2
Root パスワード:
→パスワード入力
:: パッケージデータベースの同期中...
 endeavouros は最新です
 core は最新です
 extra は最新です
 community                                                                                       7.2 MiB  4.03 MiB/s 00:02 [--------------------------------------------------------------------------] 100%
 multilib は最新です
依存関係を解決しています...
衝突するパッケージがないか確認しています...

パッケージ (3)     古いバージョン  新しいバージョン  最終的な変化  ダウンロード容量

extra/libiec61883  1.2.0-6         1.2.0-7               0.00 MiB          0.03 MiB
extra/libsoxr      0.1.3-2         0.1.3-3              -0.12 MiB          0.08 MiB
core/pciutils      3.9.0-1         3.9.0-2               0.00 MiB          0.11 MiB

合計ダウンロード容量:         0.22 MiB
合計インストール容量:         0.62 MiB
最終的なアップグレード容量:  -0.12 MiB

:: インストールを行いますか? [Y/n]
→Enter
:
:: トランザクション後のフックを実行...
(1/2) Arming ConditionNeedsUpdate...
(2/2) Checking which packages need to be rebuilt

AUR 更新の確認:
:: AUR の更新を確認しています...
:: 開発の更新を確認しています...
 何も行うことがありません

ENTER を押してこのウィンドウを閉じます:
→Enter で端末画面が閉じました。
-
6). 右下の「今後表示しない」(Don't show me anymore) をクリック:
再度開くときの設定についての画面が表示:
eos-welcome --enable
eos-welcome --once ←(一時的に使いたい時)
→「覚えました」(I remenber) をクリック
-
-
- --- - --- - --- - --- - --- - --- - --- - --- - ----- ----- ----- ----- ----- ----- --
17. 「Welcome」アプリに「個人用コマンド」タブを表示させて活用:
-
通常は「Welcome」アプリに「個人用コマンド」(Personal Commands) タブは表示されません。 そのタブを、メニュー代わりに使えるようにしました。
-
「個人用コマンド」(Personal Commands) タブの詳細については「項番 21 」を参照。
-
1). 「ショートカットキー」の表示に使うファイルを作成:
$ mkdir -p ~/ダウンロード/my-app
$ xed ~/ダウンロード/my-app/i3wm-shortcut-key.md
↓ ファイルの内容をすべて貼り付け:
### 「i3-wm」で使える、ショートカットキー:

#### 見やすいように大文字を使っていますが、実際は「小文字」を使ってください:

- Windows + 1 〜 9, 0  →  「ワークスペース」1 〜 10 を選択(フォーカス: 表示を切替)

 ワークスペース 1: 端末用
 ワークスペース 2: ブラウザ用
 ワークスペース 3: ファイルマネージャ用
 ワークスペース 5: Welcome アプリ用
 :

- Windows + Enter  → 「端末」を起動 (xfce4-terminal)
- Windows + W      → 「ブラウザ」を起動 (firefox)
- Windows + N      → 「ファイルマネージャ」を起動 (thunar)
- Windows + X      → 「Welcome」を起動 (eos-welcome --once)
- Windows + Z      → 「解像度」と「壁紙」のセット
- Windows + Q      →  選択しているアプリのウィンドウを終了

- Windows + D      →  アプリの選択一覧を表示(アプリを絞込み起動)

- Windows + Shift + 1 〜 9, 0  →  選択したアプリのウィンドウを「ワークスペース」1 〜 10 に移動

 →移動したら、「Windows + 1 〜 9, 0」としないとわかりません。

-

- Windows + H      → 選択したアプリの、次に起動するアプリのウィンドウを「横」方向に分割
- Windows + V      → 選択したアプリの、次に起動するアプリのウィンドウを「縦」方向に分割

- Windows +「↑」   → 選択したアプリの、「上」隣のアプリのウィンドウを選択(フォーカス)
- Windows +「↓」   → 選択したアプリの、「下」隣のアプリのウィンドウを選択(フォーカス)
- Windows +「←」   → 選択したアプリの、「左」隣のアプリのウィンドウを選択(フォーカス)
- Windows +「→」   → 選択したアプリの、「右」隣のアプリのウィンドウを選択(フォーカス)

- Windows + Shift +「↑」 → 選択したアプリを、「上」隣のアプリのウィンドウと入替え(移動)
- Windows + Shift +「↓」 → 選択したアプリを、「下」隣のアプリのウィンドウと入替え(移動)
- Windows + Shift +「←」 → 選択したアプリを、「左」隣のアプリのウィンドウと入替え(移動)
- Windows + Shift +「→」 → 選択したアプリを、「右」隣のアプリのウィンドウと入替え(移動)

-

---
#### フローティングのアプリのウィンドウに対する操作:

例: フローティングのアプリ: 「Welcome」

- Windows + マウスでドラッグ  → フローティング ウィンドウを目的の位置に移動

 →タイトルバーを表示している場合は、タイトルバーをマウスでドラッグ

-

---
#### 「リサイズ」モードでの操作:

フローティング ウィンドウでは 4辺の変更ができます。
タイリング ウィンドウでは 最大化していない辺だけ変更ができます。

-

- Windows + R  → 「リサイズ」モード:

選択したフローティングのアプリのウィンドウのサイズを変更します:

-

「リサイズ」モードでの操作:

- 「↑」または L             → 選択したアプリのウィンドウの、「縦」を縮小
- 「↓」または K             → 選択したアプリのウィンドウの、「縦」を拡大
- 「←」または J             → 選択したアプリのウィンドウの、「幅」を縮小
- 「→」または ; セミコロン  → 選択したアプリのウィンドウの、「幅」を拡大

または、マウスでウィンドウの 4隅をドラッグ。有効枠が細いので、右上隅がやりやすいかも。

- Esc  → 「リサイズ」モードを解除(パネル左下の赤色の「resize」表示解除)
-
2). 「Welcome」アプリで壁紙をダウンロードしておきます:
-
(1). Windows + 0 で「ワークスペース10」を選択
「Welcome」アプリが起動されたままのはずです。
-
(2). 「Welcome」アプリが起動されていない場合は、
Windows + D →「We」で絞り込み、Enter →「Welcome」アプリを起動:
-
(3). 「インストール後」タブを選択
-
(4). 「EndeavourOS の壁紙をもっとダウンロード」をクリック
Cloning into 'Community-wallpapers'...
remote: Enumerating objects: 258, done.
remote: Counting objects: 100% (62/62), done.
remote: Compressing objects: 100% (54/54), done.
remote: Total 258 (delta 15), reused 44 (delta 6), pack-reused 196
Receiving objects: 100% (258/258), 420.55 MiB | 10.05 MiB/s, done.
Resolving deltas: 100% (60/60), done.
Updating files: 100% (131/131), done.

Running the following commands:
mkdir -p /usr/share/endeavouros/backgrounds
cp -r '/home/ubn/.cache/eos-download-wallpapers.VeBje/Community-wallpapers/eos_wallpapers_classic' /usr/share/endeavouros/backgrounds/
cp -r '/home/ubn/.cache/eos-download-wallpapers.VeBje/Community-wallpapers/eos_wallpapers_community' /usr/share/endeavouros/backgrounds/

Root パスワード:
→パスワード入力
ENTER を押してこのウィンドウを閉じます:
→ 2つのフォルダが生成され、選択画面が表示されました。
フォルダをダブルクリック→ファイル名をクリックして選択:
-
(5). 「Welcome」アプリを閉じます:
-
3). 「welcome-own-commands.conf」ファイルを作成:
-
(1). ファイルの作成:
$ xed ~/.config/welcome-own-cmds.conf
↓ ファイルの内容をすべて貼り付け:
#!/bin/bash

# Contents of file $HOME/.config/welcome-own-cmds.conf
### Own commands:

local welcome_own_commands=(
    # Legend: --field=" name!icon!description":fbtn "command"

    --field=" (1). paru でシステム更新!system-software-install!「RunInTerminal」定義で端末を使います":fbtn "RunInTerminal 'paru'"

    --field=" (2). 壁紙を反映: デフォルトの宇宙!org.gnome.gThumb!デフォルトの壁紙に変更します":fbtn  "feh --bg-scale '/usr/share/endeavouros/backgrounds/endeavouros-wallpaper.png'"

    --field=" (3). 壁紙を反映: 赤い宇宙!org.gnome.gThumb!別の壁紙に変更します":fbtn  "feh --bg-scale '/usr/share/endeavouros/backgrounds/eos_wallpapers_classic/endeavouros-arm-wallpaper-artemis.png'"

    --field=" (4). 壁紙を反映: 直前にセットした壁紙!org.gnome.gThumb!壁紙セット時に作成されたスクリプトを使います":fbtn  "~/.fehbg"

    --field=" (5). 解像度を変更: 1024x768!qvidcap!解像度をセット後に、直前の壁紙を反映":fbtn  "xrandr --output Virtual-1 --mode 1024x768 && ~/.fehbg"

    --field=" (6). 解像度を変更: 1400x1050!qvidcap!解像度をセット後に、直前の壁紙を反映":fbtn  "xrandr --output Virtual-1 --mode 1400x1050 && ~/.fehbg"

    --field=" (7). 解像度を変更: 1680x1050!qvidcap!解像度をセット後に、直前の壁紙を反映":fbtn  "xrandr --output Virtual-1 --mode 1680x1050 && ~/.fehbg"

    --field=" (8). 解像度を変更: 1920x1080!qvidcap!解像度をセット後に、直前の壁紙を反映":fbtn  "xrandr --output Virtual-1 --mode 1920x1080 && ~/.fehbg"

    --field=" (9). 「i3-wm」で使える、ショートカットキーを表示!system-software-install!端末で、ショートカットキーを表示":fbtn "RunInTerminal 'cat ~/ダウンロード/my-app/i3wm-shortcut-key.md'"

    --field=" (10). featherpad で memo.md を編集!/usr/share/icons/hicolor/scalable/apps/featherpad.svg!featherpad でファイルを編集します":fbtn  "featherpad ~/ドキュメント/memo.md"

    --field=" (11). xed で memo.md を編集!/usr/share/icons/Qogir/scalable/apps/accessories-text-editor.svg!xed  でファイルを編集します":fbtn  "xed ~/ドキュメント/memo.md"

    --field=" (12). 音楽プレーヤーの「Audacious」を起動!/usr/share/icons/hicolor/scalable/apps/audacious.svg!音楽プレーヤーを起動します":fbtn  "audacious &"

    --field=" (13). ファイアウォールの「gufw」の設定!/usr/share/icons/hicolor/scalable/apps/gufw.svg!ファイアウォールを設定します":fbtn  "RunInTerminal 'sudo gufw'"

    --field=" (14). ストレージ管理: 「Disks」を起動!/usr/share/icons/hicolor/scalable/apps/org.gnome.DiskUtility.svg!「Disks」を起動します":fbtn  "gnome-disks"

    --field=" (15). ストレージ管理: 「GParted」を起動!/usr/share/icons/hicolor/scalable/apps/gparted.svg!「GParted」を起動します":fbtn  "RunInTerminal 'sudo /usr/sbin/gparted'"

    --field=" (16). ゲームの一覧!/usr/share/icons/hicolor/scalable/apps/kajongg.svgz!「ゲームの一覧」から選んで起動できます":fbtn  "rofi -modi drun -show drun -config ~/.config/rofi/rofidmenu.rasi -drun-categories Game"

)

local show_predefined_buttons_at_own_commands=no  # Show two buttons=no (default:yes)

#

### Personal Commands drag and drop:
-
(2). アイコンの指定については、下記のアイコンがパスなしで使えます:
$ ls /usr/share/icons/hicolor/scalable/apps/
:
featherpad.svg                       nm-vpn-connecting02-symbolic.svg
feh.svg                              nm-vpn-connecting03-symbolic.svg
firewall-applet-error.svg            nm-vpn-connecting04-symbolic.svg
firewall-applet-panic.svg            nm-vpn-connecting05-symbolic.svg
firewall-applet.svg                  nm-vpn-connecting06-symbolic.svg
firewall-config.svg                  nm-vpn-connecting07-symbolic.svg
galculator.svg                       nm-vpn-connecting08-symbolic.svg
ibus-engine.svg                      nm-vpn-connecting09-symbolic.svg
ibus-keyboard.svg                    nm-vpn-connecting10-symbolic.svg
ibus-setup.svg                       nm-vpn-connecting11-symbolic.svg
ibus.svg                             nm-vpn-connecting12-symbolic.svg
mpv.svg                              nm-vpn-connecting13-symbolic.svg
nm-device-wired-secure-symbolic.svg  nm-vpn-connecting14-symbolic.svg
nm-device-wired-symbolic.svg         nm-vpn-standalone-lock-symbolic.svg
nm-device-wired.svg                  org.gnome.FileRoller.Devel.svg
nm-device-wwan-symbolic.svg          org.gnome.FileRoller.svg
nm-no-connection-symbolic.svg        org.gnome.Meld.svg
nm-no-connection.svg                 org.gnome.gThumb.svg
nm-signal-00-secure-symbolic.svg     org.xfce.about.svg
nm-signal-00-symbolic.svg            org.xfce.terminal-settings.svg
nm-signal-100-secure-symbolic.svg    org.xfce.terminal.svg
nm-signal-100-symbolic.svg           org.xfce.thunar.svg
nm-signal-25-secure-symbolic.svg     org.xfce.volman.svg
nm-signal-25-symbolic.svg            qv4l2.svg
nm-signal-50-secure-symbolic.svg     qvidcap.svg
nm-signal-50-symbolic.svg            xapp-favorites-app-symbolic.svg
nm-signal-75-secure-symbolic.svg     xapp-favorites-app.svg
nm-signal-75-symbolic.svg            xapp-mate-status-applet.svg
nm-vpn-active-lock-symbolic.svg      xfce4-logo.svg
nm-vpn-connecting01-symbolic.svg
→ファイルマネージャで上記のパスを確認すれば、アイコンが確認できます:
-
アプリ専用のアイコンを持つアプリは、絶対アドレスで指定しておくと確実です。
-
4). 「Welcome」アプリで最初に開くタブに変更:
-
(1). 「Welcome」アプリを起動:
→「インストール後」タブが表示
-
(2). 右下の「Welcom で最初に開くタブを選択」をクリック
→タブを選択するダイアログ画面が表示
→順番で指定するので、「6」に設定
→「OK」
-
(3). 「Welcome」アプリが閉じて、開きました:
→「個人用コマンド」タブが表示されました:
-
-
- --- - --- - --- - --- - --- - --- - --- - --- - ----- ----- ----- ----- ----- ----- ---
18. アプリのインストール:
-
個人的によく使っているアプリを、インストールしました。 インストールは任意です。
-
-
- --- - --- - --- - --- - --- - --- - --- - --- - ----- ----- ----- ----- ----- ----- ----
18-1. ESR 版の「Firefox」をインストール
-
「Firefox」の通常版がプリインストールされています。
ESR 版にすることで、もっと起動を速くできます。更新回数も減ります。
-
ブックマークの登録のやり直しになるので、事前にブックマークを控えておくと良いです。
-
1). プリインストールされている「Firefox」を確認:
$ paru -Ss firefox | grep インストール済み
:
extra/firefox 107.0.1-1 [0B 237.42MiB] [インストール済み]
extra/firefox-i18n-ja 107.0.1-1 [0B 589.64KiB] [インストール済み]
-
2). ESR 版の「Firefox」をインストール:
-
(1). 「EndeavourOS」にて、ブラウザを起動:
-
(2). 「こちらの投稿」 のリンクを表示:
-
(3). 表示された投稿の「 項番 1). 〜 7). 」の手順を実行:
2022-12-15 現在:
ダウンロードされるファイル名は変わっているので注意:
~/ダウンロード/firefox-102.6.0esr.tar.bz2
-
(4). 再起動して ESR 版を認識させます:
$ reboot
-
3). 「Firefox」を起動:
Windows + W
-
→起動が速くなりました
-
4). 「パネル」のランチャーアイコンでも起動できることを確認:
パネルのアイコンをクリック →ブラウザが起動
→ヘルプ で、「ESR」の正式名称の「Extended Support Release」が含まれていることを確認:
-
5). 参考: プリインストールされていた「Firefox」を削除する場合:
ESR 版の「Firefox」を使うなら、既存の「Firefox」は削除できます。 そのままだと、更新の対象なので、更新のムダです。
-
(1). インストールの確認:
$ firefox --version
Mozilla Firefox 102.6.0esr
$ paru -Ss firefox | grep 済
:
extra/firefox 107.0.1-1 [0B 237.42MiB] [インストール済み]
-
(2). 削除:
$ paru -R firefox
:
firefox         107.0.1-1        -237.42 MiB
:: 以上のパッケージを削除しますか? [Y/n]
-
(3). 削除されたか確認:
$ paru -Ss firefox | grep 済
$
$ which firefox
/usr/local/bin/firefox
-
-
- --- - --- - --- - --- - --- - --- - --- - --- - ----- ----- ----- ----- ----- ----- -----
18-2. ファイアウォールのインストール:
-
GUI の「Welcome」を使ってもインストールできます。(カテゴリ: Personal Security)
「firewalld」がプリインストール済みです。
-
「gufw」も一覧にあるので、インストールする場合は、「firewalld」の削除が必要です。
-
1). ファイアウォールがインストールされているかの確認:
$ pacman -Ss firewall
:
community/firewalld 1.2.2-1 [インストール済み]
    Firewall daemon with D-Bus interface

community/gufw 22.04-1
    Uncomplicated way to manage your Linux firewall

community/ufw 0.36.1-1
    Uncomplicated and easy to use CLI tool for managing a netfilter firewall
-
$ paru -Ss firewall | grep 済
:
community/firewalld 1.2.2-1 [インストール済み]
→ファイアウォール「firewalld」がインストール済みでした
-
2). 「firewalld」の設定は難しいので、設定の楽な「gufw」に変更しました。
-
3). 「firewalld」の削除:
-
$ paru -R firewalld
:
firewalld       1.2.2-1           -18.87 MiB

:: 以上のパッケージを削除しますか? [Y/n]
→Enter
-
4). 「gufw」のインストール:
$ paru -S gufw
:
パッケージ (2)  新しいバージョン  最終的な変化
community/ufw   0.36.1-1              0.78 MiB          0.18 MiB
community/gufw  22.04-1               3.23 MiB          0.97 MiB
-
5). 確認:
$ paru -Ss ufw | grep 済
:
community/gufw 22.04-1 [0B 3.23MiB] [インストール済み]
community/ufw 0.36.1-1 [0B 794.68KiB] [インストール済み]
-
6). 起動:
Windows + D →「アプリ一覧」表示 →「fire」と入力して絞り込み
→「ファイアウォール設定ツール」を選んで、Enter
→正常に起動しました。
-
7). ファイアウォールの設定:
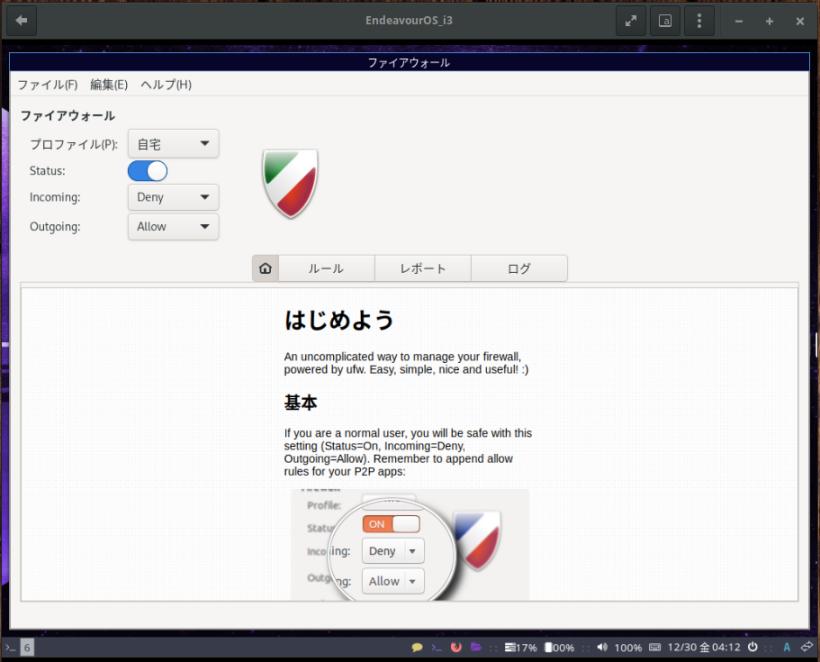
「Status:」ボタンをクリックして、オン
→カラフルな盾になったら OK
-
Windows + Q で終了
-
全画面で、フォーマットがくずれて見づらいと感じたら、
Windows + Enter で、ダミーの「端末」を起動 →「ワークスペース1」が表示:
Windows + Shift + 6 で 、ダミーの「端末」を「ワークスペース6」に移動:
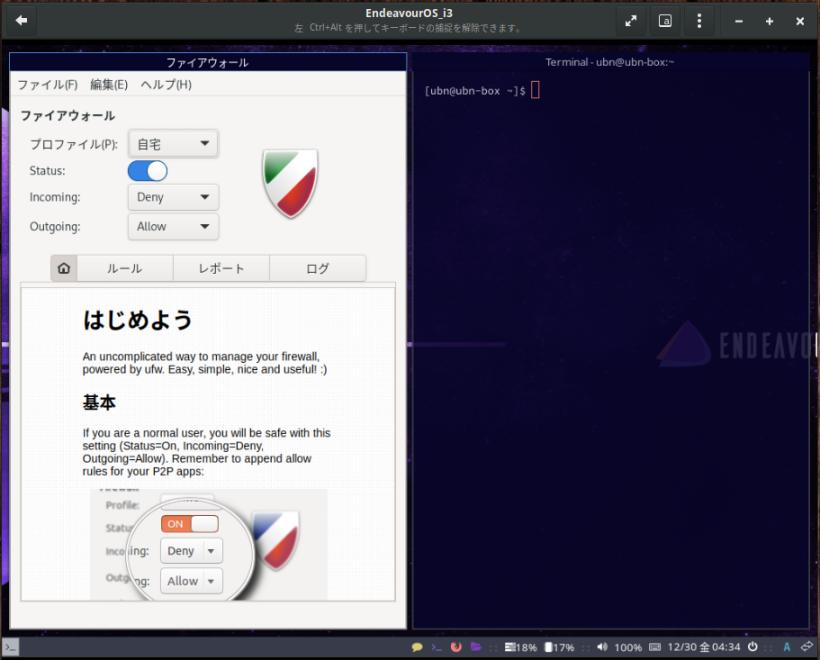
ウィンドウの幅が半分に制限されて、見やすいと思います:
-
左右のウィンドウを入替えたいときは:
Windows + Shift + 「←」もしくは、「→」
-
端末から起動する場合:
$ sudo gufw
→「ファイアウォール」画面
-
-
- --- - --- - --- - --- - --- - --- - --- - --- - ----- ----- ----- ----- ----- ----- ----- -
18-3. 「disks」のインストール:
-
- ストレージの管理、特にUSB メモリの管理に便利です。
-
1). インストール:
$ paru -S gnome-disk-utility
:
パッケージ (3)            新しいバージョン  最終的な変化  ダウンロード容量
core/cracklib             2.9.8-1               0.89 MiB          0.26 MiB
extra/libpwquality        1.4.5-1               0.41 MiB          0.09 MiB
extra/gnome-disk-utility  43.0-1                6.36 MiB          1.03 MiB
-
2). 起動:
Windows + D →「アプリ一覧」表示 →「disk」と入力して絞り込み
→「ディスク」表示で Enter
-
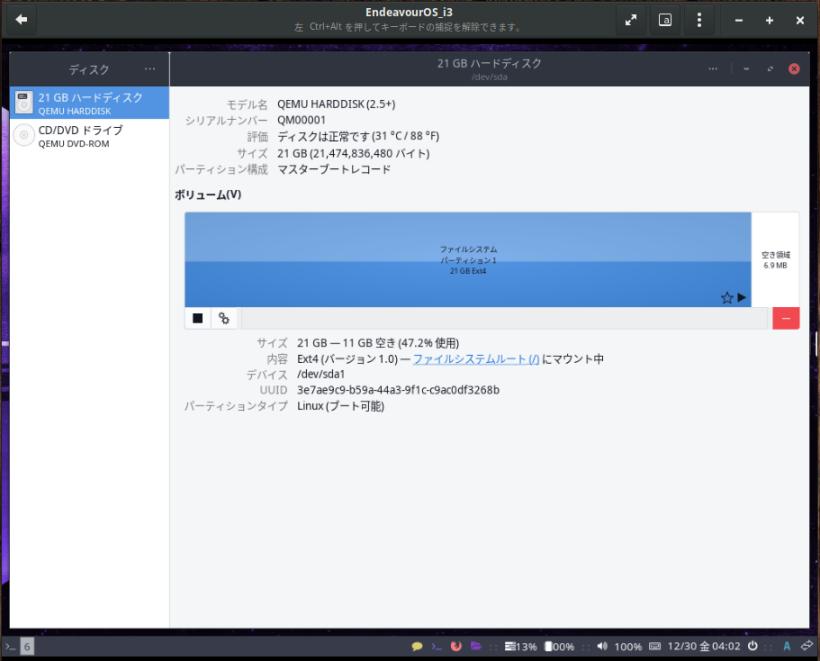
→正常に起動しました。
-
Windows + Q で終了
-
-
- --- - --- - --- - --- - --- - --- - --- - --- - ----- ----- ----- ----- ----- ----- ----- --
18-4. 「gparted」のインストール:
-
GUI の「Welcome」を使ってもインストールできます。(カテゴリ: Misc System Tools)
-
- ストレージのパーティションの管理に便利です。
-
1). インストール:
$ paru -S gparted
:
パッケージ (1)  新しいバージョン  最終的な変化  ダウンロード容量
extra/gparted   1.4.0-1               7.18 MiB          1.68 MiB
-
2). 起動:
Windows + D →「アプリ一覧」表示 →「gp」と入力して絞り込み
→「GParted」表示で Enter
→パスワード入力
-
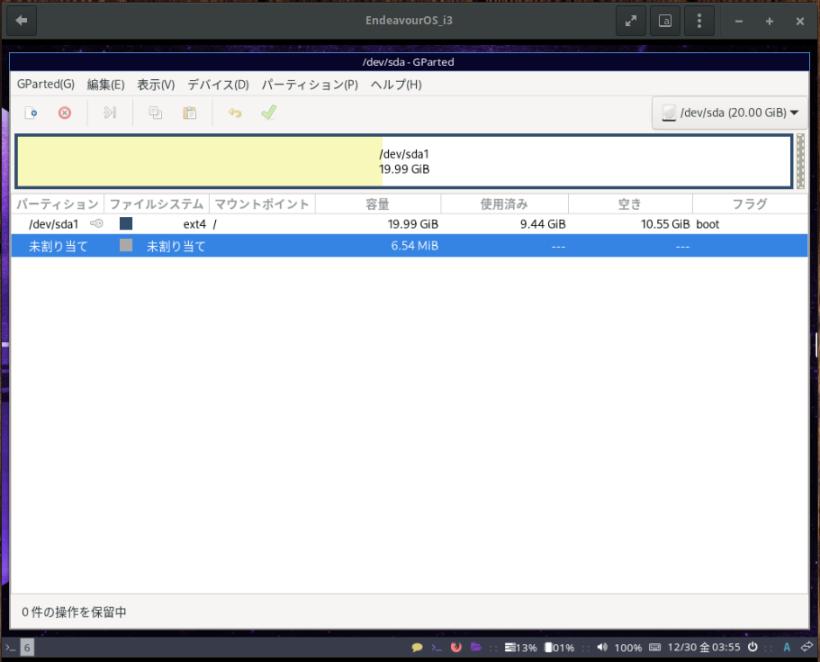
→正常に起動しました。
-
Windows + Q で終了
-
端末から起動する場合:
$ sudo gparted
→実行されました。
-
-
- --- - --- - --- - --- - --- - --- - --- - --- - ----- ----- ----- ----- ----- ----- ----- ---
18-5. 「audacious」のインストール:
-
GUI の「Welcome」を使ってもインストールできます。(カテゴリ: Audio Players)
-
音楽プレーヤー
-
1). インストール:
$ paru -S audacious
:
パッケージ (17) audacious-plugins-4.2-3  freeglut-3.4.0-1
                glu-9.0.2-3  jasper-4.0.0-1
                libcddb-1.3.2-7  libcue-2.2.1-2
                libftdi-1.5-4  libmms-0.6.4-3
                libmng-2.0.3-3  libsidplayfp-2.4.1-1
                libusb-compat-0.1.8-1  lirc-1:0.10.2-2
                qt5-imageformats-5.15.7+kde+r6-2
                qt5-svg-5.15.7+kde+r9-1
                qt5-x11extras-5.15.7-1  wavpack-5.6.0-1
                audacious-4.2-3
-
2). バージョンの確認:
$ audacious --version
Audacious 4.2 (Arch Linux)
-
3). 起動:
Windows + D →「アプリ一覧」表示 →「aud」と入力して絞り込み
→「Audacious」表示で Enter
→正常に起動しました。
-
音楽ファイルがないので、ホストOS にて作業:
-
4). 「音楽フォルダ」は、フォルダごと圧縮:
-
(1). 聞きたい音楽ファイルを、ひとつのフォルダにまとめておきます
$ cd ~/ダウンロード/test/
$ tree Superfly_BEST
:
Superfly_BEST
├── 1-01 Bi-Li-Li Emotion.mp3
├── AlbumArtSmall.jpg
└── Folder.jpg

0 directories, 3 files
-
(2). 「.tar.gz」に圧縮:
$ cd ~/ダウンロード/test/
$ tar czvf Superfly_BEST.tar.gz Superfly_BEST
-
(3). 圧縮した結果:
$ ls -1 ~/ダウンロード/test/
:
Superfly_BEST
Superfly_BEST.tar.gz
-
5). ホストOS でファイルマネージャを開きます:
-
6). 「Superfly_BEST.tar.gz」ファイルを、ゲストOS のデスクトップにドラッグ&コピー:
-
7). Windows + N にて、ファイルマネージャを開きます:
「~/ダウンロード/」にある「Superfly_BEST.tar.gz」を右クリック →「ここに展開」
Windows + Enter →「端末」を起動:
$ mv ~/ダウンロード/Superfly_BEST ~/音楽/

$ cd ~/音楽/
$ ls
Superfly_BEST
-
8). 確認:
$ ls -1 Superfly_BEST
:
'1-01 Bi-Li-Li Emotion.mp3'
AlbumArtSmall.jpg
Folder.jpg
-
9). 「tree」のインストール:
$ paru -S tree
:
パッケージ (1) tree-2.1.0-1
-
10). 確認:
$ tree
.
└── Superfly_BEST
    ├── 1-01 Bi-Li-Li Emotion.mp3
    ├── AlbumArtSmall.jpg
    └── Folder.jpg

2 directories, 3 files
-
11).「Audacious」の画面に移動。「音楽」フォルダを開きます:
-
ファイル →「フォルダを開く」→「音楽」→「開く」
→音楽ファイルが再生されました。
-
12). フローティングに指定した方が使いやすいので、フローティングのアプリに設定:
-
(1). 設定:
$ xed ~/.config/i3/config
-
(2). 「floating」で検索:
ヒット、438 行目:
##################
# floating rules #
##################

# set floating (nontiling) for apps needing it
for_window [class="Yad" instance="yad"] floating enable
for_window [class="Galculator" instance="galculator"] floating enable
for_window [class="Blueberry.py" instance="blueberry.py"] floating enable

# set floating (nontiling) for special apps
for_window [class="Xsane" instance="xsane"] floating enable
for_window [class="Pavucontrol" instance="pavucontrol"] floating enable
for_window [class="qt5ct" instance="qt5ct"] floating enable
for_window [class="Blueberry.py" instance="blueberry.py"] floating enable
for_window [class="Bluetooth-sendto" instance="bluetooth-sendto"] floating enable
for_window [class="Pamac-manager"] floating enable
for_window [window_role="About"] floating enable
-
(3). 項目の後ろの、455 行目に追記:
for_window [class="Audacious"] floating enable
-
13). 再起動:
$ reboot
-
14). ウィンドウのサイズを調整:
フローティングの設定にしただけでは、見た目は最大化されたままで変わりません。
-
(1). Windows + R で「リサイズ」モードにしました
-
(2). 「←」と「↑」でウィンドウサイズを小さくしました:
-
(3). Esc で「リサイズ」モードを解除:
-
15). Windows + Q で終了
-
16). 「Audacious」起動
Windows + D →「アプリ一覧」表示 →「aud」と入力して絞り込み
→「Audacious」表示で Enter
-
リサイズしたウィンドウの大きさで開きました:
→サイズは保持されるようです。
-
-
- --- - --- - --- - --- - --- - --- - --- - --- - ----- ----- ----- ----- ----- ----- ----- ----
18-6. 「kolourpaint」のインストール:
-
GUI の「Welcome」を使ってもインストールできます。(カテゴリ: Image Processing & Editing)
-
画像加工ソフト
-
1). インストール:
$ paru -S kolourpaint
:
パッケージ (45) cdparanoia-10.2-8  graphene-1.10.8-1
                gst-plugins-base-1.20.5-1
                karchive-5.101.0-1  kauth-5.101.0-1
                kbookmarks-5.101.0-1  kcodecs-5.101.0-1
                kcompletion-5.101.0-1  kconfig-5.101.0-1
                kconfigwidgets-5.101.0-1
                kcoreaddons-5.101.0-1  kcrash-5.101.0-1
                kdbusaddons-5.101.0-1  kded-5.101.0-1
                kglobalaccel-5.101.0-1
                kguiaddons-5.101.0-1  ki18n-5.101.0-1
                kiconthemes-5.101.0-1  kio-5.101.0-1
                kitemviews-5.101.0-1
                kjobwidgets-5.101.0-1
                knotifications-5.101.0-1
                ksanecore-22.12.0-1  kservice-5.101.0-1
                ktextwidgets-5.101.0-1  kwallet-5.101.0-1
                kwidgetsaddons-5.101.0-1
                kwindowsystem-5.101.0-1
                kxmlgui-5.101.0-1
                libdbusmenu-qt5-0.9.3+16.04.20160218-6
                libieee1284-0.2.11-14  libksane-22.12.0-1
                libvisual-0.4.0-8  media-player-info-24-2
                net-snmp-5.9.1-5  polkit-qt5-0.114.0-1
                qca-qt5-2.3.5-2
                qt5-declarative-5.15.7+kde+r25-1
                qt5-multimedia-5.15.7+kde+r1-1
                qt5-speech-5.15.7+kde+r1-1
                qt5-wayland-5.15.7+kde+r58-1
                sane-1.1.1-1  solid-5.101.0-1
                sonnet-5.101.0-1  kolourpaint-22.12.0-1
→依存のパッケージが多いのが難点。
-
2). バージョンの確認:
$ kolourpaint --version
kolourpaint 22.12.0
-
3). 起動:
Windows + D →「アプリ一覧」表示 →「ko」と入力して絞り込み
→「KolourPaint」表示で Enter
-
もしくは、Windows + N →ファイルマネージャの「ワークスペース3」を表示:
画像ファイルを選んで右クリック→「アプリケーションで開く」→「KolourPaint」
-
「KolourPaint」のウィンドウを選んで、Windows + shift + 6 で「ワークスペース6」に移動:
→正常に開きました。使う時は、右クリックで画像を開く方が多いです。
-
4). Windows + Q で終了
-
-
- --- - --- - --- - --- - --- - --- - --- - --- - ----- ----- ----- ----- ----- ----- ----- -----
18-7. テキストエディタ「Featherpad」のインストール:
-
GUI の「Welcome」を使ってもインストールできます。(カテゴリ: Text Editors)
-
featherpad は、Markdown のハイライトが見やすいです。 背景を黒(ダーク系)に設定すると空白(半角スペース)やTab が見やすいです。
-
1). インストール:
$ paru -S featherpad
:
パッケージ (1) featherpad-1.3.4-1
→今回は言語パッケージが分かれていません。
-
2). バージョンの確認:
$ featherpad --version
FeatherPad 1.3.4
-
3). 起動:
端末にて、
$ featherpad
もしくは、
Windows + D →「アプリ一覧」表示 →「f」と入力して絞り込み
→「FeatherPad」表示で Enter
-
起動された画面:
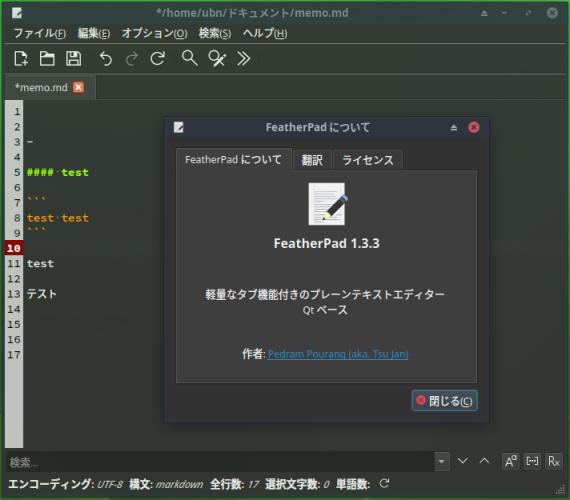
→日本語化されています
-
4). 設定:
オプション →設定
設定するときは、項目にマウスを置くとコメントが表示されます。
-
(1). 挿入する日付の書式:
「テキスト」タブ:
yyyy-MM-dd hh:mm
-
編集 →「日付と時刻を貼り付け」
2022-12-10 22:42
-
(2). 開いていたファイルを起動時に開く設定にしました:
オプション →設定 →「ファイル」タブ
「最後のウィンドウのファイルを開いて起動する」にチェック
-
5). Windows + Q で終了
-
-
- --- - --- - --- - --- - --- - --- - --- - --- - ----- ----- ----- ----- ----- ----- ----- ----- -
18-8. PDF ビュワー「qpdfview」のインストール:
-
GUI の「Welcome」の一覧にありました。(カテゴリ: PDF Viewers)
ただし、AUR リポジトリに登録されているからか、インストールできませんでした。
-
参考: 「自炊本」について:
「自炊本」は、自力で本を裁断(勇気が必要)して、リーダーで読み込み、PDF 等に落としたファイルのことです。
-
「qpdfview」はすべての製本の形式(右とじ、左とじ、表紙有り、表紙なし)に対応しています。
すべての製本の形式が使えるアプリは少ないです。日本語化にこだわるのは、閲覧の形式を指定しやすくするためです。
-
1). インストールできるかの確認:
$ paru -Ss qpdfview
:
aur/qpdfview 0.4.18-2 [+26 ~3.33]
    A tabbed PDF viewer using the poppler library.
aur/qpdfview-bzr 2070-1 [+8 ~0.12]
    A tabbed PDF viewer using the poppler library.
    (development version)
→AUR にしかありません。
-
ちなみに、「-bzr」とあるのは「-git」みたいなものです。
qpdfview は Launchpad でメンテされ、 Launchpad は「Bazaar」を使ってバージョン管理しています。
-
2). インストール:
$ paru -S qpdfview
:
リポジトリ (2) libsynctex-2022.62885-3
    poppler-qt5-22.12.0-1
リポジトリ ビルド (9) qt5-tools-5.15.7+kde+r1-2
    jbig2dec-0.19-1  libpaper-1.1.28-2  ijs-0.35-5
    libidn-1.41-1  poppler-data-0.4.11-3
    ghostscript-10.0.0-2  libspectre-0.2.11-1
    djvulibre-3.5.28-3
Aur (1) qpdfview-0.4.18-2

:: レビューを続行しますか? [Y/n]:
→Enter
ビューの終了は「q」
:: インストールを行いますか? [Y/n]
:
:: 鍵をインポートする必要があります:

:: import? [Y/n]:
→Enter
gpg:             インポート: 1
[sudo] パスワード:
→パスワード入力
:
:: インストールを行いますか? [Y/n]
→Enter
[sudo] パスワード:
→パスワード入力
パッケージ (11) djvulibre-3.5.28-3  ghostscript-10.0.0-2
                ijs-0.35-5  jbig2dec-0.19-1
                libidn-1.41-1  libpaper-1.1.28-2
                libspectre-0.2.11-1
                libsynctex-2022.62885-3
                poppler-data-0.4.11-3
                poppler-qt5-22.12.0-1
                qt5-tools-5.15.7+kde+r1-2
-
3). 起動:
Windows + D →「アプリ一覧」表示 →「pdf」と入力して絞り込み
→「pdfview」表示で Enter
-
→メニューもヘルプも英語のままです。
-
-
4). 日本語化のための「翻訳ファイル」と「ヘルプファイル」を準備:
以前の投稿(H157)で、そのとき作成したファイルを使いました:
作成手順は、以下を参照:
「qpdfview」のヘルプの日本語化、および、翻訳ファイルを iT では一般的な言い回しに変更:
-
5). ホストOS でファイルマネージャを起動:
-
ホストOS の下記のファイルを、ゲストOS のデスクトップにドラッグ&ドロップ:
~/ダウンロード/qpdfview-0.4.18/translations/qpdfview_ja.qm
~/ダウンロード/qpdfview-0.4.18/help/help_ja.html
-
6). ファイルを配置:
$ sudo cp ~/ダウンロード/qpdfview_ja.qm /usr/share/qpdfview/
$ sudo cp ~/ダウンロード/help_ja.html /usr/share/qpdfview/
-
7). 起動:
Windows + D →「アプリ一覧」表示 →「pdf」と入力して絞り込み
→「pdfview」表示で Enter
-
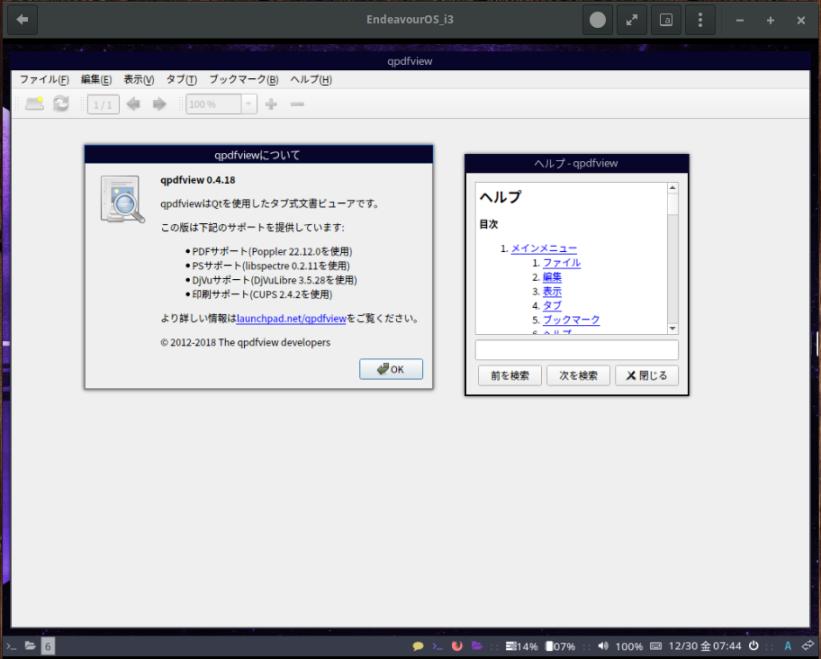
→ヘルプも日本語化されました。メニューの「しおり」も「ブックマーク」になりました。
-
「ヘルプ」の窓が小さいので、広げてみました:
「バージョン表示」の窓を閉じます。
「ヘルプ」の窓をクリック
Windows + R →パネルの左側に赤色で「resize」表示:
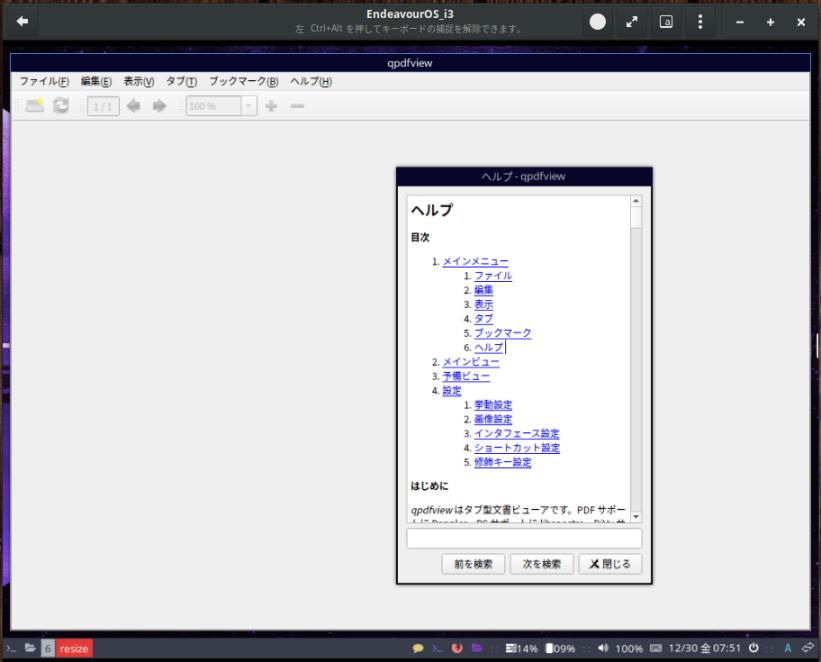
矢印キーでウィンドウのサイズを広げられます。
Esc で終了。
-
8). Windows + Q で終了
-
-
- --- - --- - --- - --- - --- - --- - --- - --- - ----- ----- ----- ----- ----- ----- ----- ----- --
18-9. 「Libre Office」のインストール:
-
GUI の「Welcome」を使ってもインストールできます。(カテゴリ: Office)
最新版の「libreoffice-fresh」と、安定版の「libreoffice-still」があります。
-
1). インストールできるかの確認:
-
最新版:
$ pacman -Ss libreoffice-fresh
:
extra/libreoffice-fresh 7.4.3-1
    LibreOffice branch which contains new features and program enhancements

extra/libreoffice-fresh-ja 7.4.3-1
    Japanese language pack for LibreOffice Fresh
-
安定版
$ pacman -Ss libreoffice-still
:
extra/libreoffice-still 7.3.7-1
    LibreOffice maintenance branch

extra/libreoffice-still-ja 7.3.7-1
    Japanese language pack for LibreOffice still
-
2). 安定版をインストール:
インストール:
$ paru -S libreoffice-still-ja
:
パッケージ (33) boost-libs-1.80.0-3  box2d-2.4.1-1
                clucene-2.3.3.4-12  libabw-0.1.3-3
                libatomic_ops-7.6.14-1  libcdr-0.1.7-5
                libe-book-0.1.3-13  libepubgen-0.1.1-4
                libetonyek-0.1.10-2
                libexttextcat-3.4.6-1
                libfreehand-0.1.2-4  libixion-0.17.0-3
                liblangtag-0.6.4-1  libmspub-0.1.4-13
                libmwaw-0.3.21-3  libnumbertext-1.0.11-1
                libodfgen-0.1.8-2  liborcus-0.17.2-3
                libpagemaker-0.0.4-3  libqxp-0.0.2-9
                libreoffice-still-7.3.7-2
                librevenge-0.0.4-5  libstaroffice-0.0.7-2
                libtommath-1.2.0-3  libvisio-0.1.7-8
                libwpd-0.10.3-4  libwpg-0.3.3-4
                libwps-0.4.13-1  libzmf-0.0.2-13
                lpsolve-5.5.2.11-2  rasqal-1:0.9.33-5
                redland-1:1.0.17-8
                libreoffice-still-ja-7.3.7-1
-
$ pacman -Ss libreoffice | grep 済
:
extra/libcdr 0.1.7-5 [インストール済み]
extra/libreoffice-still 7.3.7-2 [インストール済み]
extra/libreoffice-still-ja 7.3.7-1 [インストール済み]
-
3). バージョンの確認:
$ libreoffice --version
LibreOffice 7.3.7.2 30(Build:2)
-
4). 起動:
Windows + D →「アプリ一覧」表示 →「lib」と入力して絞り込み
→「LibreOffice」表示で Enter
-
5). 実行時の画面:
→日本語化されています。
-
6). Windows + Q で終了
-
-
- --- - --- - --- - --- - --- - --- - --- - --- - ----- ----- ----- ----- ----- ----- ----- ----- ---
19. ゲームのインストール:
-
-
- --- - --- - --- - --- - --- - --- - --- - --- - ----- ----- ----- ----- ----- ----- ----- ----- ----
19-1. 「swell-foop 」をインストール:
-
(さめざめ もどき)
-
1). インストールできるかの確認:
$ paru -Ss swell-foop
:
extra/swell-foop 41.1-1 [284.52KiB 1.02MiB] (gnome-extra)
    Clear the screen by removing groups of colored and shaped tiles
→公式リポジトリにありました。
-
2). インストール:
$ paru -S swell-foop
:
パッケージ (3) libgee-0.20.6-1
               libgnome-games-support-1.8.2-2
               swell-foop-41.1-1
-
3). 起動:
Windows + D →「アプリ一覧」表示 →「game」と入力して絞り込み
→「swell-foop」を選んで、Enter
-
4). 実行時の画面:
-
大きすぎるので調整: ダミーのアプリ(xterm)で、ウィンドウ幅を制限:
-
(1). 「xtern」の背景は白色なので、黒色に反転:
$ xed ~/.Xresources
↓ ファイルの最後に下記の行を追記:
XTerm*reverseVideo: on
-
(2). 変更されたか確認:
$ cat ~/.Xresources
:
Xcursor.theme: Qogir
Xcursor.size: 16
XTerm*reverseVideo: on
-
(3). 再起動:
$ reboot
-
(4). 「swell-foop」を起動:
Windows + D →「アプリ一覧」表示 →「game」と入力して絞り込み
→「swell-foop」を選んで、Enter
-
(5). 「xtern」を起動:
Windows + D →「アプリ一覧」表示 →「xtern」と入力して絞り込み
→「XTerm」を選んで、Enter
-
(6). 起動された「xtern」にて、下記を入力して「xtern」をもうひとつ起動:
$ xterm
-

→「xterm」の数でアプリのサイズを調整できます。
-
大きすぎるので調整: コマ数を増やしました:
ウィンドウタイトルバーの右にある「横3点」ボタンをクリック →「事前設定」
→「大きい(20x15)」にチェック
→「新しいゲーム」
-
-
5). Windows + Q で終了
-
-
- --- - --- - --- - --- - --- - --- - --- - --- - ----- ----- ----- ----- ----- ----- ----- ----- -----
19-2. 「マインスイーパ」のインストール:
-
昔ながらのマインスイーパ (Minesweeper) ゲーム
「GNOME マインスイーパー」よりも見やすいので、こちらをよく使っています。
-
1). インストール:
$ paru -S kmines
:
パッケージ (8) attica-5.101.0-1  kdeclarative-5.101.0-1
               kdnssd-5.101.0-1  knewstuff-5.101.0-1
               kpackage-5.101.0-1  libkdegames-22.12.0-1
               syndication-5.101.0-1  kmines-22.12.0-1
-
2). 起動:
Windows + D →「アプリ一覧」表示 →「game」と入力して絞り込み
→「KMines」を選んで、Enter
-
3). 実行時の画面:
-
4). Windows + Q で終了
-
-
- --- - --- - --- - --- - --- - --- - --- - --- - ----- ----- ----- ----- ----- ----- ----- ----- ----- -
19-3. 「ソリティア」のインストール:
-
カードゲーム集(クロンダイク)
-
1). インストール
$ paru -S aisleriot
:
パッケージ (1) aisleriot-3.22.27-1
-
2). 起動:
Windows + D →「アプリ一覧」表示 →「game」、または「card」と入力して絞り込み
→「AisleRiot ソリティア」を選んで、Enter
-
3). 実行時の画面:
-
4). Windows + Q で終了
-
-
- --- - --- - --- - --- - --- - --- - --- - --- - ----- ----- ----- ----- ----- ----- ----- ----- ----- --
19-4. 「四川省」 (Shisen-Sho) のインストール:
-
2コーナーまでに結ばれた同じパイを取っていくゲーム
パイが無くなると重力で落ちます。取る順番が重要なので、 全体を見渡す力と、集中力を養えます。すべて消せたのは、2回くらい。
-
1). インストール:
$ paru -S kshisen
:
パッケージ (2) libkmahjongg-22.12.0-1  kshisen-22.12.0-1
-
2). 起動:
Windows + D →「アプリ一覧」表示 →「game」と入力して絞り込み
→「Shisen-Sho」を選んで、Enter
-
3). 実行時の画面:
-
4). Windows + Q で終了
-
-
- --- - --- - --- - --- - --- - --- - --- - --- - ----- ----- ----- ----- ----- ----- ----- ----- ----- ---
19-5. 「上海」 (KMahjongg) のインストール:
-
立体的に置かれたパイから同じパイを取っていくゲーム
-
1). インストールできるかの確認:
$ paru -Ss kmahjongg
:
extra/kmahjongg 22.08.3-1 [4.04MiB 5.36MiB] (kde-applications kde-games)
    A tile matching game for one or two players
extra/libkmahjongg 22.08.3-1 [0B 2.20MiB] [インストール済み]
    Common code, backgrounds and tile sets for games using Mahjongg tiles
→公式リポジトリにありました。ライブラリは他と共通で、すでにインストール済みです。
-
2). インストール:
$ paru -S kmahjongg
:
パッケージ (1) kmahjongg-22.12.0-1
-
3). 起動:
Windows + D →「アプリ一覧」表示 →「game」と入力して絞り込み
→「KMahjongg」を選んで、Enter
-
4). 実行時の画面:
-
5). Windows + Q で終了
-
-
- --- - --- - --- - --- - --- - --- - --- - --- - ----- ----- ----- ----- ----- ----- ----- ----- ----- ----
19-6. 「中国式四人麻雀」 (Kajongg) のインストール:
-
ルールは中国式の麻雀。花パイあり。 8点しばりで、リーチがないので、門前ツモでもあがれず、役を知らないと難しいです。
でも、英語の音声付きなので、眺めているだけでも楽しいです。
-
1). 依存する、python のバージョンを確認:
$ python
:
Python 3.10.9 (main, Dec 19 2022, 17:35:49) [GCC 12.2.0] on linux
Type "help", "copyright", "credits" or "license" for more information.
>>> exit()
Ctrl+D または、「exit()」で終了
→「Python 3.10.9」が使われています。
-
2). インストールできるかの確認:
$ paru -Ss kajongg
:
extra/kajongg 22.12.0-1 [4.82MiB 9.41MiB] (kde-applications kde-games)
    The ancient Chinese board game for 4 players
→公式リポジトリにありました。2つのグループに含まれています。
-
3). 「kajongg」をインストール:
$ paru -S kajongg
:
パッケージ (27) cython-0.29.32-2  python-appdirs-1.4.4-7
                python-attrs-22.2.0-1
                python-autocommand-2.2.2-1
                python-automat-22.10.0-1
                python-click-8.1.3-1
                python-constantly-15.1.0-11
                python-hyperlink-21.0.0-4
                python-idna-3.4-1
                python-incremental-22.10.0-1
                python-inflect-6.0.2-1
                python-jaraco.context-4.2.0-1
                python-jaraco.functools-3.5.2-1
                python-jaraco.text-3.11.0-1
                python-more-itertools-9.0.0-1
                python-ordered-set-4.1.0-1
                python-pydantic-1.10.2-1
                python-qtpy-2.3.0-1
                python-setuptools-1:65.6.3-1
                python-six-1.16.0-6  python-tomli-2.0.1-1
                python-trove-classifiers-2022.12.22-1
                python-twisted-22.10.0-1
                python-typing_extensions-4.4.0-1
                python-validate-pyproject-0.10.1-1
                python-zope-interface-5.5.0-1
                kajongg-22.12.0-1
:
kajongg の提案パッケージ
    vorbis-tools: for playing sounds
-
4). 依存の「vorbis-tools」がインストールできるかの確認:
$ paru -Ss vorbis-tools
:
extra/vorbis-tools 1.4.2-3 [181.97KiB 717.68KiB]
    Extra tools for Ogg-Vorbis
aur/vorbis-tools-git r936.134b784-2 [+1 ~0.08]
    Command-line tools for creating and playing Ogg Vorbis files
→公式リポジトリにありました。
音声を出すために必要です。
-
5). 依存の「vorbis-tools」のインストール:
$ paru -S vorbis-tools
:
パッケージ (3) libao-1.2.2-5  opusfile-0.12-3
               vorbis-tools-1.4.2-3
-
6). アプリの起動:
Windows + D →「アプリ一覧」表示 →「game」と入力して絞り込み
→「kajongg」を選んで、Enter
-
4). 実行時の画面:

-
→プレイヤーを登録後、「Play」で開始すると、音声が出ました。
-
音声がいつもの「英語」ではありません。
ヘルプにある言語切替えは、メニュー表示が変わるだけでした。音声の言語の切替えの設定は見つかりません。
音声データがおかしいのかな?
-
8). 操作のしかたは、「こちら 」を参照:
-
9). 「英語」の音声ではないので、音声について調べてみました:
-
(1). 音声ファイルを検索:
$ sudo find / -name *ogg
-
(2). 「kajongg」の音声ファイルを確認:
$ cd /usr/share/kajongg/voices/
$ ls -1 /usr/share/kajongg/voices/
de
female1 ←(女性1)
female2 ←(女性2)
male1 ←(男性1)
male2 ←(男性2)
→言語フォルダがひとつだけあるのは変ですね。 テスト用を消し忘れたのかな。
-
$ ls /usr/share/kajongg/voices/female1
:
COPYRIGHT  c6.ogg             s1.ogg
b1.ogg     c7.ogg             s2.ogg
b2.ogg     c8.ogg             s3.ogg
b3.ogg     c9.ogg             s4.ogg
b4.ogg     chow.ogg           s5.ogg
b5.ogg     dangerousgame.ogg  s6.ogg
b6.ogg     db.ogg             s7.ogg
b7.ogg     dg.ogg             s8.ogg
b8.ogg     dr.ogg             s9.ogg
b9.ogg     kong.ogg           violatesoriginalcall.ogg
c1.ogg     mahjongg.ogg       we.ogg
c2.ogg     md5sum             wn.ogg
c3.ogg     nochoice.ogg       ws.ogg
c4.ogg     originalcall.ogg   ww.ogg
c5.ogg     pung.ogg
→こちらの音声データは「英語」です。チェックサムまであります。
-
$ ls -1 /usr/share/kajongg/voices/de/
female1
female2
male1
male2
→こちらの音声データは「ドイツ語」でした。(言語コード: de =ドイツ語)
-
(3). 「de」フォルダの名前を言語コード以外に変更
→音声は切り替わりませんでた。
-
(4).「de」フォルダを削除:
$ cd /usr/share/kajongg/voices/
$ sudo rm -r de
$ ls
female1  female2  male1  male2
-
10). 再起動:
$ reboot
-
11). アプリを起動して確認:
→音声が英語になりました。
-
使いたい言語のフォルダ( 4人分の音声.ogg)を準備すれば、その言語でしゃべってくれるみたい。
実際のプレイでは、いちいち「パイ名」を言うことはないので、「ホィ」とか「無音…」などの方が自然かも。
-
12). Windows + Q で終了
-
-
- --- - --- - --- - --- - --- - --- - --- - --- - ----- ----- ----- ----- ----- ----- ----- ----- ----- -----
19-7. 「フローズン・バブル」 (Frozen Bubble) のインストール:
-
カラーボールを撃ち落とすゲームです。角度を決めて発射して、同じ色が 3個以上くっつくと落っこちます。すべて落とせばクリア。
-
依存パッケージの不具合でビルド中に止まるので、先に依存パッケージをインストールしてから、インストールしました。
-
1). インストールできるか確認:
$ paru -Ss frozen-bubble
:
aur/frozen-bubble 2.2.1beta1-17 [+5 ~0.45]
    A game in which you throw colorful bubbles and build groups to destroy the bubbles
→AUR リポジトリにあります。
-
2). 「frozen-bubble」の依存パッケージのインストール1:
$ paru -S perl-alien-sdl
:
リポジトリ (10)                 古いバージョン  新しいバージョン  Makeのみ
community/perl-archive-extract                  0.88-3            はい
community/sdl12-compat                          1.2.60-1          いいえ
extra/perl-archive-zip                          1.68-7            はい
extra/perl-capture-tiny                         0.48-6            いいえ
extra/perl-class-inspector                      1.36-5            いいえ
extra/perl-file-sharedir                        1.118-2           いいえ
extra/perl-file-which                           1.27-2            はい
extra/perl-inc-latest                           0.500-9           はい
extra/perl-module-build                         0.4232-1          はい
extra/perl-text-patch                           1.8-11            はい

Aur (1)                         古いバージョン  新しいバージョン  Makeのみ
aur/perl-alien-sdl                              1.446-13          いいえ

:: レビューを続行しますか? [Y/n]:
→Enter
「q」でレビューは終了
-
:: インストールを行いますか? [Y/n]:
→Enter
パッケージ (10)                 新しいバージョン  最終的な変化  ダウンロード容量

community/perl-archive-extract  0.88-3                0.06 MiB          0.02 MiB
extra/perl-archive-zip          1.68-7                0.22 MiB          0.07 MiB
extra/perl-capture-tiny         0.48-6                0.03 MiB          0.02 MiB
extra/perl-class-inspector      1.36-5                0.03 MiB          0.01 MiB
extra/perl-file-sharedir        1.118-2               0.02 MiB          0.01 MiB
extra/perl-file-which           1.27-2                0.02 MiB          0.01 MiB
extra/perl-inc-latest           0.500-9               0.02 MiB          0.01 MiB
extra/perl-module-build         0.4232-1              0.37 MiB          0.17 MiB
extra/perl-text-patch           1.8-11                0.01 MiB          0.01 MiB
community/sdl12-compat          1.2.60-1              0.63 MiB          0.12 MiB
-
確認:
$ paru -Ss perl-alien-sdl
:
aur/perl-alien-sdl 1.446-13 [+2 ~0.07] [インストール済み]
    Build, find and use SDL binaries (package is specific to
    architecture and SDL package used at build-time)
-
3). 依存パッケージのインストール2:
$ paru -S sdl_pango
:
Aur (1)         古いバージョン  新しいバージョン  Makeのみ
aur/sdl_pango                   0.1.2-9           いいえ
-
確認:
$ paru -Ss sdl_pango
:
aur/sdl_pango 0.1.2-9 [+4 ~0.23] [インストール済み]
    Connects Pango to SDL
-
4). 依存パッケージのインストール3:
下記の「perl-sdl」のパッケージに不具合があり、ビルド中に停止するので、それを回避します。
-
(1). パッケージを確認:
$ paru -Ss perl-sdl
:
aur/perl-sdl 2.548-7 [+2 ~0.07]
    Simple DirectMedia Layer for Perl
→AUR リポジトリにあります。
-
(2). ビルド途中の、テストの「t/core_video.t」のところでフリーズします。
→PKGBUILD を修正し、「テスト」を実施しないようにして、エラーで停止しないようにしました。
原因の解消ではなく、回避です。
-
(3). PKGBUILD をダウンロード:
$ mkdir -p ~/ダウンロード/test/
$ cd ~/ダウンロード/test/
$ paru -G perl-sdl
:
:: PKGBUILD をダウンロードしています...
 (1/1) perl-sdl-2.548-7 をダウンロードしています
-
確認:
$ ls ~/ダウンロード/test/perl-sdl/
PKGBUILD
-
(4). PKGBUILD を修正:
$ cd ~/ダウンロード/test/perl-sdl/
$ xed PKGBUILD
-
check() {
  cd SDL-$pkgver
  perl Build test || true
}
↓ 下記 51行目をコメント化:
check() {
  cd SDL-$pkgver
# perl Build test || true
}
-
(5). 現在のディレクトリにある(修正した) PKGBUILD で、ビルドしてインストール:
$ cd ~/ダウンロード/test/perl-sdl/
$ ls
PKGBUILD
-
インストール:
$ paru -Ui
:: インストールを行いますか? [Y/n]:
→Enter
→パスワード入力
リポジトリ (8) perl-tie-simple-1.04-10  sdl_net-1.2.8-5
    sdl_ttf-2.0.11-6  sdl_image-1.2.12-7
    libmikmod-3.3.11.1-6  sdl_mixer-1.2.12-12
    sdl_gfx-2.0.26-5  smpeg-2.0.0-2
リポジトリ ビルド (14) perl-class-data-inheritable-0.09-2
    perl-devel-stacktrace-2.04-2
    perl-exception-class-1.45-2
    perl-test-nowarnings-1.06-2  perl-test-deep-1.130-2
    perl-algorithm-diff-1:1.201-3  perl-text-diff-1.45-2
    perl-test-differences-0.69-1
    perl-sub-uplevel-0.2800-4  perl-test-exception-0.43-8
    perl-file-slurp-tiny-0.004-8
    perl-tree-dag-node-1.32-1  perl-test-warn-0.37-1
    perl-test-most-0.38-1

:: インストールを行いますか?
→Enter
パッケージ (1)  新しいバージョン  最終的な変化
perl-sdl        2.548-7               2.32 MiB

:: インストールを行いますか? [Y/n]
→Enter
→インストール完了
-
確認:
$ paru -Ss perl-sdl
aur/perl-sdl 2.548-7 [+2 ~0.07] [インストール済み]
    Simple DirectMedia Layer for Perl
-
5). 「frozen-bubble」のインストール:
$ paru -S frozen-bubble
:
リポジトリ (2) perl-ipc-system-simple-1.30-4
    perl-compress-bzip2-2.28-3
リポジトリ ビルド (2) perl-file-slurp-9999.32-2
    perl-locale-maketext-lexicon-1.00-4
Aur (1) frozen-bubble-2.2.1beta1-17

:: レビューを続行しますか? [Y/n]:
→Enter
→「q」でレビューを終了
:: インストールを行いますか? [Y/n]:
→Enter
→パスワード入力
パッケージ (4) perl-compress-bzip2-2.28-3
perl-file-slurp-9999.32-2
perl-ipc-system-simple-1.30-4
perl-locale-maketext-lexicon-1.00-4
:: インストールを行いますか? [Y/n]
→Enter
パッケージ (1) 新しいバージョン 最終的な変化 frozen-bubble 2.2.1beta1-17 23.01 MiB
-
6). インストールされたか確認:
$ paru -Ss frozen-bubble
:
aur/frozen-bubble 2.2.1beta1-17 [+5 ~0.45] [インストール済み]
A game in which you throw colorful bubbles and build
groups to destroy the bubbles
→インストールされました。
-
7). 起動:
Windows + D →「アプリ一覧」表示 →「game」と入力して絞り込み
→「Frozen Bubble」を選んで、Enter
-
8). 実行時の画面:

「←」と「→」キーで砲台の向きを変えます。「↑」で発射。
Esc で終了。
-
9). 一覧で、「Frozen Bubble」のアイコンが表示されないので、修正:
$ sudo xed /usr/share/applications/frozen-bubble.desktop
-
Icon=frozen-bubble.png
↓ 修正:
Icon=frozen-bubble
-
ちなみに、アイコンは下記が使われていました:
$ ls /usr/share/pixmaps/frozen-bubble.png
-
-
- --- - --- - --- - --- - --- - --- - --- - --- - ----- ----- ----- ----- ----- ----- ----- ----- ----- ----- -
20. 参考: 「paru」のコマンド:
-
「paru」のみで有効なコマンドも含まれています:
-
Github からの抜粋、他:
$ paru # システム更新。「$ paru -Syu」と同じ機能。エイリアス: $ paru 「パッケージ名」 # 「パッケージ名」を対話的に検索してインストール: $ paru -S「パッケージ名」 # 特定のパッケージをインストール: $ paru -Ss 「パッケージ名」 # 公式リポジトリと、AUR リポジトリから、パッケージを検索: $ paru -Syu # 公式リポジトリと、AUR リポジトリのパッケージを更新(システム更新): $ paru -Sua # AUR パッケージを更新: $ paru -Qua # 利用可能な AUR アップデートを表示: $ paru -G 「パッケージ名」 # 「パッケージ名」の PKGBUILD と関連ファイルをカレントディレクトリにダウンロード: $ paru -Gp 「パッケージ名」 # 「パッケージ名」の PKGBUILD を表示: $ paru -Gc 「パッケージ名」 # 「パッケージ名」の AUR コメントを表示: $ paru -Ui # 現在のディレクトリにある PKGBUILD で、ビルドしてインストール: $ paru --gendb # paru を初めて使う場合にのみ必要。「*-git」パッケージを追跡するための devel データベースを生成: $ paru -R 「パッケージ名」 # 指定したパッケージのみを削除: $ paru -Rs 「パッケージ名」 # 指定したパッケージと、依存するパッケージを削除: $ paru -Qdt # 依存の切れた、孤児パッケージを検索: $ paru -Qm # インストールされた、AUR から削除されたパッケージを検索:
→「PKGBUILD」がビルド用のスクリプトです。AUR パッケージを登録するには、アプリ開発者が記述して登録するルールなので、使用者がビルドの時に依存で悩む必要が減り、ビルドが確実に動作する利点があります。
「AUR ヘルパー」は、インストール実行時に、この「PKGBUILD」スクリプトを確認する機能も持ちます。
-
-
- --- - --- - --- - --- - --- - --- - --- - --- - ----- ----- ----- ----- ----- ----- ----- ----- ----- ----- --
21. 参考: 「EndeavourOS」の「/etc/eos-update-notifier.conf」に日本語のコメント行を追記:
-
「Welcome v3.45-1」画面のメニューに、設定ファイルの「/etc/eos-update-notifier.conf」を編集するメニューがあります。単にエディタで開かれるだけなので、編集しやすいように、設定ファイルに日本語のコメント行を追記しました。
やり方は、こちらの投稿を参照すればいいので、作業しても、しなくても OK 。
どのような設定があるか、一度ながめておくと良いです。
-
1). 修正前に、「/etc/eos-update-notifier.conf」を退避:
$ sudo cp /etc/eos-update-notifier.conf /etc/eos-update-notifier.conf-ORG
-
2). 「/etc/eos-update-notifier.conf」の修正:
-「Welcome v3.45-1」の場合に使える、日本語のコメント行を追加したファイルです:
-
$ sudo xed /etc/eos-update-notifier.conf
↓ Ctrl+A ですべて選択して Del で消してから、下記をすべて貼り付け(和訳が追記されます):
### eos-update-notifier configuration file
#
### 「eos-update-notifier」設定ファイルについて
## Check also updates from AUR:
#
### ■ AUR の更新も確認しますか?:
#
### 下記の設定: AUR の更新を確認= する
#
CheckAurUpdates=yes # yes or no
## Note: the AUR helper program can be set in file
## /etc/eos-script-lib-yad.conf, variable EOS_AUR_HELPER.
#
### ■ 注: AUR ヘルパー プログラムはファイルに設定できます。
### ●●重要●●
### 「/etc/eos-script-lib-yad.conf」で、変数は「EOS_AUR_HELPER」です。
## Use additional EOS updater.
## This program will be called by the eos-update-notifier after
## updating Arch/EOS and AUR packages.
## Input parameter is the log file name.
## Additional updater must return a similar exit code as 'checkupdates'.
#
### ■ 追加の「EOS updater」を使用しますか?
### このプログラムは、Arch/EOS および AUR パッケージを更新した後、
### 「eos-update-notifier」によって呼び出されます。
### 入力パラメータは、ログ ファイル名です。
#
### 追加の「EOS updater」は、「checkupdates」と同様の終了コードを
### 返す必要があります。
#
### 下記の設定: 追加の「EOS updater」の名前= 指定なし
#
AdditionalEosUpdater=""
## Check also Arch news for you:
#
### ■ Arch のニュースもチェックしますか?
#
### 下記の設定: Arch News をチェックする= いいえ
#
CheckArchNewsForYou=no # yes or no
## Check news while updating?
#
### ■ 更新中にニュースをチェックしますか?
#
### 下記の設定: 更新中のニュースチェックを許可= はい
#
AllowNewsCheckWhileUpdating=yes # yes or no
## Program for showing the Arch news.
## 'eos-arch-news' shows news based on the date and shows the news
## only if there are newer news than at the previous check.
## Note: 'arch-news-for-you' was outdated and is now removed.
## This option was added in eos-update-notifier version 0.9-1.
#
### ■ Arch ニュースを表示するためのプログラムについて
### 「eos-arch-news」は、日付に基づいてニュースを表示し、
### 前回のチェックよりも新しいニュースがある場合にのみ
### ニュースを表示します。
### 注: 「arch-news-for-you」は古くなり削除されました。
### このオプションは、下記のバージョンで追加:
### 「eos-update-notifier version 0.9-1」
#
### 下記の設定: Arch ニュースを表示するプログラム= eos-arch-news
#
ArchNewsProg=eos-arch-news
## Prefer tray notification or small window for nofitying about updates?
##
## NOTE: if clicking the tray notification icon launches also the next panel item,
## a workaround is either to
## - re-organize panel's notification area icons so that 'Yad' is not the first (uppermost), or
## - add an empty launcher right next to the tray notification icon.
#
### ■ 更新に関する通知にトレイ通知、または小さなウィンドウを使用しますか?
### 注: トレイ通知アイコンをクリックすると、次のパネル項目も起動する場合、
### 回避策は、「Yad」が最初 (一番上) にならないように、
### パネルの通知領域のアイコンを再編成することです。
### または、トレイ通知アイコンのすぐ隣に空のランチャーを追加します。
#
### 設定できる値は、notify(通知)、notify+tray(通知+トレイ)、tray(トレイ)、
### window(小さなウィンドウ)です。
#
### 下記の設定: 更新について表示= notify(通知)
#
ShowHowAboutUpdates=notify # value: 'notify', 'notify+tray', 'tray', or 'window'
## What info to show about pending updates ("number of updates" or "package names");
## applies only when 'ShowHowAboutUpdates' is set to 'window':
#
### ■ 保留中の更新について表示する情報は、「更新の数」または「パッケージ名」です。
### 「ShowHowAboutUpdates」が「window」に設定されている場合にのみ適用されます。
#
### 設定できる値は、number(更新の数)、packages(パッケージ名)です。
#
### 下記の設定: アップデートについての表示= number(更新の数)
#
ShowWhatAboutUpdates=number # values: 'number' or 'packages'
## Specify how long time the notification window will be shown until it closes automatically.
## Refers to the following values of 'ShowHowAboutUpdates' (see above):
## - notify
## - notify+tray
## Valid values are:
## - positive integers with a suffix 's' (seconds), 'm' (minutes), and 'h' (hours)
## - 0 (notification window will not close automatically)
## Default for both is 30s.
#
### ■ 通知ウィンドウが自動的に閉じるまでの時間を指定します。
### 「ShowHowAboutUpdates」の次の値を参照します (上記を参照)。
### - notify(通知)
### - notify+tray(通知+トレイ)
#
### 有効な値は次のとおりです:
### 「s」(秒)、「m」(分)、「h」(時間) の接尾辞が付いた正の整数
### 「0」 (通知ウィンドウは自動的に閉じません)
### どちらのデフォルトも 30 秒です。
#
### 下記の設定:
### 国連 通知タイムアウト= 30s(30 秒)
### 国連 通知トレイ タイムアウト= 30s(30 秒)
#
UN_NotifyTimeout=30s # for 'notify'
UN_NotifyTrayTimeout=30s # for 'notify+tray'
## SyncAfterUpdate.
## Note: this setting was moved from here to eos-script-lib-yad.conf at 2022-Apr-28.
### ■ 更新後に同期
### 注: この設定は、2022年4月28日に、ここから「eos-script-lib-yad.conf」に移動しています。
## UpdateNotifyIcon is the icon name that will be used when showing available updates.
## The default is 'system-software-update'. If that icon does not exist on your system,
## you can change the icon to something that does.
#
### ■ 「UpdateNotifyIcon」は、利用可能な更新を表示するときに使用されるアイコン名です。
### デフォルトは「system-software-update」です。
### そのアイコンがシステムに存在しない場合は、アイコンを何かに変更できます。
#
### 下記の設定: 更新通知アイコン= system-software-update
#
UpdateNotifyIcon=system-software-update
-
-
- --- - --- - --- - --- - --- - --- - --- - --- - ----- ----- ----- ----- ----- ----- ----- ----- ----- ----- ---
22. 参考: 「EndeavourOS」の「/etc/eos-script-lib-yad.conf」に日本語のコメント行を追記:
-
設定ファイルが編集しやすいように、設定ファイルに日本語のコメント行を追記しました。
ただし、こちらの投稿を参照すればいいので、作業しても、しなくても OK 。
どのような設定があるか、一度ながめておくと良いです。
-
1). 修正前に、「/etc/eos-script-lib-yad.conf」を退避:
$ sudo cp /etc/eos-script-lib-yad.conf /etc/eos-script-lib-yad.conf-ORG
-
2). 「/etc/eos-script-lib-yad.conf」の修正:
-「Welcome v3.45-1」の場合に使える、日本語のコメント行を追加したファイルです:
-
$ sudo xed /etc/eos-script-lib-yad.conf
↓ Ctrl+A ですべて選択して Del で消してから、下記をすべて貼り付け(和訳が追記されます):
### Configuration file for eos-script-lib-yad. ### ### To enable any setting below, simply remove the starting '#' character ### on the appropriate line. # ### ■「eos-script-lib-yad」の設定ファイルについて ### 以下の設定を有効にするには、該当する行の先頭の「#」文字を削除するだけです。 ## Terminal program to be used by certain EndeavourOS packages ## like 'welcome' and 'eos-update-notifier'. ## Many popular terminals are supported. See a list of terminals known to be compatible ## in file /usr/share/endeavouros/scripts/eos-script-lib-yad, function eos_yad_terminal(). ## If you have any of the listed terminals installed, EOS_YAD_TERMINAL need not be enabled. ## Then the programs will use the first available program in the list. ## Note: other than the listed terminals may or may not be compatible. # ### ■ EndeavourOS パッケージで使用される「welcome」や「eos-update-notifier」などの ### 特定のターミナル プログラムは、多くの一般的な端末がサポートされています。 # ### 「/usr/share/endeavouros/scripts/eos-script-lib-yad」ファイルの ### 関数 eos_yad_terminal() で、互換性がある端末の一覧を参照ください。 ### 一覧にある端末がインストールされている場合、 ### EOS_YAD_TERMINAL を有効にする必要はありません。 ### 次に、プログラムはリストで最初に使用可能なプログラムを使用します。 ### 注: 記載されている端末以外は、対応している場合とそうでない場合があります。 # # EOS_YAD_TERMINAL="terminator" ## EOS_ROOTER configures the command for acquiring elevated privileges ## when running commands in terminal. # ### ■「EOS_ROOTER」は、ターミナルでコマンドを実行するときに、 ### 権限を昇格するためのコマンドを設定します。 # ## Supported values: ### サポートされている値: # ## "su" ## "sudo" ## "pkexec" ## "su-c_wrapper" ## Still supported values, but deprecated and will be removed in the future: ### 値は引き続きサポートされていますが、非推奨で将来削除の予定です。 # ## "su -c" ## "pkexec bash -c" ## "sudo bash -c" ## "/usr/bin/su -c" ## "/usr/bin/pkexec bash -c" ## "/usr/bin/sudo bash -c" # export EOS_ROOTER="su" ## EOS_WELCOME_CONNECTION_WARNING specifies whether you want to allow the warning window ## in the Welcome app about not being connected to the internet. ## Supported values are: "yes" or "no". # ### ■「EOS_WELCOME_CONNECTION_WARNING」は、 ### 「Welcome」アプリでインターネットに接続されていないという警告ウィンドウを ### 許可するかを指定します。 ### サポートされている値は、「yes」または「no」です。 # EOS_WELCOME_CONNECTION_WARNING=yes ## EOS_CONNECTION_CHECKER selects the way how an internet connection availability is checked. ## Supported values are: "ping" or "curl". ## Note: "ping" may have problems if you are behind a proxy, thus "curl" is the default. # ### ■「EOS_CONNECTION_CHECKER」は、インターネット接続のチェック方法を選択します。 ### サポートされている値は、「ping」または「curl」です。 ### 注: プロキシの配下の場合、「ping」で問題が発生することがあるので、「curl」がデフォルトです。 # EOS_CONNECTION_CHECKER="curl" ## EOS_WIFIDEV_CHECK specifies if we want to make some ad hoc checks that we have the right ## wifi card drivers installed. The checks are made in the Welcome app when using ## the button "Detect system issues". ## Supported values are "yes" or "no". # ### ■「EOS_WIFIDEV_CHECK」は、適切な Wi-Fi カード ドライバーがインストール ### されていることをチェックするかを指定します。 ### 「システムの問題を検出」ボタンを使用すると、「Welcome」アプリでチェック ### が行われます。 ### サポートされている値は「yes」または「no」です。 # EOS_WIFIDEV_CHECK="yes" ## TERMINAL_AT_START, if set, causes the Welcome app to start a terminal always when ## the Welcome app is started. The value should be an already installed terminal on your system. ## Note that you can include any terminal specific options, for example: ## TERMINAL_AT_START="xfce4-terminal --working-directory=$HOME/Downloads --geometry=+50+50" # ### ■「TERMINAL_AT_START」が設定されている場合、「Welcome」アプリの起動時に ### 必ず「Welcome」アプリがターミナルを起動します。 ### 値は、システムに既にインストールされている端末でなければなりません。 ### 次のような端末固有のオプションを含めることができることに注意。 ## TERMINAL_AT_START="xfce4-terminal --working-directory=$HOME/Downloads --geometry=+50+50" # # TERMINAL_AT_START="xfce4-terminal" ## EOS_KEEP_PKGS lists the names of packages that should not be removed when button ## "Detect system issues" of the Welcome app is clicked. ## For example: ## EOS_KEEP_PKGS="intel-ucode xf86-video-intel" # ### ■「EOS_KEEP_PKGS」には、「Welcome」アプリの「システムの問題を検出する」ボタン ### がクリックされたときに削除されるべきではないパッケージの名前が一覧表示されます。 # # EOS_KEEP_PKGS="" ## EOS_AUR_HELPER contains the AUR helper program name. ## Supported values are yay and paru, but other helpers may work as well. ## The program must support options -Qua and -Sua. # ### ■「EOS_AUR_HELPER」には、「AUR ヘルパー」プログラム名が入ります。 ### サポートされている値は「yay」と「paru」ですが、他のヘルパーも機能 ### する場合があります。 ### プログラムは、オプション「-Qua」および「-Sua」をサポートする ### 必要があります。 ### ●●「yay」から「paru」に変更しました: ●● # EOS_AUR_HELPER="paru" ## EOS_WELCOME_PACDIFFER is an array of diff programs that can be used by pacdiff ## (see man pacdiff) in Welcome. ## Supported values are: kdiff3, kompare, diffuse, meld, code, diff, vim. ## Other diff programs may work but are not tested (and may need additional support ## by Welcome). ## The array is written in preference order as only one of them is used. # ### ■「EOS_WELCOME_PACDIFFER」は、「Welcome」で ### pacdiff (man pacdiff を参照) で使用できる「diff」プログラムの配列です。 ### サポートされている値は、kdiff3、kompare、diffuse、meld、code、diff、vim です。 ### 他の「diff」プログラムでも動作する可能性がありますが、テストされていません ### (また、Welcome による追加サポートが必要になる場合があります)。 ### 配列は、そのうちの 1つだけが使われるため、優先順に書き込みます。 # EOS_WELCOME_PACDIFFERS=(meld kdiff3 kompare diffuse diff vim) ## EOS_PACDIFF_WARNING specifies whether a warning about the power of eos-pacdiff ## will be shown or not when starting it. ## Supported values: "yes" or "no". ## Default: "yes". ## Note: 'code' is not supported. # ### ■「EOS_PACDIFF_WARNING」は、起動時に eos-pacdiff の能力に関する ### 警告を表示するかを指定します。 ### サポートされている値: 「yes」または「no」 ### デフォルト: 「yes」 ### 注: 「code」はサポートされていません。 # EOS_PACDIFF_WARNING=yes ## EOS_SUDO_EDITORS is an array of editor names that are suitable for ## editing files with root permissions. ## Currently they are used only in eos-update-notifier-configure. ## Note that non-GUI editors (e.g. nano, emacs) are preferred for security reasons. # ### ■「EOS_SUDO_EDITORS」は、ルート権限でファイルを ### 編集するのに適したエディタ名です。 # ### 現在、「eos-update-notifier-configure」でのみ使用されています。 ### セキュリティ上の理由から、GUI ではないエディタ (nano、emacs など) が ### 推奨されることに注意してください。 # ## Currently editors known to work are: ### 現在、動作することが知られているエディタ: # ### 好ましい選択 ## - Non-GUI (preferred): ## - nano ## - emacs ## - vim # ### 好ましくない選択 ## - GUI (not preferred): ## - leadpad ## - xed ## - geany ## - mousepad (only with dbus-launch) dbus-launch のみ # ## Other editors may work as well, but have not been tested. ## The array is written in preference order as only one of them is used. # ### 他のエディタも同様に動作する可能性がありますが、テストされていません。 ### 配列は、そのうちの 1つだけが使われるため、優先順に書き込みます。 # EOS_SUDO_EDITORS=(nano emacs vim) ## EOS_WALLPAPER_FETCHER selects the program to be used for downloading ## certain additional wallpapers to EndeavourOS. These wallpapers (currently) ## include the legacy wallpapers, and wallpapers created by the ## EndeavourOS community. ## Supported values: "git" or "curl". "git" is the default. ## Of these, "curl" may be more suitable if bandwidth is limited. # ### ■「EOS_WALLPAPER_FETCHER」は、特定の追加の壁紙を ### EndeavourOS にダウンロードするために使用するプログラムを選択します。 ### これらの壁紙 (現在) には、従来の壁紙と、EndeavourOS コミュニティによって ### 作成された壁紙が含まれます。 ### サポートされている値: "git" または "curl"で、「git」がデフォルトです。 ### これらのうち、帯域幅が制限されている(ネットワークが遅い)場合は、 ### 「curl」が適しているかも。 # EOS_WALLPAPER_FETCHER="git" ## EOS_WELCOME_HAS_SEE_YOU_LATER_BUTTON determines whether to show ## the "See you later" button on the Welcome window. ## Supported values: "yes" or "no" ## Default: "no" # ### ■「EOS_WELCOME_HAS_SEE_YOU_LATER_BUTTON」は、 ### 「Welcome」ウィンドウに「後で見る」ボタンを表示するかを指定します。 ### サポートされている値: 「yes」または「no」 ### デフォルト: 「no」 # EOS_WELCOME_HAS_SEE_YOU_LATER_BUTTON=no ## EOS_FILESERVER_SITE specifies the site where certain documents and ## small files will be fetched during the install phase, and when using the ## installed system. # ### ■「EOS_FILESERVER_SITE」は、インストール フェーズ中、 ### およびインストールされたシステムの使用時に、特定のドキュメントと ### 小さなファイルが取得されるサイトを指定します。 # ## Supported values: ### サポートされている値: # ## gitlab (default) ## github # EOS_FILESERVER_SITE=gitlab ## SyncAfterUpdate specifies whether to call 'sync' after updating or not. ## Possible values: "yes" or "no". ## Default: "no". ## Note: this setting was moved here from eos-update-notifier.conf at 2022-Apr-28. # ### ■「SyncAfterUpdate」は、更新後に「sync」を呼び出すかどうかを指定します。 ### 可能な値: 「yes」または「no」 ### デフォルト: 「no」 ### 注: この設定は、2022年4月28日に「eos-update-notifier.conf」から ### ここに移動されました。 # SyncAfterUpdate=no ## EOS_UPDATE_ARCH_KEYRING_FIRST, if set to "yes", will try to update package ## archlinux-keyring before updating other packages. ## This may help with some PGP signature issues. ## Note: this setting is used only in these apps: ## - UpdateInTerminal ## - welcome (via UpdateInTerminal) # ### ■「EOS_UPDATE_ARCH_KEYRING_FIRST」が「yes」に ### 設定されている場合、他のパッケージを更新する前に ### パッケージ「archlinux-keyring」を更新しようとします。 ### これは、いくつかの PGP 署名の問題に役立つ場合があります。 ### 注: この設定は、次のアプリでのみ使用されます。 # ## - UpdateInTerminal ## - welcome (UpdateInTerminal 経由) # ## Supported values: ### サポートされている値: # ## no (default) ## yes # EOS_UPDATE_ARCH_KEYRING_FIRST=no ## EOS_ICON_SETS_PREFERENCE array specifies the order of preference of the icon sets ## you want to use in certain EndeavourOS apps. ## The icon sets are folder names directly under /usr/share/icons. ## The icon set names can be listed without path. ## Default: all folders names found under /usr/share/icons ## (note: not all of them contain icons...) # ### ■「EOS_ICON_SETS_PREFERENCE」は、特定の EndeavourOS アプリ ### で使用するアイコン セットの優先順位を指定します。 ### アイコン セットは、「/usr/share/icons」直下のフォルダ名です。 ### アイコン セット名は、パスなしでリストできます。 ### デフォルト: /usr/share/icons の下にあるすべてのフォルダ名 ### (注: すべてにアイコンが含まれているわけではありません...) # EOS_ICON_SETS_PREFERENCE=( # Add your preferred icon sets here. # For example: ### 好みのアイコン セットをここに追加します。 ### 例: # Qogir Adwaita hicolor # This is the default list of icon sets (note: in alphabetical order): ### これはアイコン セットのデフォルト リストです (注: アルファベット順): /usr/share/icons/* )
-
3). 再起動:
$ reboot
-
4).「Welcome v3.45-1」画面にて、「インストール後」(After install tasks) タブを選択:
-
オレンジ色の「システム更新」(Update System) をクリック
→システム更新が正常にできるか確認
-
-
- --- - --- - --- - --- - --- - --- - --- - --- - ----- ----- ----- ----- ----- ----- ----- ----- ----- ----- ----
23. 参考:「i3-wm」環境について:
-
「EndeavourOS」の「i3-wm」のサイト:
Github: endeavouros-team/endeavouros-i3wm-setup
-
1). タイル型、スタック型、タブ型のレイアウトの切替え:
タイル型 (tiling) : タイリングは i3wm のデフォルトに設定されています。
スタック型 (stacking) : コンテナ内のフォーカスされたウィンドウのみが表示されます。コンテナの上部にウィンドウのリストが表示されます。
タブ型 (tabbed) : 新しいウィンドウはそれぞれ「タブ」としてフルスクリーンで開きます。
-
マウスまたはショートカットでウィンドウタブを切り替えることができます:
[mod]+「←」 ウィンドウタブを左に切替え
[mod]+「→」 ウィンドウタブを右に切替え
-
2). 使用されているアプリ:
→端末を変更したい場合は、「~/.profile」も変更 (export TERMINAL=xfce4-terminal)
-
3). ホーム「~/」のファイル一覧:
$ ls -1a ~/ . .. .Xauthority .Xresources .bash_history .bash_logout .bash_profile .bashrc .cache .config .dmrc .fehbg .local .mozilla .nanorc .profile .xprofile .xsession-errors .xsession-errors.old ダウンロード テンプレート デスクトップ ドキュメント ビデオ 音楽 画像 公開
-
4). ディスプレイマネージャの設定ファイル:
$ cat ~/.dmrc : [Desktop] Session=i3
-
5). 直前にセットした壁紙をセットするスクリプト:
$ cat ~/.fehbg #!/bin/sh feh --no-fehbg --bg-fill '/usr/share/endeavouros/backgrounds/endeavouros-wallpaper.png'
-
6). 「~/.config/」のファイル一覧:
$ ls -1 ~/.config/ : EOS-greeter.conf ←(ログイン画面の定義) EOS-initial-wallpaper.I3 QtProject.conf Thunar ←(ファイルマネージャ Thunar の定義) autostart dconf dunst eos-update-notifier.first_init example.picom.conf featherpad ←(テキストエディタ featherpad の定義) gtk-3.0 gtk-4.0 i3 ibus mimeapps.list mozc reflector-simple-free-params.txt ←(最速のミラーの定義) rofi ←(注目: 電源メニューの定義) systemd user-dirs.dirs user-dirs.locale welcome-own-cmds.conf welcome.conf xed ←(テキストエディタ xed の定義) xfce4 yay ←(AUR ヘルパーの定義)
-
7). 「welcome.conf」自動で作成:
$ cat ~/.config/welcome.conf : EOS_WELCOME_ACTIVE_TAB_NUMBER=6 # default: 2 (=After Install)
→たぶん、インストール直後に表示 (default: 2) した後、ワーススペース6 に移動したのを覚えているのかも。
単独の起動では使われません。
-
8). 「welcome-own-cmds.conf」手動で作成:
$ cat welcome-own-cmds.conf
→「welcome」アプリで自作した「タブ」
-
9). 「~/.config/i3/」のファイル一覧:
$ ls -1 ~/.config/i3/ : config i3blocks.conf keybindings scripts
-
10). 「~/.config/i3/scripts/」のファイル一覧:
$ ls -1 ~/.config/i3/scripts/ : bandwidth2 battery-pinebook-pro battery1 battery2 blur-lock cpu_usage disk empty_workspace keyboard-layout keyhint keyhint-2 memory openweather openweather-city openweather.conf power-profiles powermenu ppd-status temperature volume vpn
-
-
- --- - --- - --- - --- - --- - --- - --- - --- - ----- ----- ----- ----- ----- ----- ----- ----- ----- ----- -----
23-1. 「i3-wm」の設定ファイル「~/.config/i3/config」:
-
- 「EndeavourOS」(i3-wm) では、$mod が Windows キー (Mod4) に変更されています。
# set the mod key to the winkey: set $mod Mod4
-
参考:
$mod のデフォルトは Alt キー (Mod1) です。
$mod で使用するキー:
Shift+$mod で使用するキー:
Windows キー (Mod4) は、アプリケーション定義のショートカットとの競合を大幅に防止する一般的な代替手段です。「EndeavourOS」(i3-wm) では、「Windows」キーに置換えられています。
-
設定ファイル:
~/.config/i3/config
-
1). 「~/.config/i3/config」のデフォルトの設定:
$ xed ~/.config/i3/config
# This file is a modified version based on default i3-config-wizard config
# source is available here:
# https://raw.githubusercontent.com/endeavouros-team/endeavouros-i3wm-setup/master/.config/i3/config
# Maintainer: joekamprad [joekamprad@endeavouros.com]
# https://endeavouros.com
#
# iconic font icon search: https://fontawesome.com/v4.7/cheatsheet/
#
# --> to update this run the following command (will backup existing setup file)
# wget --backups=1 https://raw.githubusercontent.com/endeavouros-team/endeavouros-i3wm-setup/main/.config/i3/config -P ~/.config/i3/
#
# Endeavouros-i3 config file
# Source for complete framework of our i3 config and theming here: https://github.com/endeavouros-team/endeavouros-i3wm-setup
# EndeavourOS wiki holds some Information also: https://discovery.endeavouros.com/window-tiling-managers/i3-wm/
# Please see http://i3wm.org/docs/userguide.html for the official i3 reference!
#######################
# config starts here: #
#######################
# Font for window titles. Will also be used by the bar unless a different font
# is used in the bar {} block below.
# This font is widely installed, provides lots of unicode glyphs, right-to-left
# text rendering and scalability on retina/hidpi displays (thanks to pango).
font pango: Noto Sans Regular 10 ←(フォント指定)
# set the mod key to the winkey: ←($mod を Windows キー (Mod4) に変更)
set $mod Mod4
#####################
# workspace layout: #
#####################
# default i3 tiling mode: ←(タイリングの指定)
workspace_layout default
# i3 stacking layout:
# Each window will be fullscreen and tabbed top to bottom.
#workspace_layout stacking
# i3 tabbed layout:
# Each new window will open fullscreen as a tab (left to right)
#workspace_layout tabbed
##############################
# extra options for windows: #
##############################
#border indicator on windows:
new_window pixel 1
# thin borders
# hide_edge_borders both
# Set inner/outer gaps ←(内側/外側のギャップ)
gaps inner 6
gaps outer 3
# show window title bars (not officially supported with i3gaps)
#default_border normal
# window title alignment
#title_align center
# Use Mouse+$mod to drag floating windows to their wanted position ←(Mouse+$mod でウィンドウを移動)
floating_modifier $mod
# switch/iterate between workspaces ←(ワークスペース間の切替)
bindsym $mod+Tab workspace next
bindsym $mod+Shift+Tab workspace prev
# switch to workspace
bindsym $mod+1 workspace $ws1
bindsym $mod+2 workspace $ws2
bindsym $mod+3 workspace $ws3
bindsym $mod+4 workspace $ws4
bindsym $mod+5 workspace $ws5
bindsym $mod+6 workspace $ws6
bindsym $mod+7 workspace $ws7
bindsym $mod+8 workspace $ws8
bindsym $mod+9 workspace $ws9
bindsym $mod+0 workspace $ws10
# switch to workspace with numpad keys
bindcode $mod+87 workspace 1
bindcode $mod+88 workspace 2
bindcode $mod+89 workspace 3
bindcode $mod+83 workspace 4
bindcode $mod+84 workspace 5
bindcode $mod+85 workspace 6
bindcode $mod+79 workspace 7
bindcode $mod+80 workspace 8
bindcode $mod+81 workspace 9
bindcode $mod+90 workspace 10
# switch to workspace with numlock numpad keys
bindcode $mod+Mod2+87 workspace $ws1
bindcode $mod+Mod2+88 workspace $ws2
bindcode $mod+Mod2+89 workspace $ws3
bindcode $mod+Mod2+83 workspace $ws4
bindcode $mod+Mod2+84 workspace $ws5
bindcode $mod+Mod2+85 workspace $ws6
bindcode $mod+Mod2+79 workspace $ws7
bindcode $mod+Mod2+80 workspace $ws8
bindcode $mod+Mod2+81 workspace $ws9
bindcode $mod+Mod2+90 workspace $ws10
# move focused container to workspace
bindsym $mod+Shift+1 move container to workspace $ws1
bindsym $mod+Shift+2 move container to workspace $ws2
bindsym $mod+Shift+3 move container to workspace $ws3
bindsym $mod+Shift+4 move container to workspace $ws4
bindsym $mod+Shift+5 move container to workspace $ws5
bindsym $mod+Shift+6 move container to workspace $ws6
bindsym $mod+Shift+7 move container to workspace $ws7
bindsym $mod+Shift+8 move container to workspace $ws8
bindsym $mod+Shift+9 move container to workspace $ws9
bindsym $mod+Shift+0 move container to workspace $ws10
# move focused container to workspace with numpad keys
bindcode $mod+Shift+Mod2+87 move container to workspace $ws1
bindcode $mod+Shift+Mod2+88 move container to workspace $ws2
bindcode $mod+Shift+Mod2+89 move container to workspace $ws3
bindcode $mod+Shift+Mod2+83 move container to workspace $ws4
bindcode $mod+Shift+Mod2+84 move container to workspace $ws5
bindcode $mod+Shift+Mod2+85 move container to workspace $ws6
bindcode $mod+Shift+Mod2+79 move container to workspace $ws7
bindcode $mod+Shift+Mod2+80 move container to workspace $ws8
bindcode $mod+Shift+Mod2+81 move container to workspace $ws9
bindcode $mod+Shift+Mod2+90 move container to workspace $ws10
# move focused container to workspace with numpad keys
bindcode $mod+Shift+87 move container to workspace $ws1
bindcode $mod+Shift+88 move container to workspace $ws2
bindcode $mod+Shift+89 move container to workspace $ws3
bindcode $mod+Shift+83 move container to workspace $ws4
bindcode $mod+Shift+84 move container to workspace $ws5
bindcode $mod+Shift+85 move container to workspace $ws6
bindcode $mod+Shift+79 move container to workspace $ws7
bindcode $mod+Shift+80 move container to workspace $ws8
bindcode $mod+Shift+81 move container to workspace $ws9
bindcode $mod+Shift+90 move container to workspace $ws10
# resize window (you can also use the mouse for that): ←(ウィンドウサイズの変更)無効
#mode "resize" {
# These bindings trigger as soon as you enter the resize mode
# Pressing left will shrink the window's width.
# Pressing right will grow the window's width.
# Pressing up will shrink the window's height.
# Pressing down will grow the window's height.
# bindsym j resize shrink width 10 px or 10 ppt
# bindsym k resize grow height 10 px or 10 ppt
# bindsym l resize shrink height 10 px or 10 ppt
# bindsym ntilde resize grow width 10 px or 10 ppt
# same bindings, but for the arrow keys ←(矢印キーでのサイズ変更)
# bindsym Left resize shrink width 10 px or 10 ppt
# bindsym Down resize grow height 10 px or 10 ppt
# bindsym Up resize shrink height 10 px or 10 ppt
# bindsym Right resize grow width 10 px or 10 ppt
# back to normal: Enter or Escape
# bindsym Return mode "default"
# bindsym Escape mode "default"
#}
#bindsym $mod+r mode "resize" ←(サイズ変更のショートカット)無効
######################################
# keybindings for different actions: #
######################################
# start a terminal ←(「端末の起動」のショートカット)
bindsym $mod+Return exec xfce4-terminal
# kill focused window ←(「ウィンドウの終了」のショートカット)
bindsym $mod+q kill
# exit-menu ←(「電源ボタン」のショートカット)
bindsym $mod+Shift+e exec ~/.config/i3/scripts/powermenu
# Lock the system ←(「ロック画面」のショートカット)
# lock with a picture:
#bindsym $mod+l exec i3lock -i ~/.config/i3/i3-lock-screen.png -p default|win -t
# lock by blurring the screen:
bindsym $mod+l exec ~/.config/i3/scripts/blur-lock
# reload the configuration file ←(「設定ファイルの再読込」のショートカット)
bindsym $mod+Shift+c reload
# restart i3 inplace (preserves your layout/session, can be used to update i3) ←(「再起動」のショートカット)
bindsym $mod+Shift+r restart
# keybinding in fancy rofi (automated):
bindsym F1 exec ~/.config/i3/scripts/keyhint-2
# alternative
# keybinding list in editor:
# bindsym $mod+F1 exec xed ~/.config/i3/keybindings
# Backlight control ←(輝度調整)
bindsym XF86MonBrightnessUp exec xbacklight +5 && notify-send "Brightness - $(xbacklight -get | cut -d '.' -f 1)%"
bindsym XF86MonBrightnessDown exec xbacklight -5 && notify-send "Brightness - $(xbacklight -get | cut -d '.' -f 1)%"
# change focus ←(フォーカスの変更: jkbo)
bindsym $mod+j focus left
bindsym $mod+k focus down
bindsym $mod+b focus up
bindsym $mod+o focus right
# alternatively, you can use the cursor keys: ←(フォーカスの変更: 矢印キー)
bindsym $mod+Left focus left
bindsym $mod+Down focus down
bindsym $mod+Up focus up
bindsym $mod+Right focus right
# move focused window ←(フォーカスを移動: jkbo)
bindsym $mod+Shift+j move left
bindsym $mod+Shift+k move down
bindsym $mod+Shift+b move up
bindsym $mod+Shift+o move right
# alternatively, you can use the cursor keys: ←(フォーカスを移動: 矢印キー)
bindsym $mod+Shift+Left move left
bindsym $mod+Shift+Down move down
bindsym $mod+Shift+Up move up
bindsym $mod+Shift+Right move right
# split in horizontal orientation ←(横方向に分割)
bindsym $mod+h split h
# split in vertical orientation ←(縦方向に分割)
bindsym $mod+v split v
# enter fullscreen mode for the focused container ←(フルスクリーン)
bindsym $mod+f fullscreen toggle
# change container layout (stacked, tabbed, toggle split) ←(スタック、タブ、トグル分割の変更)
bindsym $mod+s layout stacking
bindsym $mod+g layout tabbed
bindsym $mod+e layout toggle split
# toggle tiling / floating ←(タイリング/フローティングの切替)
bindsym $mod+Shift+space floating toggle
# change focus between tiling / floating windows ←(タイリング とフローティング ウィンドウの間でフォーカスを変更)
bindsym $mod+space focus mode_toggle
# focus the parent container ←(親コンテナにフォーカス)
bindsym $mod+a focus parent
# open new empty workspace ←(新しい空のワークスペースを開く)
bindsym $mod+Shift+n exec ~/.config/i3/scripts/empty_workspace
# Multimedia Keys
# volume
bindsym XF86AudioRaiseVolume exec amixer -D pulse sset Master 5%+ && pkill -RTMIN+1 i3blocks
bindsym XF86AudioLowerVolume exec amixer -D pulse sset Master 5%- && pkill -RTMIN+1 i3blocks
# gradular volume control
bindsym $mod+XF86AudioRaiseVolume exec amixer -D pulse sset Master 1%+ && pkill -RTMIN+1 i3blocks
bindsym $mod+XF86AudioLowerVolume exec amixer -D pulse sset Master 1%- && pkill -RTMIN+1 i3blocks
# mute
bindsym XF86AudioMute exec amixer sset Master toggle && killall -USR1 i3blocks
# audio control
bindsym XF86AudioPlay exec playerctl play
bindsym XF86AudioPause exec playerctl pause
bindsym XF86AudioNext exec playerctl next
bindsym XF86AudioPrev exec playerctl previous
# Redirect sound to headphones
bindsym $mod+p exec /usr/local/bin/switch-audio-port
## App shortcuts ←(アプリのショートカット)
bindsym $mod+w exec /usr/bin/firefox
bindsym $mod+n exec /usr/bin/thunar
bindsym Print exec scrot ~/%Y-%m-%d-%T-screenshot.png && notify-send "Screenshot saved to ~/$(date +"%Y-%m-%d-%T")-screenshot.png"
# Power Profiles menu switcher (rofi) ←(電源ボタンのメニューの切替 )
bindsym $mod+Shift+p exec ~/.config/i3/scripts/power-profiles
##########################################
# configuration for workspace behaviour: #
##########################################
# Define names for default workspaces for which we configure key bindings later on.
# We use variables to avoid repeating the names in multiple places.
set $ws1 "1:"
set $ws2 "2:"
set $ws3 "3:"
set $ws4 "4:"
set $ws5 "5:"
set $ws6 "6"
set $ws7 "7"
set $ws8 "8"
set $ws9 "9"
set $ws10 "10"
# use workspaces on different displays:
# where you have to replace VGA-0/HDMI-0 with the names for your displays
# you can get from xrandr command
#workspace $ws1 output VGA-0
#workspace $ws2 output VGA-0
#workspace $ws3 output HDMI-0
#workspace $ws4 output HDMI-0
#workspace $ws5 output HDMI-0
# bind program to workspace and focus to them on startup:
assign [class="Xfce4-terminal"] $ws1
assign [class="(?i)firefox"] $ws2
assign [class="Thunar"] $ws3
assign [class="Thunderbird"] $ws4
assign [class="TelegramDesktop"] $ws5
# automatic set focus new window if it opens on another workspace than the current:
for_window [class=Xfce4-terminal] focus
for_window [class=(?i)firefox] focus
for_window [class=Thunar] focus
for_window [class=Thunderbird] focus
for_window [class=TelegramDesktop] focus
##############
# compositor #
##############
# transparency
# uncomment one of them to be used
# options could need changes, related to used GPU and drivers.
# to find the right setting consult the archwiki or ask at the forum.
#
# xcompmgr: https://wiki.archlinux.org/title/Xcompmgr
# manpage: https://man.archlinux.org/man/xcompmgr.1.en
# install xcompmgr package to use it (yay -S xcompmgr)
#exec --no-startup-id xcompmgr -C -n &
# or an more specialized config like this:
#exec --no-startup-id xcompmgr -c -C -t-5 -l-5 -r4.2 -o.55 &
#
# or:
#
# picom: https://wiki.archlinux.org/title/Picom
# manpage: https://man.archlinux.org/man/picom.1.en
# The default configuration is available in /etc/xdg/picom.conf
# For modifications, it can be copied to ~/.config/picom/picom.conf or ~/.config/picom.conf
# install picom package (yay -S picom)
# start using default config
#exec_always --no-startup-id picom -b
#
# for custom config:
#exec_always --no-startup-id picom --config ~/.config/picom.conf
#############################################
# autostart applications/services on login: #
#############################################
#get auth work with polkit-gnome
exec --no-startup-id /usr/lib/polkit-gnome/polkit-gnome-authentication-agent-1
# dex execute .desktop files + apps using /etc/xdg/autostart.
# when second to i3 a DE is installed or mixed usage of i3 + xfce4 or GNOME
# in this cases better disable dex and use manual starting apps using xdg/autostart
# if enabled you should comment welcome app.
# https://github.com/jceb/dex
#exec --no-startup-id dex -a -s /etc/xdg/autostart/:~/.config/autostart/
exec --no-startup-id dex --autostart --environment i3
# start welcome app ←(welcome の自動起動)
#exec --no-startup-id sh /usr/share/endeavouros/scripts/welcome --startdelay=3
# num lock activated
#exec --no-startup-id numlockx on
# configure multiple keyboard layouts and hotkey to switch (Alt+CAPSLOCK in this example)
#exec --no-startup-id setxkbmap -layout 'us,sk' -variant altgr-intl,qwerty -option 'grp:alt_caps_toggle'
# start conky:
#exec_always --no-startup-id conky
# start a script to setup displays
# uncomment the next line, use arandr to setup displays and save the file as monitor:
exec --no-startup-id ~/.screenlayout/monitor.sh
# set wallpaper ←(壁紙)
# exec --no-startup-id sleep 2 && nitrogen --restore
exec --no-startup-id sleep 1 && feh --bg-fill /usr/share/endeavouros/backgrounds/endeavouros-wallpaper.png
# set powersavings for display:
exec --no-startup-id xset s 480 dpms 600 600 600
# disable power saving (for example if using xscreensaver)
#exec --no-startup-id xset -dpms
# use xautolock to use autosuspend rules for mobile devices
# https://wiki.archlinux.org/title/Session_lock#xautolock
#exec --no-startup-id xautolock -time 60 -locker "systemctl suspend"
# xscreensaver
# https://www.jwz.org/xscreensaver
#exec --no-startup-id xscreensaver --no-splash
# Desktop notifications ←(デスクトップ通知)
exec --no-startup-id dbus-launch dunst --config ~/.config/dunst/dunstrc
# alternative if you installed aside with XFCE4:
# exec --no-startup-id /usr/lib/xfce4/notifyd/xfce4-notifyd &
# autotiling script
# https://github.com/nwg-piotr/autotiling
# `yay -S autotiling ;) (it is in AUR)
#exec_always --no-startup-id autotiling
# Autostart apps as you like ←(自動起動アプリ)
#exec --no-startup-id sleep 2 && xfce4-terminal
exec --no-startup-id sleep 7 && firefox https://github.com/endeavouros-team/endeavouros-i3wm-setup/blob/main/force-knowledge.md
#exec --no-startup-id sleep 3 && thunar
###############
# system tray #
###############
# if you do not use dex: exec --no-startup-id dex --autostart --environment i3
# you need to have tray apps started manually one by one:
# start blueberry app for managing bluetooth devices from tray:
#exec --no-startup-id blueberry-tray
# networkmanager-applet
#exec --no-startup-id nm-applet
# clipman-applet
#exec --no-startup-id xfce4-clipman
##################
# floating rules #
##################
# set floating (nontiling) for apps needing it
for_window [class="Yad" instance="yad"] floating enable
for_window [class="Galculator" instance="galculator"] floating enable
for_window [class="Blueberry.py" instance="blueberry.py"] floating enable
# set floating (nontiling) for special apps
for_window [class="Xsane" instance="xsane"] floating enable
for_window [class="Pavucontrol" instance="pavucontrol"] floating enable
for_window [class="qt5ct" instance="qt5ct"] floating enable
for_window [class="Blueberry.py" instance="blueberry.py"] floating enable
for_window [class="Bluetooth-sendto" instance="bluetooth-sendto"] floating enable
for_window [class="Pamac-manager"] floating enable
for_window [window_role="About"] floating enable
# set border of floating window
for_window [class="urxvt"] border pixel 1
# set size of floating window
#for_window [window_role="(?i)GtkFileChooserDialog"] resize set 640 480 #to set size of file choose dialog
#for_window [class=".*"] resize set 640 480 #to change size of all floating windows
# set position of floating window
#for_window [class=".*"] move position center
######################################
# color settings for bar and windows #
######################################
# Define colors variables:
set $darkbluetrans #08052be6
set $darkblue #08052b
set $lightblue #5294e2
set $urgentred #e53935
set $white #ffffff
set $black #000000
set $purple #e345ff
set $darkgrey #383c4a
set $grey #b0b5bd
set $mediumgrey #8b8b8b
set $yellowbrown #e1b700
# define colors for windows:
#class border bground text indicator child_border
client.focused $lightblue $darkblue $white $mediumgrey $mediumgrey
client.unfocused $darkblue $darkblue $grey $darkgrey $darkgrey
client.focused_inactive $darkblue $darkblue $grey $black $black
client.urgent $urgentred $urgentred $white $yellowbrown $yellowbrown
############################################
# bar settings (input comes from i3blocks) #
############################################
# Start i3bar to display a workspace bar
# (plus the system information i3status finds out, if available)
bar {
font pango: Noto Sans Regular 10
status_command i3blocks -c ~/.config/i3/i3blocks.conf
position bottom
# i3bar_command i3bar --transparency
# it could be that you have no primary display set: set one (xrandr --output <output> --primary)
# reference: https://i3wm.org/docs/userguide.html#_tray_output
#tray_output primary
tray_padding 0
# When strip_workspace_numbers is set to yes,
# any workspace that has a name of the form
# “[n][:][NAME]” will display only the name.
strip_workspace_numbers yes
##strip_workspace_name no
colors {
separator $purple
background $darkgrey
statusline $white
# border bg txt indicator
focused_workspace $mediumgrey $grey $darkgrey $purple
active_workspace $lightblue $mediumgrey $darkgrey $purple
inactive_workspace $darkgrey $darkgrey $grey $purple
urgent_workspace $urgentred $urgentred $white $purple
}
}
# you can add different bars for multidisplay setups on each display:
# set output HDMI-0 to the display you want the bar, --transparency can be set.
# Transparency needs rgba color codes to be used where the last two letters are the transparency factor see here:
# https://gist.github.com/lopspower/03fb1cc0ac9f32ef38f4
# #08052be6 --> e6=90%
# bar {
# font pango: Noto Sans Regular 10
# status_command i3blocks -c ~/.config/i3/i3blocks-2.conf
# i3bar_command i3bar --transparency
# output HDMI-0
# position bottom
#
# When strip_workspace_numbers is set to yes,
# any workspace that has a name of the form
# “[n][:][NAME]” will display only the name.
#strip_workspace_numbers yes
##strip_workspace_name no
#
# colors {
# separator $purple
# background $darkbluetrans
# statusline $white
# border bg txt indicator
# focused_workspace $lighterblue $lighterblue $darkblue $purple
# active_workspace $lightdblue $lightdblue $darkblue $purple
# inactive_workspace $darkblue $darkblue $lightdblue $purple
# urgent_workspace $urgentred $urgentred $white $purple
# }
#}
##################################### ←(アプリケーションメニュー)
# Application menu handled by rofi: #
#####################################
## rofi bindings fancy application menu ($mod+d /F9 optional disabled)
bindsym $mod+d exec rofi -modi drun -show drun \
-config ~/.config/rofi/rofidmenu.rasi
#bindsym F9 exec rofi -modi drun -show drun \
# -config ~/.config/rofi/rofidmenu.rasi
## rofi bindings for window menu ($mod+t /F10 optional disabled)
bindsym $mod+t exec rofi -show window \
-config ~/.config/rofi/rofidmenu.rasi
#bindsym F10 exec rofi -show window \
# -config ~/.config/rofi/rofidmenu.rasi
## rofi bindings to manage clipboard (install rofi-greenclip from the AUR)
#exec --no-startup-id greenclip daemon>/dev/null
#bindsym $mod+c exec --no-startup-id rofi -modi "clipboard:greenclip print" -show clipboard \
# -config ~/.config/rofi/rofidmenu.rasi
-
-
- --- - --- - --- - --- - --- - --- - --- - --- - ----- ----- ----- ----- ----- ----- ----- ----- ----- ----- ----- -
23-2. 「lxappearance-gtk3」 = gtk3 テーマの処理:
-
一般的なテーマ // gtk3 とアイコン:
~/.config/gtk-3.0
~/.Xresources
GTK3 テーマ、アイコン、および 「Xcursor theme」を参照および設定できる「LXAppearance」がインストールされています。
ただし、LXAppearance で Xcursor を変更してすべてのアプリに適用する場合は、~/.Xresources 内で Xcursor を手動で設定する必要があります。
-
-
- --- - --- - --- - --- - --- - --- - --- - --- - ----- ----- ----- ----- ----- ----- ----- ----- ----- ----- ----- --
23-3. 「dunst」 = 通知
-
設定ファイル:
~/.config/dunst/dunstrc
-
-
- --- - --- - --- - --- - --- - --- - --- - --- - ----- ----- ----- ----- ----- ----- ----- ----- ----- ----- ----- ---
23-4. 「dex」 =自動起動:
-
設定ファイル:
/etc/xdg/autostart/
-
dex はデフォルトで有効で、自動起動します。
→無効にするには、次の行をコメントアウトします。
「exec --no-startup-id dex --autostart --environment i3」
-
$ pacman -Si dex : リポジトリ : community 名前 : dex バージョン : 0.9.0-1 説明 : Program to generate and execute DesktopEntry files of type Application アーキテクチャ : any URL : https://github.com/jceb/dex ライセンス : GPL2 グループ : なし 提供 : なし 依存パッケージ : python 提案パッケージ : なし 衝突パッケージ : なし 置換パッケージ : なし ダウンロード容量 : 12.02 KiB インストール容量 : 31.57 KiB パッケージ作成者 : Johannes Löthberg <demize@archlinux.org> ビルド日時 : 2020年10月10日 19時50分00秒 検証方法 : MD5 Sum SHA-256 Sum 署名
--> タイプ Application の DesktopEntry ファイルを生成して実行するプログラム
-
$ dex --version dex 0.9.0
-
$ dex --help
usage: dex [options] [DesktopEntryFile [DesktopEntryFile ...]]
dex, DesktopEntry Execution, is a program to generate and execute DesktopEntry files of the type
Application
positional arguments:
files DesktopEntry files
options:
-h, --help show this help message and exit
--test perform a self-test
-v, --verbose verbose output
-V, --version display version information
run:
-a, --autostart autostart programs
-d, --dry-run dry run, don't execute any command
-e ENVIRONMENT, --environment ENVIRONMENT
specify the Desktop Environment an autostart should be performed for;
works only in combination with --autostart
-s SEARCHPATHS, --search-paths SEARCHPATHS
colon separated list of paths to search for desktop files, overriding the
default search list
--term TERM the terminal emulator that will be used to run the program if
Terminal=true is set in the desktop file, defaults to x-terminal-emulator
-w, --wait block until the program exits
create:
-c CREATE [CREATE ...], --create CREATE [CREATE ...]
create a DesktopEntry file for the given program. If a second argument is
provided it's taken as output filename or written to stdout (filename: -).
By default a new file with the postfix .desktop is created
-t TARGETDIR, --target-directory TARGETDIR
create files in target directory
Example usage: list autostart programs: dex -ad
-
$ dex -ad Executing command: /usr/lib/at-spi-bus-launcher --launch-immediately Executing command: eos-update-notifier -init Executing command: nm-applet Executing command: xdg-user-dirs-gtk-update Executing command: sh /usr/share/endeavouros/scripts/wallpaper-once Executing command: sh /usr/share/endeavouros/scripts/welcome --startdelay=3 Executing command: /usr/lib/xapps/sn-watcher/xapp-sn-watcher
-
$ ls -1 /etc/xdg/autostart/ : at-spi-dbus-bus.desktop eos-update-notifier.desktop firewall-applet.desktop nm-applet.desktop user-dirs-update-gtk.desktop wallpaper-once.desktop welcome.desktop xapp-sn-watcher.desktop
-
$ ls -1 ~/.config/autostart/ : firewall-applet.desktop
-
$ cat ~/.config/autostart/firewall-applet.desktop : [Desktop Entry] Name=Firewall Applet Name[ja]=ファイアウォールアプレット Comment=Firewall Applet Comment[ja]=ファイアウォールアプレット Icon=firewall-applet Categories=System;Settings;Security; Exec=/usr/bin/firewall-applet Type=Application StartupNotify=true Terminal=false Hidden=true
-
$ cat /etc/xdg/autostart/eos-update-notifier.desktop [Desktop Entry] Type=Application Encoding=UTF-8 Name=EndeavourOS Update Notifier Comment=Update Notifier and Updater for EndeavourOS Comment[fi]=Päivitysten näyttäjä Exec=eos-update-notifier -init Icon=endeavouros-icon # StartupNotify=false # Terminal=False Hidden=false X-GNOME-Autostart-enabled=true X-KDE-autostart-after=panel Categories=System
-
$ cat /etc/xdg/autostart/wallpaper-once.desktop [Desktop Entry] Type=Application Encoding=UTF-8 Name=wallpaper-once Comment=EndeavourOS initial wallpaper installer Exec=sh /usr/share/endeavouros/scripts/wallpaper-once Icon=endeavouros-icon # StartupNotify=false # Terminal=False Hidden=false X-GNOME-Autostart-enabled=true X-KDE-autostart-after=panel
-
$ cat /etc/xdg/autostart/welcome.desktop [Desktop Entry] Type=Application Encoding=UTF-8 Name=Welcome Comment=EndeavourOS Welcome launcher Comment[fi]=EndeavourOS:n Welcome-ohjelman käynnistin Comment[sk]=Spúšťač privítania v systéme EndeavourOS # for autostart: Exec=sh /usr/share/endeavouros/scripts/welcome --startdelay=3 # for desktop launcher: #Exec=sh /usr/share/endeavouros/scripts/welcome --once Icon=endeavouros-icon # StartupNotify=false # Terminal=False Hidden=false X-GNOME-Autostart-enabled=true X-KDE-autostart-after=panel Categories=System
-
$ cat /etc/xdg/autostart/firewall-applet.desktop [Desktop Entry] Name=Firewall Applet Name[ja]=ファイアウォールアプレット Comment=Firewall Applet Comment[ja]=ファイアウォールアプレット Icon=firewall-applet Categories=System;Settings;Security; Exec=/usr/bin/firewall-applet Type=Application StartupNotify=true Terminal=false
-
$ sudo xed /etc/xdg/autostart//ibus-daemon.desktop
[Desktop Entry] Encoding=UTF-8 Version=0.9.4 Type=Application Name=IBus daemon Comment=ibus デーモンの起動 Exec=/usr/bin/ibus-daemon -drx StartupNotify=false Terminal=false Hidden=false
-
$ dex -ad : Executing command: /usr/lib/at-spi-bus-launcher --launch-immediately Executing command: eos-update-notifier -init Executing command: /usr/bin/ibus-daemon -drx Executing command: nm-applet Executing command: xdg-user-dirs-gtk-update Executing command: sh /usr/share/endeavouros/scripts/wallpaper-once Executing command: sh /usr/share/endeavouros/scripts/welcome --startdelay=3 Executing command: /usr/lib/xapps/sn-watcher/xapp-sn-watcher
-
-
- --- - --- - --- - --- - --- - --- - --- - --- - ----- ----- ----- ----- ----- ----- ----- ----- ----- ----- ----- ----
23-5. 「i3blocks」= パネルバー:
-
パネルバー:
(1). プリセットのワークスペース(端末、ブラウザ、メール、チャット)
(2). アプリケーション クイックスターター
(3). システムの情報(ディスク空き、メモリ使用、CPU、ネットワーク)
(4). 音量
→音量レベル、右クリックで pulseaudio コントロールを開く
(5). ショートカット
(6). 時計
(7). 電源ボタン: ログアウトメニュー
→電源オフ、ログアウト、サスペンド、休止状態など
(8). システムトレイ
→ネットワーク マネージャーと更新アイコンを表示
(9). 天気 (openweather)を使用する場合:
「都市コード」を取得: https://openweathermap.org/find?q=
-
例: 「kobe, Japan」で検索:
ヒットした、「Kobe, JP」をクリック
地図が開くので、そのURL を確認:
https://openweathermap.org/city/1859171
URL の最後の 7つの数字が「都市コード」です。
-
「apikey」を取得: https://openweathermap.org/appid
→有料と無料があるので注意。
-
→「都市コード」と「apikey」を「~/.config/i3/scripts/openweather.sh」に追加
-
1). 「~/.config/i3/i3blocks.conf」のデフォルトの設定:
$ xed ~/.config/i3/i3blocks.conf
# i3blocks config file changed for EndeavourOS-i3 setup
# source is available here:
# https://raw.githubusercontent.com/endeavouros-team/endeavouros-i3wm-setup/main/.config/i3/i3blocks.conf
# Maintainer: joekamprad [joekamprad@endeavouros.com]
# Former Visual Designer: Florent Valetti [@FLVAL EndeavourOS]
# created for i3wm setup on EndeavourOS
# https://endeavouros.com
# cheatsheet for icon fonts used on the block-bar:
# https://fontawesome.com/v4.7/cheatsheet/
# --> to update this run the following command:
# wget --backups=1 https://raw.githubusercontent.com/endeavouros-team/endeavouros-i3wm-setup/main/.config/i3/i3blocks.conf -P ~/.config/i3/
# Please see man i3blocks for a complete reference!
# The man page is also hosted at http://vivien.github.io/i3blocks
# List of valid properties:
#
# align
# color
# command
# full_text
# instance
# interval
# label
# min_width
# name
# separator
# separator_block_width
# short_text
# signal
# urgent
# Global properties
#
# The top properties below are applied to every block, but can be overridden.
separator=false
markup=pango
#[Weather] ←(お天気)未使用
#command=~/.config/i3/scripts/openweather
# or:
#command=~/.config/i3/scripts/openweather-city
#interval=1800
#color=#7275b3
[terminal] ←(端末)
full_text=
color=#807dfe
command=i3-msg -q exec xfce4-terminal
[browser] ←(ブラウザ)
full_text=
color=#ff7f81
command=i3-msg -q exec firefox
[files] ←(ファイルマネージャ)
full_text=
color=#7f3fbf
command=i3-msg -q exec thunar ~/
#[mail] ←(メール)未使用
#full_text=
#color=#dbcb75
#command=i3-msg -q exec thunderbird
[simple-2] ←(セパレータ)
full_text=: :
color=#717171
# Disk usage ←(ディスクの空き)
#
# The directory defaults to $HOME if the instance is not specified.
# The script may be called with a optional argument to set the alert
# (defaults to 10 for 10%).
[disk]
label=
instance=/
command=~/.config/i3/scripts/disk
interval=30
# Memory usage ←(メモリの使用率)
#
# The type defaults to "mem" if the instance is not specified.
[memory]
label=
command=~/.config/i3/scripts/memory
interval=2
[cpu_usage] ←(CPUの使用率)
label=
command=~/.config/i3/scripts/cpu_usage
#min_width=CPU: 100.00%
interval=2
[CPU-temperature] ←(CPUの温度)
label=
command=~/.config/i3/scripts/temperature
interval=30
#T_WARN=70
#T_CRIT=90
#SENSOR_CHIP=""
# where SENSOR_CHIP can be find with sensors output
# can be used also for GPU temperature or other temperature sensors lm-sensors detects.
# showing name of connected network (enable for wifi use)
#[net]
#label=
#command=echo "$(LANG=C nmcli d | grep connected | awk '{print $4}')"
#interval=30
[bandwidth] ←(無線LAN の電波強度)
command=~/.config/i3/scripts/bandwidth2
interval=persist
# Battery indicator ←(バッテリ残量)
[battery]
command=~/.config/i3/scripts/battery2
# for alternative battery script change to battery1
# change this to battery-pinebook-pro if you are running on pinebook-pro
label=
interval=30
[simple-2] ←(セパレータ)
full_text=: :
color=#717171
[pavucontrol]
full_text=
command=pavucontrol
[volume-pulseaudio]
command=~/.config/i3/scripts/volume
instance=Master
interval=1
# display keyboard layout name
# for keyboard layouts switcher
# see i3 config file
# this needs xkblayout-state installed from the AUR:
# https://aur.archlinux.org/packages/xkblayout-state-git
#[keyboard-layout]
#command=~/.config/i3/scripts/keyboard-layout
#interval=2
[keybindings]
full_text=
command=~/.config/i3/scripts/keyhint
# power-profiles-daemon implementation:
# needs package power-profiles-daemon installed and the service running see here:
# https://wiki.archlinux.org/title/CPU_frequency_scaling#power-profiles-daemon
#set power-profile
[ppd_menu]
full_text=
command=~/.config/i3/scripts/power-profiles
color=#407437
#Show the current power-profile
[ppd-status]
command=~/.config/i3/scripts/ppd-status
interval=5
[time] ←(時計)
#label=
command=date '+%a %d %b %H:%M:%S' ←修正: 「command=date '+%m/%d %a %H:%M'」
interval=1
[shutdown_menu] ←(電源ボタン)
full_text=
command=~/.config/i3/scripts/powermenu
[simple-2] ←(セパレータ)
full_text=: :
color=#717171
→パネルの右端の「有線LAN の接続」は定義されていません。別の設定ファイルがあるのかも。
-
-
- --- - --- - --- - --- - --- - --- - --- - --- - ----- ----- ----- ----- ----- ----- ----- ----- ----- ----- ----- -----
23-6. 「rofi」= ログアウトメニュー:
-
電源ボタン: ログアウトメニュー
-
電源オフする場合:
電源ボタンをクリック→「Shutdown」をクリック→Enter
もしくは、
Windows + Shift + e →Tab または矢印キーで「Shutdown」を選択 →Enter
-
設定ファイル:
~/.config/i3/scripts/powermenu
-
メニューのテーマ/配色の設定:
~/.config/rofi/powermenu.rasi
-
1).「i3-wm」環境での、「rofi」の設定:
$ ls -1 ~/.config/rofi/ : arc_dark_colors.rasi arc_dark_transparent_colors.rasi power-profiles.rasi powermenu.rasi rofidmenu.rasi rofikeyhint.rasi
→「rofi」で通常使われる「config.rasi」が見当たりません。
-
2).「~/.config/rofi/arc_dark_colors.rasi」
Arch Dark の色の定義:
$ cat ~/.config/rofi/arc_dark_colors.rasi
/*******************************************************
* ROFI Arc Dark colors for EndeavourOS
* Maintainer: joekamprad <joekamprad@endeavouros.com>
*******************************************************/
* {
selected-normal-foreground: rgba ( 249, 249, 249, 100 % );
foreground: rgba ( 196, 203, 212, 100 % );
normal-foreground: @foreground;
alternate-normal-background: rgba ( 64, 69, 82, 59 % );
red: rgba ( 220, 50, 47, 100 % );
selected-urgent-foreground: rgba ( 249, 249, 249, 100 % );
blue: rgba ( 38, 139, 210, 100 % );
urgent-foreground: rgba ( 204, 102, 102, 100 % );
alternate-urgent-background: rgba ( 75, 81, 96, 90 % );
active-foreground: rgba ( 101, 172, 255, 100 % );
lightbg: rgba ( 238, 232, 213, 100 % );
selected-active-foreground: rgba ( 249, 249, 249, 100 % );
alternate-active-background: rgba ( 75, 81, 96, 89 % );
background: rgba ( 45, 48, 59, 95 % );
alternate-normal-foreground: @foreground;
normal-background: @background;
lightfg: rgba ( 88, 104, 117, 100 % );
selected-normal-background: rgba ( 64, 132, 214, 100 % );
border-color: rgba ( 124, 131, 137, 100 % );
spacing: 2;
separatorcolor: rgba ( 29, 31, 33, 100 % );
urgent-background: rgba ( 29, 31, 33, 17 % );
selected-urgent-background: rgba ( 165, 66, 66, 100 % );
alternate-urgent-foreground: @urgent-foreground;
background-color: rgba ( 0, 0, 0, 0 % );
alternate-active-foreground: @active-foreground;
active-background: rgba ( 29, 31, 33, 17 % );
selected-active-background: rgba ( 68, 145, 237, 100 % );
}
-
3).「~/.config/rofi/arc_dark_transparent_colors.rasi」
Arch Dark の透明色の定義:
$ cat ~/.config/rofi/arc_dark_transparent_colors.rasi
/*******************************************************
* ROFI Arch Dark Transparent colors for EndeavourOS
* Maintainer: joekamprad <joekamprad@endeavouros.com>
*******************************************************/
* {
selected-normal-foreground: rgba ( 255, 147, 5, 100 % );
foreground: rgba ( 196, 203, 212, 100 % );
normal-foreground: @foreground;
alternate-normal-background: rgba ( 45, 48, 59, 1 % );
red: rgba ( 220, 50, 47, 100 % );
selected-urgent-foreground: rgba ( 249, 249, 249, 100 % );
blue: rgba ( 38, 139, 210, 100 % );
urgent-foreground: rgba ( 204, 102, 102, 100 % );
alternate-urgent-background: rgba ( 75, 81, 96, 90 % );
active-foreground: rgba ( 101, 172, 255, 100 % );
lightbg: rgba ( 238, 232, 213, 100 % );
selected-active-foreground: rgba ( 249, 249, 249, 100 % );
alternate-active-background: rgba ( 45, 48, 59, 88 % );
background: rgba ( 45, 48, 59, 88 % );
alternate-normal-foreground: @foreground;
normal-background: rgba ( 45, 48, 59, 1 % );
lightfg: rgba ( 88, 104, 117, 100 % );
selected-normal-background: rgba ( 24, 26, 32, 100 % );
border-color: rgba ( 124, 131, 137, 100 % );
spacing: 2;
separatorcolor: rgba ( 45, 48, 59, 1 % );
urgent-background: rgba ( 45, 48, 59, 15 % );
selected-urgent-background: rgba ( 165, 66, 66, 100 % );
alternate-urgent-foreground: @urgent-foreground;
background-color: rgba ( 0, 0, 0, 0 % );
alternate-active-foreground: @active-foreground;
active-background: rgba ( 29, 31, 33, 17 % );
selected-active-background: rgba ( 26, 28, 35, 100 % );
}
-
4).「~/.config/rofi/powermenu.rasi」
$ cat ~/.config/rofi/powermenu.rasi
/*******************************************************
* ROFI configs i3 powermenu for EndeavourOS
* Maintainer: joekamprad <joekamprad@endeavouros.com>
*******************************************************/
configuration {
font: "Noto Sans Regular 10";
show-icons: false;
icon-theme: "Qogir";
scroll-method: 0;
disable-history: false;
sidebar-mode: false;
}
@import "~/.config/rofi/arc_dark_transparent_colors.rasi"
window {
background-color: @background;
border: 0;
padding: 10;
transparency: "real";
width: 120px;
location: east;
/*y-offset: 18;*/
/*x-offset: 850;*/
}
listview {
lines: 7;
columns: 1;
scrollbar: false;
}
element {
border: 0;
padding: 1px;
}
element-text {
background-color: inherit;
text-color: inherit;
}
element.normal.normal {
background-color: @normal-background;
text-color: @normal-foreground;
}
element.normal.urgent {
background-color: @urgent-background;
text-color: @urgent-foreground;
}
element.normal.active {
background-color: @active-background;
text-color: @active-foreground;
}
element.selected.normal {
background-color: @selected-normal-background;
text-color: @selected-normal-foreground;
}
element.selected.urgent {
background-color: @selected-urgent-background;
text-color: @selected-urgent-foreground;
}
element.selected.active {
background-color: @selected-active-background;
text-color: @selected-active-foreground;
}
element.alternate.normal {
background-color: @alternate-normal-background;
text-color: @alternate-normal-foreground;
}
element.alternate.urgent {
background-color: @alternate-urgent-background;
text-color: @alternate-urgent-foreground;
}
element.alternate.active {
background-color: @alternate-active-background;
text-color: @alternate-active-foreground;
}
scrollbar {
width: 4px;
border: 0;
handle-color: @normal-foreground;
handle-width: 8px;
padding: 0;
}
mode-switcher {
border: 2px 0px 0px;
border-color: @separatorcolor;
}
button {
spacing: 0;
text-color: @normal-foreground;
}
button.selected {
background-color: @selected-normal-background;
text-color: @selected-normal-foreground;
}
inputbar {
spacing: 0;
text-color: @normal-foreground;
padding: 1px;
}
case-indicator {
spacing: 0;
text-color: @normal-foreground;
}
entry {
spacing: 0;
text-color: @normal-foreground;
}
prompt {
spacing: 0;
text-color: @normal-foreground;
}
inputbar {
children: [ prompt,textbox-prompt-colon,entry,case-indicator ];
}
textbox-prompt-colon {
expand: false;
str: ":";
margin: 0px 0.3em 0em 0em;
text-color: @normal-foreground;
}
/*removes the text input line*/
mainbox {
children: [listview];
}
-
-
- --- - --- - --- - --- - --- - --- - --- - --- - ----- ----- ----- ----- ----- ----- ----- ----- ----- ----- ----- ----- -
23-7. 「rofi」= アプリケーションメニュー:
-
カラースキーム:
~/.config/rofi/arc_dark_transparent_colors.rasi
~/.config/rofi/arc_dark_colors-ori.rasi
→色は、最後の列の透明度を呼び出す rgba です:
rgba ( 26, 28, 35, 100 % )
-
メニューのテーマ/配色の設定:
~/.config/rofi/rofidmenu.rasi
-
1).「i3-wm」環境での、「rofi」の設定:
$ ls -1 ~/.config/rofi/ : arc_dark_colors.rasi arc_dark_transparent_colors.rasi power-profiles.rasi powermenu.rasi rofidmenu.rasi rofikeyhint.rasi
→「rofi」で通常使われる「config.rasi」が見当たりません。
-
2).「~/.config/rofi/rofidmenu.rasi」
通常、i3wm の dmenu (アプリランチャー)の代用として、rofi は使われます。
-
$ cat ~/.config/rofi/rofidmenu.rasi
/*******************************************************
* ROFI configs i3 Apps menu for EndeavourOS
* Maintainer: joekamprad <joekamprad@endeavouros.com>
*******************************************************/
configuration {
font: "Noto Sans Regular 10";
show-icons: true;
icon-theme: "Qogir";
display-drun: "Apps";
drun-display-format: "{name}";
scroll-method: 0;
disable-history: false;
sidebar-mode: false;
}
@import "~/.config/rofi/arc_dark_transparent_colors.rasi"
window {
background-color: @background;
border: 0;
padding: 30;
}
listview {
lines: 10;
columns: 3;
}
mainbox {
border: 0;
padding: 0;
}
message {
border: 2px 0px 0px;
border-color: @separatorcolor;
padding: 1px;
}
textbox {
text-color: @foreground;
}
listview {
fixed-height: 0;
border: 8px 0px 0px;
border-color: @separatorcolor;
spacing: 8px;
scrollbar: false;
padding: 2px 0px 0px;
}
element {
border: 0;
padding: 1px;
}
element-text {
background-color: inherit;
text-color: inherit;
}
element.normal.normal {
background-color: @normal-background;
text-color: @normal-foreground;
}
element.normal.urgent {
background-color: @urgent-background;
text-color: @urgent-foreground;
}
element.normal.active {
background-color: @active-background;
text-color: @active-foreground;
}
element.selected.normal {
background-color: @selected-normal-background;
text-color: @selected-normal-foreground;
}
element.selected.urgent {
background-color: @selected-urgent-background;
text-color: @selected-urgent-foreground;
}
element.selected.active {
background-color: @selected-active-background;
text-color: @selected-active-foreground;
}
element.alternate.normal {
background-color: @alternate-normal-background;
text-color: @alternate-normal-foreground;
}
element.alternate.urgent {
background-color: @alternate-urgent-background;
text-color: @alternate-urgent-foreground;
}
element.alternate.active {
background-color: @alternate-active-background;
text-color: @alternate-active-foreground;
}
scrollbar {
width: 4px;
border: 0;
handle-color: @normal-foreground;
handle-width: 8px;
padding: 0;
}
mode-switcher {
border: 2px 0px 0px;
border-color: @separatorcolor;
}
button {
spacing: 0;
text-color: @normal-foreground;
}
button.selected {
background-color: @selected-normal-background;
text-color: @selected-normal-foreground;
}
inputbar {
spacing: 0;
text-color: @normal-foreground;
padding: 1px;
}
case-indicator {
spacing: 0;
text-color: @normal-foreground;
}
entry {
spacing: 0;
text-color: @normal-foreground;
}
prompt {
spacing: 0;
text-color: @normal-foreground;
}
inputbar {
children: [ prompt,textbox-prompt-colon,entry,case-indicator ];
}
textbox-prompt-colon {
expand: false;
str: ":";
margin: 0px 0.3em 0em 0em;
text-color: @normal-foreground;
}
→検索窓の「:」部分の定義みたい。
-
-
- --- - --- - --- - --- - --- - --- - --- - --- - ----- ----- ----- ----- ----- ----- ----- ----- ----- ----- ----- ----- --
23-8. 電源プロファイル:
-
電源プロファイル ハンドラのメニュー (power-profiles handler menu):
→「i3-bar」からパワーモードを簡単に切り替えることができます。
-
「~/.config/rofi/power-profiles.rasi」
$ cat ~/.config/rofi/power-profiles.rasi
/*******************************************************
* ROFI configs i3 powermenu for EndeavourOS
* Maintainer: joekamprad <joekamprad@endeavouros.com>
*******************************************************/
configuration {
font: "Noto Sans Regular 10";
show-icons: false;
icon-theme: "Qogir";
scroll-method: 0;
disable-history: false;
fullscreen: false;
hide-scrollbar: true;
sidebar-mode: false;
}
@import "~/.config/rofi/arc_dark_colors.rasi"
window {
background-color: @background;
border: 0;
padding: 10;
transparency: "real";
width: 170px;
location: east;
/*y-offset: 18;*/
/*x-offset: 850;*/
}
listview {
lines: 4;
columns: 1;
}
element {
border: 0;
padding: 1px;
}
element-text {
background-color: inherit;
text-color: inherit;
}
element.normal.normal {
background-color: @normal-background;
text-color: @normal-foreground;
}
element.normal.urgent {
background-color: @urgent-background;
text-color: @urgent-foreground;
}
element.normal.active {
background-color: @active-background;
text-color: @active-foreground;
}
element.selected.normal {
background-color: @selected-normal-background;
text-color: @selected-normal-foreground;
}
element.selected.urgent {
background-color: @selected-urgent-background;
text-color: @selected-urgent-foreground;
}
element.selected.active {
background-color: @selected-active-background;
text-color: @selected-active-foreground;
}
element.alternate.normal {
background-color: @alternate-normal-background;
text-color: @alternate-normal-foreground;
}
element.alternate.urgent {
background-color: @alternate-urgent-background;
text-color: @alternate-urgent-foreground;
}
element.alternate.active {
background-color: @alternate-active-background;
text-color: @alternate-active-foreground;
}
scrollbar {
width: 4px;
border: 0;
handle-color: @normal-foreground;
handle-width: 8px;
padding: 0;
}
mode-switcher {
border: 2px 0px 0px;
border-color: @separatorcolor;
}
button {
spacing: 0;
text-color: @normal-foreground;
}
button.selected {
background-color: @selected-normal-background;
text-color: @selected-normal-foreground;
}
inputbar {
spacing: 0;
text-color: @normal-foreground;
padding: 1px;
}
case-indicator {
spacing: 0;
text-color: @normal-foreground;
}
entry {
spacing: 0;
text-color: @normal-foreground;
}
prompt {
spacing: 0;
text-color: @normal-foreground;
}
inputbar {
children: [ prompt,textbox-prompt-colon,entry,case-indicator ];
}
textbox-prompt-colon {
expand: false;
str: "Set Power Profile:";
margin: 0px 0.3em 0em 0em;
text-color: @normal-foreground;
}
-
-
- --- - --- - --- - --- - --- - --- - --- - --- - ----- ----- ----- ----- ----- ----- ----- ----- ----- ----- ----- ----- ---
23-9. 「ショートカットキーの説明」ダイアログの表示:
-
「~/.config/rofi/rofikeyhint.rasi」
$ cat ~/.config/rofi/rofikeyhint.rasi
/*******************************************************
* ROFI configs i3 keyhint-menu for EndeavourOS
* Maintainer: joekamprad <joekamprad@endeavouros.com>
*******************************************************/
configuration {
font: "Noto Sans Regular 10";
show-icons: false;
icon-theme: "Qogir";
display-drun: "KeyHint";
drun-display-format: "{name}";
scroll-method: 0;
disable-history: false;
fullscreen: false;
hide-scrollbar: true;
sidebar-mode: false;
}
@import "~/.config/rofi/arc_dark_transparent_colors.rasi"
window {
background-color: @background;
border: 0;
padding: 30;
}
listview {
lines: 10;
columns: 1;
}
mainbox {
border: 0;
padding: 0;
}
message {
border: 2px 0px 0px;
border-color: @separatorcolor;
padding: 1px;
}
textbox {
text-color: @foreground;
}
listview {
fixed-height: 0;
border: 8px 0px 0px;
border-color: @separatorcolor;
spacing: 8px;
scrollbar: false;
padding: 2px 0px 0px;
}
element {
border: 0;
padding: 1px;
}
element-text {
background-color: inherit;
text-color: inherit;
}
element.normal.normal {
background-color: @normal-background;
text-color: @normal-foreground;
}
element.normal.urgent {
background-color: @urgent-background;
text-color: @urgent-foreground;
}
element.normal.active {
background-color: @active-background;
text-color: @active-foreground;
}
element.selected.normal {
background-color: @selected-normal-background;
text-color: @selected-normal-foreground;
}
element.selected.urgent {
background-color: @selected-urgent-background;
text-color: @selected-urgent-foreground;
}
element.selected.active {
background-color: @selected-active-background;
text-color: @selected-active-foreground;
}
element.alternate.normal {
background-color: @alternate-normal-background;
text-color: @alternate-normal-foreground;
}
element.alternate.urgent {
background-color: @alternate-urgent-background;
text-color: @alternate-urgent-foreground;
}
element.alternate.active {
background-color: @alternate-active-background;
text-color: @alternate-active-foreground;
}
scrollbar {
width: 4px;
border: 0;
handle-color: @normal-foreground;
handle-width: 8px;
padding: 0;
}
mode-switcher {
border: 2px 0px 0px;
border-color: @separatorcolor;
}
button {
spacing: 0;
text-color: @normal-foreground;
}
button.selected {
background-color: @selected-normal-background;
text-color: @selected-normal-foreground;
}
inputbar {
spacing: 0;
text-color: @normal-foreground;
padding: 1px;
}
case-indicator {
spacing: 0;
text-color: @normal-foreground;
}
entry {
spacing: 0;
text-color: @normal-foreground;
}
prompt {
spacing: 0;
text-color: @normal-foreground;
}
inputbar {
children: [ prompt,textbox-prompt-colon,entry,case-indicator ];
}
textbox-prompt-colon {
expand: false;
str: ":";
margin: 0px 0.3em 0em 0em;
text-color: @normal-foreground;
}
-
-
- --- - --- - --- - --- - --- - --- - --- - --- - ----- ----- ----- ----- ----- ----- ----- ----- ----- ----- ----- ----- ----
23-10. 「feh」 = 壁紙:
-
「i3-wm」の環境は、通常のデスクトップ環境とは異なり、壁紙をセットする機能はないはずですが、セットできる機能が実現されていました。
-
「welcome」のメニューにて、壁紙のダウンロードはできます。
「welcome」のメニューにて、壁紙のセットも実行できました。
ただし、ファイルマネージャで、画像ファイルを右クリック→「壁紙として設定」は無効です。
-
「i3-wm」での壁紙のデフォルトの設定:
$ xed ~/.config/i3/config
抜粋:
# set wallpaper # exec --no-startup-id sleep 2 && nitrogen --restore exec --no-startup-id sleep 1 && feh --bg-fill /usr/share/endeavouros/backgrounds/endeavouros-wallpaper.png
→「feh」でのセットが有効です。
-
「feh」は、「壁紙をセットする」機能を持つ「画像ビュワー」です:
このアプリの機能を使います。
-
バージョンの表示:
$ feh --version feh version 3.9.1 Compile-time switches: curl exif inotify help magic stat64 verscmp xinerama
-
「壁紙をセットする」機能のみ表示:
$ feh --help | grep "bg-"
--bg-center FILE Set FILE as centered desktop background
--bg-fill FILE Like --bg-scale, but preserves aspect ratio by
--bg-max FILE Like --bg-fill, but scale the image to the maximum
--bg-scale FILE Set FILE as scaled desktop background. This will
--bg-tile FILE Set FILE as tiled desktop background
-
抜粋した機能の説明:
--bg-center FILE: デスクトップの中央に画像を表示 --bg-fill FILE: 縦横比を維持しながら、画面に収まる最大サイズに画像をズームして表示 一部が切り取られることがあります --bg-max FILE: 画面に収まる最大サイズに画像をズームして表示、片側に黒い境界線を付けます --bg-scale FILE: 画面に収まる最大サイズに画像をズームして表示、 画像の縦横比は維持されません --bg-tile FILE: 画像ファイルを並べて表示 --no-fehbg: 「~/.fehbg」スクリプトファイルを作りません
-
1). デフォルトの壁紙をセットする場合:
-
ホームフォルダの確認:
$ ls -a : . .Xresources .bash_profile .config .local .profile .xsession-errors.old デスクトップ 音楽 .. .bash_history .bashrc .dmrc .mozilla .xprofile ダウンロード ドキュメント 画像 .Xauthority .bash_logout .cache .fehbg .nanorc .xsession-errors テンプレート ビデオ 公開
-
デフォルトの壁紙をセットするスクリプト:
$ cat ~/.fehbg : #!/bin/sh feh --no-fehbg --bg-fill '/usr/share/endeavouros/backgrounds/endeavouros-wallpaper.png'
→立ち上げ時に壁紙をセットするときに、このスプリクトは作られたみたい。
-
「Worm」と壁紙のファイル名は同じですが、画像が違います。
-
デフォルトの壁紙の再セット:
$ ~/.fehbg
→注意点は、何かしらの壁紙をコマンドで設定すると、その画像に変更されます。
もしくは、
$ feh --no-fehbg --bg-fill '/usr/share/endeavouros/backgrounds/endeavouros-wallpaper.png'
→こちらのコマンドは、スクリプトを作成しない設定になっています。
-
2). 壁紙を追加ダウンロードして、その壁紙をセットする場合:
-
(1). 「welcome」アプリのメニューにて、壁紙をダウンロード:
-
(2). ダウンロードにて、「/usr/share/endeavouros/backgrounds/」に、2つのフォルダが追加:
$ ls -1 /usr/share/endeavouros/backgrounds/ : endeavouros-wallpaper.png eos_wallpapers_classic ←(公式版で使われていた壁紙) eos_wallpapers_community ←(コミュニティ版で使われていた壁紙)
-
(3). 使った壁紙:
/usr/share/endeavouros/backgrounds/eos_wallpapers_classic/endeavouros-arm-wallpaper-artemis.png
-
(4). 画像ファイルを壁紙に反映:
$ feh --bg-scale '/usr/share/endeavouros/backgrounds/eos_wallpapers_classic/endeavouros-arm-wallpaper-artemis.png'
→画面の解像度に合わせて、画像がズームされてセットされます。画面の解像度に調整されるのがポイント
ただし、その後、解像度が変更されても、壁紙は調整されず余白が広がります。
-
(5). 壁紙を設定するコマンドで、「~/.fehbg」スクリプトファイルが自動作成されます:
$ ls -a ~/ : . .Xresources .bash_profile .config .local .profile .xsession-errors.old デスクトップ 音楽 .. .bash_history .bashrc .dmrc .mozilla .xprofile ダウンロード ドキュメント 画像 .Xauthority .bash_logout .cache .fehbg .nanorc .xsession-errors テンプレート ビデオ 公開
-
(6). 「~/.fehbg」ファイルの内容を確認:
$ cat ~/.fehbg
#!/bin/sh feh --no-fehbg --bg-scale '/usr/share/endeavouros/backgrounds/eos_wallpapers_classic/endeavouros-arm-wallpaper-artemis.png'
→スクリプトファイルです。「.fehbg」は作成しない指定に注目。
-
3). 直前にセットしたことのある、壁紙をセットする場合:
$ cd $ ./.fehbg
もしくは、
$ ~/.fehbg
-
-
- --- - --- - --- - --- - --- - --- - --- - --- - ----- ----- ----- ----- ----- ----- ----- ----- ----- ----- ----- ----- -----
23-11. 参考:「解像度」の設定について:
-
「spice-vdagent」パッケージをインストールすると、解像度の自動設定の機能が有効になります。
なので、こちらの作業は要りません。参考として参照してください。
-
1). 「解像度を1920x1080」にセットするコマンドを「ショートカットキー」に登録:
Boxes のゲストOS として使う場合:
-
(1). 手持ちのディスプレイに適した解像度を確認:
$ xrandr
Screen 0: minimum 320 x 200, current 1024 x 768, maximum 8192 x 8192 Virtual-1 connected primary 1024x768+0+0 (normal left inverted right x axis y axis) 0mm x 0mm 1024x768 60.00*+ 2560x1600 59.99 59.97 1920x1440 60.00 1856x1392 60.00 1792x1344 60.00 2048x1152 60.00 1920x1200 59.88 59.95 1920x1080 60.00 1600x1200 60.00 1680x1050 59.95 59.88 1400x1050 59.98 59.95 1600x900 60.00 1280x1024 60.02 1440x900 59.89 59.90 1280x960 60.00 1280x854 59.95 1366x768 59.79 60.00 1360x768 60.02 1280x800 59.81 59.91 1280x768 59.87 59.99 1280x720 60.00 1152x768 59.95 800x600 60.32 56.25 848x480 60.00 720x480 59.94 640x480 59.94 Virtual-2 disconnected (normal left inverted right x axis y axis) Virtual-3 disconnected (normal left inverted right x axis y axis) Virtual-4 disconnected (normal left inverted right x axis y axis)
-
(2). コマンドで、解像度を変更してみる:
$ xrandr --output Virtual-1 --mode 1920x1080 && ~/.fehbg
-
$ xrandr --output Virtual-1 --mode 1680x1050 && ~/.fehbg
-
$ xrandr --output Virtual-1 --mode 1400x1050 && ~/.fehbg
-
「Virtual-1」の部分は、「Boxes のゲストOS の場合」の場合です。
-
使用環境によりモニタ名は異なるので注意:
「VirtualBox のゲストOS の場合」は、「Virtual1」
「ホストOS の場合」は、「HDMI-1」などになります。
-
(3). 「ショートカットキー」の「Windows + Z」に登録しました。
$ xed ~/.config/sxhkd/sxhkdrc
↓ ファイルの最後に追記:
super + d
xrandr --output Virtual-1 --mode 1680x1050 && ~/.fehbg
-
-
- --- - --- - --- - --- - --- - --- - --- - --- - ----- ----- ----- ----- ----- ----- ----- ----- ----- ----- ----- ----- ----- -
23-12. 参考: arandr による表示設定:
-
複数のモニタを接続する場合の設定です。
-
arandr を開き、必要に応じてディスプレイをセットアップします。 arandr メニューまたはボタンから設定をファイル名で保存します
ファイル名を使用して、arandr メニューまたはボタンから設定を正確に保存します。
monitor ---> i3 EndeavourOS では、~/.config/i3/config にスターター行があります。
# start a script to setup displays # put `monitor.sh` into the location specified by this line: exec --no-startup-id ~/.screenlayout/monitor.sh
これは、ログインごとに表示を設定するように処理します。または、xrandr を使用して手動でスクリプトを作成することもできます。
-
-
- --- - --- - --- - --- - --- - --- - --- - --- - ----- ----- ----- ----- ----- ----- ----- ----- ----- ----- ----- ----- ----- --
24. 参考: i3 の設定で使う、アプリの「クラス名」を事前に調べました:
-
「xprop」ツールを使いました。
-
設定ファイルのアプリの「クラス名」のところに、「ps aux」で実行ファイル名を調べて記述しても、常に機能するとは限りません。
-
「xprop」ツールで、「インスタンス名」と「クラス名」を調べることができます:
WM_CLASS(STRING) ="instance", "class"
→上記の(大文字含む)後半の "class" を使うと、ちゃんと動作します。
-
1). システム更新:
$ paru
-
2). 「xprop」ツールをインストール:
X のプロパティ表示機能 (Property displayer for X)
$ paru -S xorg-xprop : パッケージ (1) 古いバージョン 新しいバージョン 最終的な変化 extra/xorg-xprop 1.2.6-1 1.2.6-1 0.00 MiB
-
$ which xprop /usr/bin/xprop
-
3). バージョンの表示:
$ xprop -version xprop 1.2.6
→オプションの付け方は「--version」でなく、「-version」です。
-
4). ヘルプの表示:
$ xprop -help
:
usage: xprop [-options ...] [[format [dformat]] atom] ...
where options include:
-help print out a summary of command line options
-grammar print out full grammar for command line
-display host:dpy the X server to contact
-id id resource id of window to examine
-name name name of window to examine
-font name name of font to examine
-remove propname remove a property
-set propname value set a property to a given value
-root examine the root window
-len n display at most n bytes of any property
-notype do not display the type field
-fs filename where to look for formats for properties
-frame don't ignore window manager frames
-f propname format [dformat] formats to use for property of given name
-spy examine window properties forever
-version print program version
-
5). 「クラス名」を調べる手順:
-
(1). 調べたい「アプリ」を起動
-
(2). 「端末」を起動
-
(3). 調べたい「アプリ」が起動しているワークスペースに「端末」を移動
$ xprop | grep WM_CLASS
-
(4). マウスカーソルが「+」に変化
-
(5). 調べたい「アプリ」のウィンドウの空きをクリック
-
(6). 起動した端末に、下記を表示:
WM_CLASS(STRING) ="instance", "class"
→必要なのは、後半の「class」です。
-
6). 各アプリの「クラス名」を調べてみました:
-
(1). 「端末」の「xfce4-terminal」:
Windows + Enter で、「xfce4-terminal」を起動
$ xprop | grep WM_CLASS : WM_CLASS(STRING) = "xfce4-terminal", "Xfce4-terminal"
→クラス名は「Xfce4-terminal」
-
(2). ブラウザの「Firefox」(ESR 版):
-
$ xprop | grep WM_CLASS : WM_CLASS(STRING) = "Navigator", "firefox-esr"
→クラス名は「firefox-esr」
-
(3). ファイルマネージャの「Thunar」:
Windows + N で、「Thunar」を起動
-
$ xprop | grep WM_CLASS : WM_CLASS(STRING) = "thunar", "Thunar"
→クラス名は「Thunar」
-
(4). 「Welcome」:
Windows + D で、「Welcome」を起動
-
$ xprop | grep WM_CLASS : WM_CLASS(STRING) = "yad", "Yad"
→クラス名は「Yad」
-
(5). 端末の「xterm」:
$ xprop | grep WM_CLASS : WM_CLASS(STRING) = "xterm", "XTerm"
→クラス名は「XTerm」
-
(6). 音楽プレーヤーの「audacious」:
$ xprop | grep WM_CLASS : WM_CLASS(STRING) = "audacious", "Audacious"
→クラス名は「Audacious」
-
-
- --- - --- - --- - --- - --- - --- - --- - --- - ----- ----- ----- ----- ----- ----- ----- ----- ----- ----- ----- ----- ----- ---
25. 参考: 「Welcome」アプリの「個人用コマンド」(Personal Commands) タブの使い方を確認:
-
「EndeavourOS」で、「Welcome」アプリの機能をチェックしたときの備忘録です。
機能のテストをしたときの作業なので、試すときは、追記で確認がいいかも…。
-
「Welcome」アプリを日本語に翻訳していて気付いたのが、表示されていない「タブ」があることです。
通常は「Welcome」アプリに「Personal Commands」タブはありません。その表示のやり方です。
-
参考:
「yad」コマンドについて:
-
「yad」は、シェルから GTK のダイアログを使うためのコマンド(GUI が呼び出せるコマンド)で、zenity のフォークです。
これをシェル・スクリプトの中で使うことで、手軽にいろいろな「GUIアプリ」が作れます。
$ paru -Ss yad | grep 済 : endeavouros/yad-eos 12.1-1.1 [0B 609.45KiB] [インストール済み]
→「yad-eos」は、アップストリーム「yad」にパッチを当てるパッケージです。 パッチは、yad フォームのウィンドウの高さの問題を修正します。
-
追記:
2022-12-17
システム更新で、下記のパッケージに変更されました:
$ paru -Ss yad | grep 済 : endeavouros/yad 12.3-1 [0B 609.66KiB] [インストール済み] community/yad 12.3-1 [0B 613.65KiB] [インストール済み]
→「yad」の不具合が解消されたのかも。
-
なので、実行ファイルは、
$ which yad /usr/bin/yad
→「yad」です。なので、「yad」や「yad-git」のパッケージとは衝突します。
-
「チュートリアル: 個人用コマンド」について:
PKGBUILDS/welcome/Adding-own-commands.md
「Welcome」アプリに新しいコマンド ボタンを追加して、「Welcome」を使いやすいようにカスタマイズできます。 新しいコマンド ボタンは、「個人用コマンド」タブの下に表示されます。
「Welcome」アプリに新しいコマンド ボタンを追加するには、新しいコマンドを設定ファイルに追加します。
-
ポイント: 「個人用コマンド」(Personal Commands) タブは、次の「設定ファイル」にコマンドが記述されている場合にのみ表示されます:
~/.config/welcome-own-commands.conf
→「yad」が理解できる形式のコマンドをこのファイルに記述します。空だと無効です。
-
1). Welcome アプリを閉じます:
-
2). 「welcome-own-commands.conf」ファイルを作成:
$ xed ~/.config/welcome-own-cmds.conf
↓ 貼り付け:
local welcome_own_commands=( --field=" xed memo.md!xed!text editor":fbtn "xed /home/ubn/ドキュメント/memo.md" )
→上記のファイルを作ると、「個人用コマンド」(Personal Commands) タブが表示されるようになりました。 「yad」が理解できる形式のコマンドなら、内容は何でも構いません。
こちらの例では、xed エディタが起動して、memo.md ファイルの編集ができます。
-
3). 「Welcome」アプリを起動:
Windows + D →「welcome」で絞り込み
-
「Welcome」アプリは、よく使うので「パネル」のランチャーに登録しました。
「項番 11. の 4) 」を参照:
-
4). 「個人用コマンド」(Personal Commands) タブをクリック:
-
5). Welcome アプリを閉じます:
-
6). 「welcome-own-commands.conf」ファイルに、色々と定義しました:
-
ファイルの修正:
$ xed ~/.config/welcome-own-cmds.conf
↓ ファイルの内容をすべて置換え:
#!/bin/bash
# Contents of file $HOME/.config/welcome-own-cmds.conf
### Own commands:
local welcome_own_commands=(
# Legend: --field=" name!icon!description":fbtn "command"
--field=" (a). Firefox web ブラウザ!firefox-default!アプリを起動する例です":fbtn "firefox"
--field=" (b). xed で memo.md を編集!xed!xed でファイルを編集する例です":fbtn "xed /home/ubn/ドキュメント/memo.md"
--field=" (c). featherpad で memo.md を編集!/usr/share/icons/hicolor/scalable/apps/featherpad.svg!featherpad でファイルを編集する例です":fbtn "featherpad /home/ubn/ドキュメント/memo.md"
--field=" (d). paru でシステム更新!system-software-install!「RunInTerminal」定義で端末を使う例です":fbtn "RunInTerminal 'paru'"
--field=" (e). Firefox web ブラウザ!firefox-default!「WelcomeBrowser」定義でブラウザを使う例です":fbtn "WelcomeBrowser https://archlinux.org/packages/"
)
#### local show_predefined_buttons_at_own_commands=no # Show two buttons=no (default:yes)
#
### Personal Commands drag and drop:
personal_commands_add "xdg-open 'https://gitlab.com/endeavouros-filemirror/PKGBUILDS/-/blob/master/welcome/Adding-own-commands.md'" \
" (f). 「個人用コマンド」についてブラウザで確認" \
"web-browser" \
"URLアドレスの「カギ」アイコンを、マウスで登録した例"
personal_commands_add "xdg-open '/home/ubn/ドキュメント/memo.md'" \
" (g). memo.md" \
"featherpad" \
"「ファイル」のアイコンを、マウスで登録した例"
personal_commands_add "xdg-open '/usr/share/applications/featherpad.desktop'" \
" (h). FeatherPad" \
"/usr/share/icons/hicolor/scalable/apps/featherpad.svg" \
"「デスクトップファイル」のアイコンを、マウスで登録した例"
personal_commands_add "firefox" \
" (i). Firefox web browser" \
"firefox-default" \
"コマンドを手動で記述"
personal_commands_add "xed --new-window" \
" (j). Xed" \
"accessories-text-editor" \
"コマンドを手動で記述" \
"xed"
→コマンド追記後、適当にコメント行や項目名を編集しました。
作成したコマンドは縦に並んで行くと勝手に思っていたら、「ls」コマンドみたいに並んで行きます。
-
「修正内容の説明」:
-
(1). 作成したコマンドが見づらいので、各コマンドに番号を振りました。
-
上段部分が、手動で入れたコマンド (a)〜(e) で、下段部分がドラッグ&ドロップで入れたコマンド (f)〜(j) です。
上段部分と下段部分を入れ替えると、後で手動で入れたコマンドしか有効になりませんでした。順番があるみたい。
-
(2). 「welcome_own_commands」コマンドを手動で記述しました: (a). (b). (c). (d). (e).
-
「welcome_own_commands」コマンドの形式:
--field=" 「名前」!「アイコン」!「説明」":fbtn "「コマンド」"
「yad」アプリが理解できる形式にする必要があります。
--field= と :fbtn の間に、ボタンの名前、アイコン、説明、を感嘆符 (!) で区切って記述します。
-
アイコンの指定については、「項番 11 」を参照:
→専用のアイコンを持つアプリは、絶対アドレスで指定しておくと安心です。
-
(3). 「個人用コマンド」タブでは、既存の 2つの項目を表示しない設定にして、作成したコマンドだけの表示にできます:
#### local show_predefined_buttons_at_own_commands=no # Show two buttons=no (default:yes)
↓ 修正:
local show_predefined_buttons_at_own_commands=no # Show two buttons=no (default:yes)
-
修正前の表示:
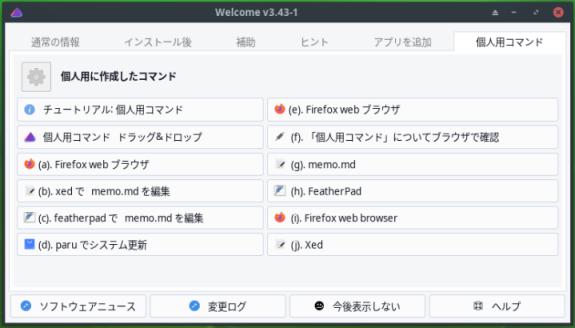
-
修正後の表示:
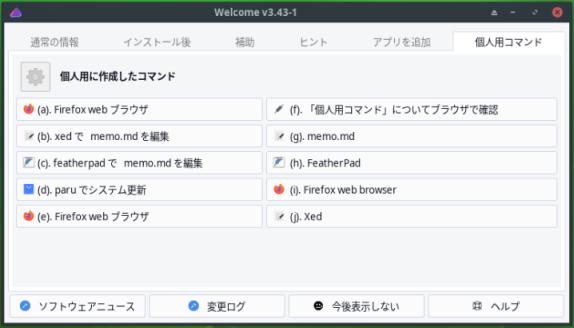
→表示されない 2つの項目は、「ヒント」タブにあるので表示されなくても支障ありません。
-
(4). 「RunInTerminal」定義を使うと、ターミナル画面からコマンドを実行できます: (d)
-
(5). 「WelcomeBrowser」定義を使うと、ブラウザでURL を開けます: (e)
-
(6). ブラウザで「URL アドレス」を、ドラッグして登録した例: (f).
URLアドレスの左にある「カギ」アイコンをつかんで、「Personal Commands drag & drop」画面にドラッグ&ドロップ
→うまく行くと、「Welcome」画面が閉じます。
-
(7). ファイルマネージャで、書類「ファイル」のアイコンを、ドラッグして登録した例: (g).
「featherpad」 で「memo.md」ファイルを作成(登録したいアプリを使うのがポイント)して準備しました。
-
ファイルマネージャで「memo.md」ファイルのアイコンを、「Personal Commands drag & drop」画面にドラッグ&ドロップ
→うまく行くと、「Welcome」画面が閉じます。
-
(8). ファイルマネージャで、「デスクトップファイル」のアイコンを、ドラッグして登録した例: (h).
ファイルマネージャで、「/usr/share/applications」を開きました。
-
デスクトップファイルの「featherpad.desktop」のアイコンを、「Personal Commands drag & drop」画面にドラッグ&ドロップ
→うまく行くと、「Welcome」画面が閉じます。
-
(9). 「personal_commands_add」コマンドを手動で記述した例: (i). (j).
-
「personal_commands_add」コマンドの形式:
personal_commands_add "「コマンド」" \
"「ボタン名」" \
"「アイコン名」" \
"「ボタンの説明」" \
"「実際のプログラム名」" ←(最初のコマンドがあいまいな場合に使用)
2番目は、メニューに表示される「ボタン名」
5番目は、コマンドによって、ある場合とない場合があります。
-
-
- --- - --- - --- - --- - --- - --- - --- - --- - ----- ----- ----- ----- ----- ----- ----- ----- ----- ----- ----- ----- ----- ----
26. 「EndeavourOS」(i3-wm) にて、気づいたこと:
-
良いところ:
-
(1). 本格的なタイリングのウィンドウの GUI 環境が手に入ります。
-
(2). 設定ファイルはテキストベースなので、修正が楽です:
「i3」は、だいぶ以前から使われている環境ということもあり、設定ファイルのコメントが充実しています。
また、設定ファイルがひとつにまとまっています。なので、エディタでの検索でコメントがヒットします。
なので、設定はそれほど難しくありませんでした。
-
マルチモニタとか、多くのウィンドウを開いて作業しているのなら、使いやすい環境にできそうです。
モニタごとに、ワークスペースを割当て出来るので、見やすいと思います。自由に設定できるのが利点です。
-
(3). 「Boxes」のゲストOS で「spice-vdagent」をインストールすると、「クリップボードの共有」機能が使えます
→注意点は、「ホストOS」の再起動をしないと有効にならないこと。
-
Boxes の「ゲストOS」として使う場合、「クリップボードの共有」が使えるのは大きなポイントです。
半画面でホストOS のブラウザを表示。半画面にゲストOS の端末を起動。という個人的によく使うスタイルが使えます。モード切替えしなくて済むので手に馴染んだ使い方ができます。
-
気になるのは:
-
(1). インストール直後、時々、しばらくの間、キー入力できなくなることがありました:
→しばらく待つと復旧。
パネルの情報では、負荷がそれほど高くなくても発生しました。
下記と同じ原因かも。
-
(2). 以前見たことがある、ウィンドウがマウスに引っ張られて固まってしまう現象が発生:
「Alpine Linux」をインストールして気付いたこと:
-
例1:「端末」アプリで右クリック→「設定」にて、固まったケース:

→「設定」窓がマウスの動きで引っ張られます。しばらくは、キー入力できず。画像が取り残されてます。 以前、カーネル 5.8 のときに経験した、デスクトップ表示の異常(GPU オフで解消)と似ています。
-
例2:「ファイルマネージャ」のヘルプ表示で、固まったケース:
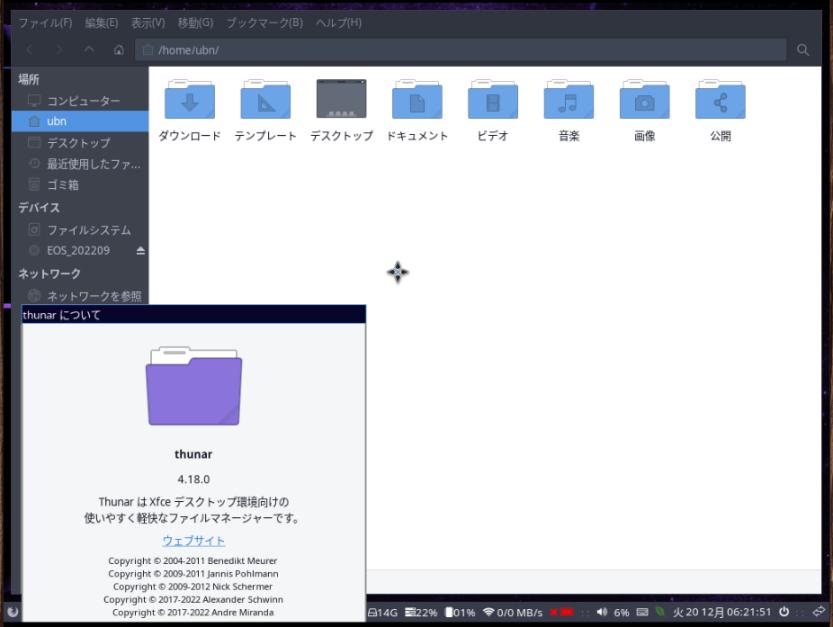
→「ヘルプ」窓がマウスの動きで引っ張られます。しばらくは、キー入力できず。カーソルの形状(ウィンドウ移動時に表示されるアイコンになってます)に注目。
-
通常は「タイリング」でウィンドウは最大化されているので、ウィンドウを動かせないので問題ありません。フローティングの「ダイアログ」を表示させると発生。
「EndeavourOS」の「Xfce」と「Worm」では発生していません。
また、Boxes のバージョンに関係なく発生するみたい。
-
コスパが良いので使っている、マウス (M100r) との相性があるかも。
→FreeBSD では、過去にこのマウスだとエラーが出放しで使えなかったことがあります。ドライバー?。
-
いつの間にか発生しなくなりました:
操作に慣れて、あまりマウスを使わなくなったからか、設定で負荷を減らしたからか、設定でウィンドウのタイトルバーを表示させたからか、システム更新で解消されたのか、条件の環境に変化があったようで、いつの間にか発生しなくなりました。
-
-
- --- - --- - --- - --- - --- - --- - --- - --- - ----- ----- ----- ----- ----- ----- ----- ----- ----- ----- ----- ----- ----- -----
27. 「EndeavourOS」(i3-wm) にて、もしもに備えての設定ファイルの退避:
-
1). 設定ファイルを退避:
-
(1). 作業前:
$ mkdir -p ~/ダウンロード/my-app
$ ls -1 ~/ダウンロード/my-app/ i3-config.2022-12-29 i3wm-shortcut-key.md
-
(2). 退避:
$ cp -r ~/.config/i3 ~/ダウンロード/my-app/i3-2023-01-02
-
(3). 確認:
$ ls -1 ~/ダウンロード/my-app/ i3-2023-01-02 i3-config.2022-12-29 i3wm-shortcut-key.md
-
$ ls -1 ~/ダウンロード/my-app/i3-2023-01-02/ config ←(注目) i3blocks.conf ←(注目) keybindings scripts
→ 2つの設定ファイルがあれば何とかなるかな。
-
2). ゲストOS 上なので、自分宛にメールで送信:
-
(1). 「.tar.gz」に圧縮:
$ cd ~/ダウンロード/ $ tar czvf EndeavourOS-my-app-2023-01-02.tar.gz my-app
$ ls *.tar.gz EndeavourOS-my-app-2023-01-02.tar.gz Superfly_BEST.tar.gz
-
(2). G メールで添付ファイルとして、自分宛てに送信
表題: 「EndeavourOS」(i3-wm) 設定ファイルの退避 (2023-01-02)
添付ファイル:
~/ダウンロード/EndeavourOS-my-app-2023-01-02.tar.gz
-
→送信履歴から、ダウンロードできます。
-
-
まとめ
タイリングのウィンドウがメインの「EndeavourOS」(i3-wm) をインストールしてみました。
前回、「EndeavourOS」(Worm) にトライしており、共通な部分が多かったので、作業はやりかすかったです。
-
色々と設定に手を入れているうちに、手に馴染んできました。使い慣れると使いやすいです。
一度体験してみると、このような環境もあるという、良い勉強になります。
-
-
-
-
-
目次
-
-
- 目次
- - --- - --- - --- - --- - --- - --- - --- - --- - -
- Xubuntu 22.04.1 LTS で、「Boxes」を使う:
- - --- - --- - --- - --- - --- - --- - --- - --- - --
- 「Boxes」について:
- - --- - --- - --- - --- - --- - --- - --- - --- - ---
- 「EndeavorOS」について:
- - --- - --- - --- - --- - --- - --- - --- - --- - ----
- 「EndeavourOS」の「i3-wm」について:
- - --- - --- - --- - --- - --- - --- - --- - --- - -----
- 1. 事前に iso イメージをダウンロード:
- - --- - --- - --- - --- - --- - --- - --- - --- - ----- -
- 2. ボックス(仮想マシン環境)の作成:
- - --- - --- - --- - --- - --- - --- - --- - --- - ----- --
- 3. 「EndeavourOS」のインストール:
- - --- - --- - --- - --- - --- - --- - --- - --- - ----- ---
- 4. Boxes のボックス名を変更:
- - --- - --- - --- - --- - --- - --- - --- - --- - ----- ----
- 5. 最初の起動:
- - --- - --- - --- - --- - --- - --- - --- - --- - ----- -----
- 6. パネルについて:
- - --- - --- - --- - --- - --- - --- - --- - --- - ----- ----- -
- 7. 「i3-wm」で使える、ショートカットキー:
- - --- - --- - --- - --- - --- - --- - --- - --- - ----- ----- --
- 8. 「クリップボードの共有」機能が使えるか確認:
- - --- - --- - --- - --- - --- - --- - --- - --- - ----- ----- ---
- 9. できるだけ、システムの負荷を減らしました:
- - --- - --- - --- - --- - --- - --- - --- - --- - ----- ----- ----
- 10. AUR ヘルパーを「paru」に変更:
- - --- - --- - --- - --- - --- - --- - --- - --- - ----- ----- -----
- 11. 「paru」でシステム更新:
- - --- - --- - --- - --- - --- - --- - --- - --- - ----- ----- ----- -
- 12. 日本語入力:
- 1). インストールされている入力メソッドを確認:
- 2). ~/.xprofile を作成:
- 3). ibus-mozc の確認:
- 4). ibus-mozc のインストール:
- 5). インストールを再実行:
- 6). インストールされたか確認:
- 7). ログアウト →ログイン
- 8). キーボードアイコンが表示されません。
- 9). 「自動起動」の設定ファイル
- 9). 「自動起動」の設定ファイルに追加:
- 10). 再起動
- 11). キーボードアイコンが表示され、「半角/全角」キーで日本語オンになりました。
- 12). 日本語入力できるかの確認:
- 13). 参考: 入力メソッドのアイコンは、明るい水色に変更されています
- 14). 任意:「Windows+スペース」では面倒なので、「半角/全角」キーに割当てを変更:
- 15). 任意:「日本語 キーボード」の個別のキーに割当てを定義:
- (1). パネルの「JA」または、「あ」を左クリック → ツール →プロパティ →「Mozc プロパティ」画面
- (1)'. パネルの「JA」または、「あ」を右クリック → 設定 →「IBusの設定」画面 →「入力メソッド」タブ→「日本語 - Mozc」を選んで「設定」→「Mozc プロパティ」画面
- (2). 左下の「初期値に戻す」 →OK
- (3). キー設定の選択: →「カスタム」を選んで右の「編集…」
- (4). 左下の「編集」→「定義済みのキーマップからインポート」→「MS-IME」→OK
- (5). 再び、「編集…」(ウィンドウはマウスで縦に広げておくと、作業しやすいです)
- (6). 下記のキーのコマンドを修正:
- (7). これで「あ」を見なくても操作できます:
- - --- - --- - --- - --- - --- - --- - --- - --- - ----- ----- ----- --
- 13. 「i3-wm」環境を使いやすくする設定:
- - --- - --- - --- - --- - --- - --- - --- - --- - ----- ----- ----- ---
- 13-1. ログインで「Firefox」が起動、「i3-setup」のサイトが開くので、起動しないように変更:
- - --- - --- - --- - --- - --- - --- - --- - --- - ----- ----- ----- ----
- 13-2. Windows + w のショートカットで、ESR 版の「Firefox」が起動しないので修正:
- - --- - --- - --- - --- - --- - --- - --- - --- - ----- ----- ----- -----
- 13-3. 「Print Screen」キーを押したときに作られるファイル名を修正:
- - --- - --- - --- - --- - --- - --- - --- - --- - ----- ----- ----- ----- -
- 13-4. 「ショートカットを表示」するメニューを「Welcome」アプリに追加:
- - --- - --- - --- - --- - --- - --- - --- - --- - ----- ----- ----- ----- --
- 13-5. 解像度と壁紙をセットするコマンドを「ショートカットキー」の Windows + Z に登録:
- - --- - --- - --- - --- - --- - --- - --- - --- - ----- ----- ----- ----- ---
- 13-6. ウィンドウの「リサイズ」の機能を使えるように設定:
- - --- - --- - --- - --- - --- - --- - --- - --- - ----- ----- ----- ----- ----
- 13-7. キーを押しても、「ショートカットキー」が働かないとき:
- - --- - --- - --- - --- - --- - --- - --- - --- - ----- ----- ----- ----- -----
- 13-8. 参考: 「端末」の背景を透明にする設定:
- - --- - --- - --- - --- - --- - --- - --- - --- - ----- ----- ----- ----- ----- -
- 13-9. 参考: ウィンドウのタイトルバーを表示する設定:
- - --- - --- - --- - --- - --- - --- - --- - --- - ----- ----- ----- ----- ----- --
- 13-10. 「Welcome」アプリをワークスペース 5 に割当て:
- - --- - --- - --- - --- - --- - --- - --- - --- - ----- ----- ----- ----- ----- ---
- 13-11. パネルに、「Welcome」のランチャーアイコンを追加:
- - --- - --- - --- - --- - --- - --- - --- - --- - ----- ----- ----- ----- ----- ----
- 14. 「Welcome」アプリを日本語化:
- - --- - --- - --- - --- - --- - --- - --- - --- - ----- ----- ----- ----- ----- -----
- 15. 「eos-update-notifier 」スクリプトで、「paru」を使うように変更:
- 1).「/etc/eos-script-lib-yad.conf」の修正:
- 2). 再起動:
- 3). 「paru」に変更したので、「yay」を削除:
- 4). 削除されたか確認:
- 5). コマンドで更新の通知ができるか確認:
- 6). 「paru」でシステム更新があるまで待ちます(放おっておきます)
- 7). システム更新が来たら、システム更新せずに、自動で「更新の通知」がされるかを確認:
- 8). サービスの設定ファイルを確認:
- 9). 「systemd/user」が、どう認識しているかを確認:
- 10). 再起動してみると:
- 11). プログラムの自動起動を行うように指示:
- 12). 変更されたか確認:
- 13). 再起動:
- 14). ログインにて、通知されるか確認:
- - --- - --- - --- - --- - --- - --- - --- - --- - ----- ----- ----- ----- ----- ----- -
- 16. ミラーの設定:
- - --- - --- - --- - --- - --- - --- - --- - --- - ----- ----- ----- ----- ----- ----- --
- 17. 「Welcome」アプリに「個人用コマンド」タブを表示させて活用:
- - --- - --- - --- - --- - --- - --- - --- - --- - ----- ----- ----- ----- ----- ----- ---
- 18. アプリのインストール:
- - --- - --- - --- - --- - --- - --- - --- - --- - ----- ----- ----- ----- ----- ----- ----
- 18-1. ESR 版の「Firefox」をインストール
- - --- - --- - --- - --- - --- - --- - --- - --- - ----- ----- ----- ----- ----- ----- -----
- 18-2. ファイアウォールのインストール:
- - --- - --- - --- - --- - --- - --- - --- - --- - ----- ----- ----- ----- ----- ----- ----- -
- 18-3. 「disks」のインストール:
- - --- - --- - --- - --- - --- - --- - --- - --- - ----- ----- ----- ----- ----- ----- ----- --
- 18-4. 「gparted」のインストール:
- - --- - --- - --- - --- - --- - --- - --- - --- - ----- ----- ----- ----- ----- ----- ----- ---
- 18-5. 「audacious」のインストール:
- 1). インストール:
- 2). バージョンの確認:
- 3). 起動:
- 4). 「音楽フォルダ」は、フォルダごと圧縮:
- 5). ホストOS でファイルマネージャを開きます:
- 6). 「Superfly_BEST.tar.gz」ファイルを、ゲストOS のデスクトップにドラッグ&コピー:
- 7). Windows + N にて、ファイルマネージャを開きます:
- 8). 確認:
- 9). 「tree」のインストール:
- 10). 確認:
- 11).「Audacious」の画面に移動。「音楽」フォルダを開きます:
- 12). フローティングに指定した方が使いやすいので、フローティングのアプリに設定:
- 13). 再起動:
- 14). ウィンドウのサイズを調整:
- 15). Windows + Q で終了
- 16). 「Audacious」起動
- - --- - --- - --- - --- - --- - --- - --- - --- - ----- ----- ----- ----- ----- ----- ----- ----
- 18-6. 「kolourpaint」のインストール:
- - --- - --- - --- - --- - --- - --- - --- - --- - ----- ----- ----- ----- ----- ----- ----- -----
- 18-7. テキストエディタ「Featherpad」のインストール:
- - --- - --- - --- - --- - --- - --- - --- - --- - ----- ----- ----- ----- ----- ----- ----- ----- -
- 18-8. PDF ビュワー「qpdfview」のインストール:
- - --- - --- - --- - --- - --- - --- - --- - --- - ----- ----- ----- ----- ----- ----- ----- ----- --
- 18-9. 「Libre Office」のインストール:
- - --- - --- - --- - --- - --- - --- - --- - --- - ----- ----- ----- ----- ----- ----- ----- ----- ---
- 19. ゲームのインストール:
- - --- - --- - --- - --- - --- - --- - --- - --- - ----- ----- ----- ----- ----- ----- ----- ----- ----
- 19-1. 「swell-foop 」をインストール:
- - --- - --- - --- - --- - --- - --- - --- - --- - ----- ----- ----- ----- ----- ----- ----- ----- -----
- 19-2. 「マインスイーパ」のインストール:
- - --- - --- - --- - --- - --- - --- - --- - --- - ----- ----- ----- ----- ----- ----- ----- ----- ----- -
- 19-3. 「ソリティア」のインストール:
- - --- - --- - --- - --- - --- - --- - --- - --- - ----- ----- ----- ----- ----- ----- ----- ----- ----- --
- 19-4. 「四川省」 (Shisen-Sho) のインストール:
- - --- - --- - --- - --- - --- - --- - --- - --- - ----- ----- ----- ----- ----- ----- ----- ----- ----- ---
- 19-5. 「上海」 (KMahjongg) のインストール:
- - --- - --- - --- - --- - --- - --- - --- - --- - ----- ----- ----- ----- ----- ----- ----- ----- ----- ----
- 19-6. 「中国式四人麻雀」 (Kajongg) のインストール:
- - --- - --- - --- - --- - --- - --- - --- - --- - ----- ----- ----- ----- ----- ----- ----- ----- ----- -----
- 19-7. 「フローズン・バブル」 (Frozen Bubble) のインストール:
- - --- - --- - --- - --- - --- - --- - --- - --- - ----- ----- ----- ----- ----- ----- ----- ----- ----- ----- -
- 20. 参考: 「paru」のコマンド:
- - --- - --- - --- - --- - --- - --- - --- - --- - ----- ----- ----- ----- ----- ----- ----- ----- ----- ----- --
- 21. 参考: 「EndeavourOS」の「/etc/eos-update-notifier.conf」に日本語のコメント行を追記:
- - --- - --- - --- - --- - --- - --- - --- - --- - ----- ----- ----- ----- ----- ----- ----- ----- ----- ----- ---
- 22. 参考: 「EndeavourOS」の「/etc/eos-script-lib-yad.conf」に日本語のコメント行を追記:
- - --- - --- - --- - --- - --- - --- - --- - --- - ----- ----- ----- ----- ----- ----- ----- ----- ----- ----- ----
- 23. 参考:「i3-wm」環境について:
- - --- - --- - --- - --- - --- - --- - --- - --- - ----- ----- ----- ----- ----- ----- ----- ----- ----- ----- -----
- 23-1. 「i3-wm」の設定ファイル「~/.config/i3/config」:
- - --- - --- - --- - --- - --- - --- - --- - --- - ----- ----- ----- ----- ----- ----- ----- ----- ----- ----- ----- -
- 23-2. 「lxappearance-gtk3」 = gtk3 テーマの処理:
- - --- - --- - --- - --- - --- - --- - --- - --- - ----- ----- ----- ----- ----- ----- ----- ----- ----- ----- ----- --
- 23-3. 「dunst」 = 通知
- - --- - --- - --- - --- - --- - --- - --- - --- - ----- ----- ----- ----- ----- ----- ----- ----- ----- ----- ----- ---
- 23-4. 「dex」 =自動起動:
- - --- - --- - --- - --- - --- - --- - --- - --- - ----- ----- ----- ----- ----- ----- ----- ----- ----- ----- ----- ----
- 23-5. 「i3blocks」= パネルバー:
- - --- - --- - --- - --- - --- - --- - --- - --- - ----- ----- ----- ----- ----- ----- ----- ----- ----- ----- ----- -----
- 23-6. 「rofi」= ログアウトメニュー:
- - --- - --- - --- - --- - --- - --- - --- - --- - ----- ----- ----- ----- ----- ----- ----- ----- ----- ----- ----- ----- -
- 23-7. 「rofi」= アプリケーションメニュー:
- - --- - --- - --- - --- - --- - --- - --- - --- - ----- ----- ----- ----- ----- ----- ----- ----- ----- ----- ----- ----- --
- 23-8. 電源プロファイル:
- - --- - --- - --- - --- - --- - --- - --- - --- - ----- ----- ----- ----- ----- ----- ----- ----- ----- ----- ----- ----- ---
- 23-9. 「ショートカットキーの説明」ダイアログの表示:
- - --- - --- - --- - --- - --- - --- - --- - --- - ----- ----- ----- ----- ----- ----- ----- ----- ----- ----- ----- ----- ----
- 23-10. 「feh」 = 壁紙:
- - --- - --- - --- - --- - --- - --- - --- - --- - ----- ----- ----- ----- ----- ----- ----- ----- ----- ----- ----- ----- -----
- 23-11. 参考:「解像度」の設定について:
- - --- - --- - --- - --- - --- - --- - --- - --- - ----- ----- ----- ----- ----- ----- ----- ----- ----- ----- ----- ----- ----- -
- 23-12. 参考: arandr による表示設定:
- - --- - --- - --- - --- - --- - --- - --- - --- - ----- ----- ----- ----- ----- ----- ----- ----- ----- ----- ----- ----- ----- --
- 24. 参考: i3 の設定で使う、アプリの「クラス名」を事前に調べました:
- - --- - --- - --- - --- - --- - --- - --- - --- - ----- ----- ----- ----- ----- ----- ----- ----- ----- ----- ----- ----- ----- ---
- 25. 参考: 「Welcome」アプリの「個人用コマンド」(Personal Commands) タブの使い方を確認:
- 参考:
- ポイント: 「個人用コマンド」(Personal Commands) タブは、次の「設定ファイル」にコマンドが記述されている場合にのみ表示されます:
- 1). Welcome アプリを閉じます:
- 2). 「welcome-own-commands.conf」ファイルを作成:
- 3). 「Welcome」アプリを起動:
- 4). 「個人用コマンド」(Personal Commands) タブをクリック:
- 5). Welcome アプリを閉じます:
- 6). 「welcome-own-commands.conf」ファイルに、色々と定義しました:
- ファイルの修正:
- 「修正内容の説明」:
- (1). 作成したコマンドが見づらいので、各コマンドに番号を振りました。
- (2). 「welcome_own_commands」コマンドを手動で記述しました: (a). (b). (c). (d). (e).
- (3). 「個人用コマンド」タブでは、既存の 2つの項目を表示しない設定にして、作成したコマンドだけの表示にできます:
- (4). 「RunInTerminal」定義を使うと、ターミナル画面からコマンドを実行できます: (d)
- (5). 「WelcomeBrowser」定義を使うと、ブラウザでURL を開けます: (e)
- (6). ブラウザで「URL アドレス」を、ドラッグして登録した例: (f).
- (7). ファイルマネージャで、書類「ファイル」のアイコンを、ドラッグして登録した例: (g).
- (8). ファイルマネージャで、「デスクトップファイル」のアイコンを、ドラッグして登録した例: (h).
- (9). 「personal_commands_add」コマンドを手動で記述した例: (i). (j).
- - --- - --- - --- - --- - --- - --- - --- - --- - ----- ----- ----- ----- ----- ----- ----- ----- ----- ----- ----- ----- ----- ----
- 26. 「EndeavourOS」(i3-wm) にて、気づいたこと:
- - --- - --- - --- - --- - --- - --- - --- - --- - ----- ----- ----- ----- ----- ----- ----- ----- ----- ----- ----- ----- ----- -----
- 27. 「EndeavourOS」(i3-wm) にて、もしもに備えての設定ファイルの退避:
- まとめ
- -
-
-
-