登録日: 2023-12-01
更新日: 2024-03-14
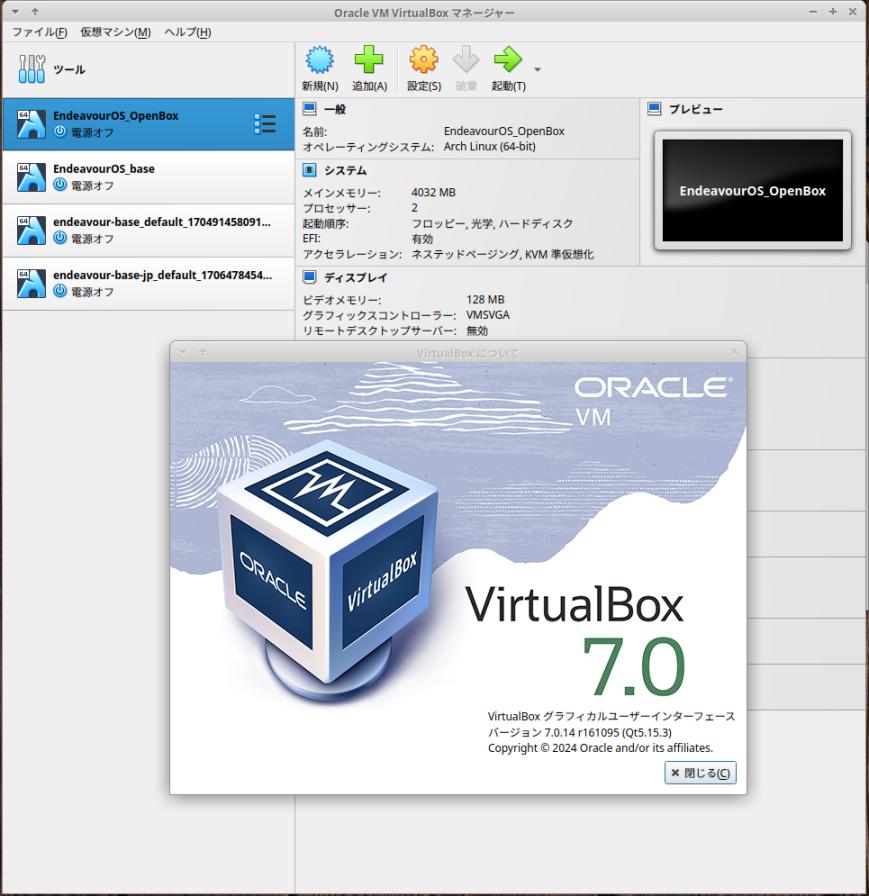
「Xubuntu 22.04 LTS」および「Windows11」(22H2) の「VirtualBox 7.0」の仮想マシンに、色々なLinux ディストリビューションをインストールして、自分に最適なものはないか試しています。
それらの仮想マシン(ボックス)の管理で手間を減らすツールとして、開発環境では「Vagrant」(ベイグラント) というソフトがよく使われるようです。
-
「Vagrant」について学ぶため、色々と作業時に参考にできそうな項目を書き出しました。
確認が不十分だし勘違いもありそうです。
確認が取れたらその都度、追加や訂正のつもりですが、個人的な備忘録なので、
参考にするぐらいにして下さい。
-
次回の「実践編」〈H170-2〉で、「Xubuntu 22.04.3 LTS」の「VirtualBox 7.0.10」にて、実際に「Vagrant」をインストールして、確認しています。
-
-
(注)リンクを戻るときはブラウザの左上の「←」をクリック
スマホの場合は、「ホーム」ボタンの横の「<」キーをタップ
-
-
目次
-
参考:
「Vagrant」コマンドについて:
「Vagrant」コマンドの使用例:
「Vagrant」コマンドの使用例:(目次)
修正版3: 使い回し可能な「Vagrantfile」:
-
今回の作業:
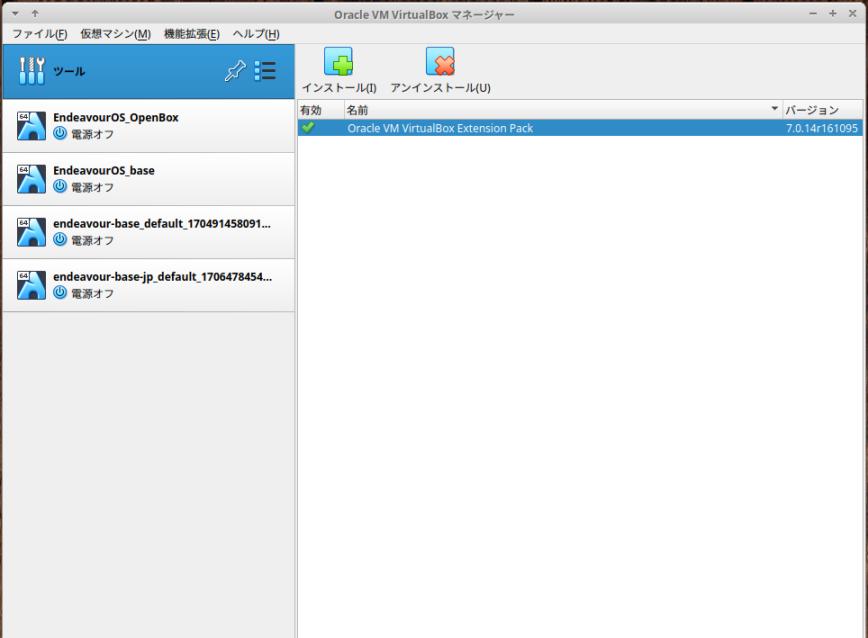
ホストOS に「VirtualBox」をインストール:
「Ubuntu」 に、「Vagrant」をインストール:
「Windows11」 に、「Vagrant」をインストール:
「rpm」系のLinux に、「Vagrant」をインストール:
公開された「Box」を検索:
「vagrant box add」にて、「Box」を追加する場合:
「Vagrantfile」の作成:
「Vagrantfile」から「仮想マシン」を作成、立ち上げて、操作:
-
「まとめ へ」
「目次詳細 へ」
-
-
- --- - --- - --- - --- - --- - --- - --- - --- - -
「Xubuntu 22.04 LTS」を起動:
-
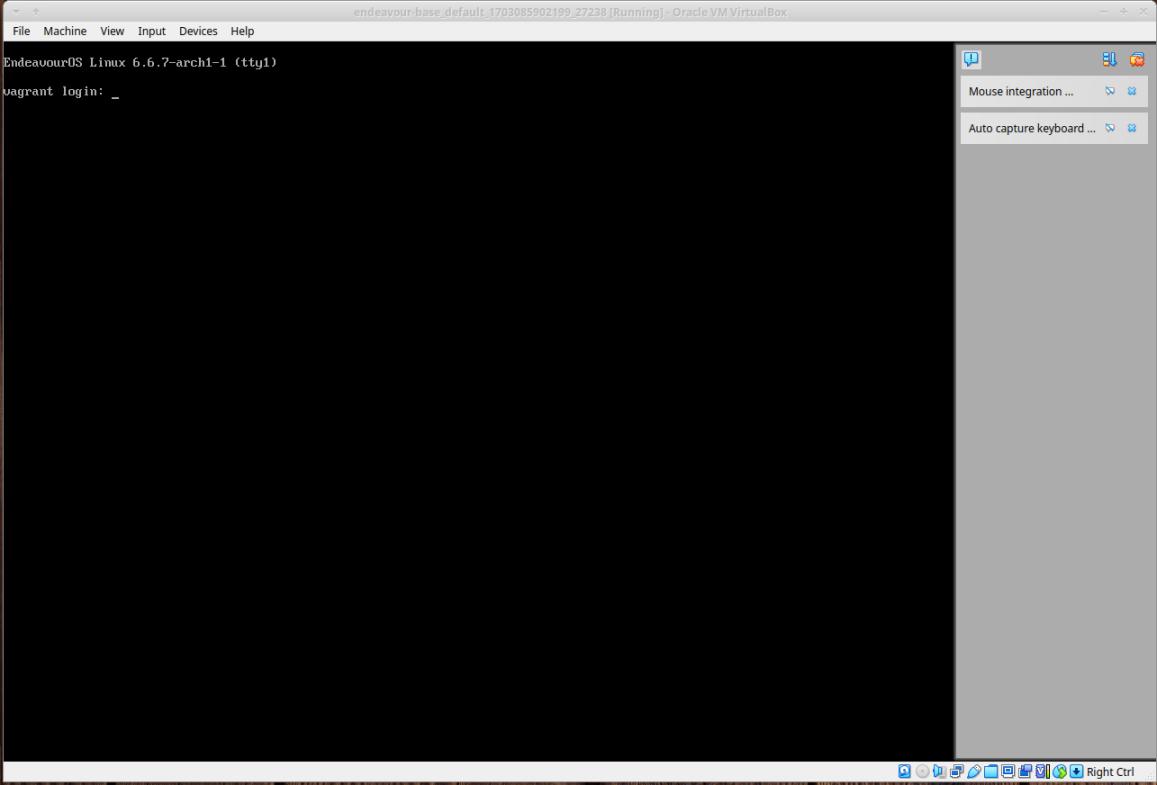
→ホストの「Xubuntu 22.04 LTS」の端末で「vagrant up」と入力するだけで起動しています。
「VirtualBox」のゲスト画面なのに、「VirtualBox マネージャ」は起動していません。仕組みが見える気がします。
-
多くの「Box」はデスクトップ表示なしで「ssh 接続」できれば良いだけなので、簡単に使えると思います。
こちらの「Box」の場合はデスクトップ表示が必要なので、ちゃんと表示させるまでに手間がかかりました。
もしかしたら、「VirtualBox 7.0」でなく「VirtualBox 6.1」などの最新ではない?環境だったら、すんなりと表示されたかも。イメージを作成した環境によりそう。
-
-
- --- - --- - --- - --- - --- - --- - --- - --- - --
-
「VirtualBox」は、Oracle が開発している「仮想マシン」を構築するためのソフトウェアです。
-
-
-
- --- - --- - --- - --- - --- - --- - --- - --- - ---
「Vagrant」 (ベイグラント) について:
-
公式サイト:
Vagrant by HashiCorp
-
「仮想マシン」の管理や操作をコマンドで使うための「フロントエンド」のソフトウェアです:
-
1). 特徴:
-
「Box」ファイル (.box)、および、設定を記述した設定ファイル「Vagrantfile」を元に、「仮想マシン」の生成から設定までを自動化できます:
作った「仮想環境」は、何度も繰り返し利用できます:
同じ「仮想環境」を複数のサーバーに物理的に展開できます:
同じ「仮想環境」をファオルダ分けにより、目的別に使用できます:
仮想環境の起動や停止などの基本操作、状態のロールバックなどの操作は「プラグイン」で実現されます:
-
2). 「仮想環境」を管理するツール、「Vagrant」と「Docker」を比較:
どちらも「仮想環境」を管理する技術ですが、対象が異なります。
目的によって、使い分けるのが良さそう。
-
(1). 「Docker」は、「コンテナ」を管理:
「Docker」は、Docker 社が提供する Linux の「コンテナ」技術(プロセスの実行空間を隔離する為の技術)を利用したもの。
ソフトウェアの高速配布やソフトウェアの実行が容易で、
シンプルなイメージのカスタマイズや導入が簡単にできます。
-
→仮想環境のソフト(プロバイダ)は「Boxes」ですが、「VirtualBox」の仮想環境と同じです。
-
「Vagrant」は、「仮想マシン」をコマンドで操作するので、GUI 操作や管理の手間を減らせます。
また、同じ仮想環境を複数のサーバーに物理的に展開できます。
-
3). 用語の説明:
参考:
今更だけどVagrantを公式チュートリアルで入門! (翻訳+解説付き)
-
公式な「Box」ファイルの公開サイトです。
-
「vagrant box add」のコマンドで、Vagrant clooud からダウンロードする場合は、URL の指定が要りません。
逆に、好みの「Box」名を付けるとき、「Vagrantfile」ファイルの修正が必要です。
コミュニティからダウンロードする場合は、URL の指定が必要ですが、
コマンドのパラメータで指定するだけで、好みの「Box」名に簡単にできます。
-
(2). 「プロバイダ」(Provider) :
仮想環境を提供するソフトウェアのことで、この仮想環境上に「仮想マシン」を作成して、操作します。
デフォルトは「VirtualBox」です。追加したいブロバイダはプラグインで対応できます。
-
(3). 「プロビジョニング」(Provisioning) :
「仮想マシン」に、「Webサーバー」(Apache、Nginx)、「プログラミング言語」(PHP、Python、Ruby)、DBMS(Posgre、MySQL) 、などのソフトウェアを組み込む(インストールして設定する)ことです。
-
(4). 「Box」ファイル:
「仮想マシン」を作成するときのベース(ひな型、テンプレート)となるイメージファイルです。
「vagrant box add」、または初回の「vagrant up」によって、「ホームの隠しフォルダ」にダウンロードされます。
-
(5). 「Vagrantfile」ファイル:
Vagrant を使って生成する「仮想マシン」の設定(仮想マシンのスペックやプロビジョニングツールの指定など)を記述するファイルです。
「vagrant init」の実行で、現在の「作業ディレクトリ」に生成されるので、ベースになる「Box」は同じでも、プロジェクトごとに「フォルダ分け」できます。
-
簡単にVagrant で「仮想マシン」を操作するために、「端末エミュレータ」画面上で使うコマンドのことです。
-
「Vagrant」コマンドについては、「項番 10. 」を参照:
「Vagrant」コマンドの使用例は、「項番 11. 」を参照:
「Vagrant」コマンドの使用例の「目次」は、「項番 12. 」を参照:
-
-
- --- - --- - --- - --- - --- - --- - --- - --- - ----
-
「Vagrant」の動作の土台となる「プロバイダ」のひとつで、「Vagrant」ではデフォルトです。
-
-
2). 「VirtualBox Extension」のインストール:
-
ちなみに、「Guest Additions」は、各「仮想マシン」(Box)の作成後に、「仮想マシン」側にインストール(インストールしてあれば、アップデート)します。ただし、「共有フォルダ」の機能以外?は、デスクトップ環境がないと無駄になります。
-
-
- --- - --- - --- - --- - --- - --- - --- - --- - -----
-
「「Xubuntu 22.04 LTS」で、「VirtualBox 7.0.10」へアップデート〈H169〉 」を参照:
→「VirtualBox」の「アップデート」手順ですが、バージョンが違うだけで、新規の場合と手順は同じです:
-
-
- --- - --- - --- - --- - --- - --- - --- - --- - ----- -
1-b. 「Windows11」にて、「VirtualBox」をインストール:
-
「「Windows11」(22H2) で、「VirtualBox 7.0.10」へアップデート〈H169-2〉 」を参照:
→「VirtualBox」の「アップデート」手順ですが、バージョンが違うだけで、新規の場合と手順は同じです:
-
-
- --- - --- - --- - --- - --- - --- - --- - --- - ----- --
2. ホストOS に「Vagrant」をインストール:
-
-
- --- - --- - --- - --- - --- - --- - --- - --- - ----- ---
2-a. 「Ubuntu」にて、「Vagrant」をapt でインストールする場合:
-
「Xubuntu 22.04.3 LTS」で確認:
-
2023-12-01 現在
「Vagrant」Version: 2.2.19
-
追記:
apt で「VirtualBox」をインストールしている場合に、apt で「vagrant」をインストールできます。
→「VirtualBox 7.0」で使うには、最新の「Vagrant」を(リポジトリを登録するか、ダウンロードして)インストールする必要があります:
→「VirtualBox 7.0」がインストールされている場合、apt で「Vagrant」をインストールしても、現時点のバージョン (2.2.19) では「VirtualBox 7.0」はサポートされていません。「仮想マシン」の作成で失敗します。
-
-
1). apt でインストールされるバージョンを確認:
$ apt search vagrant
:
vagrant/jammy,jammy 2.2.19+dfsg-1ubuntu1 all
Tool for building and distributing virtualized development environments
和訳:
仮想化開発環境を構築および配布するためのツール
-
2). apt で「VirtualBox」をインストールしている場合に、apt でインストールできます:
$ sudo apt update
$ sudo apt install vagrant
-
3). Vagrant がインストールされたか確認:
$ vagrant --version
-
-
- --- - --- - --- - --- - --- - --- - --- - --- - ----- ----
2-b. 「Ubuntu」にて、最新の「Vagrant」をダウンロードしてインストールする場合:
-
「Xubuntu 22.04.3 LTS」で確認:
-
2023-12-01 現在
「Vagrant」Version: 2.4.0 (最新バージョン)
-
公式サイトのページからは「Fedora」系の「rpm」パッケージしかダウンロードできないようです。
なので、直接、ダウンロードのページにアクセスしました:
-
-
直接、ダウンロードページ にアクセス:
vagrant_2.4.0_SHA256SUMS
vagrant_2.4.0_SHA256SUMS.72D7468F.sig
vagrant_2.4.0_SHA256SUMS.sig
vagrant-2.4.0-1-x86_64.pkg.tar.zst
vagrant-2.4.0-1.i686.rpm
vagrant-2.4.0-1.x86_64.rpm
vagrant_2.4.0-1_amd64.deb ←(こちらをクリック)
vagrant_2.4.0-1_i686.deb
vagrant_2.4.0_darwin_amd64.dmg
vagrant_2.4.0_darwin_arm64.dmg
vagrant_2.4.0_linux_amd64.zip
vagrant_2.4.0_windows_amd64.msi
vagrant_2.4.0_windows_i686.msi
更新があって、バージョンが上がったら、フォルダ名を変更してアクセスすれば OK
-
2). Vagrant 2.4.0 の SHA256 チェックサムをダウンロードして確認:
SHA256 checksums for Vagrant 2.4.0
内容:
e04916750205819c90e38acf639ab12af89fd4593dcc6ef38c33c306666f73c5 vagrant_2.4.0-1_amd64.deb
87be2e0db61fd2c7ab60fbd3814a67e3ccdd0f7b04f59adfaf54ec181b8e0ac5 vagrant_2.4.0-1_i686.deb
0061505c8aae8a83df525374403af021270d331253a82ff93909930c8a2c4ee7 vagrant-2.4.0-1.i686.rpm
5770768234da6546f71602c4c4e97f2f120231a45b1b83eadd6c5c2727a48a02 vagrant-2.4.0-1-x86_64.pkg.tar.zst
37255ab7b903695863d3a6ee77cb9c660f34f14839a133d50f3a8672bffe4807 vagrant-2.4.0-1.x86_64.rpm
97806047dfc7e0c3818f946a1c954ab03d8f6d1ae45d1aa43e5bdbd7a8856631 vagrant_2.4.0_darwin_amd64.dmg
97806047dfc7e0c3818f946a1c954ab03d8f6d1ae45d1aa43e5bdbd7a8856631 vagrant_2.4.0_darwin_arm64.dmg
a638c22f9dd35481a4486bdb0eca614ad695036aa444cc3aace4513d3de0cbbe vagrant_2.4.0_linux_amd64.zip
d8f62fce5de0f4b9fb1a4afece10faa6fafed41929ccfe7bb380f160358043e4 vagrant_2.4.0_windows_amd64.msi
6c63fab066223e55f52e3eb58dd41876e877926e152f61aafb60bb2651c88c68 vagrant_2.4.0_windows_i686.msi
-
3). ダウンロード後に、チェックサムが同じか確認:
$ cd ~/ダウンロード/
$ sha256sum vagrant_2.4.0-1_amd64.deb
e04916750205819c90e38acf639ab12af89fd4593dcc6ef38c33c306666f73c5 vagrant_2.4.0-1_amd64.deb
-
4). 「.deb」ファイルのインストール:
$ cd ~/ダウンロード/
$ sudo apt install ./vagrant_2.4.0-1_amd64.deb
-
5). Vagrant がインストールされたか確認:
$ vagrant --version
-
-
- --- - --- - --- - --- - --- - --- - --- - --- - ----- -----
-
Ubuntu の場合です:
-
2023-12-01 現在
「Vagrant」Version: 2.4.0 (最新バージョン)
-
参考: パッケージ管理が「rpm」系の場合のリポジトリを登録してのインストールは、「項番 3-c. 」を参照:
-
- すぐに、下記の「項番 5).」にあるコマンドを、1行ずつ端末に貼り付けて実行しても良いです:
-
-
1). 公式サイトをブラウザで開きます:
Vagrant by HashiCorp
-
-
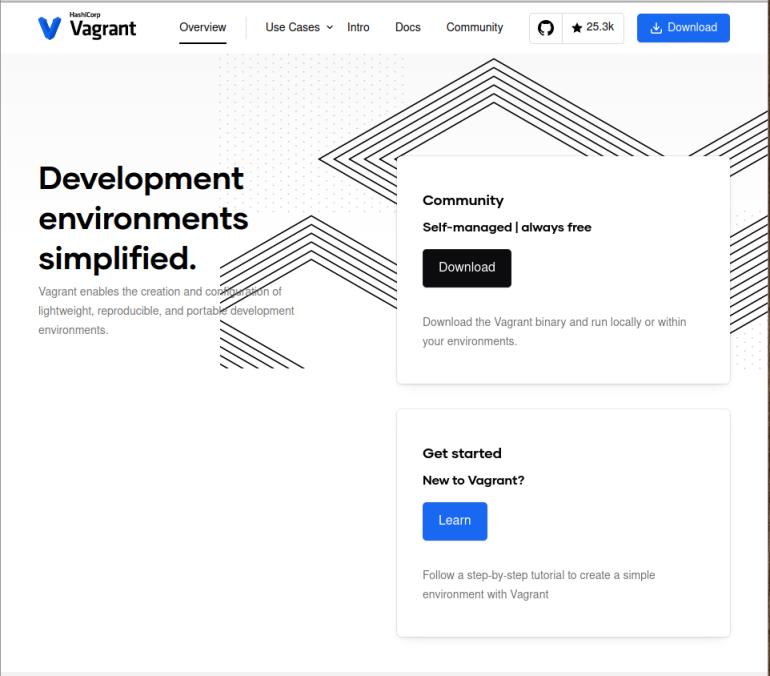
2). 画面右上の「Download」をクリック:
もしくは、下記の画面の「Download」をクリック:
Community
Self-managed | always free
Download
-
「Linux」の項目を確認します:
-
4). 「Package manager」にて、
→「Ubuntu/Debian」を選択
-
5). 「コピー」ボタンをクリックして、クリップボードにコピー:
→テキストエディタに貼り付け
-
wget -O- https://apt.releases.hashicorp.com/gpg | sudo gpg --dearmor -o /usr/share/keyrings/hashicorp-archive-keyring.gpg
echo "deb [signed-by=/usr/share/keyrings/hashicorp-archive-keyring.gpg] https://apt.releases.hashicorp.com $(lsb_release -cs) main" | sudo tee /etc/apt/sources.list.d/hashicorp.list
sudo apt update && sudo apt install vagrant
-
6). 端末で、各行を実行:
-
7). Vagrant がインストールされたか確認:
$ vagrant --version
-
-
- --- - --- - --- - --- - --- - --- - --- - --- - ----- ----- ----- ----- ----- -----
2-d. 参考: 「Windows11」にて、「Vagrant」をインストールする場合:
-
「Windows11」(22H2) で確認:
-
2023-12-04 現在
「Vagrant」Version: 2.4.0 (最新バージョン)
-
こちらは、Windows の「msi」パッケージをダウンロードして、インストールする場合です:
-
-
1). 公式サイトをブラウザで開きます:
Vagrant by HashiCorp
-
-
2). 画面右上の「Download」をクリック:
もしくは、下記の画面の「Download」をクリック:
Community
Self-managed | always free
Download
-
「Windows」の項目を確認します:
-
4). 「Binary download」にて、
→「AMD64」にある、「Download 」をクリック:
-
PC で使われている「CPU 」のタイプを選びます。
-
5). Vagrant 2.4.0 の SHA256 チェックサムをダウンロードして確認:
「Note」にある下記のリンクをクリック:
SHA256 checksums for Vagrant 2.4.0
内容:
e04916750205819c90e38acf639ab12af89fd4593dcc6ef38c33c306666f73c5 vagrant_2.4.0-1_amd64.deb
87be2e0db61fd2c7ab60fbd3814a67e3ccdd0f7b04f59adfaf54ec181b8e0ac5 vagrant_2.4.0-1_i686.deb
0061505c8aae8a83df525374403af021270d331253a82ff93909930c8a2c4ee7 vagrant-2.4.0-1.i686.rpm
5770768234da6546f71602c4c4e97f2f120231a45b1b83eadd6c5c2727a48a02 vagrant-2.4.0-1-x86_64.pkg.tar.zst
37255ab7b903695863d3a6ee77cb9c660f34f14839a133d50f3a8672bffe4807 vagrant-2.4.0-1.x86_64.rpm
97806047dfc7e0c3818f946a1c954ab03d8f6d1ae45d1aa43e5bdbd7a8856631 vagrant_2.4.0_darwin_amd64.dmg
97806047dfc7e0c3818f946a1c954ab03d8f6d1ae45d1aa43e5bdbd7a8856631 vagrant_2.4.0_darwin_arm64.dmg
a638c22f9dd35481a4486bdb0eca614ad695036aa444cc3aace4513d3de0cbbe vagrant_2.4.0_linux_amd64.zip
d8f62fce5de0f4b9fb1a4afece10faa6fafed41929ccfe7bb380f160358043e4 vagrant_2.4.0_windows_amd64.msi
6c63fab066223e55f52e3eb58dd41876e877926e152f61aafb60bb2651c88c68 vagrant_2.4.0_windows_i686.msi
-
6). 「Windows11」で、「PowerShell」を起動:
Windows ボタン →「po」(ピー・オー)で絞り込み →「Windows PowerShell」
PS C:\Users\user>
-
参考:「PowerShell」では、テキストエディタのような「編集」操作ができるので便利です:
表示された「文字列」をダブルクリックするか、マウスや Shift+「矢印キー」で範囲選択して、Ctrl+C
プロンプトで、Ctrl+V で貼り付け
-
7). 作業ディレクトリを「Downloads\」フォルダに移動:
> cd C:\Users\user\Downloads\
PS C:\Users\user\Downloads>
→「>」はプロンプトで、ここでは「PS C:\Users\user>」を省略して表示してます。入力しません。
「user」はユーザ名なので、各自異なります。
-
8). 「Windows11」で、ファイルを確認:
> ls vagrant*
ディレクトリ: C:\Users\user\Downloads
Mode LastWriteTime Length Name
---- ------------- ------ ----
-a---- 2023/12/04 月 22:53 952 vagrant_2.4.0_SHA256SUMS
-a---- 2023/12/04 月 22:52 273833984 vagrant_2.4.0_windows_amd64.msi
-
9). 「Windows11」で、「チェックサム」を確認:
ハッシュ値である「Hashプロパティ」の値のみを「小文字」で表示:
> (Get-FileHash -Algorithm SHA256 vagrant_2.4.0_windows_amd64.msi).Hash.toLower()
d8f62fce5de0f4b9fb1a4afece10faa6fafed41929ccfe7bb380f160358043e4
-
ウィンドウの右上の「x」で、閉じます。
-
10). ダウンロードした「.msi」パッケージをインストール:
-

-
(2). ダウンロードした、「C:\Users\user\Downloads\」フォルダにある、下記の「ファイル」をダブルクリック:
「vagrant_2.4.0_windows_amd64.msi」
-
(3). 「Please read the Vagrant License Agreement」(ライセンス契約をお読みください)画面が表示:
下にある「I accept the terms in the License Agreement」(同意します)にチェックして、
→右下の「Install」
-
(4). (実行を許可しますか?)
→「はい」
-
(5). 「Completed the Vagrant Setup Wizard」画面が表示:
→「Finish」
-
(6). 「Vagrant Setup」画面が表示:
(再起動が必要なので、再起動しますか?)
→「no」
-
(7). 手動で再起動:
-
-
12). Vagrant がインストールされたか確認:
> vagrant --version
Vagrant 2.4.0
-
-
- --- - --- - --- - --- - --- - --- - --- - --- - ----- ----- -
-
「rpm」系のLinux とは、「Fedora」、「CentOS」、「RHEL」、「Amazon Linux」等のことです:
-
-
- --- - --- - --- - --- - --- - --- - --- - --- - ----- ----- --
3-a. 参考: 「rpm」系のLinux にて、「Vagrant」をdnf でインストールする場合:
-
dnf コマンドを使えるのは、「Fedora 35」以降に該当する(新しめの)Fedora 系のOS の場合です。
先進の「Fedora」よりも世代を遅らせて、安定志向にしたのが「CentOS」や「RHEL」(Red Hat Enterprise Linux) です。
新しめの「RHEL 9.0」などでないとdnf コマンドは使えません。
-
2023-12-01 現在
「Vagrant」Version: ( 未確認 )
-
参考:
Server World: Fedora 39、Vagrant : インストール
-
-
1). dnf でインストール:
$ sudo dnf update
$ sudo dnf install vagrant
-
2). Vagrant がインストールされたか確認:
$ vagrant --version
-
-
- --- - --- - --- - --- - --- - --- - --- - --- - ----- ----- ---
3-b. 参考: 「rpm」系のLinux にて、最新の「Vagrant」をダウンロードして、インストールする場合:
-
2023-12-01 現在
「Vagrant」Version: 2.4.0 (最新バージョン)
-
こちらは、「rpm」パッケージをダウンロードして、インストールする場合です:
-
-
1). 公式サイトをブラウザで開きます:
Vagrant by HashiCorp
-
-
2). 画面右上の「Download」をクリック:
もしくは、下記の画面の「Download」をクリック:
Community
Self-managed | always free
Download
-
「Linux」の項目を確認します:
-
4). 「Binary download」にて、
→「X86_64」にある、「Download 」をクリック:
-
PC で使われている「CPU 」のタイプを選びます。
5). Vagrant 2.4.0 の SHA256 チェックサムをダウンロードして確認:
「Note」にある下記のリンクをクリック:
SHA256 checksums for Vagrant 2.4.0
内容:
e04916750205819c90e38acf639ab12af89fd4593dcc6ef38c33c306666f73c5 vagrant_2.4.0-1_amd64.deb
87be2e0db61fd2c7ab60fbd3814a67e3ccdd0f7b04f59adfaf54ec181b8e0ac5 vagrant_2.4.0-1_i686.deb
0061505c8aae8a83df525374403af021270d331253a82ff93909930c8a2c4ee7 vagrant-2.4.0-1.i686.rpm
5770768234da6546f71602c4c4e97f2f120231a45b1b83eadd6c5c2727a48a02 vagrant-2.4.0-1-x86_64.pkg.tar.zst
37255ab7b903695863d3a6ee77cb9c660f34f14839a133d50f3a8672bffe4807 vagrant-2.4.0-1.x86_64.rpm
97806047dfc7e0c3818f946a1c954ab03d8f6d1ae45d1aa43e5bdbd7a8856631 vagrant_2.4.0_darwin_amd64.dmg
97806047dfc7e0c3818f946a1c954ab03d8f6d1ae45d1aa43e5bdbd7a8856631 vagrant_2.4.0_darwin_arm64.dmg
a638c22f9dd35481a4486bdb0eca614ad695036aa444cc3aace4513d3de0cbbe vagrant_2.4.0_linux_amd64.zip
d8f62fce5de0f4b9fb1a4afece10faa6fafed41929ccfe7bb380f160358043e4 vagrant_2.4.0_windows_amd64.msi
6c63fab066223e55f52e3eb58dd41876e877926e152f61aafb60bb2651c88c68 vagrant_2.4.0_windows_i686.msi
-
$ cd ~/ダウンロード/
$ sha256sum vagrant-2.4.0-1.x86_64.rpm
37255ab7b903695863d3a6ee77cb9c660f34f14839a133d50f3a8672bffe4807 vagrant-2.4.0-1.x86_64.rpm
-
7). 「.rpm」パッケージのインストール:
$ sudo rpm -ivh ./vagrant-2.4.0-1.x86_64.rpm
-
8). Vagrant がインストールされたか確認:
$ vagrant --version
もしくは、
$ sudo rpm -qa | grep vagrant
-
-
- --- - --- - --- - --- - --- - --- - --- - --- - ----- ----- ----
-
2023-12-01 現在
「Vagrant」Version: 2.4.0 (最新バージョン)
-
参考: 「Ubuntu/Debian」の場合のリポジトリを登録してのインストールは、「項番 2-c. 」を参照:
-
- 手順を経ずに、下記の「項番 4).」にあるコマンドを、端末に 1行ずつ貼付けて実行しても良いです:
-
-
1). 公式サイトをブラウザで開きます:
Vagrant by HashiCorp
-
-
2). 画面右上の「Download」をクリック:
もしくは、下記の画面の「Download」をクリック:
Community
Self-managed | always free
Download
-
「Linux」の項目を確認します:
-
4). 「Package manager」にて、
→下記の「Linux ディストリビューション」のどれかを選択
-
$ sudo yum install -y yum-utils
$ sudo yum-config-manager --add-repo https://rpm.releases.hashicorp.com/RHEL/hashicorp.repo
$ sudo yum -y install vagrant
-
(2). 「Fedora」を選んだ場合:
$ sudo dnf install -y dnf-plugins-core
$ sudo dnf config-manager --add-repo https://rpm.releases.hashicorp.com/fedora/hashicorp.repo
$ sudo dnf -y install vagrant
→「dnf」は「yum」の後継のコマンドです
-
$ sudo yum install -y yum-utils shadow-utils
$ sudo yum-config-manager --add-repo https://rpm.releases.hashicorp.com/AmazonLinux/hashicorp.repo
$ sudo yum -y install vagrant
-
(4). 「Homebrew」を選んだ場合 (MacOS):
$ brew tap hashicorp/tap
$ brew install hashicorp/tap/vagrant
「Homebrew」は、「MacOS」の「パッケージ管理ツール」です。
「Homebrew-on-Linux」をインストールすることで、「Linux」、「Windows (wsl2)」にも対応しました:
-
参考:「Homebrew-on-Linux」のインストール手順:
Homebrew Documentation: Homebrew on Linux
MacOS、Linux、および Windows (wsl2) で、同じパッケージ マネージャを使用してパッケージ管理ができます。
ちなみに、Homebrew (brew) を使うときは、sudo を付ける必要はありません。
-
5). 表示された項目の「コピー」ボタンをクリックして、クリップボードにコピー:
→テキストエディタに貼り付け
-
6). 端末に 1行ずつ貼り付けて実行:
-
7). Vagrant がインストールされたか確認:
$ vagrant --version
-
-
- --- - --- - --- - --- - --- - --- - --- - --- - ----- ----- -----
3-d. 参考: 「rpm」系のLinux にて、歴代の rpm の「Vagrant」をダウンロードして、インストールする場合:
-
「Fedora」でインストールできるソフトを使いたいけど、CentOS のリポジトリにないとき等に使えます:
インストールが楽な、デフォルトのリポジトリに登録されているパッケージは、
サーバー目的で使われることの多い「CentOS/RHEL」とか「RHEL 互換OS」(AlmaLinux、Rocky Linux 等)だと、「Fedora」よりも
(リスクを減らすため、わざと?)少ないです。
-
歴代のrpm を自由に使えるのが「rpm」の利点です
歴代のリポジトリに登録されていた「rpm」パッケージは、3世代ほどの期間だけ、「RPM resource 」のサイトで公開されています。
-
なので、次のシステムが出ると「消える」リポジトリがあるので注意:
→サイトに存在しているときに(依存パッケージも含めて)保存しておくと良いです。
-
インストールできるのは、事前に「依存パッケージ」とのバージョンの整合が解決(インストール)できる、rpm のバージョンの場合だけです:
依存するパッケージの情報も「RPM resource 」のサイトで確認できます:
-
rpm のインストールで失敗したとき表示されるメッセージは、「rpm」パッケージ名でなく、「共有ライブラリ名」で表示されます。
ライブラリ名で検索すると、ヒットすることも、ヒットしない場合もあります。
-
-
2023-12-01 現在:
ダウンロードできるのは、下記のリポジトリに登録されていたrpm パッケージです:
「Fedora 37」、「Fedora 38」、「Fedora 39」、「Fedora Rawhide」(Fedora のローリング・リリース版)
-
vagrant-2.2.19-5.fc37.noarch.rpm
-
vagrant-2.2.19-10.fc38.noarch.rpm
-
vagrant-2.3.4-3.fc39.noarch.rpm
-
vagrant-2.3.4-3.fc39.noarch.rpm
-
→例えば、次のリビジョンが出ると、「Fedora 37」のrpm パッケージの登録は消えます。
-
システムが違うと共有ライブラリのバージョンが変わるので、すべての rpm パッケージが使えるとは限りません。
微妙に「vagrant」のバージョンが違うので、バージョンを整合させるときの選択肢が増えます。
ちなみに、「noarch」は「no アーキテクチャ」のことで、どのCPU タイプでも動くので、これを選ぶのが無難です。
-
参考:
→注意: 「rpm」コマンドは、依存パッケージを自動解決してくれません:
手動で事前に、インストールしたいパッケージの依存パッケージをインストールしておく必要があります。「yum」や「dnf」コマンドの有り難みがわかります。
-
「rpm」コマンドの使用例:
残念ながら、1年前の投稿なので「Fedora34」、「Fedora35」のリポジトリの rpm は(消えており)使えません。
別のリポジトリに変えて使えるかは、試すしかなさそう。
-
1. 簡単な例:
「Rocky Linux 9.0」(Xfce) にて、
スクリーンビュワー「ristretto」のインストール:
-
2. 依存の多い例:
「Rocky Linux 9.0」(Xfce) にて、
日本語入力「ibus-mozc」のインストール:
-
-
- --- - --- - --- - --- - --- - --- - --- - --- - ----- ----- ----- -
4. ホストOS を再起動:
-
$ reboot
-
-
- --- - --- - --- - --- - --- - --- - --- - --- - ----- ----- ----- --
5. Web サイトで、使う目的に近い「Box」を検索:
-
Vagrant にて仮想マシンを作成(使用)するときに使われるのが、専用のサイトに置かれた使う目的に近い(ベースとなる) Vagrantの「Box」ファイルをダウンロードして追加することです:
→世界中で作成された様々な「Box」が公開されています。個人で試したい環境に近い、ベースとなる「Box」(仮想マシン)が手に入ります。
-
-
- --- - --- - --- - --- - --- - --- - --- - --- - ----- ----- ----- ---
5-a. ダウンロード可能な「Box」を、公式の「Vagrant Cloud」にて検索:
-
- Vagrant Cloud (のバージョニングボックス)の機能を使うと、「Box」のバージョン管理が簡単になります。
→コミュニティのサイトにはない利点
-
公式サイトの「VagrantCloud」:
Discover Vagrant Boxes
-
1). 「Discover Vagrant Boxes」の検索窓に、欲しい検索キーを入力:
例:
「CentOS7 PHP MariaDB」で検索:
→複数見つかります。
-
2). 「Box」を選ぶときの注意点:
-
(1). 「Popular」にあるダウンロード数が多い「Box」を選ぶのが無難。
-
(2). 「Box」のユーザ名:
ユーザ名が「Bent」や「ubuntu」の「Box」は信頼度が高いです。
-
(3). 「Box」のダウンロード数:
ダウンロードが多い「Box」は、頻繁に使われているので実績があります。
もし、悪意のあるソフトウェアが含まれている「Box」を見つけたら「support+vagrantcloud@bashicorp.com」に報告。
-
(4). 最新の公開日:
定期的に更新される「Box」、リリースが最近の「Box」には、最新のソフトウェアが含まれています。
-
(5). 「Box」のダウンロードが利用できるか:
Vagrant Cloud は、Vagrant Cloud 以外で「Box」の作成者によってホストされている「Box」の場合は、パブリックにアクセスできるか、定期的にチェックしています。この情報は、プロバイダの横にあるボックス ページで確認できます。
-
3). 表示された「Box」の一覧から、使用したい「Box」のURL をコピー:
→テキストエディタに貼り付け
-
-
- --- - --- - --- - --- - --- - --- - --- - --- - ----- ----- ----- ----
5-b. ダウンロード可能な「Box」を、コミュニティの「Vagrantbox.es」にて検索:
-
ユーザが作成した「Box」を公開している、コミュニティのサイトがあります:
Vagrantbox.es
-
1). 「Box」の一覧が表示:
→検索キーでの絞り込みはできるけど、「ダウンロード数」や「サイズ」などでのソートはできません。
-
2). 使用したい「Box」のURL をコピー:
→テキストエディタに貼り付け
-
3). 参考: 公開しても良い「Box」が出来たら、一覧に登録(貢献):
アップすることで、個人的にも、サイトを準備しなくても良いし、管理が楽で、「Box」も使いやすくなります。
→プルリクエストを送信 します:
-
README.md より抜粋:
このリポジトリには、Web サイト「Vagrantbox.es」のコンテンツ、
つまり Vagrant 仮想化ツール用のサードパーティの「ベース ボックス」の一覧 が含まれています。
こちらで、一覧を更新したい人がプル リクエストを送信するだけで簡単に更新できます。
ただし、コードは「gh-pages」ブランチに移動されているので注意。そこに変更を提出します。
-
-
- --- - --- - --- - --- - --- - --- - --- - --- - ----- ----- ----- -----
6. 「vagrant box add」にて、「Box」を追加する場合:
-
「vagrant box add」コマンドを使って、「Box」を追加(ホームの隠しフォルダに保存)する場合、
基本的に「作業フォルダ」は、この時点では要りません。「vagrant init」の実行の時に必要です。
しかしながら、ファイルの動きを見たいので、わざと事前に準備しました。
-
1). 「仮想マシン」の設定ファイルを置く、「作業フォルダ」を準備:
-
C:¥Users¥user> md CentOS-test
C:¥Users¥user> cd CentOS-test
-
mkdir で作成、もしくは、GUI で右クリック →「フォルダ作成」
$ mkdir -p ~/ダウンロード/vm/CentOS-test
$ cd ~/ダウンロード/vm/CentOS-test/
-
2). 参考: Vagrant にて、 使用したい「Box」(仮想マシンイメージ)をダウンロードして追加:
基本的に「vagrant box add」コマンドを使う必要はありません:
通常の作業手順である、「vagrant init」で作成された「Vagrantfile」を使って「vagrant up」を実行すると、
「Box」がダウンロードされていない場合は、自動で(ホームの隠しフォルダに)ダウンロードされます。
つまり、「vagrant box add」の機能が流れの中に含まれています。
-
個人的には、コミュニティのサイトからのダウンロードの場合は、セキュリティ面で不安があるので、「vagrant box add」で自動でホームに一旦落としてから、実行する前に、ファイル構成を確認するなどできるので便利です。
-
→「vagrant box add」または、「vagrant up」時に、「ホームの隠しフォルダ」に自動的に保存されます:
-
Vagrant BOX ファイルの一覧を表示:
$ vagrant box list
:
CentOS7-test (virtualbox, 0)
generic/fedora38 (virtualbox, 4.3.6, (amd64))
nercceh/ubuntu22.04-desktop (virtualbox, 4.0.3)
-
実際のファイルの構造を表示:
$ ls -1ARp ~/.vagrant.d/boxes/
/home/ubn/.vagrant.d/boxes/: ←(3つのBox が落ちています)
CentOS7-test/
generic-VAGRANTSLASH-fedora38/ ←(generic/fedora38 のことです)
nercceh-VAGRANTSLASH-ubuntu22.04-desktop/ ←(nercceh/ubuntu22.04-desktop のことです)
/home/ubn/.vagrant.d/boxes/CentOS7-test: ←(Box 名)
0/
/home/ubn/.vagrant.d/boxes/CentOS7-test/0: ←(バージョン番号を省略した時)
virtualbox/
/home/ubn/.vagrant.d/boxes/CentOS7-test/0/virtualbox: ←(プロバイダ名)
Vagrantfile
box-disk1.vmdk
box.ovf
metadata.json
/home/ubn/.vagrant.d/boxes/generic-VAGRANTSLASH-fedora38: ←(Box 名)
4.3.6/
metadata_url
/home/ubn/.vagrant.d/boxes/generic-VAGRANTSLASH-fedora38/4.3.6: ←(バージョン番号)
amd64/
/home/ubn/.vagrant.d/boxes/generic-VAGRANTSLASH-fedora38/4.3.6/amd64: ←(アーキテクチャ)
virtualbox/
/home/ubn/.vagrant.d/boxes/generic-VAGRANTSLASH-fedora38/4.3.6/amd64/virtualbox: ←(プロバイダ名)
Vagrantfile
box.ovf
generic-fedora38-virtualbox-x64-disk001.vmdk
info.json
metadata.json
/home/ubn/.vagrant.d/boxes/nercceh-VAGRANTSLASH-ubuntu22.04-desktop: ←(Box 名)
4.0.3/
metadata_url
/home/ubn/.vagrant.d/boxes/nercceh-VAGRANTSLASH-ubuntu22.04-desktop/4.0.3: ←(バージョン番号)
virtualbox/
/home/ubn/.vagrant.d/boxes/nercceh-VAGRANTSLASH-ubuntu22.04-desktop/4.0.3/virtualbox: ←(プロバイダ名)
Vagrantfile
box.ovf
box_update_check
metadata.json
packer-virtualbox-iso-1670500096-disk001.vmdk
ubn@ubn-box:~$
-
不要になったVagrant BOX ファイルを削除:
$ vagrant box remove [Vagrant box名]
-
-
- --- - --- - --- - --- - --- - --- - --- - --- - ----- ----- ----- ----- -
6-a. 公式サイトの「Vagrant Cloud」で検索、「Box」を追加する場合:
-
公式サイトの「VagrantCloud」:
Discover Vagrant Boxes
-
「vagrant box add」コマンドの形式:
$ vagrant box add {管理名}
- {管理名} は、公式サイトに登録された名前(サイトに登録したユーザ名/box名)です:
→好みの「仮想マシン」名にすることはできません。
→ホームの隠しフォルダに「Vagrantfile」ファイル、およびディスクイメージが保存されます。
-
「vagrant box add」コマンドを使うだけなら、事前に「作業フォルダ」を作る必要はありません:
「vagrant initi」コマンドを使う時点で、「作業フォルダ」が必要です。
ただし、作業前に「作業フォルダ」に移動しておく、のが無難かも。
-
作業フォルダの作成:
$ mkdir -p ~/ダウンロード/vm/{test1,test2,test3}
$ ls -1 ~/ダウンロード/vm/
test1
test2
test3
ubn2204
→投稿が見やすいように「test1、test2、test3」のフォルダ名にしましたが、実際に使う場合は「fedora」等のわかりやすい名前がオススメです。
複数指定できるのは Linux の シェル (bash) の機能です。
ちなみに「ubn2204」は操作前に存在していたフォルダです。
「-p」は存在しなければ作成してくれる指定です。
-
「Box」を追加する例1:
-
(1). 「Box」を追加:
$ cd ~/ダウンロード/vm/test1/
$ vagrant box add generic/fedora38
==> box: Loading metadata for box 'generic/fedora38'
box: URL: https://vagrantcloud.com/api/v2/vagrant/generic/fedora38
This box can work with multiple providers! The providers that it
can work with are listed below. Please review the list and choose
the provider you will be working with.
1) docker
2) hyperv
3) libvirt
4) parallels
5) virtualbox
6) vmware_desktop
Enter your choice: 5 ←(「プロバイダ」の選択: virtualbox)
→複数のプロバイダに対応している場合の表示です。
==> box: Adding box 'generic/fedora38' (v4.3.6) for provider: virtualbox (amd64)
box: Downloading: https://vagrantcloud.com/generic/boxes/fedora38/versions/4.3.6/providers/virtualbox/amd64/vagrant.box
↓ ダウンロード開始: %がカウントされます
box: Calculating and comparing box checksum...
==> box: Successfully added box 'generic/fedora38' (v4.3.6) for 'virtualbox (amd64)'!
ubn@ubn-box:~/ダウンロード/vm/test1$
-
(2). 作業フォルダを確認:
$ ls -1A ~/ダウンロード/vm/test1/
$
→「vagrant box add」コマンドの実行では、「作業フォルダ」にファイルは作られません。
-
(3). ホームにある隠しフォルダを確認:
$ ls -1ARp ~/.vagrant.d/boxes/
/home/ubn/.vagrant.d/boxes/:
generic-VAGRANTSLASH-fedora38/
nercceh-VAGRANTSLASH-ubuntu22.04-desktop/
/home/ubn/.vagrant.d/boxes/generic-VAGRANTSLASH-fedora38:
4.3.6/
metadata_url
/home/ubn/.vagrant.d/boxes/generic-VAGRANTSLASH-fedora38/4.3.6:
amd64/
/home/ubn/.vagrant.d/boxes/generic-VAGRANTSLASH-fedora38/4.3.6/amd64:
virtualbox/
/home/ubn/.vagrant.d/boxes/generic-VAGRANTSLASH-fedora38/4.3.6/amd64/virtualbox: ←(今回分)
Vagrantfile
box.ovf
generic-fedora38-virtualbox-x64-disk001.vmdk
info.json
metadata.json
/home/ubn/.vagrant.d/boxes/nercceh-VAGRANTSLASH-ubuntu22.04-desktop:
4.0.3/
metadata_url
/home/ubn/.vagrant.d/boxes/nercceh-VAGRANTSLASH-ubuntu22.04-desktop/4.0.3:
virtualbox/
/home/ubn/.vagrant.d/boxes/nercceh-VAGRANTSLASH-ubuntu22.04-desktop/4.0.3/virtualbox: ←(次回分)
Vagrantfile
box.ovf
box_update_check
metadata.json
packer-virtualbox-iso-1670500096-disk001.vmdk
-
(4). 「Vagrantfile」の内容を確認:
$ cat ~/.vagrant.d/boxes/generic-VAGRANTSLASH-fedora38/4.3.6/amd64/virtualbox/Vagrantfile
# The contents below were provided by the Packer Vagrant post-processor
Vagrant.configure("2") do |config|
config.vm.base_mac = "0800277AC324"
end
# The contents below (if any) are custom contents provided by the
# Packer template during image build.
# -*- mode: ruby -*-
# vi: set ft=ruby :
Vagrant.configure(2) do |config|
config.vm.boot_timeout = 1800
config.vm.synced_folder ".", "/vagrant", disabled: true
config.vm.box_check_update = true
# config.vm.post_up_message = ""
config.vm.boot_timeout = 1800
# config.vm.box_download_checksum = true
config.vm.boot_timeout = 1800
# config.vm.box_download_checksum_type = "sha256"
# config.vm.provision "shell", run: "always", inline: <<-SHELL
# SHELL
# Adding a second CPU and increasing the RAM to 2048MB will speed
# things up considerably should you decide to do anythinc with this box.
config.vm.provider :hyperv do |v, override|
v.maxmemory = 2048
v.memory = 2048
v.cpus = 2
end
config.vm.provider :libvirt do |v, override|
v.disk_bus = "virtio"
v.driver = "kvm"
v.video_vram = 256
v.memory = 2048
v.cpus = 2
end
config.vm.provider :parallels do |v, override|
v.customize ["set", :id, "--on-window-close", "keep-running"]
v.customize ["set", :id, "--startup-view", "headless"]
v.customize ["set", :id, "--memsize", "2048"]
v.customize ["set", :id, "--cpus", "2"]
end
config.vm.provider :virtualbox do |v, override|
v.customize ["modifyvm", :id, "--memory", 2048]
v.customize ["modifyvm", :id, "--vram", 256]
v.customize ["modifyvm", :id, "--cpus", 2]
v.gui = false
end
["vmware_fusion", "vmware_workstation", "vmware_desktop"].each do |provider|
config.vm.provider provider do |v, override|
v.whitelist_verified = true
v.gui = false
v.vmx["cpuid.coresPerSocket"] = "1"
v.vmx["memsize"] = "2048"
v.vmx["numvcpus"] = "2"
end
end
end
→複数の「ブロバイダ」に対応しています。
このように書くと、選択メッセージが表示されるのかな。
-
ちなみに、4行目は、ゲスト上のデフォルト NAT インターフェイスに割り当てられる MAC アドレス で、
ベンダー名の 08:00:27 は、ドイツのハードウェアのメーカ「PCS Systemtechnik GmbH」です。
「Packer」ツールのテンプレートを使うと、追加されるみたい。
-
(5). ディスクイメージのサイズを確認:
$ ls -lA ~/.vagrant.d/boxes/generic-VAGRANTSLASH-fedora38/4.3.6/amd64/virtualbox/
:
-rw-rw-r-- 1 ubn ubn 1949 11月 28 21:07 Vagrantfile
-rw-rw-r-- 1 ubn ubn 6786 11月 28 21:07 box.ovf
-rw-rw-r-- 1 ubn ubn 875532288 11月 28 21:07 generic-fedora38-virtualbox-x64-disk001.vmdk
-rw-rw-r-- 1 ubn ubn 301 11月 28 21:07 info.json
-rw-rw-r-- 1 ubn ubn 26 11月 28 21:07 metadata.json
→ディスクイメージのサイズで「Box」を選ぶのもありかも。
-
-
- --- - --- - --- - --- - --- - --- - --- - --- - ----- ----- ----- ----- --
6-b. コミュニティの「Vagrantbox.es」で検索、「Box」を追加する場合:
-
コミュニティのサイト:
Vagrantbox.es
-
「Vagrant Cloud」を利用していないサイトの場合は、微妙にコマンドの書式が変わります。
-
「vagrant box add」コマンドの形式:
$ vagrant box add {管理名} {URL}
- {管理名} は、好みの管理しやすい名前にします。
- {URL} に、使用したい「Box」のURL を貼り付けます。
→ホームの隠しフォルダに「Vagrantfile」ファイル、およびディスクイメージが保存されます。
-
「Box」を追加する例2:
-
(1). 「Box」を追加:
$ cd ~/ダウンロード/vm/test2/
$ vagrant box add CentOS7-test https://github.com/tommy-muehle/puppet-vagrant-boxes/releases/download/1.1.0/centos-7.0-x86_64.box
==> box: Box file was not detected as metadata. Adding it directly...
==> box: Adding box 'CentOS7-test' (v0) for provider:
box: Downloading: https://github.com/tommy-muehle/puppet-vagrant-boxes/releases/download/1.1.0/centos-7.0-x86_64.box
Download redirected to host: objects.githubusercontent.com
==> box: Successfully added box 'CentOS7-test' (v0) for ''!
ubn@ubn-box:~/ダウンロード/vm/test2$
-
(2). 作業フォルダを確認:
$ ls -1A ~/ダウンロード/vm/test2/
$
→「vagrant box add」では「作業フォルダ」にファイルは作られません。
-
(3). 「ホームの隠しフォルダ」を確認:
$ ls -1A ~/.vagrant.d/boxes/
:
CentOS7-test
generic-VAGRANTSLASH-fedora38
nercceh-VAGRANTSLASH-ubuntu22.04-desktop
-
$ ls -1ARp ~/.vagrant.d/boxes/CentOS7-test/
/home/ubn/.vagrant.d/boxes/CentOS7-test/:
0/
/home/ubn/.vagrant.d/boxes/CentOS7-test/0:
virtualbox/
/home/ubn/.vagrant.d/boxes/CentOS7-test/0/virtualbox:
Vagrantfile
box-disk1.vmdk
box.ovf
metadata.json
-
(4). 「Vagrantfile」の内容を確認:
$ cat ~/.vagrant.d/boxes/CentOS7-test/0/virtualbox/Vagrantfile
Vagrant::Config.run do |config|
# This Vagrantfile is auto-generated by `vagrant package` to contain
# the MAC address of the box. Custom configuration should be placed in
# the actual `Vagrantfile` in this box.
config.vm.base_mac = "080027DE0E0E"
end
# Load include vagrant file if it exists after the auto-generated
# so it can override any of the settings
include_vagrantfile = File.expand_path("../include/_Vagrantfile", __FILE__)
load include_vagrantfile if File.exist?(include_vagrantfile)
-
-
- --- - --- - --- - --- - --- - --- - --- - --- - ----- ----- ----- ----- ---
6-c. コミュニティの「Vagrantbox.es」でURL を検索、好みの「Box」名で追加する場合:
-
「項番 6-b 」の「vagrant box add」コマンドを使うやり方だけでなく、 「vagrant init」を使うやり方もあります:
-
「vagrant init」コマンドを実行して、テンプレートとなる「Vagrantfile」を作成。
「Vagrantfile」を修正して、「Box」をダウンロードして、好みの「Box」名で追加(保存)します:
-
「Box」を追加する例3:
-
(1). コミュニティのサイトで、好みの「Box」を検索し、URL をコピーしておきます:
-
コミュニティのサイト:
Vagrantbox.es
→「コピー」ボダンでクリップボードにコピー、テキストエディタに貼付けておきます。
-
(2). 作業フォルダの作成:
$ mkdir -p ~/ダウンロード/vm/{test1,test2,test3}
もしくは、
$ mkdir -p ~/ダウンロード/vm/test3
-
$ ls -1 ~/ダウンロード/vm/
test1
test2
test3
ubn2204
-
(3). 「Vagrantfile」を作成:
$ cd ~/ダウンロード/vm/test3/
$ vagrant init -m
A `Vagrantfile` has been placed in this directory. You are now
ready to `vagrant up` your first virtual environment! Please read
the comments in the Vagrantfile as well as documentation on
`vagrantup.com` for more information on using Vagrant.
→いつもの表示
-
確認:
$ ls -1A
Vagrantfile
→「Vagrantfile」が作成されました。
-
(4). 「Vagrantfile」の内容の確認:
$ cd ~/ダウンロード/vm/test3/
$ cat Vagrantfile
# -*- mode: ruby -*-
# vi: set ft=ruby :
Vagrant.configure("2") do |config|
config.vm.box = "base"
end
-
(5). 「Vagrantfile」の修正:
使用するテキストエディタは何でも良いです:
$ cd ~/ダウンロード/vm/test3/
$ featherpad Vagrantfile
↓ 下記に置換:
# -*- mode: ruby -*-
# vi: set ft=ruby :
Vagrant.configure("2") do |config|
#config.vm.box = "base"
config.vm.box = “CentOS7_test3”
config.vm.box_url = "https://github.com/holms/vagrant-centos7-box/releases/download/7.1.1503.001/CentOS-7.1.1503-x86_64-netboot.box"
end
好みの「Box 名」に修正:
任意の「Box」ファイルのダウンロードURL を追記(URL を貼付け):
→コマンド側でパラメータを付加するのでなく、「Vagrantfile」を直接修正しました。
-
(6). 参考: 「-m」を付けない場合の「Vagrantfile」の内容:
$ cd ~/ダウンロード/vm/test3/
$ cat Vagrantfile
# -*- mode: ruby -*-
# vi: set ft=ruby :
# All Vagrant configuration is done below. The "2" in Vagrant.configure
# configures the configuration version (we support older styles for
# backwards compatibility). Please don't change it unless you know what
# you're doing.
Vagrant.configure("2") do |config|
# The most common configuration options are documented and commented below.
# For a complete reference, please see the online documentation at
# https://docs.vagrantup.com.
# Every Vagrant development environment requires a box. You can search for
# boxes at https://vagrantcloud.com/search.
config.vm.box = "base"
# Disable automatic box update checking. If you disable this, then
# boxes will only be checked for updates when the user runs
# `vagrant box outdated`. This is not recommended.
# config.vm.box_check_update = false
# Create a forwarded port mapping which allows access to a specific port
# within the machine from a port on the host machine. In the example below,
# accessing "localhost:8080" will access port 80 on the guest machine.
# NOTE: This will enable public access to the opened port
# config.vm.network "forwarded_port", guest: 80, host: 8080
# Create a forwarded port mapping which allows access to a specific port
# within the machine from a port on the host machine and only allow access
# via 127.0.0.1 to disable public access
# config.vm.network "forwarded_port", guest: 80, host: 8080, host_ip: "127.0.0.1"
# Create a private network, which allows host-only access to the machine
# using a specific IP.
# config.vm.network "private_network", ip: "192.168.33.10"
# Create a public network, which generally matched to bridged network.
# Bridged networks make the machine appear as another physical device on
# your network.
# config.vm.network "public_network"
# Share an additional folder to the guest VM. The first argument is
# the path on the host to the actual folder. The second argument is
# the path on the guest to mount the folder. And the optional third
# argument is a set of non-required options.
# config.vm.synced_folder "../data", "/vagrant_data"
# Disable the default share of the current code directory. Doing this
# provides improved isolation between the vagrant box and your host
# by making sure your Vagrantfile isn't accessable to the vagrant box.
# If you use this you may want to enable additional shared subfolders as
# shown above.
# config.vm.synced_folder ".", "/vagrant", disabled: true
# Provider-specific configuration so you can fine-tune various
# backing providers for Vagrant. These expose provider-specific options.
# Example for VirtualBox:
#
# config.vm.provider "virtualbox" do |vb|
# # Display the VirtualBox GUI when booting the machine
# vb.gui = true
#
# # Customize the amount of memory on the VM:
# vb.memory = "1024"
# end
#
# View the documentation for the provider you are using for more
# information on available options.
# Enable provisioning with a shell script. Additional provisioners such as
# Ansible, Chef, Docker, Puppet and Salt are also available. Please see the
# documentation for more information about their specific syntax and use.
# config.vm.provision "shell", inline: <<-SHELL
# apt-get update
# apt-get install -y apache2
# SHELL
end
-
-
- --- - --- - --- - --- - --- - --- - --- - --- - ----- ----- ----- ----- ----
6-d. 公式サイトの「Vagrant Cloud」でURL を検索、好みの「Box」名で追加する場合:
-
「項番 6-c. 」のやり方が公式のサイトでも使えるか、
つまり、「Vagrantfile」を修正して、「Box」をダウンロードして、好みの「Box」名で追加(保存)できるか、
トライしました:
-
ちなみに、公式のサイトで最初、「URL を見つけられなかった」ときに行った作業は「項番 9. 」に備忘録として残しました:
-
「Box」を追加する例3-2:
-
(1). 公式サイトで、好みの「Box」を検索し、URL をコピーしておきます:
-
公式サイトの「VagrantCloud」:
Discover Vagrant Boxes
-
公式サイトで、「Box」のURL をコピーするやり方:
公式サイトの一覧にある「generic/centos7 」をクリック
最新のバージョンである
v4.3.6 currently released version
virtualbox の項目にある、「amd64」の行の右端にある 水色の「↓」アイコンを右クリック →「リンクをコピー」
-
これが欲しかったURL です:
「https://app.vagrantup.com/generic/boxes/centos7/versions/4.3.6/providers/virtualbox/amd64/vagrant.box」
-
(2). 作業フォルダの作成:
$ mkdir -p ~/ダウンロード/vm/{test1,test2,test3}
もしくは、
$ mkdir -p ~/ダウンロード/vm/test3
-
$ ls -1 ~/ダウンロード/vm/
test1
test2
test3
ubn2204
-
すでに test3 を使っているので、ファイルを削除:
$ cd ~/ダウンロード/vm/test3
$ ls -1A
Vagrantfile
削除:
$ rm Vagrantfile
$ ls -1A
$
-
(3). 「Vagrantfile」を作成:
例.「generic/centos7」
$ cd ~/ダウンロード/vm/test3/
$ vagrant init -m generic/centos7
A `Vagrantfile` has been placed in this directory. You are now
ready to `vagrant up` your first virtual environment! Please read
the comments in the Vagrantfile as well as documentation on
`vagrantup.com` for more information on using Vagrant.
→いつもの表示
-
確認:
$ ls -1A
Vagrantfile
→「Vagrantfile」が作成されました。
-
(4). 「Vagrantfile」の内容の確認:
$ cd ~/ダウンロード/vm/test3/
$ cat Vagrantfile
# -*- mode: ruby -*-
# vi: set ft=ruby :
Vagrant.configure("2") do |config|
config.vm.box = "generic/centos7"
end
-
(5). 「Vagrantfile」を修正:
$ cd ~/ダウンロード/vm/test3/
$ featherpad Vagrantfile
↓ すべて置換:
# -*- mode: ruby -*-
# vi: set ft=ruby :
Vagrant.configure("2") do |config|
config.vm.box = "CentOS7_test3_2"
config.vm.box_url = "https://vagrantcloud.com/generic/boxes/centos7/versions/4.3.6/providers/virtualbox/amd64/vagrant.box"
end
→Ctrl+S で、保存
→修正するよりも、すべて置換した方が確実です。
ちなみに、この状態が「vagrant init」を終えた状態です。
-
(6). うまく「仮想マシン」が作成されるか確認:
$ cd ~/ダウンロード/vm/test3/
$ vagrant up
Bringing machine 'default' up with 'virtualbox' provider...
==> default: Box 'CentOS7_test3_2' could not be found. Attempting to find and install...
default: Box Provider: virtualbox
default: Box Version: >= 0
==> default: Box file was not detected as metadata. Adding it directly...
==> default: Adding box 'CentOS7_test3_2' (v0) for provider: virtualbox ←(仮想マシン名)
default: Downloading: https://vagrantcloud.com/generic/boxes/centos7/versions/4.3.6/providers/virtualbox/amd64/vagrant.box
==> default: Successfully added box 'CentOS7_test3_2' (v0) for 'virtualbox'!
==> default: Importing base box 'CentOS7_test3_2'...
==> default: Matching MAC address for NAT networking...
==> default: Setting the name of the VM: test3_default_1701354147406_49248 ←(仮想マシン名)
==> default: Clearing any previously set network interfaces...
==> default: Preparing network interfaces based on configuration...
default: Adapter 1: nat
==> default: Forwarding ports...
default: 22 (guest) => 2222 (host) (adapter 1)
==> default: Running 'pre-boot' VM customizations...
==> default: Booting VM...
==> default: Waiting for machine to boot. This may take a few minutes...
default: SSH address: 127.0.0.1:2222
default: SSH username: vagrant
default: SSH auth method: private key
default:
default: Vagrant insecure key detected. Vagrant will automatically replace
default: this with a newly generated keypair for better security.
default:
default: Inserting generated public key within guest...
default: Removing insecure key from the guest if it's present...
default: Key inserted! Disconnecting and reconnecting using new SSH key...
==> default: Machine booted and ready!
==> default: Checking for guest additions in VM... ←(Guest Additions Version のチェックでアウト)
default: The guest additions on this VM do not match the installed version of
default: VirtualBox! In most cases this is fine, but in rare cases it can
default: prevent things such as shared folders from working properly. If you see
default: shared folder errors, please make sure the guest additions within the
default: virtual machine match the version of VirtualBox you have installed on
default: your host and reload your VM.
default:
default: Guest Additions Version: 5.2.44 r139111
default: VirtualBox Version: 7.0
ubn@ubn-box:~/ダウンロード/vm/test3$
→エラーの対応は、次の投稿で回避しています。今回は無視。
-
$ vagrant status
Current machine states:
default running (virtualbox)
The VM is running. To stop this VM, you can run `vagrant halt` to
shut it down forcefully, or you can run `vagrant suspend` to simply
suspend the virtual machine. In either case, to restart it again,
simply run `vagrant up`.
-
$ vagrant box list
:
CentOS7-test (virtualbox, 0)
CentOS7_test3_2 (virtualbox, 0) ←(Box 名は変更されました)
generic/fedora38 (virtualbox, 4.3.6, (amd64))
nercceh/ubuntu22.04-desktop (virtualbox, 4.0.3)
-
(7). ファイルの確認:
$ ls -1 ~/.vagrant.d/boxes/
:
CentOS7-test
CentOS7_test3_2 ←(Box 名は変更されました)
generic-VAGRANTSLASH-fedora38
nercceh-VAGRANTSLASH-ubuntu22.04-desktop
-
$ ls -1A ~/ダウンロード/vm/test3/
:
.vagrant
Vagrantfile
→作業フォルダは正常です。
-
$ ls -1 ~/'VirtualBox VMs'/
:
EndeavourOS_OpenBox
test3_default_1701354147406_49248 ←(注目)
→VirtualBox の「仮想マシン」名はほとんど変わりません。数字が変わった位です。
-
結論:
-
(1). ダウンロードして保存される「Box」ファイル名は、「Vagrantfile」を修正すれば変更できます。
(2). ただし、公式サイトから持ってくる場合は、URL がわからないので、面倒です。
-
(3). VirtualBox の「仮想マシン」名は自動で付けられ、好みの名前に出来ません。
(4). VirtualBox の「仮想マシン」名は、「フォルダ名_default_自動で付く番号」になります。
→なので、フォルダ名を工夫すれば、わかりやすい名前を頭にすることは可能
-
ちなみに、「default」は仮想マシン名です。
-
-
- --- - --- - --- - --- - --- - --- - --- - --- - ----- ----- ----- ----- -----
7. 「仮想マシン」の初期化(「Vagrantfile」の作成):
-
「vagrant init」コマンドを実行した「作業フォルダ」に「Vagrantfile」ファイルが生成されます:
-
「vagrant init」コマンドの形式:
使い方: vagrant init [options] [name [url]]
→ [name [url]] の部分は、使うサイトで変わります。
公式サイトであれば、「登録された名前」(サイトに登録したユーザ名/box名)になり、
コミュニティサイトであれば、「管理しやすいように付けた名前」と「URL」になります。
-
1). 作業フォルダの作成:
すでに作成していた場合は不要です:
フォルダ作成で「-p」(--parents) を指定しているので、すでに存在していてもエラーは発生しません。
必要に応じて親ディレクトリが作成されます。
$ mkdir -p ~/ダウンロード/vm/{test1,test2,test3}
$ ls -1 ~/ダウンロード/vm/
test1
test2
test3
ubn2204
→次の処理に備えて、すでに作成されていたフォルダの中は「空」にしておく必要があります:
-
前回の作業でフォルダ内に作成されたファイルがあれば削除:
$ ls -1A
:
.vagrant
Vagrantfile
-
$ rm -r .vagrant
$ rm Vagrantfile
$ ls -A
$
-
ちなみに、フォルダ名はわかりやすい名前(例えば、fedora)にするのがオススメです。
-
2). 「仮想マシン」の初期化の例1:
-
(1). 「Vagrantfile」の作成:
$ cd ~/ダウンロード/vm/test1/
$ vagrant init generic/fedora38
A `Vagrantfile` has been placed in this directory. You are now
ready to `vagrant up` your first virtual environment! Please read
the comments in the Vagrantfile as well as documentation on
`vagrantup.com` for more information on using Vagrant.
和訳:
「Vagrantfile」はこのディレクトリに配置されています。
これで、最初の仮想環境を「vagrant up」する準備が整いました。
Vagrant の使用方法の詳細については、Vagrantfile のコメントと
「vagrantup.com」のドキュメントをお読みください。
-
(2). 作業フォルダを確認:
$ ls -1A ~/ダウンロード/vm/test1/
Vagrantfile
→「Vagrantfile」のみ作成されました。
-
(3). 「Vagrantfile」の内容を確認:
$ cat Vagrantfile
# -*- mode: ruby -*-
# vi: set ft=ruby :
# All Vagrant configuration is done below. The "2" in Vagrant.configure
# configures the configuration version (we support older styles for
# backwards compatibility). Please don't change it unless you know what
# you're doing.
Vagrant.configure("2") do |config|
# The most common configuration options are documented and commented below.
# For a complete reference, please see the online documentation at
# https://docs.vagrantup.com.
# Every Vagrant development environment requires a box. You can search for
# boxes at https://vagrantcloud.com/search.
config.vm.box = "generic/fedora38"
# Disable automatic box update checking. If you disable this, then
# boxes will only be checked for updates when the user runs
# `vagrant box outdated`. This is not recommended.
# config.vm.box_check_update = false
# Create a forwarded port mapping which allows access to a specific port
# within the machine from a port on the host machine. In the example below,
# accessing "localhost:8080" will access port 80 on the guest machine.
# NOTE: This will enable public access to the opened port
# config.vm.network "forwarded_port", guest: 80, host: 8080
# Create a forwarded port mapping which allows access to a specific port
# within the machine from a port on the host machine and only allow access
# via 127.0.0.1 to disable public access
# config.vm.network "forwarded_port", guest: 80, host: 8080, host_ip: "127.0.0.1"
# Create a private network, which allows host-only access to the machine
# using a specific IP.
# config.vm.network "private_network", ip: "192.168.33.10"
# Create a public network, which generally matched to bridged network.
# Bridged networks make the machine appear as another physical device on
# your network.
# config.vm.network "public_network"
# Share an additional folder to the guest VM. The first argument is
# the path on the host to the actual folder. The second argument is
# the path on the guest to mount the folder. And the optional third
# argument is a set of non-required options.
# config.vm.synced_folder "../data", "/vagrant_data"
# Disable the default share of the current code directory. Doing this
# provides improved isolation between the vagrant box and your host
# by making sure your Vagrantfile isn't accessable to the vagrant box.
# If you use this you may want to enable additional shared subfolders as
# shown above.
# config.vm.synced_folder ".", "/vagrant", disabled: true
# Provider-specific configuration so you can fine-tune various
# backing providers for Vagrant. These expose provider-specific options.
# Example for VirtualBox:
#
# config.vm.provider "virtualbox" do |vb|
# # Display the VirtualBox GUI when booting the machine
# vb.gui = true
#
# # Customize the amount of memory on the VM:
# vb.memory = "1024"
# end
#
# View the documentation for the provider you are using for more
# information on available options.
# Enable provisioning with a shell script. Additional provisioners such as
# Ansible, Chef, Docker, Puppet and Salt are also available. Please see the
# documentation for more information about their specific syntax and use.
# config.vm.provision "shell", inline: <<-SHELL
# apt-get update
# apt-get install -y apache2
# SHELL
end
→サイトに登録されている「Vagrantfile」と内容が違うことに注目:
「Vagrant」のデフォルトのテンプレートで上書きされて、「vagrant init」コマンドに付けたパラメータ部分が反映されます。
-
3). 「仮想マシン」の初期化の例1-2:
-
(1). 「Vagrantfile」の作成:
$ cd ~/ダウンロード/vm/test1/
$ vagrant init -m generic/fedora38
`Vagrantfile` already exists in this directory. Remove it before
running `vagrant init`.
和訳:
`Vagrantfile` はこのディレクトリにすでに存在します。
「vagrant init」を実行する前に削除してください。
-
→「Vagrantfile」が存在すると、「vagrant init」は実行できません:
-
(2). 「Vagrantfile」を削除して「vagrant init」を再実行:
$ cd ~/ダウンロード/vm/test1/
$ rm Vagrantfile
$ vagrant init -m generic/fedora38
A `Vagrantfile` has been placed in this directory. You are now
ready to `vagrant up` your first virtual environment! Please read
the comments in the Vagrantfile as well as documentation on
`vagrantup.com` for more information on using Vagrant.
-
(3). 作業フォルダを確認:
$ ls -1A ~/ダウンロード/vm/test1/
:
.vagrant
Vagrantfile
→「Vagrantfile」だけでなく、「.vagrant」も作成されました。
-
(4). 「Vagrantfile」の内容を確認:
$ cat Vagrantfile
# -*- mode: ruby -*-
# vi: set ft=ruby :
Vagrant.configure("2") do |config|
config.vm.box = "generic/fedora38"
end
→コメント行の削除を指示したので、スッキリ
-
4). 「仮想マシン」の初期化の例2:
-
(1). 「Vagrantfile」の作成:
$ cd ~/ダウンロード/vm/test2/
$ vagrant init CentOS7-test
→「vagrant box add」したので、URL の指定は省略できます。
もしくは、
$ cd ~/ダウンロード/vm/test2/
$ vagrant init CentOS7-test https://github.com/tommy-muehle/puppet-vagrant-boxes/releases/download/1.1.0/centos-7.0-x86_64.box
-
(2). 作業フォルダを確認:
$ ls -1A
Vagrantfile
-
(3). 「Vagrantfile」の内容を確認:
$ cat Vagrantfile
# -*- mode: ruby -*-
# vi: set ft=ruby :
# All Vagrant configuration is done below. The "2" in Vagrant.configure
# configures the configuration version (we support older styles for
# backwards compatibility). Please don't change it unless you know what
# you're doing.
Vagrant.configure("2") do |config|
# The most common configuration options are documented and commented below.
# For a complete reference, please see the online documentation at
# https://docs.vagrantup.com.
# Every Vagrant development environment requires a box. You can search for
# boxes at https://vagrantcloud.com/search.
config.vm.box = "CentOS7-test"
# Disable automatic box update checking. If you disable this, then
# boxes will only be checked for updates when the user runs
# `vagrant box outdated`. This is not recommended.
# config.vm.box_check_update = false
# Create a forwarded port mapping which allows access to a specific port
# within the machine from a port on the host machine. In the example below,
# accessing "localhost:8080" will access port 80 on the guest machine.
# NOTE: This will enable public access to the opened port
# config.vm.network "forwarded_port", guest: 80, host: 8080
# Create a forwarded port mapping which allows access to a specific port
# within the machine from a port on the host machine and only allow access
# via 127.0.0.1 to disable public access
# config.vm.network "forwarded_port", guest: 80, host: 8080, host_ip: "127.0.0.1"
# Create a private network, which allows host-only access to the machine
# using a specific IP.
# config.vm.network "private_network", ip: "192.168.33.10"
# Create a public network, which generally matched to bridged network.
# Bridged networks make the machine appear as another physical device on
# your network.
# config.vm.network "public_network"
# Share an additional folder to the guest VM. The first argument is
# the path on the host to the actual folder. The second argument is
# the path on the guest to mount the folder. And the optional third
# argument is a set of non-required options.
# config.vm.synced_folder "../data", "/vagrant_data"
# Disable the default share of the current code directory. Doing this
# provides improved isolation between the vagrant box and your host
# by making sure your Vagrantfile isn't accessable to the vagrant box.
# If you use this you may want to enable additional shared subfolders as
# shown above.
# config.vm.synced_folder ".", "/vagrant", disabled: true
# Provider-specific configuration so you can fine-tune various
# backing providers for Vagrant. These expose provider-specific options.
# Example for VirtualBox:
#
# config.vm.provider "virtualbox" do |vb|
# # Display the VirtualBox GUI when booting the machine
# vb.gui = true
#
# # Customize the amount of memory on the VM:
# vb.memory = "1024"
# end
#
# View the documentation for the provider you are using for more
# information on available options.
# Enable provisioning with a shell script. Additional provisioners such as
# Ansible, Chef, Docker, Puppet and Salt are also available. Please see the
# documentation for more information about their specific syntax and use.
# config.vm.provision "shell", inline: <<-SHELL
# apt-get update
# apt-get install -y apache2
# SHELL
end
-
$ cd ~/ダウンロード/vm/test2/
$ rm Vagrantfile
$ vagrant init -m vagrant init -m CentOS7-test https://github.com/tommy-muehle/puppet-vagrant-boxes/releases/download/1.1.0/centos-7.0-x86_64.box
A `Vagrantfile` has been placed in this directory. You are now
ready to `vagrant up` your first virtual environment! Please read
the comments in the Vagrantfile as well as documentation on
`vagrantup.com` for more information on using Vagrant.
-
(4). 作業フォルダを確認:
$ ls -1A
Vagrantfile
-
(5). 「Vagrantfile」の内容を確認:
$ cat Vagrantfile
$ cat Vagrantfile
# -*- mode: ruby -*-
# vi: set ft=ruby :
Vagrant.configure("2") do |config|
config.vm.box = "CentOS7-test"
config.vm.box_url = "https://github.com/tommy-muehle/puppet-vagrant-boxes/releases/download/1.1.0/centos-7.0-x86_64.box"
end
→「 vagrant init」時にコマンドで指定したパラメータが生きています。
-
5). 追加されたbox のリストを確認:
$ vagrant box list
CentOS7-test (virtualbox, 0)
generic/fedora38 (virtualbox, 4.3.6, (amd64))
nercceh/ubuntu22.04-desktop (virtualbox, 4.0.3)
-
6). 「仮想マシン」の設定を変更したい場合:
「Vagrantfile」ファイルをエディタで修正:
$ cd ~/ダウンロード/vm/fedora38/
$ vi Vagrantfile
→「Vagrantfile」ファイルが置かれているフォルダに移動します。エディタは何でも構いません。
-
例1: 仮想環境の ipアドレスを指定する部分(35行目)のコメントを解除:
# -*- mode: ruby -*-
# vi: set ft=ruby :
Vagrant.configure("2") do |config|
config.vm.box = "bento/ubuntu-16.04"
end
-
例2: CPU数とメモリー容量を変更:
57行目から以下のようにコメント解除して値を変更:
config.vm.provider "virtualbox" do |vb|
# # Display the VirtualBox GUI when booting the machine
# vb.gui = true
#
# # Customize the amount of memory on the VM:
vb.memory = "4096"
vb.cpus = 2
end
-
-
- --- - --- - --- - --- - --- - --- - --- - --- - ----- ----- ----- ----- ----- -
8. 「Vagrantfile」から「仮想マシン」を作成、立ち上げて、操作してみる:
-
「Vagrantfile」ファイルを使って、「仮想マシン」を作成して立ち上げ:
$ cd ~/ダウンロード/vm/fedora38/
$ vagrant up
しばらく待つと、プロンプトが表示:
→「Box」の利用はサーバー目的が多いので、デスクトップ環境が含まれていないことがほとんどです。
「仮想マシン」が起動されても GUI の画面が表示されないことがあります。
-
「virtualbox」を実行して、「virtualbox」マネージャ画面で確認:
-
ちなみに、「Vagrant」の使用では、「virtualbox」マネージャは使われておらず、通常は起動されません。
「virtualbox」マネージャで設定を変更すると「仮想マシン」(イメージ)には反映されますが、「Vagrantfile」ファイルには反映されません。逆に、「Vagrantfile」ファイルの設定は、初回の作成時に、「virtualbox」マネージャの設定画面に反映されます。
-
3). 「仮想マシン」に、SSH で接続してログイン:
-
端末にて:
$ vagrant ssh
→(すでに設定されているので)ポート指定しなくても、自動ログインされます。
-
ポート番号等の指定が必要な場合:
「vagrant up」のメッセージに含まれる、 「仮想マシン」にSSH で接続するための情報を確認:
アドレス:192.168.33.10
ポート:22
ユーザ名:vagrant
パスワード:vagrant
-
もしくは、下記でも確認できます:
$ cd ~/ダウンロード/vm/test3
$ vagrant ssh-config
→「仮想マシン」の起動と、「作業フォルダ」への移動が必要です。
-
「PowerShell」を使うか、
もしくは、
「TeraTerm」等の SSH クライアントを使って、ログイン:
「TeraTerm」の入手:
-
4). 作業を終えたら、「仮想マシン」の SSH 接続を切断:
$ exit
もしくは、
$ logout
もしくは、
Ctrl+D
→「仮想マシン」からローカルPC環境に戻ります:
-
5). 「仮想マシン」の停止(シャットダウン):
$ vagrant halt
-
6). 要らなくなった「仮想マシン」を削除するとき:
「仮想マシン」の作業フォルダに移動後、
$ vagrant destroy
-
-
- --- - --- - --- - --- - --- - --- - --- - --- - ----- ----- ----- ----- ----- --
9. 備忘録: 公式サイトの「Vagrant Cloud」から、好みの「Box」名で追加する場合:
-
「Vagrantfile」を修正して、「Box」をダウンロードして、好みの「Box」名で追加(保存)できるか、
「項番 6-d. 」の作業で、「URL を見つけられなかった」ときに行った作業です。
その後 URL を見つけたので、こちらの作業は要りません。参考として手順を残しました。
-
「Box」を追加する例3-2:
公式のサイトでも「例3 」のやり方ができるか、確認:
-
(1). 公式サイトで、好みの「Box」を検索し、URL をコピーしておきます:
-
公式サイトの「VagrantCloud」:
Discover Vagrant Boxes
→残念ながら、サイトに「URL の表示が見つかりません」
-
なので、「Box」名をコピーしました。
例.「generic/centos7」
-
追記: URL を見つけました:
公式サイトの一覧にある「generic/centos7 」をクリック
最新のバージョンである
v4.3.6 currently released version
virtualbox の項目にある、「amd64」の行の右端にある 水色の「↓」アイコンを右クリック →「リンクをコピー」
-
これが欲しかったURL です:
「https://app.vagrantup.com/generic/boxes/centos7/versions/4.3.6/providers/virtualbox/amd64/vagrant.box」
-
URL が見つかったので、項番 (5). 〜 (19). は要りません。
項番 (1). 〜 (4).、および、項番 (20).以降を実行して下さい:
-
(2). 作業フォルダの作成:
$ mkdir -p ~/ダウンロード/vm/{test1,test2,test3}
もしくは、
$ mkdir -p ~/ダウンロード/vm/test3
-
$ ls -1 ~/ダウンロード/vm/
test1
test2
test3
ubn2204
-
すでに test3 を使っているので、ファイルを削除:
$ cd ~/ダウンロード/vm/test3
$ ls -1A
Vagrantfile
削除:
$ rm Vagrantfile
$ ls -1A
$
-
(3). 「Vagrantfile」を作成:
例.「generic/centos7」
$ cd ~/ダウンロード/vm/test3/
$ vagrant init -m generic/centos7
A `Vagrantfile` has been placed in this directory. You are now
ready to `vagrant up` your first virtual environment! Please read
the comments in the Vagrantfile as well as documentation on
`vagrantup.com` for more information on using Vagrant.
→いつもの表示
-
確認:
$ ls -1A
Vagrantfile
→「Vagrantfile」が作成されました。
-
(4). 「Vagrantfile」の内容の確認:
$ cd ~/ダウンロード/vm/test3/
$ cat Vagrantfile
# -*- mode: ruby -*-
# vi: set ft=ruby :
Vagrant.configure("2") do |config|
config.vm.box = "generic/centos7"
end
→残念ながら、URL の指定がわからないので、修正できません。
-
(5). 試しに、「vagrant up」して、立ち上げ時のメッセージを確認:
$ cd ~/ダウンロード/vm/test3/
$ vagrant up
Bringing machine 'default' up with 'virtualbox' provider...
==> default: Box 'generic/centos7' could not be found. Attempting to find and install...
default: Box Provider: virtualbox
default: Box Version: >= 0
==> default: Loading metadata for box 'generic/centos7'
default: URL: https://vagrantcloud.com/api/v2/vagrant/generic/centos7
==> default: Adding box 'generic/centos7' (v4.3.6) for provider: virtualbox (amd64)
default: Downloading: https://vagrantcloud.com/generic/boxes/centos7/versions/4.3.6/providers/virtualbox/amd64/vagrant.box ←★1
default: Calculating and comparing box checksum...
==> default: Successfully added box 'generic/centos7' (v4.3.6) for 'virtualbox (amd64)'!
==> default: Importing base box 'generic/centos7'...
==> default: Matching MAC address for NAT networking...
==> default: Checking if box 'generic/centos7' version '4.3.6' is up to date...
==> default: Setting the name of the VM: test3_default_1701344130827_52682 ←(仮想マシン名)
==> default: Clearing any previously set network interfaces...
==> default: Preparing network interfaces based on configuration...
default: Adapter 1: nat
==> default: Forwarding ports...
default: 22 (guest) => 2222 (host) (adapter 1)
==> default: Running 'pre-boot' VM customizations...
==> default: Booting VM...
==> default: Waiting for machine to boot. This may take a few minutes...
default: SSH address: 127.0.0.1:2222
default: SSH username: vagrant
default: SSH auth method: private key
default:
default: Vagrant insecure key detected. Vagrant will automatically replace
default: this with a newly generated keypair for better security.
default:
default: Inserting generated public key within guest...
default: Removing insecure key from the guest if it's present...
default: Key inserted! Disconnecting and reconnecting using new SSH key...
==> default: Machine booted and ready!
==> default: Checking for guest additions in VM... ←★2
default: The guest additions on this VM do not match the installed version of
default: VirtualBox! In most cases this is fine, but in rare cases it can
default: prevent things such as shared folders from working properly. If you see
default: shared folder errors, please make sure the guest additions within the
default: virtual machine match the version of VirtualBox you have installed on
default: your host and reload your VM.
default:
default: Guest Additions Version: 5.2.44 r139111
default: VirtualBox Version: 7.0
ubn@ubn-box:~/ダウンロード/vm/test3$
→「★1」の行のURL に注目: (欲しかった URL)
「https://vagrantcloud.com/generic/boxes/centos7/versions/4.3.6/providers/virtualbox/amd64/vagrant.box」
-
→「★2」の行の「Guest Additions Version」のチェックで失敗。作成された「仮想マシン」が起動しきれません。
-
(5). 追加された「Box」を確認:
$ vagrant box list
:
CentOS7-test (virtualbox, 0)
generic/centos7 (virtualbox, 4.3.6, (amd64)) ←(注目)
generic/fedora38 (virtualbox, 4.3.6, (amd64))
nercceh/ubuntu22.04-desktop (virtualbox, 4.0.3)
-
仮想マシンとして、「/test3_default_1701344130827_52682」が追加されて「実行中」です:
サブ画面が真っ黒です。
→「VirtualBox マネージャ」画面の右上の「x」で閉じます。
-
(7). 「仮想マシン」の状態を確認:
$ vagrant status
Current machine states:
default running (virtualbox) ←(仮想マシン「default」が実行中)
The VM is running. To stop this VM, you can run `vagrant halt` to
shut it down forcefully, or you can run `vagrant suspend` to simply
suspend the virtual machine. In either case, to restart it again,
simply run `vagrant up`.
-
(8). 「仮想マシン」の停止:
$ vagrant halt
==> default: Attempting graceful shutdown of VM...
-
(9). 「仮想マシン」の状態を確認:
$ vagrant status
Current machine states:
default poweroff (virtualbox) ←(仮想マシン「default」が電源オフ)
The VM is powered off. To restart the VM, simply run `vagrant up`
-
(10). 保存された「Box」のファイル(フォルダ)を確認
$ ls -1 ~/.vagrant.d/boxes/
:
CentOS7-test
generic-VAGRANTSLASH-centos7 ←(注目)
generic-VAGRANTSLASH-fedora38
nercceh-VAGRANTSLASH-ubuntu22.04-desktop
-
$ ls -1 ~/'VirtualBox VMs'/
:
EndeavourOS_OpenBox
test3_default_1701344130827_52682 ←(注目)
→VirtualBox の「仮想マシン」名は、「フォルダ名default自動付加された番号」
-
(12). 作業フォルダの確認:
$ cd ~/ダウンロード/vm/test3/
$ ls -1A
.vagrant
Vagrantfile
-
(13). 「仮想マシン」の削除:
$ cd ~/ダウンロード/vm/test3/
$ vagrant destroy
default: Are you sure you want to destroy the 'default' VM? [y/N]
和訳:
default: 「default」VM を破棄してもよろしいですか? [y/N]
→「y」Enter
-
==> default: Destroying VM and associated drives...
-
(14). ファイルの確認:
$ ls -1A ~/ダウンロード/vm/test3/
:
.vagrant
Vagrantfile
→作業フォルダは残っています。
-
$ ls -1 ~/'VirtualBox VMs'/
:
EndeavourOS_OpenBox
→VirtualBox の「仮想マシン」が削除されました。
-
$ ls -1 ~/.vagrant.d/boxes/
:
CentOS7-test
generic-VAGRANTSLASH-centos7 ←(注目)
generic-VAGRANTSLASH-fedora38
nercceh-VAGRANTSLASH-ubuntu22.04-desktop
→ダウンロードされた「Box」のファイルは残っています。
-
(15). 「仮想マシン」の状態を確認:
$ vagrant status
Current machine states:
default not created (virtualbox) ←(仮想マシン「default」が作成されていません)
The environment has not yet been created. Run `vagrant up` to
create the environment. If a machine is not created, only the
default provider will be shown. So if a provider is not listed,
then the machine is not created for that environment.
-
(16). 「VirtualBox マネージャ」を起動して、追加された「仮想マシン」を確認:
仮想マシンの「/test3_default_1701344130827_52682」が削除されました。
→「VirtualBox マネージャ」画面の右上の「x」で閉じます。
-
(17). 不要になったVagrant BOX ファイルを削除:
$ ls -1 ~/.vagrant.d/boxes/
:
CentOS7-test
generic-VAGRANTSLASH-centos7 ←(注目)
generic-VAGRANTSLASH-fedora38
nercceh-VAGRANTSLASH-ubuntu22.04-desktop
-
$ vagrant box list
:
CentOS7-test (virtualbox, 0)
generic/centos7 (virtualbox, 4.3.6, (amd64)) ←(注目)
generic/fedora38 (virtualbox, 4.3.6, (amd64))
nercceh/ubuntu22.04-desktop (virtualbox, 4.0.3)
-
削除:
$ vagrant box remove generic/centos7
Removing box 'generic/centos7' (v4.3.6) with provider 'virtualbox'...
-
確認:
$ vagrant box list
:
CentOS7-test (virtualbox, 0)
generic/fedora38 (virtualbox, 4.3.6, (amd64))
nercceh/ubuntu22.04-desktop (virtualbox, 4.0.3)
→削除されました。
-
$ ls -1 ~/.vagrant.d/boxes/
:
CentOS7-test
generic-VAGRANTSLASH-fedora38
nercceh-VAGRANTSLASH-ubuntu22.04-desktop
→削除されました。
-
$ ls -1A ~/ダウンロード/vm/test3
:
.vagrant
Vagrantfile
→作業フォルダは残っています。影響なし。
-
(18). 残った「.vagrant」フォルダだけ削除:
$ cd ~/ダウンロード/vm/test3/
$ rm -r .vagrant
$ ls -1A
Vagrantfile
→やっと、ここまで来ました。
-
(19). 「Vagrantfile」の内容を確認:
$ cd ~/ダウンロード/vm/test3/
$ cat Vagrantfile
# -*- mode: ruby -*-
# vi: set ft=ruby :
Vagrant.configure("2") do |config|
config.vm.box = "generic/centos7"
end
-
(20). 「Vagrantfile」を修正:
$ cd ~/ダウンロード/vm/test3/
$ featherpad Vagrantfile
↓ すべて置換:
# -*- mode: ruby -*-
# vi: set ft=ruby :
Vagrant.configure("2") do |config|
config.vm.box = "CentOS7_test3_2"
config.vm.box_url = "https://vagrantcloud.com/generic/boxes/centos7/versions/4.3.6/providers/virtualbox/amd64/vagrant.box"
end
→Ctrl+S で、保存
→修正するよりも、すべて置換した方が確実です。
ちなみに、この状態が「vagrant init」を終えた状態です。
-
(21). うまく「仮想マシン」が作成されるか確認:
$ cd ~/ダウンロード/vm/test3/
$ vagrant up
Bringing machine 'default' up with 'virtualbox' provider...
==> default: Box 'CentOS7_test3_2' could not be found. Attempting to find and install...
default: Box Provider: virtualbox
default: Box Version: >= 0
==> default: Box file was not detected as metadata. Adding it directly...
==> default: Adding box 'CentOS7_test3_2' (v0) for provider: virtualbox ←(仮想マシン名)
default: Downloading: https://vagrantcloud.com/generic/boxes/centos7/versions/4.3.6/providers/virtualbox/amd64/vagrant.box
==> default: Successfully added box 'CentOS7_test3_2' (v0) for 'virtualbox'!
==> default: Importing base box 'CentOS7_test3_2'...
==> default: Matching MAC address for NAT networking...
==> default: Setting the name of the VM: test3_default_1701354147406_49248 ←(仮想マシン名)
==> default: Clearing any previously set network interfaces...
==> default: Preparing network interfaces based on configuration...
default: Adapter 1: nat
==> default: Forwarding ports...
default: 22 (guest) => 2222 (host) (adapter 1)
==> default: Running 'pre-boot' VM customizations...
==> default: Booting VM...
==> default: Waiting for machine to boot. This may take a few minutes...
default: SSH address: 127.0.0.1:2222
default: SSH username: vagrant
default: SSH auth method: private key
default:
default: Vagrant insecure key detected. Vagrant will automatically replace
default: this with a newly generated keypair for better security.
default:
default: Inserting generated public key within guest...
default: Removing insecure key from the guest if it's present...
default: Key inserted! Disconnecting and reconnecting using new SSH key...
==> default: Machine booted and ready!
==> default: Checking for guest additions in VM... ←(Guest Additions Version のチェックでアウト)
default: The guest additions on this VM do not match the installed version of
default: VirtualBox! In most cases this is fine, but in rare cases it can
default: prevent things such as shared folders from working properly. If you see
default: shared folder errors, please make sure the guest additions within the
default: virtual machine match the version of VirtualBox you have installed on
default: your host and reload your VM.
default:
default: Guest Additions Version: 5.2.44 r139111
default: VirtualBox Version: 7.0
ubn@ubn-box:~/ダウンロード/vm/test3$
→エラーの対応は、次の投稿で回避しています。今回は無視。
-
$ vagrant status
Current machine states:
default running (virtualbox)
The VM is running. To stop this VM, you can run `vagrant halt` to
shut it down forcefully, or you can run `vagrant suspend` to simply
suspend the virtual machine. In either case, to restart it again,
simply run `vagrant up`.
-
$ vagrant box list
:
CentOS7-test (virtualbox, 0)
CentOS7_test3_2 (virtualbox, 0) ←(Box 名は変更されました)
generic/fedora38 (virtualbox, 4.3.6, (amd64))
nercceh/ubuntu22.04-desktop (virtualbox, 4.0.3)
-
(22). ファイルの確認:
$ ls -1 ~/.vagrant.d/boxes/
:
CentOS7-test
CentOS7_test3_2 ←(Box 名は変更されました)
generic-VAGRANTSLASH-fedora38
nercceh-VAGRANTSLASH-ubuntu22.04-desktop
-
$ ls -1A ~/ダウンロード/vm/test3/
:
.vagrant
Vagrantfile
→作業フォルダは正常です。
-
$ ls -1 ~/'VirtualBox VMs'/
:
EndeavourOS_OpenBox
test3_default_1701354147406_49248 ←(注目)
→VirtualBox の「仮想マシン」名はほとんど変わりません。数字が変わった位です。
-
結論:
-
(1). ダウンロードして保存される「Box」ファイル名は、「Vagrantfile」を修正すれば変更できます。
(2). ただし、公式サイトから持ってくる場合は、URL がわからないので、面倒です。
-
(3). VirtualBox の「仮想マシン」名は自動で付けられ、好みの名前に出来ません。
(4). VirtualBox の「仮想マシン」名は、「フォルダ名_default_自動で付く番号」になります。
→なので、フォルダ名を工夫すれば、わかりやすい名前を頭にすることは可能
-
ちなみに、「default」は仮想マシン名です。
-
-
- --- - --- - --- - --- - --- - --- - --- - --- - ----- ----- ----- ----- ----- ---
10. 参考: 「Vagrant」コマンドについて:
-
1). すべての「Vagrant」コマンド のヘルプを表示:
$ vagrant list-commands
和訳:
以下は、利用可能なすべての Vagrant コマンドのリストとその機能の簡単な説明です:
autocomplete ホスト上の自動完了されるインストールを管理
box ボックスを管理します: インストール、削除など ★
cap 能力をチェックして実行します
cloud Vagrant Cloud に関連するすべてを管理
destroy vagrant マシンのすべてのトレースを停止して削除 ★
docker-exec すでに実行されている Docker コンテナにアタッチします
docker-logs Dockerコンテナからログを出力します。
docker-run コンテナのコンテキストで 1 回限りのコマンドを実行
global-status このユーザの Vagrant 環境のステータスを表示
halt vagrant マシンを停止 ★★
help サブコマンドのヘルプを表示 ★
init Vagrantfile を作成して新しい Vagrant 環境を初期化します ★★
list-commands プライマリ以外も含め、利用可能なすべての Vagrant サブコマンドを表示
login
package 実行中の vagrant 環境を、ボックスにパッケージ化します ★
plugin プラグインを管理します: インストール、アンインストール、更新など
port ゲストポートマッピングに関する情報を表示
powershell PowerShell をリモート経由でマシンに接続します
provider この環境のプロバイダーを表示
provision vagrant マシンをプロビジョニングします
push この環境内のコードを構成された宛先にデプロイします
rdp RDP経由でマシンに接続します
reload vagrant マシンを再起動し、新しい Vagrantfile 設定を反映します ★★
resume 一時停止された vagrant マシンを再開します ☆
rsync rsync 同期フォルダーをリモートマシンに同期します
rsync-auto 同期 rsync ファイルが変更されると自動的に同期フォルダーを同期します
serve Vagrant サーバーを起動
snapshot スナップショットを管理します: 保存、復元など
ssh SSH 経由でマシンに接続 ☆(「ssh」より「vagrant ssh」は操作が楽)
ssh-config マシンに接続するための OpenSSH の有効な設定を表示
status vagrant で管理されている「仮想マシン」の稼働状況を表示 ★
suspend マシンを一時停止 ☆
up vagrant 環境を開始してプロビジョニングします ★★
upload コミュニケータ経由でマシンにアップロード
validate Vagrantfile を検証します
version 現在および最新の Vagrant バージョンを表示
winrm WinRM 経由で Windows の「仮想マシン」上でコマンドを実行します
winrm-config Windows の「マシン」に接続するための WinRM の設定を表示
→「★」はよく使うコマンド。「☆」は個人的に少し頻度が下がり、「★★」は頻度が高いもの。
-
参考: 「WinRM」とは、
他の Windows マシンのコマンドライン(PowerShell)を呼び出して、遠隔でコマンドの実行やプログラムの起動などを行うための機能です。
-
2). 「Vagrant init」コマンド のヘルプを表示:
$ vagrant init --help
和訳:
使い方: vagrant init [オプション] [name [url]]
オプション:
--box-version VERSION 追加するボックスのバージョン
-f, --force 既存の Vagrantfile を上書きする
-m, --minimal 最小限の Vagrantfile テンプレートを使用 ★
(コメント行の省略) --template の指定があれば無視
--output FILE ボックスの出力パス。標準出力の場合は「-」
--template FILE カスタム Vagrantfile テンプレートへのパス
--[no-]color カラー出力を有効または無効にします
--machine-readable マシンの可読出力を有効にします
-v, --version Vagrantのバージョンを表示
--debug デバッグ出力を有効にします
--timestamp ログ出力のタイムスタンプを有効にします
--debug-timestamp タイムスタンプ付きのデバッグ出力を有効にします
--no-tty 非対話型出力を有効にします
-h, --help このヘルプを表示します
-
3). 「Vagrant box」コマンド のヘルプを表示:
$ vagrant box --help
和訳:
使い方: vagrant box <サブコマンド> [<args>]
利用可能なサブコマンド:
add
list
outdated
prune
-
repackage
update
個々のサブコマンドのヘルプについては、「vagrant box <サブコマンド> -h」を実行ください
--[no-]color カラー出力を有効または無効にします
--machine-readable マシンの可読出力を有効にします
-v, --version Vagrant のバージョンを表示
--debug デバッグ出力を有効にします
--timestamp ログ出力のタイムスタンプを有効にします
--debug-timestamp タイムスタンプ付きのデバッグ出力を有効にします
--no-tty 非対話型出力を有効にします
-
4). 「Vagrant box add」コマンド のヘルプを表示:
$ vagrant box add --help
和訳:
使い方: vagrant box add [オプション] <name, url, or path>
オプション:
-c, --clean 一時ダウンロード ファイルをすべて削除します
-f, --force 既存のボックスが存在する場合は上書きします
--insecure SSL 証明書を検証しません
--cacert FILE SSLダウンロード用のCA証明書
--capath DIR SSLダウンロード用のCA証明書ディレクトリ
--cert FILE クライアント SSL 証明書 (必要な場合)
--location-trusted HTTP リダイレクトの「Location」ヘッダーを信頼し、
後続の URL に対して最初の URL と同じ認証情報を使用
-a, --architecture ARCH ボックスが満たすべきアーキテクチャ
--provider PROVIDER ボックスが満たすべきプロバイダ
--box-version VERSION 追加されたボックスのバージョンを制限します
ボックスのパラメータは、HashiCorp の Vagrant Cloud 上のボックスの名前、URL、
ローカル .box ファイル、または カタログ メタデータを含むローカル .json ファイル
にすることができます。
以下のオプションは、Vagrant サーバーや「user/box」のような構造
のボックスを使用せず、ボックス ファイルを直接追加する場合にのみ適用されます:
--checksum CHECKSUM ボックスのチェックサム
--checksum-type TYPE チェックサムの種類 (md5、sha1、sha256)
--name BOX ボックスの名前 ★
--[no-]color カラー出力を有効または無効にします
--machine-readable マシンの可読出力を有効にします
-v, --version Vagrantのバージョンを表示
--debug デバッグ出力を有効にします
--timestamp ログ出力のタイムスタンプを有効にします
--debug-timestamp タイムスタンプ付きのデバッグ出力を有効にします
--no-tty 非対話型出力を有効にします
-h, --help このヘルプを表示します
-
5). 「vagrant ssh-config」コマンド のヘルプを表示:
$ vagrant ssh-config --help
和訳:
使い方: vagrant ssh-config [オプション] [name|id]
オプション:
--host NAME 設定ファイルのHost 行の「名前」を設定します
--[no-]color カラー表示を有効または無効にします
--machine-readable マシン可読出力を有効にします
-v, --version Vagrant のバージョンを表示
--debug デバッグ出力を有効にします
--timestamp ログ出力のタイムスタンプを有効にします
--debug-timestamp タイムスタンプ付きのデバッグ出力を有効にします
--no-tty 非対話型出力を有効にします
-h, --help このヘルプを表示
-
コマンドを使用する場合は、
起動している「仮想マシン」の「作業フォルダ」で実行します:
$ cd ~/ダウンロード/vm/ubn2204/
$ vagrant ssh-config
→「ssh」コマンドで、ssh 接続時に使える、ssh の設定を表示:
表示されるだけで、使える設定にするには、「~/.ssh/config」に反映させるか、ssh コマンドのパラメータとして与えます。
-
$ vagrant ssh-config --host test01
→Host 行の「名前」を「test01」に変更して表示
-
6). 「vagrant package」コマンド のヘルプを表示:
$ vagrant package --help
和訳:
使い方: vagrant package [オプション] [name|id]
オプション:
--base NAME ベース になる Box としてパッケージ化したい
VirtualBox 内の VM の名前 (VirtualBox の場合)
--output NAME 出力するファイルの名前
--include FILE,FILE.. Box にパッケージ化したいカンマ区切りの追加ファイル
--info FILE 追加のBox の情報を含むカスタム info.jsonファイルへのパス
--vagrantfile FILE Box に同梱する Vagrantfile
--[no-]color カラー表示を有効または無効にします
--machine-readable マシン可読出力を有効にします
-v, --version Vagrant のバージョンを表示
--debug デバッグ出力を有効にします
--timestamp ログ出力のタイムスタンプを有効にします
--debug-timestamp タイムスタンプ付きのデバッグ出力を有効にします
--no-tty 非対話型出力を有効にします
-h, --help このヘルプを表示
-
コマンドを使用する場合は、
作成した「仮想マシン」の「作業フォルダ」で実行します:
$ cd ~/ダウンロード/vm/ubn2204/
$ vagrant package
→「作業フォルダ」に「package.box」が生成されます
ちなみに、「仮想マシン」を id で指定した場合は、どのフォルダ位置でも実行できます:
実行前に、「package.box」を生成したい「フォルダ」に移動しておきます。
-
7). 「vagrant box update」のヘルプを表示:
→「こちら」を参照:
-
8). 「vagrant vbguest」のヘルプを表示:
→「こちら」を参照:
-
9). 「vagrant box remove」のヘルプを表示:
→「こちら」を参照:
-
-
- --- - --- - --- - --- - --- - --- - --- - --- - ----- ----- ----- ----- ----- ----
11. 参考: 「Vagrant」コマンドの使用例:
-
「項番 9. 」で色々と使っているので、そこからの抜粋、および、補足しました:
-
「Vagrant」コマンドの使用例:
目次は「項番 12. 」を参照:
-
1). 公式サイトから「Box」を追加:
「ホームの隠しフォルダ」にある「Box」の一覧に保存されます:
$ vagrant box add generic/fedora38
→「作業フォルダ」に移動する必要はありません。
名前が「登録ユーザ名/box 名」になっており、URL の指定は要りません。
好みの「Box」名で保存するのは手間がかかる割に、おいしくありません。
それは「仮想マシン名」として使われないからです。
-
参考: 「VirtualBox」の仮想マシン名の先頭に「作業フォルダ」名が含まれるので、
どちらかというと「作業フォルダ」の名前の付け方が重要です。
-
2). コミュニティのサイトから「Box」を追加:
「ホームの隠しフォルダ」にある「Box」の一覧に保存されます:
$ vagrant box add CentOS7-test https://github.com/tommy-muehle/puppet-vagrant-boxes/releases/download/1.1.0/centos-7.0-x86_64.box
→「作業フォルダ」に移動する必要はありません。
好みの「Box」名で保存できます。(例では「CentOS7-test」)
URL の指定は、どこからダウンロードするかわからないので必須です。
URL の指定は、ローカルにある「Box」の指定でもOK です。
-
参考: 好みの「Box」名で保存できても、作成される「仮想マシン」の名前は「項番 1).」と同じ形式なので、「作業フォルダ」の名前の付け方が重要です。
-
3). 保存された「Box」の一覧を表示:
$ vagrant box list
CentOS7-test (virtualbox, 0)
generic/centos7 (virtualbox, 4.3.6, (amd64))
generic/fedora38 (virtualbox, 4.3.6, (amd64))
nercceh/ubuntu22.04-desktop (virtualbox, 4.0.3)
-
保存された「Box」のファイル(フォルダ)を表示:
$ ls -1 ~/.vagrant.d/boxes/
CentOS7-test
generic-VAGRANTSLASH-centos7
generic-VAGRANTSLASH-fedora38
nercceh-VAGRANTSLASH-ubuntu22.04-desktop
→フォルダの内容と連動しています。
-
参考1: 「Box」はリビジョン管理がしやすいフォルダの並びです:
-
例1. リビジョン指定がない場合:
$ cd ~/.vagrant.d/boxes/
$ ls -1 CentOS7-test/0/virtualbox/
Vagrantfile
box-disk1.vmdk
box.ovf
metadata.json
-
例2. リビジョン指定がある場合(公式サイト):
$ cd ~/.vagrant.d/boxes/
$ ls -1 generic-VAGRANTSLASH-fedora38/4.3.6/amd64/virtualbox/
Vagrantfile
box.ovf
generic-fedora38-virtualbox-x64-disk001.vmdk
info.json
metadata.json
-
参考2: 「Box」の一覧が保存される「ホームの隠しフォルダ」の位置は変更可能:
デフォルトは「$HOME/.vagrant.d/」(つまり、「~/.vagrant.d/」)で、その配下の「boxes/」に保存されます。
ホストOS にて、下記の操作でパスを変更できます:
-
一時的な変更:
$ export VAGRANT_HOME=/任意のディレクトリの絶対パス
-
永続的な変更:
シェルがBash の場合:
「~/.bash_profile」ファイルの最後に下記の 1行を追記:
export VAGRANT_HOME=/任意のディレクトリの絶対パス
-
4). 「作業フォルダ」に「Vagrantfile」を作成:
Web サイトによっては「仮想マシン」の初期化、という表現もされてます。
(1). 「作業フォルダ」の準備:
目的の業務(プロジェクト)ごとに「フォルダ分け」を行う、
「vagrant init」の実行で「Vagrantfile」が作られるフォルダを準備します:
-
-- -- -- -- -- -- -- -- -- -- -- -- -- -- -- -- -- -- -- -- -- -- -- --
参考: 「作業フォルダ」配下は「共有フォルダ」として、「仮想マシン」上の「/vagrant」と同期されます:
「仮想マシン」を立ち上げて、
デバイス →「共有フォルダー」→「共有フォルダー設定」
「作業フォルダ」が共有フォルダとして登録されているか、確認:

-
ホストOS を再起動:
一度再起動しないと、有効になりません。
-
使用例:
「仮想マシン」にて、
$ gedit Documents/sudo-cat-etc-sudoers.txt
-
共有フォルダにコピー:
$ sudo cp Documents/sudo-cat-etc-sudoers.txt /vagrant
-
「ホストOS」にて、
$ ls -1A ~/ダウンロード/vm/ubn2204
.vagrant
Vagrantfile
sudo-cat-etc-sudoers.txt ←(追加されました)
ちなみに、上記の 3つとも「仮想マシン」の「/vagrant」で見えるようになります。
-
-- -- -- -- -- -- -- -- -- -- -- -- -- -- -- -- -- -- -- -- -- -- -- --
Windows11 の場合:
(下記は PowerShell7 を使用) 黒い端末アイコン
-
ホームの「Downloads」フォルダで作業した場合:
PS C:\Users\user> cd Downloads
-
フォルダの作成:
PS C:\Users\user\Downloads> md vm/fedora
もしくは、
PS C:\Users\user\Downloads> mkdir vm/fedora
Directory: C:\Users\user\Downloads\vm
Mode LastWriteTime Length Name
---- ------------- ------ ----
d---- 2023/12/05 火 0:19 fedora
→「md vm\fedora」を間違って「md vm/fedora」と入れても、ちゃんと実行されました。
また、2階層(2つのフォルダ)の指定でも、ちゃんと 2つのフォルダが作成されました。
-
ちなみに、Windows のコマンドプロンプトの「PS C:\Users\user>」の「user」は(ログイン時に表示される)任意のユーザ名です。 また、頭にある「PS」は、「PowerShell」のコマンドプロンプトであることを意味します。
-
参考: ファイル階層(パス)の指定で使われるフォルダの区切りは、Linux であれば「/」で、Windows であれば「\」(または ¥)です。
-
「作業フォルダ」の移動:
PS C:\Users\user\Downloads> cd vm/fedora
もしくは、
PS C:\Users\user\Downloads> Set-Location vm/fedora
-
「作業フォルダ」の確認:
PS C:\Users\user\Downloads\vm\fedora> pwd
もしくは、
PS C:\Users\user\Downloads\vm\fedora> Get-Location
Path
----
C:\Users\user\Downloads\vm\fedora
→PowerShell だと、文字列でなく配列で返るので、うるさい(見やすい?)ですね。
-
ちなみに、ヘルプを見ようと「md --help」としたら「--help」フォルダが出来てしまいました。
Linux の「Bash」とコマンドは似てるけど、別物(別なコマンドに似せたエイリアス )なので操作に注意。使えるパラメータも機能も違います。
-
-- -- -- -- -- -- -- -- -- -- -- -- -- -- -- -- -- -- -- -- -- -- -- --
$ mkdir -p ~/ダウンロード/vm/ubn2204
-
(2). 「Vagrantfile」を作成:
例. 公式サイトの「nercceh/ubuntu22.04-desktop」
$ cd ~/ダウンロード/vm/ubn2204/
$ vagrant init -m nercceh/ubuntu22.04-desktop
A `Vagrantfile` has been placed in this directory. You are now
ready to `vagrant up` your first virtual environment! Please read
the comments in the Vagrantfile as well as documentation on
`vagrantup.com` for more information on using Vagrant.
→いつものメッセージが表示
-
「-m, --minimal」パラメータについて:
→「-m」はコメント行を削除して見やすくします。修正の可能性があるなら付けません。
「--template」を指定すると「-m」は無視されます。
-
(3). 「vagrant init」の実行後の確認:
$ cd ~/ダウンロード/vm/ubn2204/
$ ls -1A
Vagrantfile
→現在の「作業フォルダ」に「Vagrantfile」が作成されます。
-
(4). 参考: 「vagrant init」の実行で、
テンプレートファイルを使って、
入力した「vagrant init」コマンドに付けたパラメータ、
および省略した「プロバイダ名」を加えた内容で、
「作業フォルダ」に「Vagrantfile」が保存されます。
-
(5). 「Vagrantfile」の内容を確認:
$ cat Vagrantfile
# -*- mode: ruby -*-
# vi: set ft=ruby :
Vagrant.configure("2") do |config|
config.vm.box_url = "nercceh/ubuntu22.04-desktop"
end
→「Vagrantfile」は、デフォルトのテンプレートで上書きされました。
「-m」で、コメント行を削除したので、すっきりしました。
修正の可能性があるなら付けません。
-
(6). 参考: 「Vagrantfile」の書式について:
Vagrant.configure("2") do |config|
:
end
「2」は、Vagrant の config のバージョンを示し、"1" または "2" が指定できます。
「|config|」は、( do から end までの)スコープの識別子です。
-
5). 「仮想マシン」の(初回のみ生成、および)立ち上げ:
$ cd ~/ダウンロード/vm/ubn2204/
$ vagrant up
→「Vagrantfile」が置かれた「作業フォルダ」に移動して、実行します。
-
作業フォルダの確認:
$ ls -1A ~/ダウンロード/vm/ubn2204/
.vagrant ←(vagrant up で追加: 「仮想マシン」を管理)
Vagrantfile ←(vagrant up するのに必要)
-
ホームの隠しフォルダに保存された「Box」(フォルダ)を確認
$ ls -1 ~/.vagrant.d/boxes/
:
CentOS7-test
generic-VAGRANTSLASH-centos7
generic-VAGRANTSLASH-fedora38
nercceh-VAGRANTSLASH-ubuntu22.04-desktop ←(初回、なければ自動で追加)
-
$ ls -1 ~/'VirtualBox VMs'/
:
EndeavourOS_OpenBox
ubn2204_default_1701558714834_11706 ←(追加)
-
参考: まとめ
VirtualBox で管理されている「仮想マシン」名は、「フォルダ名_default_自動付加された番号」の形式です
先頭の「フォルダ名」 は邪魔だけど、逆に、 VirtualBox 側の「仮想マシン」名を見れば、対応している(「Vagrantfile」が置かれた)「作業フォルダ」の名前(位置)がすぐにわかります
「default」は、「Vagrant」で管理されている「仮想マシン名」で(自分の知識では)変更できませんでした:
→「Vagrant」では、「vagrant status default」のように使えます
-
$ cd ~/ダウンロード/vm/ubn2204/
$ vagrant status
Current machine states:
default poweroff (virtualbox)
The VM is powered off. To restart the VM, simply run `vagrant up`
もしくは、
「VirtualBox マネージャ」画面でも「仮想マシン」の状態は確認できます:
-
$ vagrant global-status
id name provider state directory
-------------------------------------------------------------------------
d4b57c8 default virtualbox running /home/ubn/ダウンロード/vm/test3
5770428 default virtualbox poweroff /home/ubn/ダウンロード/vm/ubn2204
The above shows information about all known Vagrant environments
on this machine. This data is cached and may not be completely
up-to-date (use "vagrant global-status --prune" to prune invalid
entries). To interact with any of the machines, you can go to that
directory and run Vagrant, or you can use the ID directly with
Vagrant commands from any directory. For example:
"vagrant destroy 1a2b3c4d"
和訳:
上記は、このマシン上のすべての既知の Vagrant 環境に関する情報を示しています。
このデータはキャッシュされているため、完全に最新ではない可能性があります。
(無効なエントリを削除するには「vagrant global-status --prune」を使用します)。
いずれかのマシンと対話するには、そのディレクトリに移動して Vagrant を実行するか、
任意のディレクトリから Vagrant コマンドで ID を直接使用することができます。
例: 「vagrant destroy 1a2b3c4d」
もしくは、
「VirtualBox マネージャ」画面でも「仮想マシン」の状態は確認できます:
-
8). 起動している「仮想マシン」に直接、SSH で接続(自動ログイン):
-
「仮想マシン」が起動していない場合:
ssh で接続:
$ cd ~/ダウンロード/vm/ubn2204/
$ vagrant ssh
赤色で警告表示:
VM must be running to open SSH connection. Run `vagrant up`
to start the virtual machine.
和訳:
SSH 接続するには「仮想マシン」が実行されている必要があります。
「vagrant up」を実行して「仮想マシン」を起動します。
-
「仮想マシン」の立ち上げ:
$ cd ~/ダウンロード/vm/ubn2204/
$ vagrant up
-
ssh で接続:
$ vagrant ssh
The list of available updates is more than a week old.
To check for new updates run: sudo apt update
,u@@E@@E@@>,
.;EBBBBBBBBBBBBBBE@
p@BB@5EBBBBBBBBBBBBBB@ Packer.io built VM maintained by the Application
,EBBBBBB@@BBBBBBBBBBBBBBBL Development Team, Centre for Ecology & Hydrology
@B██████BB██████BB██BB██BB,
EBB██BBBBBB██@BBBBB██BB██BBE
EBB██BBBBBB████BBBB██████BBB
(BB██BBBBBB██BB@BBB██BB██BBE Version: Ubuntu 22.04.1 LTS
EB██████BB██████@B██BB██BB Built: 2022-12-08
EBBBBBBBBBBBBBB@@BBBBBBE" Management: puppet
"EBBBBBBBBBBBBBB@@B@@P Repository: https://github.com/NERC-CEH/ubuntu
"tEBBBBBBBBBBBBBb"
"*CehP*"^"
vagrant@vagrant:~$
→自動ログインされました。
-
操作してみる:
vagrant@vagrant:~$ uname -r
5.15.0-56-generic
vagrant@vagrant:~$ cat /etc/lsb-release
DISTRIB_ID=Ubuntu
DISTRIB_RELEASE=22.04
DISTRIB_CODENAME=jammy
DISTRIB_DESCRIPTION="Ubuntu 22.04.1 LTS"
-
ログアウト:
vagrant@vagrant:~$ exit
logout
ubn@ubn-box:~/ダウンロード/vm/ubn2204$
→ホストOS のプロンプトに戻りました。
-
「vagrant ssh」でなく、「ssh」コマンドで接続するときに、ssh 接続に必要な情報(「vagrant ssh」の設定情報)を表示します:
接続できなかったり、「端末」画面以外の「ssh クライアント」で接続するときとか、
ssh 接続時の入力の手間を減らすために、設定ファイルの「~/.ssh/config」に反映(出力)させるときに使えます。
-
「仮想マシン」が起動していて、該当の「作業フォルダ」で実行しないと使えません:
-
「仮想マシン」が作成されていない「作業フォルダ」で実行した場合:
現在の設定を表示:
$ cd ~/ダウンロード/vm/test3
$ vagrant ssh-config
The provider for this Vagrant-managed machine is reporting that it
is not yet ready for SSH. Depending on your provider this can carry
different meanings. Make sure your machine is created and running and
try again. Additionally, check the output of `vagrant status` to verify
that the machine is in the state that you expect. If you continue to
get this error message, please view the documentation for the provider
you're using.
和訳:
この Vagrant 管理マシンのプロバイダは、まだ SSH の準備ができていない
ことを報告しています。プロバイダーによっては、これは異なる意味を持ちます。
マシンが作成され実行されていることを確認して、再試行してください。
さらに、「vagrant status」の出力をチェックして、マシンが期待した状態に
あることを確認します。このエラー メッセージが引き続き表示される場合は、
使用しているプロバイダのドキュメントを参照してください。
-
起動している「仮想マシン」の「作業フォルダ」で実行した場合:
現在の設定を表示:
$ cd ~/ダウンロード/vm/ubn2204/
$ vagrant ssh-config
Host default ←(ssh 接続先につけた「名前」: デフォルトは default)
HostName 127.0.0.1 ←(ssh 接続先の「ホスト名」または「IP アドレス」)
User vagrant ←(ユーザ名)
Port 2222 ←(ポート番号: デフォルトは 22 )
UserKnownHostsFile /dev/null
StrictHostKeyChecking no
PasswordAuthentication no
IdentityFile /home/ubn/ダウンロード/vm/ubn2204/.vagrant/machines/default/virtualbox/private_key
IdentitiesOnly yes
LogLevel FATAL
PubkeyAcceptedKeyTypes +ssh-rsa
HostKeyAlgorithms +ssh-rsa
→「vagrant ssh-config」で出力される、ssh 接続先につけた「名前」のデフォルトは「default」です
ポート番号のデフォルトは「22」ですが、有名すぎてリスクが高いので「2222」に変更されてます
-
「ssh」コマンドは、これらの表示された「ポート番号」や「秘密鍵」を指定しての ssh 接続ができますが、
「~/.ssh/config」に記述することで、それらの入力の手間を減らせます:
-
$ hostname
-
「ホストOS」で実行:
$ vagrant ssh-config --host ubn-box >> ~/.ssh/config
→「--host」で設定ファイルの「Host」行の値を「わかりやすい名前」に変更できます。
実際の「ホスト名」にする必要はありません。ラベルなので、ip アドレスを記述しても OK です。任意です。
-
「ssh」コマンドで接続:
$ ssh [Tab キー 2回で、ssh 接続先として指定できる一覧が表示されます]
→「ssh」の後ろに「半角スペース」が必要です:
設定ファイルに、複数の「Host」行(ラベル)を記述しているときに便利。ひとつの記述でも表示されます。
-
$ ssh ubn-box
→「ubn-box」は、「Host」行で ssh 接続先につけた「名前」です。
-
10). 参考: 起動している「仮想マシン」に、Linux の機能の「ssh」コマンドで接続して、ログイン:
これは「Vagrant」の機能ではなく、Linux の機能です:
-
「仮想マシン」の立ち上げ:
$ cd ~/ダウンロード/vm/ubn2204/
$ vagrant up
-
ssh で接続:
$ ssh -p 2222 vagrant@localhost
→「パスワード」(vagrant) や「ポート番号」(2222) は、「vagrant up」時のメッセージ中に表示されます
もしくは、「vagrant ssh-config」で確認できます:
-
ssh 接続できると、
初回のログインの前にメッセージが表示されるので、
→「yes」Enter
-
次は、ログインのパスワードを聞いてくるので、
→パスワードは「vagrant」
-
実際の操作例は、
次回の投稿〈H170-2〉の「項番 6.」を参照:
-
$ cd ~/ダウンロード/vm/test3/
$ vagrant halt
もしくは、
起動している「仮想マシン」画面のメニューバーから、
「仮想マシン」→「ACPI 」シャットダウン
-
$ cd ~/ダウンロード/vm/test3/
$ vagrant halt
$ vagrant up
→初回の立ち上げではないので、「Vagrantfile」は「仮想マシン」に反映されません
-
もしくは、
$ cd ~/ダウンロード/vm/test3/
$ vagrant reload
→必ず、立ち上げたときに、「Vagrantfile」が「仮想マシン」に反映されます
-
「VirtualBox マネージャ」でも削除できます:
$ cd ~/ダウンロード/vm/test3/
$ vagrant destroy
→ダウンロードされた「Box」のファイルは残っています。
-
$ ls -1 ~/'VirtualBox VMs'/
:
EndeavourOS_OpenBox
→削除されました。
-
14). 不要になった「Box」ファイルを一覧から削除:
-
(1). 事前に「Box」名を確認:
$ vagrant box list
:
CentOS7-test (virtualbox, 0)
generic/centos7 (virtualbox, 4.3.6, (amd64)) ←(注目)
generic/fedora38 (virtualbox, 4.3.6, (amd64))
nercceh/ubuntu22.04-desktop (virtualbox, 4.0.3)
-
(2). (ホームの隠しフォルダに保存された)「Box」ファイルを削除:
$ vagrant box remove generic/centos7
-
(3). 「Box」の一覧を確認:
$ vagrant box list
:
CentOS7-test (virtualbox, 0)
generic/fedora38 (virtualbox, 4.3.6, (amd64))
nercceh/ubuntu22.04-desktop (virtualbox, 4.0.3)
→削除されました。
-
(4). ホームの隠しフォルダを確認:
$ ls -1 ~/.vagrant.d/boxes/
:
CentOS7-test
generic-VAGRANTSLASH-fedora38
nercceh-VAGRANTSLASH-ubuntu22.04-desktop
→削除されました。
-
(5). 作業フォルダの確認:
$ ls -1A ~/ダウンロード/vm/test3
:
.vagrant
Vagrantfile
→作業フォルダは残っています。影響なし。
-
15). 参考:「Vagrantfile」を修正したときは、「.vagrant」フォルダ を削除します:
「.vagrant」フォルダを削除しないと、「vagrant up」したときに「初回の立ち上げ」と認識されず、
「Vagrantfile」の修正が「仮想マシン」に反映されません。
-
(1). 既存の「仮想マシン」を削除:
$ cd ~/ダウンロード/vm/test3/
$ vagrant destroy
-
(2). 「.vagrant」フォルダ を削除:
$ cd ~/ダウンロード/vm/test3
$ rm -r .vagrant
-
(3). 「仮想マシン」の作成と立ち上げ
$ cd ~/ダウンロード/vm/test3/
$ vagrant up
→新しい「仮想マシン」が追加されて、立ち上がります。
-
参考: 既存の「仮想マシン」の削除を忘れて、「仮想マシン」が重複したら、
既存の「仮想マシン」は「Vagrant」の管理から外れており、「Vagrant destroy」は使えないので、
もしくは、
画面左の、管理から外れた「仮想マシン」を右クリック→「除去…」→「すべてのファイルを削除」
-
16). 参考: 既存の「仮想マシン」の「Vagrantfile」を修正してみました:
すでに「仮想マシン」が作成されており、
「作業フォルダ」に、以前の「.vagrant」フォルダが残っています:
-
(1). 「Vagrantfile」の修正:
使用するエディタは何でもかまいません。
-
$ cd ~/ダウンロード/vm/ubn2204/
$ featherpad Vagrantfile
↓ すべて置換:
# -*- mode: ruby -*-
# vi: set ft=ruby :
Vagrant.configure("2") do |config|
config.vm.box_url = "nercceh/ubuntu22.04-desktop"
config.vm.provider "virtualbox" do |vb|
# Display the VirtualBox GUI when booting the machine
vb.gui = true
# Customize the amount of memory on the VM:
vb.memory = "3840"
vb.cpus = 2
end
end
Ctrl+S で保存
-
説明:
プロバイダに、virtualbox を設定
マシンの起動時に VirtualBox GUI を表示
virtualbox でのメモリ指定: 3840 MB
virtualbox での CPU数: 2
-
(2). 既存の「仮想マシン」を削除:
$ vagrant destroy
(3). 「.vagrant」フォルダ を削除:
$ rm -r .vagrant
(4). 「仮想マシン」の作成と立ち上げ
$ vagrant up
→「Ubuntu」のデスクトップ画面が表示されました。
-
(5). 「仮想マシン」にて、設定が反映されたか確認:
「仮想マシン」の画面の右上の「電源ボタン」→「Settings」→「About」
About 画面:
Memory 3.6 GiB
→設定が反映されています。
-
(6). 設定画面を、右上の「x」で閉じました。
-
16-2). 参考: 既存の「仮想マシン」の「Vagrantfile」を修正してみました(改訂版):
すでに「仮想マシン」が作成されてる場合に、「Vagrantfile」を修正したときの操作:
上記の「項番 16).」よりも操作が簡単:
-
(1). 「仮想マシン」は、「停止」(vagrant halt) していても、「起動」(vagrant up) していてもかまいません。
-
(2). 「Vagrantfile」の修正:
使用するエディタは何でもかまいません。
-
$ cd ~/ダウンロード/vm/ubn2204/
$ featherpad Vagrantfile
-
(3). 「vagrant reload」を実行:
$ cd ~/ダウンロード/vm/ubn2204/
$ vagrant reload
-
「仮想マシン」が「停止」(vagrant halt) していた場合は、起動されます。
「仮想マシン」が「起動」(vagrant up) していた場合は、再起動されます。
→「Vagrantfile」が「仮想マシン」に反映されました。余計な「仮想マシン」は作成されません。
-
17). 参考: 「作業フォルダ」の「.vagrant」を確認:
「仮想マシン」の確認:
$ ls -1 ~/'VirtualBox VMs'/
:
EndeavourOS_OpenBox
test3_default_1701354147406_49248
ubn2204_default_1701558714834_11706 ←(こちらの「仮想マシン」)
-
「作業フォルダ」の「.vagrant」を確認:
$ cd ~/ダウンロード/vm/ubn2204
$ cd .vagrant/machines/default/virtualbox/
$ ls -1A
:
action_provision
action_set_name
box_meta
creator_uid
id
index_uuid
private_key
synced_folders
vagrant_cwd
-
ファイル内容の確認:
$ cat action_provision
1.5:36501fb4-5b50-492a-a845-ba306dafbe0d
-
$ cat action_set_name
1701558715
-
$ cat box_meta
見やすく記述:
{
"name":"nercceh/ubuntu22.04-desktop",
"version":"4.0.3",
"provider":"virtualbox",
"directory":"boxes/nercceh-VAGRANTSLASH-ubuntu22.04-desktop/4.0.3/virtualbox"
}
→「Box」のメタ情報です(下にある「参考2:」を参照)
-
$ cat creator_uid
1000
-
$ cat id
36501fb4-5b50-492a-a845-ba306dafbe0d
-
$ cat index_uuid
57704281883a494c8b94fb93554bc15b
-
$ cat private_key
-----BEGIN OPENSSH PRIVATE KEY-----
:
-----END OPENSSH PRIVATE KEY-----
-
$ cat synced_folders
見やすく記述:
{
"virtualbox":
{
"/vagrant":
{
"guestpath":"/vagrant",
"hostpath":"/home/ubn/ダウンロード/vm/ubn2204",
"disabled":false,
"__vagrantfile":true
}
}
}
→「共有フォルダ」の(ゲスト側とホスト側の)指定
-
$ cat vagrant_cwd
/home/ubn/ダウンロード/vm/ubn2204
→「作業フォルダ」の位置。「cwd」とは「cd」のこと。
-
-- -- -- -- -- -- -- -- -- -- -- -- -- -- -- -- -- -- -- -- -- -- -- --
参考1: 現在の「作業フォルダ」にある、「Vagrantfile」の内容:
$ cat ~/ダウンロード/vm/ubn2204/Vagrantfile
# -*- mode: ruby -*-
# vi: set ft=ruby :
Vagrant.configure("2") do |config|
config.vm.box = "nercceh/ubuntu22.04-desktop"
config.vm.provider "virtualbox" do |vb|
# Display the VirtualBox GUI when booting the machine
vb.gui = true
#vb.memory = "2048" ←( 「項番 18).」を参照)
vb.memory = "3840"
vb.cpus = 2
end
end
→デフォルトの内容 を少しだけ修正しています(コメント行の削除と、数行の追加)。
-
-- -- -- -- -- -- -- -- -- -- -- -- -- -- -- -- -- -- -- -- -- -- -- --
参考2: 「Box」のメタ情報について:
抜粋:
"directory":"boxes/nercceh-VAGRANTSLASH-ubuntu22.04-desktop/4.0.3/virtualbox"
-
ディレクトリ (directory) のパスは、「~/.vagrant.d/」の配下になります:
$ ls -1A ~/.vagrant.d/boxes/nercceh-VAGRANTSLASH-ubuntu22.04-desktop/4.0.3/virtualbox
:
Vagrantfile ←(導入時用)
box.ovf
box_update_check
metadata.json
packer-virtualbox-iso-1670500096-disk001.vmdk ←(仮想マシンのイメージファイル)
→こちらにある「Vagrantfile」は導入時用です:
$ cat ~/.vagrant.d/boxes/nercceh-VAGRANTSLASH-ubuntu22.04-desktop/4.0.3/virtualbox/Vagrantfile
# The contents below were provided by the Packer Vagrant post-processor
Vagrant.configure("2") do |config|
config.vm.base_mac = "080027E17009"
end
# The contents below (if any) are custom contents provided by the
# Packer template during image build.
# -*- mode: ruby -*-
# vi: set ft=ruby :
Vagrant.configure("2") do |config|
config.vm.define "vagrant-ubuntu2204-desktop"
config.vm.box = "ubuntu2204-desktop"
config.vm.provider :virtualbox do |v, override|
v.gui = true
v.customize ["modifyvm", :id, "--memory", 2048] ←(「項番 18).」を参照)
v.customize ["modifyvm", :id, "--cpus", 2]
v.customize ["modifyvm", :id, "--vram", "256"]
v.customize ["setextradata", "global", "GUI/MaxGuestResolution", "any"]
v.customize ["setextradata", :id, "CustomVideoMode1", "1024x768x32"]
v.customize ["modifyvm", :id, "--ioapic", "on"]
v.customize ["modifyvm", :id, "--rtcuseutc", "on"]
v.customize ["modifyvm", :id, "--accelerate3d", "on"]
v.customize ["modifyvm", :id, "--clipboard", "bidirectional"]
end
["vmware_fusion", "vmware_workstation"].each do |provider|
config.vm.provider provider do |v, override|
v.gui = true
v.vmx["memsize"] = "2048"
v.vmx["numvcpus"] = "2"
v.vmx["cpuid.coresPerSocket"] = "1"
v.vmx["ethernet0.virtualDev"] = "vmxnet3"
v.vmx["RemoteDisplay.vnc.enabled"] = "false"
v.vmx["RemoteDisplay.vnc.port"] = "5900"
v.vmx["scsi0.virtualDev"] = "lsilogic"
v.vmx["mks.enable3d"] = "TRUE"
v.vmx["pref.autoFitGuestToWindow"] = "TRUE"
end
end
end
→(上にある「参考1: 」の)「作業フォルダ」にある、「Vagrantfile」と内容が異なることに注目:
こちらの「Box」でサポートしている「プロバイダ」(virtualbox、vmware_fusion、vmware_workstation)ごとの定義が記述されてます
-
「Vagrant」は、Virtualbox の「仮想マシン」を起動する直前に、Virtualbox が持つ機能である、 「仮想マシン」の設定を変更できる「VBoxManage」コマンドを呼び出せます。
「VBoxManage」コマンドで ID を必要とするコマンドの場合は、「:id」と記述すると、そのパラメータを渡せます。
-
「VBoxManage」コマンドで使えるパラメータは、
例えば、「 vb.customize ["modifyvm", :id, "--XXXXX", "XXXX"] 」の行で使えるパラメータは、
VBoxManage のガイドにある、
8.10. VBoxManage modifyvm の項目を参照:
-
(1). 「仮想マシン」は停止しておきます:
-
(2). コマンドの使用前に、「仮想マシン」の「uuid」を確認:
$ cd ~/ダウンロード/vm/ubn2204
$ cat .vagrant/machines/default/virtualbox/id
36501fb4-5b50-492a-a845-ba306dafbe0d
→改行されないので、Enter で改行
-
(3). 使用前に、「Vagrantfile」の内容を確認:
$ cd ~/ダウンロード/vm/ubn2204
$ cat Vagrantfile
# -*- mode: ruby -*-
# vi: set ft=ruby :
Vagrant.configure("2") do |config|
config.vm.box = "nercceh/ubuntu22.04-desktop"
config.vm.provider "virtualbox" do |vb|
# Display the VirtualBox GUI when booting the machine
vb.gui = true
#vb.memory = "2048"
vb.memory = "3840"
vb.cpus = 2
end
end
-
-- -- -- -- -- -- -- -- -- -- -- -- -- -- -- -- -- -- -- -- -- -- -- --
-
使用例1: 「仮想マシン」のメモリサイズ(MB) の設定変更:
デフォルトは "2048"、現在の値は "3840"
-
ホストOS にて、「VBoxManage」コマンドを使ってみる:
$ VBoxManage modifyvm "36501fb4-5b50-492a-a845-ba306dafbe0d" --memory="4096"
→変更されたかは、「VirtualBox」マネージャ画面を起動して、設定画面で確認すると、
すぐに反映されます。
-
「Vagrantfile」での記述:
v.customize ["modifyvm", :id, "--memory", "4096"]
-
記述の省略形(ショートカット):
vb.memory = "4096"
-
実際に「Vagrantfile」を修正:
$ cd ~/ダウンロード/vm/ubn2204
$ featherpad Vagrantfile
-
#vb.memory = "2048"
vb.memory = "3840"
↓ 置換:
#vb.memory = "2048"
vb.memory = "4096"
-
-- -- -- -- -- -- -- -- -- -- -- -- -- -- -- -- -- -- -- -- -- -- -- --
-
使用例2: 「仮想マシン」のディスプレイの設定変更:
参考:
「仮想マシン」が使用するグラフィックアダプタの種類を指定します。
「VBoxSVGA」または「VMSVGA」グラフィックスコントローラを指定するには、
「仮想マシン」に「Guest Additions」をインストールする必要があります。
-
ホストOS にて、「VBoxManage」コマンドを使って変更してみる:
コマンドの構文が誤っていないかの確認:
$ VBoxManage modifyvm "36501fb4-5b50-492a-a845-ba306dafbe0d" --graphicscontroller="vmsvga"
コマンド実行前に、「VirtualBox」マネージャ画面を起動して、設定画面で「VBoxSVGA」にでも変更しておき、
→コマンドを実行。
すぐに「VMSVGA」に変更されました。
-
「Vagrantfile」での記述:
v.customize ["modifyvm", :id, "--graphicscontroller", "vmsvga"]
-
記述の省略形(ショートカット): (下記は誤り、省略形なし)
vb.graphicscontroller = "vmsvga"
→検証で、エラーします:
-
(1). 参考:「Vagrantfile」の検証でエラー:(今回のコマンドの省略形の構文はないみたい)
$ cd ~/ダウンロード/vm/ubn2204
$ vagrant validate
There are errors in the configuration of this machine.
Please fix the following errors and try again:
VirtualBox Provider:
* The following settings shouldn't exist: graphicscontroller
和訳:
このマシンの設定にエラーがあります。
次のエラーを修正して、再試行してください。
VirtualBox プロバイダー:
* 次の設定は存在しないはずです: graphicscontroller
-
(2). 実際に「Vagrantfile」を修正:
$ cd ~/ダウンロード/vm/ubn2204
$ featherpad Vagrantfile
-
vb.cpus = 2
↓ 下記に置換:
vb.cpus = 2
v.customize ["modifyvm", :id, "--graphicscontroller", "vmsvga"]
-
(3). 参考:「Vagrantfile」の検証でエラー:(構文エラー)
$ vagrant validate
Vagrant failed to initialize at a very early stage:
There was an error loading a Vagrantfile. The file being loaded
and the error message are shown below. This is usually caused by
a syntax error.
Path: <provider config: virtualbox>
Line number: 14
Message: NameError: undefined local variable or method `v' for main:Object
v.customize ["modifyvm", :id, "--graphicscontroller", "vmsvga"]
^
Did you mean? vb
14行目を「入力ミス」しました
-
↓ 下記に修正:
vb.cpus = 2
#vb.graphicscontroller = "vboxvga" ←(省略形なし)
#vb.graphicscontroller = "vmsvga" ←(省略形なし)
vb.customize ["modifyvm", :id, "--graphicscontroller", "vmsvga"]
-
(4). 「Vagrantfile」を検証:
$ vagrant validate
Vagrantfile validated successfully.
→成功
-
-- -- -- -- -- -- -- -- -- -- -- -- -- -- -- -- -- -- -- -- -- -- -- --
-
(5). 最終的な「Vagrantfile」の内容を確認:
$ cd ~/ダウンロード/vm/ubn2204
$ cat Vagrantfile
# -*- mode: ruby -*-
# vi: set ft=ruby :
Vagrant.configure("2") do |config|
config.vm.box = "nercceh/ubuntu22.04-desktop"
config.vm.provider "virtualbox" do |vb|
# Display the VirtualBox GUI when booting the machine
vb.gui = true
#vb.memory = "2048"
vb.memory = "4096"
vb.cpus = 2
vb.customize ["modifyvm", :id, "--graphicscontroller", "vmsvga"]
end
end
-
(6). 「vagrant reload」を実行:
$ cd ~/ダウンロード/vm/ubn2204/
$ vagrant reload
-
「仮想マシン」が起動されました。
→「Vagrantfile」が「仮想マシン」に反映されました。余計な「仮想マシン」は作成されていません。
-
-
(1). 「Vagrantfile」のある「作業フォルダ」に移動して、「vagrant package」コマンドを実行する場合:
手順は、「こちら 」を参照:
-
(2). 「仮想マシン」の ID を指定して、「vagrant package」コマンドを実行する場合:
手順は、「こちら 」を参照:
-
20). 参考: Virtualbox にて、配布された「Box」ファイルを使って、「仮想マシン」を共有:
手順は、「こちら 」を参照:
-
-
- --- - --- - --- - --- - --- - --- - --- - --- - ----- ----- ----- ----- ----- ----- -
12. 「Vagrant」コマンドの「使用例」--( 目次 )--
-
「項番 11. 」の「目次」です:
「コマンド」だけでなく、「ファイル」や「用語」なども含めましました:
-
(1). 「vagrant box add」
「11-1) 」
「11-2) 」
-
(2). 「vagrant box list」
「11-3) 」
「11-14) 」
-
「11-4)-2 」
-
「11-5) 」
「11-8) 」
「11-12) 」
-
「11-6) 」
-
(6). 「vagrant global-status」
「11-7) 」
-
「11-11) 」
「11-12) 」
-
「11-12) 」
「11-16)-2 」
「11-18)-使用例2-6 」
-
(9). 「vagrant destroy」
「11-13) 」
-
(10). 「vagrant box remove」
「11-14)-2 」
-
(11). 「vagrant validate」
「11-18)-使用例2-1 」
「11-18)-使用例2-3 」
「11-18)-使用例2-4 」
-
「11-8) 」
-
「11-9) 」
-
(14). 「ssh」
「11-10) 」
-
(15). 「Box」一覧のフォルダの「~/.vagrant.d/boxes/」
「11-3) 」
「11-3-参考1 」
「11-例2 」
「11-5) 」
-
(16). 「作業フォルダ」
「11-4) 」
「11-5) 」
-
(17). 「Vagrantfile」
「11-4)-5 」
「11-16) 」
-
「11-17)-参考2 」
→導入時用の例:
-
「11-18)-使用例2-5 」
→最終的な例:
-
「11-15) 」
「11-17) 」
-
(19). 「rm -r .vagrant」
「11-16) 」
-
「11-5) 」
-
(21). 「共有フォルダ」
「11-4)-参考 」
-
(22). 「-VAGRANTSLASH-」の用語
「11-5-参考 」
-
(23). 「default」の用語
「11-5-参考 」
-
(24). 「仮想マシン」が重複
「11-15)-参考 」
-
(25). 「Box」のメタ情報:
「11-17)-参考2 」
-
(26). 「VBoxManage」コマンド: 「VirtualBox」が持つコマンド
「11-18) 」
-
(27). 「VBoxManage modifyvm …」コマンド: 「VirtualBox」の「仮想マシン」の設定を変更
「11-18)-使用例1 」
「11-18)-使用例2 」
-
(28). 「vb.customize ["modifyvm"…」構文
「11-18)-使用例1 」
「11-18)-使用例2 」
「11-18)-使用例2-5 」
-
(29). 「PowerShell7」
「11-4)-Windows11」
-
(30). 「vagrant package」コマンド: 「仮想マシン」から「Box」ファイルを作成
「11-19)-1 」
「11-19)-2 」
-
(31). 「vagrant plugin install」コマンド: 「プラグイン」のインストール
Vagrant に「vagrant-vbguest」プラグインをインストール:
-
(32). 「Box」ファイルから「仮想マシン」を共有
「11-20) 」
-
-
まとめ
「Xubuntu 22.04.3 LTS」の「VirtualBox 7.0.10」にて、「Vagrant」をインストールして使えるように、下調べをして「覚書き」としました。
色々と試してわかったのは、
「vagrant box add」もしくは初回の「vagrant init」コマンドで「Box」がダウンロードされ、
それを元に、「vagrant up」コマンドで「VirtualBox」の「仮想マシン」が作られます。
作る際の指示を行う、「Vagrantfile」ファイルを作成するのが「vagrant init」コマンドです。
-
動作の確認ができていない項目もあります。確認が取れたらその都度、訂正するつもりです。
最終的には、手持ちの「仮想マシン」のイメージを「Box」として利用できればと思います。
-
-
-
-
-
目次
-
「投稿の先頭 へ」
-
-
-
「この目次 の先頭へ」
「本編の目次 に戻る」
-